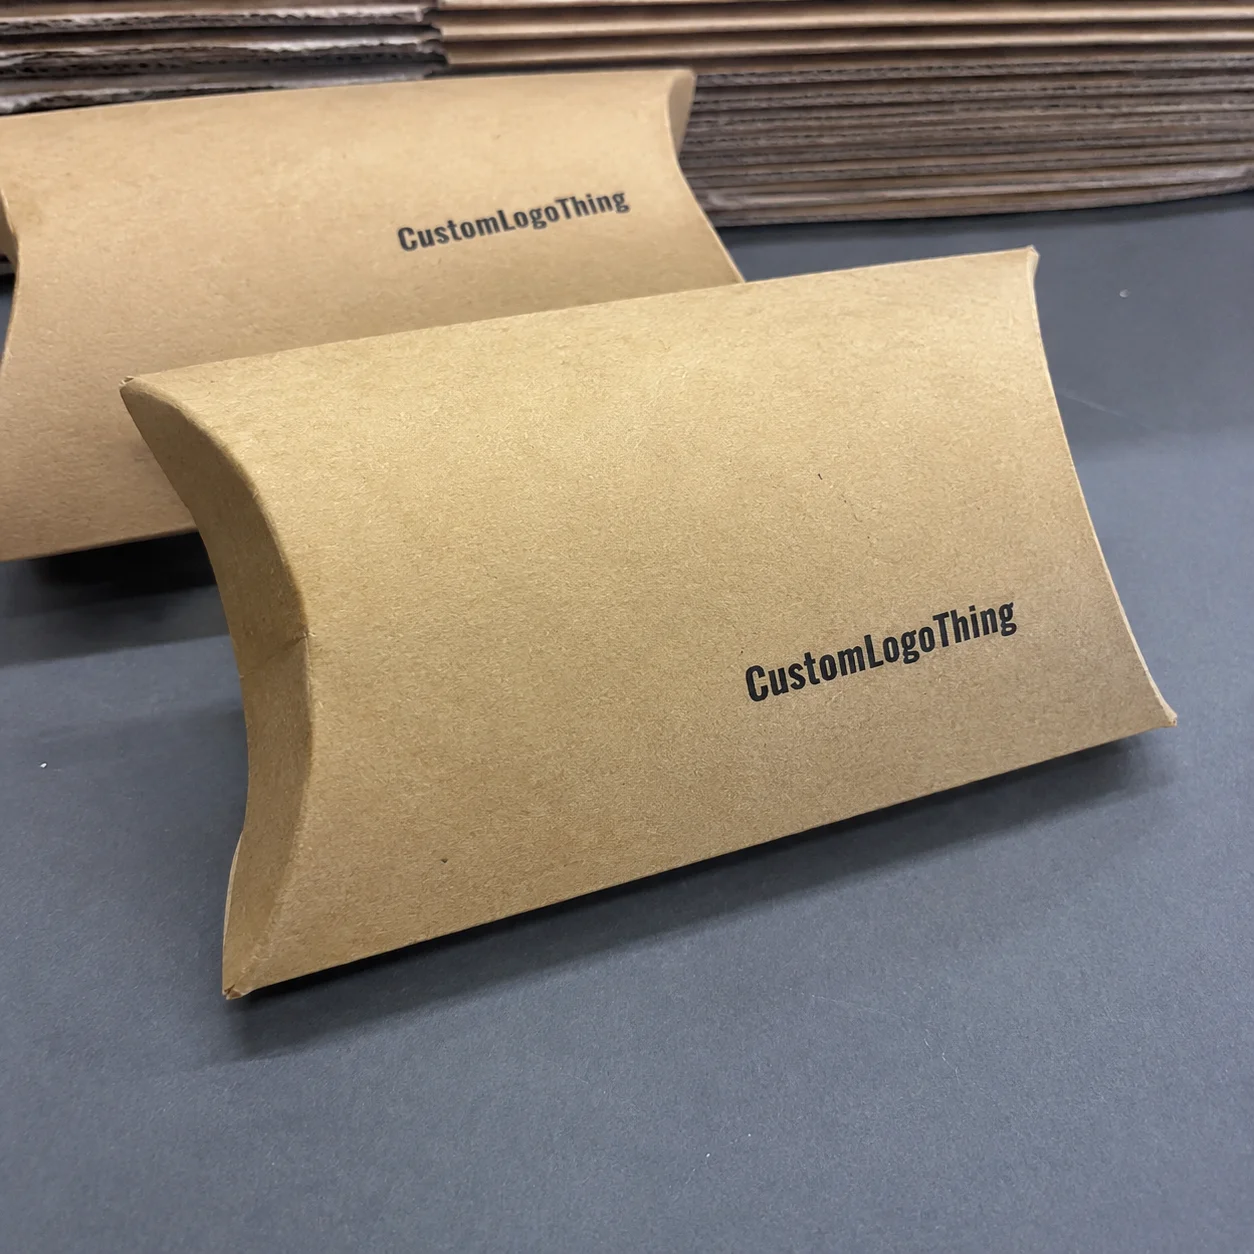
Buyer Fit Snapshot
| Best fit | Branded Packaging Pricing projects where brand print, material claims, artwork control, MOQ, and repeat-order consistency need to be specified before quoting. |
|---|---|
| Quote inputs | Share finished size, material target, print colors, finish, packing count, annual reorder estimate, ship-to region, and any compliance wording. |
| Proofing check | Approve dieline scale, logo placement, barcode or warning zones, color tolerance, closure strength, and carton packing before bulk production. |
| Main risk | Vague material claims, crowded artwork, missing packing details, or unclear freight terms can make a low unit price expensive after revisions. |
Fast answer: Branded Packaging Pricing: Spec Review should be specified like a repeatable production item. The safest quote records material, print method, finish, artwork proof, packing count, and reorder notes in one written spec.
Production checks before approval
Compare the actual filled-product size with the drawing, then confirm tolerance on folds, seals, hang holes, label areas, and retail display edges. Reserve space for logos, QR codes, warning copy, and material claims before decorative graphics fill the panel.
Quote comparison points
Review material grade, print process, finish, sampling route, tooling charges, carton quantity, and freight assumptions side by side. A quote is only useful when the supplier can repeat the same color, closure quality, and packing count on the next order.
I’ve spent enough time on factory floors to know this: the branded packaging pricing guide that actually helps you is rarely the one with the prettiest spreadsheet. The one that matters most is the one that survives contact with a real production line, a real freight quote, and a real client who suddenly wants foil, magnets, and a custom insert after saying the box was “pretty straightforward.” I remember standing in Dongguan beside a stack of white mailer boxes, watching a client insist that a “simple” build should stay under $0.80 a unit. Then they added foil, a custom insert, soft-touch lamination, and a two-piece sleeve, and the quote didn’t just nudge upward — it practically put on boots and climbed. In that same plant, the unit price moved from $0.78 to $1.46 once the finish schedule changed, and the production calendar slid from 10 business days to 15 business days after proof approval. Packaging math, honestly, is never cruel for no reason; it just refuses to pretend details don’t exist.
If you’re buying branded packaging for products, retail shelves, or direct-to-consumer shipping, pricing can look random from the outside. It isn’t. The branded packaging pricing guide I use starts with the same truth every time: unit price is only one part of the bill. Setup charges, tooling, sampling, storage, and decoration all show up eventually. For a 5,000-piece run in Shenzhen, a factory might quote $0.15 per unit for a plain kraft mailer, then add $180 for die setup, $95 for print plates, and $220 for ocean freight to Long Beach. Usually those extras appear right when someone says, “Wait, I thought that included everything.” I hear that line so often I should probably print it on a box.
This piece covers custom printed boxes, mailer boxes, folding cartons, rigid boxes, inserts, sleeves, tissue, and paper bags. If you’re comparing packaging suppliers and trying to stop the budget from wandering off a cliff, this branded packaging pricing guide will help you ask better questions and get cleaner quotes without getting trapped in supplier jargon. It also gives you a practical way to compare a 350gsm C1S artboard carton from Guangzhou against a 32 ECT corrugated mailer from Chicago or a rigid chipboard set-up from Ningbo, because those are not the same animal even when the mockup looks similar.
Overview: What Branded Packaging Pricing Actually Means
Let’s keep this plain. Branded packaging pricing is the total cost of making your packaging look, fit, and perform the way you want. That includes the box itself, but also the stuff people love to forget: die cutting, plates, foil stamps, embossing tools, print setup, proofing, freight, and sometimes storage or kitting. The branded packaging pricing guide is really a map of all those moving parts, and if it feels a little sprawling, that’s because packaging is a pile of decisions wearing one neat label. A 2mm greyboard rigid box wrapped in 157gsm art paper behaves very differently from a 12pt SBS folding carton, and the quote knows it even when the sales deck doesn’t say so out loud.
Two boxes can look almost identical and still price wildly differently. I’ve seen a kraft mailer quoted at $0.74 in one factory and $1.28 in another, only because one used 32 ECT corrugate, water-based ink, and no coating, while the other added a window patch, custom insert, and premium board. In one case, the plant in Dongguan ran the mailer on a standard flexo line with 1-color print; in the other, a facility in Suzhou needed a custom dieline and a white underprint pass. Same footprint. Very different economics. That’s why a serious branded packaging pricing guide starts with structure, not vibes. Vibes are lovely for mood boards; they are deeply unhelpful on purchase orders.
There’s also a difference between packaging cost, landed cost, and marketing value. Packaging cost is what the supplier charges for the box or bag. Landed cost is what you actually pay to get it into your hands: freight, import fees, cartons, pallets, and any warehouse charges. Marketing value is the part everyone wants to ignore until they see unboxing videos. I’ve watched a $0.42 box do more for perceived value than a $4,000 ad spend, especially for a skincare launch in Los Angeles where a matte black folding carton with gold foil got shared in 18 separate TikTok clips over the first weekend. Not every time. But often enough to matter, which is the sort of inconvenient truth that keeps packaging people employed.
The best pricing doesn’t come from the cheapest number. It comes from understanding how the quote is built. That’s the whole point of a good branded packaging pricing guide. You can’t negotiate a price intelligently if you don’t know whether you’re paying for paper, labor, shipping, or someone’s “urgent” Tuesday (which, in my experience, is always a mess). A factory in Foshan may quote 12 business days for production, while a domestic converter in Ohio may quote 8 business days but start with a higher setup fee. Both can be right, but only if you know what you’re comparing.
And yes, the packaging types in this guide are the usual suspects: retail packaging for shelves, mailer boxes for e-commerce, rigid boxes for premium products, folding cartons for cosmetics and supplements, inserts for fragile items, sleeves for branding, and tissue for presentation. Different formats. Same pricing logic. Different factory setup, too, which is usually where people first realize packaging is not one tidy category but a family reunion of processes. A folding carton line in Guangzhou, a rigid box workshop in Dongguan, and a paper bag plant in Ningbo can all quote the same brand, and none of them are actually quoting the same work.
“The quote looked cheap until we added the actual shipping lanes, the foam insert, and the second proof. That’s when the math got honest.” — a client I worked with after a 3-hour supplier call in Shenzhen
I still remember one supplier meeting in Shenzhen where the sales rep wrote five line items on a whiteboard: board, print, coating, die, freight. The client had been comparing only the board price. That’s like judging a restaurant by the cost of onions. The branded packaging pricing guide only makes sense if you look at the whole recipe, and yes, sometimes that recipe includes a very expensive garnish. On that job, the quote moved from $0.31 to $0.67 per unit once a soft-touch overlaminate and a magnetic closure were added to a 2,000-piece rigid box run.
How Branded Packaging Pricing Works From Quote to Invoice
A real quote starts with a spec sheet, not a logo. Suppliers like UPrinting, Packlane, and local converters usually need dimensions, material preference, print coverage, quantity, destination, and a dieline before they can price accurately. If you send “Need 2,000 boxes, full color, nice finish,” you’ll get a ballpark. Maybe a rough one. The branded packaging pricing guide only works when the inputs are tight, because packaging factories are good at manufacturing and only moderately psychic. A plant in Dongguan can usually turn around a clean preliminary quote in 24 to 48 hours if the dieline is complete and the artwork is final.
The usual pricing flow looks like this:
- Specs request — size, structure, quantity, and intended use.
- Dieline review — checking whether the box is standard or custom tool-dependent.
- Material selection — corrugate, paperboard, rigid chipboard, or specialty stock.
- Print method — digital, offset, flexo, screen, foil, embossing, or a mix.
- Sampling — blank sample, printed proof, or pre-production prototype.
- Production — cutting, printing, finishing, assembly, and QC.
- Freight — domestic trucking, air, ocean, or split shipment.
That’s the full path from quote to invoice. The branded packaging pricing guide gets useful right around step three, when the supplier stops guessing and starts pricing actual material and process choices. A Shenzhen converter can tell you within minutes whether a 350gsm C1S artboard carton with matte aqueous coating will sit comfortably inside a target price of $0.24 to $0.29 per unit at 5,000 pieces. That’s also the point where the quote stops looking cute and starts looking like a real procurement document.
Most suppliers quote with per-unit pricing plus extra charges. You’ll see things like setup fees, plate charges, die costs, and surcharge add-ons. A digital run might have lower setup but higher unit cost. Offset often flips that math: more setup, lower per-box cost at scale. I once negotiated a folding carton job with a plant in Guangzhou where the plate fee was $180, but the per-unit cost dropped enough that the break-even landed around 4,500 units. On 10,000 pieces, the unit price fell from $0.31 to $0.19 once the run crossed the threshold. That’s the kind of tradeoff a solid branded packaging pricing guide should make obvious, instead of hiding it behind a spreadsheet nobody wants to read twice.
Minimum order quantity matters a lot. A run of 500 custom boxes can easily cost more per unit than 5,000 because the setup cost gets spread over fewer pieces. That’s not suppliers being dramatic. That’s arithmetic. If the die setup is $220 and the print setup is $150, 500 units absorb a much bigger share than 5,000 units. So yes, the small run sometimes feels unfair. It isn’t. It’s just expensive infrastructure being divided by fewer boxes. Packaging is very democratic in that annoying way. A 500-piece rigid box order in Shenzhen can land at $3.80 per unit, while the same structure at 5,000 pieces may fall to $1.95 per unit if the board, wrap, and insert stay constant.
| Packaging Type | Example Qty | Approx. Unit Price | Typical Setup/Tooling | Best For |
|---|---|---|---|---|
| Kraft mailer box, 1-color print | 1,000 | $0.62–$0.92 | $120–$280 | E-commerce basics |
| Full-color folding carton | 5,000 | $0.18–$0.36 | $180–$450 | Retail packaging |
| Rigid box with insert and foil | 2,000 | $2.40–$4.80 | $250–$600 | Premium product packaging |
| Printed paper bag | 3,000 | $0.22–$0.58 | $90–$220 | Retail, events, boutiques |
Those are realistic working ranges, not promises carved into stone. If your art has a full ink flood, a custom finish, or a weird shape, the price changes fast. A 12-inch mailer with two color hits can stay near the low end, but once you add a belly band, insert, and high-gloss UV, the same job can jump by 20% to 35%. The branded packaging pricing guide is about patterns, not fairy tales, and certainly not the kind of fantasy that survives a production schedule.
Hidden costs are where budgets go to get mugged in an alley. Rush fees show up when someone approves artwork on Friday and wants freight booked by Monday. Split shipments cost more because pallets are divided. Kitting fees appear when boxes, inserts, and tissue need to be assembled together. Artwork revisions can trigger new plates or reproofing. I’ve seen a “simple” rigid box job gain $640 in extra costs because the client changed the magnetic closure location after sample approval. That was an expensive magnet, emotionally and financially. On another job in Suzhou, a Pantone change after prepress added $110 for new plates and pushed the dock date by 4 business days. I’m still a little annoyed on their behalf.
If you want an industry benchmark, organizations like the Packaging Machinery Manufacturers Institute, ISTA, and FSC are useful references for performance, testing, and sustainable material claims. For shipping-related impacts, the EPA’s sustainable materials guidance is worth a look too. Standards don’t make your quote cheaper, but they do keep everybody honest, which is refreshing in a business where “almost the same” can mean “not remotely the same.”
Key Factors That Change Branded Packaging Pricing
Material is usually the first big swing factor in any branded packaging pricing guide. Corrugate is common for shipping boxes and mailers. Paperboard works well for folding cartons. Rigid chipboard costs more because it’s thicker, heavier, and more labor-intensive. Specialty paper, recycled stock, and FSC-certified materials can shift pricing again depending on availability and supplier inventory. I’ve seen recycled content add only a few cents per unit on one job and nearly 18% on another, depending on mill supply and order timing. A 350gsm C1S artboard carton might run $0.22 per unit in one batch from Guangzhou and $0.27 in another if the mill changes coating stock. That’s the part people don’t love hearing, because it means sustainability choices are real choices, not decorative talking points.
Size matters more than most buyers expect. More board means more raw material, more waste on the press sheet, and more shipping weight. A box that’s 10% bigger isn’t necessarily 10% more expensive. Sometimes it’s worse, because the die layout becomes less efficient and pallet counts increase. One extra inch can affect how many units fit in a carton, which affects freight, which affects storage. A 9 x 6 x 3 inch mailer may fit 96 units per master carton, while a 10 x 7 x 4 inch version may only fit 72, and that difference can raise freight by 8% to 12% on an ocean shipment out of Shenzhen. The branded packaging pricing guide really starts to feel like dominoes once structure gets involved, and the first domino is often a measurement somebody eyeballed instead of checking twice.
Then there’s print method. Digital printing is great for short runs and fast turnarounds. Offset shines when quantities rise and color consistency matters. Flexo is often used for corrugated packaging because it’s efficient for larger runs and simpler graphics. Screen printing can be useful for specialty effects. Foil stamping, embossing, debossing, and spot UV each add a layer of labor and tooling. Pretty things are rarely cheap. A 1,000-piece digital carton order may ship in 7 to 10 business days from proof approval, while an offset run with foil in Dongguan typically needs 12 to 15 business days once the plates and dies are locked. Shocking, I know. We all love a premium finish until the purchase order arrives and suddenly everybody has questions.
Here’s the breakdown I usually give clients:
- Digital — lower setup, good for smaller runs, often $0.18–$0.85 per unit depending on format.
- Offset — stronger for medium to large runs, better unit economics at scale.
- Flexo — efficient on corrugated, especially with simpler graphics and repeat orders.
- Foil stamping — adds shine and perceived value, but creates extra tooling and press time.
- Emboss/deboss — tactile, premium, and usually not free.
Finishes and add-ons can change the entire price conversation. Soft-touch lamination gives a velvety feel and usually costs more than plain matte. Gloss coating can be cheaper but less premium for some brands. Magnetic closures on rigid boxes add material and assembly time. Inserts raise both material and labor cost, especially if they’re molded pulp, EVA foam, or custom SBS die-cut inserts. Windows need patching. Ribbons need tying. Tissue needs folding. None of this is expensive in isolation. All of it is expensive together, which is somehow the packaging industry’s favorite prank. A 2,000-piece rigid box with a foam insert in Ningbo can run $3.10 per unit with a simple wrap, then jump to $3.95 once the closure changes from tuck to magnet.
There’s a reason I keep pushing the branded packaging pricing guide idea instead of one flat “box price.” Packaging is not one material in one format. It’s a stack of choices. If your brand sells skincare in a premium rigid box, that box might include a 157gsm art paper wrap, 2mm greyboard, a foam insert, gold foil, and soft-touch lamination. That’s a completely different cost profile from a kraft mailer with one-color black ink and no coating. Same word “box.” Very different reality. I’ve seen that skincare structure land at $2.68 per unit in Dongguan and nearly $3.40 in California once local labor and board pricing were added.
Supplier location also matters. Domestic production can reduce transit time and simplify communication, but unit prices are often higher. Offshore production can lower the factory price, though ocean freight, tariffs, customs clearance, and warehouse timing can wipe out the savings if you’re not careful. I’ve had clients save $0.12 per unit in factory pricing and then lose $0.09 in freight plus $0.05 in duty. So much for the victory lap. On a 10,000-piece run, that difference means the “cheaper” overseas quote was only $220 ahead after port fees and drayage. I still remember the silence on that call — the kind of silence that says everyone just discovered math has teeth.
Lead time affects price too. If a factory can slot your job into a normal run, you’ll usually pay less than if you demand an accelerated schedule. Our Shenzhen facility once quoted a folding carton order at 16 business days. The client wanted it in 7. The rush fee added 14%. Not because the factory enjoyed drama, but because it forced overtime, priority scheduling, and a different freight plan. That’s standard in packaging design and production, even if it feels a little like paying a tax on impatience. On the same order, proof approval on a Tuesday meant the cartons could leave by the second Thursday only if the client signed off by 3:00 p.m. local time.
Branded Packaging Pricing Guide: Step-by-Step Budgeting Process
If you want the branded packaging pricing guide version that actually helps you spend less, start with the packaging goal. Not the decoration. The goal. Are you shipping safely, creating shelf impact, lifting repeat purchases, or improving the unboxing experience? I’ve sat in product meetings where the team argued over foil colors before they’d even confirmed whether the product was glass or plastic. That is how budgets get weird. It also explains why some launches feel like they were planned by three different people in three different time zones. In one Amsterdam meeting, a team chose a gold sleeve for a $12 serum kit before confirming the bottle diameter was 38 mm, not 42 mm.
Step 1: Define the use case. A mailer for subscription coffee does not need the same structure as a rigid gift box for a $120 candle. Product packaging has to match the product’s value, fragility, and channel. If it ships through carriers, it needs compression strength and drop protection. If it sits on shelves, it needs shelf presence and scan-friendly design. Decide that first. Everything else gets easier once the packaging knows what job it actually has. A 32 ECT mailer may be enough for a 1.2 lb skincare set, while a 44 ECT corrugated shipper makes more sense for glassware headed to Texas or Florida.
Step 2: Gather exact specs. Get dimensions, material preference, print coverage, finishes, quantity, and delivery destination. If you can, include the product weight and any insert requirements. A supplier can’t quote smartly on “medium box” or “luxury feel.” I mean, they can, but the number will be useless. A proper branded packaging pricing guide always begins with hard specs, because hard specs keep everyone from pretending the box is smaller in their imagination than it is on the pallet. If your carton is 8.5 x 6 x 2 inches and your insert is EVA foam at 3mm thickness, write that down before the call starts.
Step 3: Ask for apples-to-apples quotes. Send the same dieline and artwork notes to three to five vendors. If one quote includes a 12pt SBS carton and another uses 14pt C1S artboard, you’re not comparing the same thing. If one includes freight to your warehouse and another doesn’t, the lower quote is fake-cheap. I’ve seen buyers lose two weeks because one vendor was actually quoting FOB and the other was quoting delivered. Same spreadsheet. Wrong math. Very expensive confusion. A supplier in Shenzhen may quote EXW, while a distributor in Chicago quotes DDP to your dock in Illinois; those are not equivalent prices.
Step 4: Calculate landed Cost Per Unit. Add the unit price, freight, taxes, sampling, storage, and kitting. If you need 10,000 inserts stored for six months, that matters. If you need boxes broken down and shipped to three fulfillment centers, that matters too. A real branded packaging pricing guide should help you calculate what each unit truly costs you on the dock, not just at the factory gate. That’s where the budget lives, whether people acknowledge it or not. On a 5,000-piece folding carton order, for example, $0.24 factory price can become $0.31 landed once ocean freight, customs brokerage, and warehouse receiving are added.
Step 5: Build a target, a ceiling, and a fallback. Your target is what you hope to pay. Your ceiling is the maximum that still protects margins. Your fallback is the simpler version you’ll use if the premium option breaks the budget. I like this because it keeps the team from making emotional decisions at the eleventh hour. If soft-touch lamination pushes you over, maybe matte coating plus a better structural insert gets you 85% of the feel for less money. That is a much calmer conversation than staring at an overruns email and making choices with gritted teeth. A fallback might save $0.28 per unit on a 3,000-piece run, which is a real $840 back in the budget.
Step 6: Verify samples before approval. I cannot stress this enough. A sample can save a production run or kill a bad idea early. One bad proof can eat the savings from a cheap quote. I once watched a client approve a digitally printed sample without checking the black density under warm retail lighting. In production, the black shifted a little gray. The remake cost them $1,900. That was a very expensive lesson in lighting, color control, and patience. It also produced one of those long pauses where everyone suddenly becomes very interested in the table. In another run from Suzhou, a sample approved on day 9 exposed an insert tolerance problem that would have cost 4,000 units if it had waited until final assembly.
Below is a quick planning framework I often use for branded packaging pricing decisions:
| Budget Layer | What It Includes | Why It Matters |
|---|---|---|
| Factory price | Materials, printing, finishing, assembly | Base quote from supplier |
| Landed cost | Factory price + freight + duty + storage | True cost to receive goods |
| Total program cost | Landed cost + sampling + revisions + kitting | Full budget impact |
If you’re doing packaging for a retail launch, I’d also recommend reviewing your box strategy against your channel strategy. A premium unboxing experience might justify a higher spend on tissue, inserts, or a sleeve. If your product is a commodity consumable with thin margins, the branded packaging pricing guide should push you toward structure efficiency and cleaner print economics. Fancy is fine, but fancy that sabotages margin is just expensive decor. In a Toronto supplement launch, we shifted from a two-piece rigid set to a tuck-end carton and saved $0.47 per unit without changing the front-panel design.
For buyers who want to see how structure and finish choices look in the real world, our Custom Packaging Products page is a useful starting point. If you want examples of what worked for other brands, our Case Studies page has plenty of packaging design decisions that were made with a calculator, not wishful thinking.
Branded Packaging Pricing Guide: Common Mistakes That Inflate Costs
The first mistake is picking premium finishes before the margin math is done. Foil, embossing, and soft-touch lamination can look beautiful. They also can crush a budget if your product margin is only $6.50. I’ve seen brands spec a rigid box with magnetic closure for a $19 candle and then wonder why the packaging burned through too much profit. The branded packaging pricing guide should tell you whether the decoration fits the economics, not just whether it looks impressive in a mockup. A candle box that lands at $2.90 per unit may be fine at $42 retail, but it can hurt badly at $18 retail.
The second mistake is ignoring standard sizes. Custom dimensions are sometimes necessary, but every unique size can create fragmented inventory and weaker volume pricing. If you split a run into three box sizes when one or two would do, you multiply tooling, storage, and ordering complexity. Standardization is boring. It also saves money. Funny how that works. The sort of boring that finance teams call “beautiful.” A plant in Guangzhou can often price a standard 9 x 6 x 2.5 inch mailer 11% lower than a custom size with only 3mm of extra height because the standard die already exists.
The third mistake is forgetting freight and customs. On paper, offshore production can look cheaper by a wide margin. Then the boxes arrive, and everyone pretends the ocean didn’t cost money. I’ve seen buyers save $300 on production and pay $480 more in shipping because the pallet configuration was inefficient. The branded packaging pricing guide only works if it includes the route, not just the factory. Shipping is not a side note; it is a budget line with a passport. On one route from Ningbo to Seattle, a 2,000-piece rigid box order needed 14 cartons instead of 10 because the insert trays were packed separately.
The fourth mistake is over-specifying materials. Some teams think heavier board always means better quality. Not always. A well-designed 350gsm C1S carton can outperform a thicker board if the structure is right and the product isn’t too heavy. A lighter board may even improve shipping efficiency. You do not get extra points for buying cardboard you don’t need. I say that with love, but also with the tiredness of someone who has seen too many oversized cartons. If your product weighs 180 grams and ships in a corrugated master case, a 350gsm artboard carton can be more than enough if the internal fit is solid.
The fifth mistake is skipping sample rounds. One color shift, one die-cut issue, one insert misfit, and suddenly your “cheap” quote gets very expensive. Sample rounds are insurance. Not glamorous. Definitely not free. But cheaper than a reprint. I’d rather have one more proof than one more apology call, and I suspect your operations team feels the same. A $65 pre-production sample can prevent a $2,400 remake, which is a trade most teams would happily make if they saw it written down before the panic.
The sixth mistake is failing to ask about artwork prep, plate changes, or revision fees. These are the quiet costs. The ones that show up after the buyer thinks the deal is done. Ask whether the quote includes prepress checks, dieline adjustments, proofing, and revisions. Ask what happens if the Pantone changes or the logo moves 3 millimeters. In my experience, the unpleasant surprise is almost always in the small print, not the big shiny number. A factory in Dongguan may include one proof, while a printer in Chicago charges $85 for each additional digital proof after the first round.
A solid branded packaging pricing guide also reminds you that packaging is a supply chain item, not just a design piece. If the cartons don’t arrive flat-packed, if the inserts ship separately, or if the warehouse needs to assemble kitted sets, labor costs rise. Packaging is more than branding. It is operations. A pretty box that breaks your fulfillment workflow is not a win, no matter how good it looks on a shelf. I’ve seen a subscription brand in Austin lose two fulfillment hours per day because tissue, insert, and mailer arrived in three separate cartons instead of nested together.
Expert Tips to Lower Costs Without Making Packaging Feel Cheap
Want the honest version? You usually don’t save big money by making the box ugly. You save money by making smarter decisions earlier. That’s the real value of a practical branded packaging pricing guide. Start with one strong brand color plus one accent if your visual identity allows it. Full-coverage printing looks rich, but a well-chosen kraft base with a bold spot color can still feel intentional and premium. I’m personally a fan of restraint done well; it tends to look more expensive than it is. A two-color kraft mailer from Dongguan can stay near $0.68 per unit at 3,000 pieces, while a full flood-coated version may rise to $0.94 with the same board.
Prioritize tactile upgrades customers actually notice first. Structure and fit beat random decoration. If the box opens with a clean reveal and the product sits properly, you’re already ahead. I’ve watched buyers spend extra on foil while using a loose insert that made the product rattle. Bad trade. Packaging design should support the product, not just decorate it. If the consumer hears the bottle thunk around inside, the foil on the lid isn’t going to save the day. A simple 2mm greyboard insert trimmed to 0.5 mm tolerance will often outperform a fancier finish if the item arrives stable and centered.
Consolidate SKUs where you can. Fewer sizes mean fewer die lines, fewer inventory headaches, and better volume pricing. If two packaging formats can handle most of your product line, that’s usually better than six sizes with mediocre turnover. I know that sounds unexciting. It also sounds like money staying in the account, which is a pleasant kind of boring. A New Jersey brand I worked with cut from five carton sizes to two, and their annual packaging spend dropped by $11,400 on 40,000 combined units.
Ask suppliers for material alternates. FSC-certified paperboard, lighter corrugate, or a different liner can sometimes hit the same look while improving pricing. I’ve had a plant in Shenzhen suggest switching from a heavy art paper wrap to a slightly lighter coated stock on a rigid box. The look stayed close, the feel stayed premium, and the unit cost dropped by $0.31. That was a useful conversation, the kind that makes me wish more teams would ask “what else can work?” before they lock the spec. On another job, a 157gsm wrap was swapped for 128gsm coated art paper, and the final box still passed the hand-feel test in the showroom in Shenzhen.
Negotiate around repeat orders and annual volume. Suppliers price differently when they know a second or third run is likely. If you can bundle packaging components—box, insert, sleeve, tissue, and labels—under one production schedule, you may reduce tooling duplication and freight inefficiency. A good branded packaging pricing guide should make volume planning part of the discussion, not an afterthought. I know planning sounds dull, but so does paying twice for the same setup. If a factory in Ningbo knows you’ll reorder every quarter, you may get a 3% to 7% pricing improvement after the first run.
Test where you can save in presentation without harming performance. For example, a matte varnish may deliver enough polish without the cost of soft-touch. A printed insert may work instead of a separate foam component. A tuck top may replace a magnetic closure if the premium feel is still there. These choices depend on brand positioning, but the savings can be real. On a 4,000-piece cosmetics order, shifting from EVA foam to printed paperboard inserts saved $1,120 while keeping the same shelf presentation in the retail box.
One more thing: don’t overbuy because the unit price looks sexy. A quote of $0.21 can be worse than $0.29 if the lower-priced option leads to more damage, more repacks, or more customer complaints. Better packaging can reduce hidden costs outside the factory. That’s one reason I like to treat branded packaging pricing as a business decision, not a craft project. Craft matters. Margin matters more. A box that saves $0.08 at procurement but adds a 2% damage rate can cost far more by the end of a quarter.
“We cut packaging spend by 18% without changing the logo. We changed the insert, standardized two sizes, and stopped paying for a finish no one could see in a shipping carton.” — a client in a cosmetics launch meeting
If you want to see how different packaging approaches affect cost and appearance, browse our Custom Packaging Products section alongside a few Case Studies. Real examples beat opinions from people who have never stood next to a folding line at 6:40 a.m. and tried to explain why a die line matters. A case study from a Chicago fulfillment center can tell you more about cost tradeoffs in one page than a week of abstract debate.
What to Do Next: Turn Your Pricing Range Into a Real Quote
The fastest path from guessing to knowing is a clean packaging brief. Put together your dimensions, quantity, artwork, material preference, finish requirements, delivery destination, and must-have versus nice-to-have features. If the box is for shipping, include product weight and fragility. If it’s for retail packaging, include shelf role and target price point. That brief is the first real step in any branded packaging pricing guide that produces usable quotes, because good quotes are built on clear information, not hopeful adjectives. A 6,000-piece brief for a cosmetic carton in Toronto should read differently than a 2,000-piece launch for a candle in Los Angeles, and the factory needs to see those differences in writing.
Then shortlist two or three suppliers and send the exact same brief to each. Same dieline. Same notes. Same quantity. Same delivery zip. Otherwise you’re comparing apples to shipping crates again. Ask each supplier what is included: sampling, freight, revisions, and any tooling or plate fees. Ask how long the quote holds. A seven-day hold is common. A thirty-day hold is nice. A quote that changes after one email exchange is not a quote; it’s a mood. If a plant in Dongguan quotes 14 business days from proof approval and a domestic converter in Ohio quotes 9 business days, make sure you understand which one includes delivery to your warehouse in Atlanta.
Before you approve production, request a prototype or sample. Verify color, structure, assembly, and fit. Check whether the product slides, rattles, crushes, or gets fingerprint marks on the finish. If your packaging design includes a coated surface or soft-touch lamination, check it under bright retail lighting and in shipping conditions. A good branded packaging pricing guide should never skip the physical sample. Paper lies less than sales decks do, and samples are where the truth finally shows up. I still want hands-on approval before a 10,000-piece run, even if the sample only took 3 business days to make in Shenzhen.
Build a landed-cost spreadsheet so you can compare real delivered cost against factory price. Add in freight, duty, storage, kitting, and any local handling charges. If you’re ordering seasonal packaging, include warehousing timing and inventory risk. A cheap box that sits in a warehouse for nine months is not cheap. It’s just delayed expense wearing a disguise. A pallet stored in New Jersey for half a year may add $28 to $45 per month in fees, which turns “savings” into a rerun of the same old mistake.
Then set a decision deadline and lock specs before production starts. Midstream changes are expensive. They always are. A revised logo placement, a different insert thickness, or a finish change after approval can add new setup, new tooling, and new delays. I learned that the hard way on a tea brand order where the client changed the sleeve width after prepress. The extra charge was only $110, but the delay pushed the ship date back four business days. That’s the sort of thing a disciplined branded packaging pricing guide helps you avoid, and the sort of thing that makes everyone in operations stare into the middle distance for a minute.
One last rule I give every buyer: negotiate from facts, not vibes. If you know your material, structure, quantity, freight route, and finish priorities, you can push back on pricing with confidence. You can also decide where to spend and where to save without wrecking the brand. That’s the point. A strong branded packaging pricing guide doesn’t just help you get a quote. It helps you buy packaging like someone who has done this before. Whether the job is a 1,000-piece sleeve in Portland or a 20,000-piece mailer run out of Dongguan, the same logic holds: details decide the price.
FAQ
How much should I budget for branded packaging pricing on a small run?
Budget by landed cost, not just box price. Small runs usually carry higher setup and per-unit costs because tooling, print setup, and sampling get spread across fewer units. For a simple mailer box, you might be in the $0.60–$1.25 range per unit for a small run, while rigid or heavily finished packaging can jump far above that. If you’re ordering 500 units of a 350gsm C1S carton in Shenzhen, a fair first quote may start around $0.46 per unit plus $175 to $250 in setup. The branded packaging pricing guide answer is always: simple formats cost less, and quantity matters more than people expect.
What makes branded packaging pricing go up the fastest?
Complex finishes like foil stamping, embossing, debossing, and soft-touch lamination raise costs quickly. Low quantities do it too, because setup costs spread across fewer units. Oversized structures can also drive up material and freight. I’ve seen a box grow by just 12 millimeters and trigger a new die layout, extra waste, and higher shipping weight. That’s how the branded packaging pricing guide starts costing more without anyone realizing why. A rigid box that moves from a 2mm board wrap to 2.5mm greyboard plus magnet closure can add $0.35 to $0.70 per unit almost immediately.
Is digital printing always cheaper for branded packaging pricing?
Not always, though it is often better for smaller quantities or artwork that changes often. Offset can beat digital on larger runs because the setup cost gets diluted over more units. The right choice depends on quantity, finish requirements, and color consistency. A good branded packaging pricing guide compares the full quote, not just the print method label. A 1,000-piece digital carton may come in at $0.41 per unit, while a 10,000-piece offset run could fall to $0.18 per unit after the initial plate and setup charges are spread out.
How do I compare branded packaging pricing from different suppliers?
Use the same specs, dieline, and quantity for every quote. Then compare landed cost, not just unit price. Check whether freight, sampling, setup, and revisions are included. If one quote is lower but excludes shipping or charges separately for proofs, it is not truly cheaper. That’s a classic mistake, and the branded packaging pricing guide exists to stop it. If one supplier in Guangzhou quotes EXW at $0.23 and another in Chicago quotes delivered at $0.31, normalize the freight and duty before deciding.
Can I reduce branded packaging pricing without changing my brand look?
Yes. Simplify finishes, optimize structure, and standardize sizes. You can often keep the same visual identity with smarter material choices, like switching to a lighter board or using one strong color instead of full-coverage decoration. Ordering larger batches can help too. The trick is to protect the parts customers notice while trimming the parts they won’t miss. That’s the practical side of the branded packaging pricing guide. For example, a 157gsm art paper wrap might be swapped for 128gsm coated stock, saving $0.19 to $0.31 per unit while preserving the same shelf look.
If you want packaging that fits the brand and the budget, start with the numbers first and the decoration second. That’s how I’ve handled every serious packaging buy I’ve ever worked on, from folding cartons to rigid boxes to retail bags. A smart branded packaging pricing guide won’t tell you to spend less everywhere. It will show you where the spend actually matters, where it doesn’t, and how to negotiate with suppliers using facts instead of hopeful guesses. Whether the production line is in Dongguan, Guangzhou, Ningbo, or a converter closer to home in Chicago or Los Angeles, the principle is the same: clear specs, honest pricing, and no surprises hiding in the freight column.