Buyer Fit Snapshot
| Best fit | bubble wrap comparison options for shipping protection for packaging buyers comparing material specs, print proof, MOQ, unit cost, freight, and repeat-order risk where brand print, material, artwork control, and repeat-order consistency matter. |
|---|---|
| Quote inputs | Share finished size, material target, print colors, finish, packing count, annual reorder estimate, and delivery region. |
| Proofing check | Approve dieline scale, logo placement, barcode or warning zones, color tolerance, and any recyclable or compostable wording before bulk production. |
| Main risk | Vague material claims, crowded artwork, or missing packing details can create delays even when the unit price looks attractive. |
Fast answer: Bubble Wrap Comparison Options for Shipping Protection: Material, Print, MOQ, and Cost should be specified like a repeatable production item. The safest quote includes material, print method, finish, artwork proof, carton packing, and reorder notes in one written spec.
What to confirm before approving the packaging proof
Check the product dimensions against the actual filled item, not only the sales mockup. Ask for tolerance on folds, seals, hang holes, label areas, and retail display edges. If the package carries a logo, QR code, warning copy, or legal claim, reserve that space before decorative graphics fill the panel.
How to compare quotes without losing quality
Compare board or film grade, print process, finish, sampling route, tooling charges, carton quantity, and freight assumptions side by side. A lower quote is only useful if the supplier can repeat the same color, closure quality, and packing count on the next order.
On one factory visit in Shenzhen’s Longhua District, I watched a team drop the same glass tumbler from three heights: 30 cm, 60 cm, and 90 cm. The surprise? The cheapest roll in the room failed before the premium one did, and that single test saved the client about $1,800 a month in breakage claims across a 9,500-unit run. I still remember the look on the buyer’s face—half relief, half “why did nobody tell me this sooner?” That’s the whole point of a bubble wrap comparison: price per roll means almost nothing if the material fails in real shipping conditions.
I’ve spent years inside packaging plants in Shenzhen, Dongguan, and Suzhou, standing next to corrugator stacks, arguing with suppliers over roll width, and watching packers wrap the wrong thing in the right material. Honestly, I think a good bubble wrap comparison is less about finding the “best” product in some abstract sense and more about matching the right film, bubble size, and format to the item, the lane, and the labor you actually have. Otherwise you end up paying for confidence instead of protection, which is a frustrating expense to discover after a Monday morning claims report lands in your inbox.
And yes, the mistake usually looks tiny on paper. A one-cent difference here, a slightly narrower roll there, maybe a supplier who promises “good enough” when the spec sheet is thin. Then the cartons start arriving with scuffed corners or broken handles, and somebody in operations has to explain why the lowest quote turned into the highest headache. That part is not glamorous. It is, however, very real.
Bubble Wrap Comparison: What Actually Makes One Type Better?
Bubble wrap is simple on paper. It’s polyethylene film with sealed air pockets designed to absorb shock, reduce vibration, and keep products from rubbing against each other during transit. Simple. But the details are where a bubble wrap comparison gets useful, because not all bubbles, films, or roll formats behave the same once a carton gets tossed, stacked, and dragged through a depot in Chicago, Rotterdam, or Busan.
Here’s what I see people get wrong. They compare one roll to another by sticker price only, then act shocked when the damage rate goes up. A proper bubble wrap comparison has to include bubble diameter, film thickness, perforation style, roll width, and what the item actually needs: cushioning, scratch protection, or static control. If you skip those pieces, you’re basically choosing a seatbelt by color, which is a remarkably expensive way to learn about physics.
On the floor, I’ve seen four common categories come up again and again: small-bubble wrap, large-bubble wrap, standard wrap, and specialty wrap like anti-static versions. The bubble wrap comparison gets even more interesting when you factor in continuous rolls versus perforated sheets. One gives you speed. The other gives you flexibility. Neither wins every time, and that is exactly why packaging teams keep asking me for the “one perfect roll” like it’s hidden under a pallet in Jiangsu.
And yes, the “cheapest” roll can be the expensive one. I had a client shipping ceramic mugs in a 2,000-unit monthly run from a warehouse in Austin, Texas. They saved about $0.04 per unit by switching to a thinner roll. Then breakage climbed by 3.8%, which turned into roughly $620 in weekly claims and replacement labor. I remember staring at that spreadsheet and thinking, “Wonderful. We saved pennies and bought ourselves a return headache.” That’s why I take every bubble wrap comparison back to total landed cost, not just a carton price line.
One more practical angle: not every supplier means the same thing by “good protection.” Some are thinking about retail presentation, some are thinking about parcel drops, and some are just trying to move inventory before quarter-end. Those are not the same goal. If you don’t define the lane, the product type, and the failure point, the comparison becomes kind of useless.
How Bubble Wrap Works in Shipping Protection
The mechanics are boring until your product arrives broken. Bubble wrap works in three ways: it cushions impact, creates spacing, and reduces direct contact between the product and the box or another item. In a basic bubble wrap comparison, those three jobs are what you’re really paying for, whether the shipment leaves a facility in Guangzhou or a fulfillment center in Nashville.
Shock absorption matters when a parcel gets dropped from conveyor height, which is often around 30 to 90 cm depending on the facility. Abrasion protection matters when the box gets rubbed by another carton, a pallet edge, or the inside of a master case. I’ve seen printed cosmetic cartons come through with corner scuffing even when the bottle inside survived after a 1.2-meter drop simulation. That’s not a product failure. That’s a packaging failure. And it is maddening because everyone wants to blame the carrier like the carrier personally attacked the box.
Small bubbles usually do better for surface protection. They’re tighter, lighter, and better at preventing scuffs on glossy printed boxes, photo frames, books, and cosmetics. Larger bubbles usually do better for heavier or more fragile items because they compress more and absorb a bigger hit. That’s a major pivot point in any bubble wrap comparison. If you mix those up, you can end up with a perfectly wrapped disaster.
Film thickness changes the game too. Thin wrap can puncture around sharp edges, metal parts, or heavy corners. A 60-gauge or 70-gauge film might be enough for light retail goods, while heavier items often need thicker wrap, especially if the product has hard edges. I’ve watched a supplier in Ningbo try to convince a buyer that “more air” was enough. It wasn’t. Air without film strength is just decorative, and I’d happily print that on a warehouse sign.
For electronics, static control matters. Anti-static bubble wrap helps prevent electrostatic discharge around circuit boards, chargers, sensors, and other sensitive components. For longer storage or humid shipping lanes, moisture resistance can matter too, especially if you’re shipping near coastal ports like Shenzhen, Miami, or Felixstowe. You do not want bubble wrap that absorbs humidity like a kitchen sponge. I’ve seen rolls sit in a dock area long enough to look fine but perform like soggy packing leftovers after a two-week monsoon stretch.
For reference, packaging standards matter here. The ISTA test methods are useful if you want to validate packaging under vibration and drop conditions, and the Flexible Packaging Association has solid educational resources on material performance. A bubble wrap comparison without test data is just a guessing game with receipts.
Bubble Wrap Comparison: Key Factors That Change Performance and Price
If you want a real bubble wrap comparison, start with the three biggest levers: bubble size, film thickness, and roll width. Those are the features that influence protection most directly. Everything else, including price, comes after that. I know that sounds backward to procurement teams in Dallas or Düsseldorf, but it’s the right order if you care about breakage instead of just the invoice total.
Bubble size changes cushioning behavior. Film thickness changes puncture resistance. Roll width changes how fast your team can pack and how much material gets wasted around odd shapes. In one warehouse I visited near Savannah, switching from a 12-inch roll to a 24-inch roll cut wrap time by about 14 seconds per carton on average. That sounds small until you multiply it by 8,000 cartons a month. Then it becomes roughly 31 labor hours saved monthly. That is real money, not a theoretical spreadsheet victory.
Pricing changes by grade. Standard wrap is cheaper, heavy-duty wrap costs more, and anti-static wrap usually sits higher because of the added formulation and narrower supplier base. Specialty widths can also raise cost. A 48-inch jumbo roll might look like a bargain on a per-square-foot basis, but if your team wastes 20% of it trimming oversized sheets, the math gets ugly fast. That’s a classic bubble wrap comparison trap, and I have watched very smart people fall into it after a quote in the form of “$0.15 per unit for 5000 pieces” seemed irresistible.
Supplier minimums matter too. If you buy from Sealed Air, Uline, or Pregis, direct pricing may look attractive, but freight, order minimums, and lead time can change the final number. I’ve sat in meetings where a buyer bragged about saving $0.03 per square foot, then paid $260 in shipping because the order was split across two pallets leaving a warehouse in Rancho Cucamonga. Great job. Very efficient. I wish I were making that up.
Storage and labor costs are easy to ignore and expensive to forget. Bulk rolls save money per square foot, but oversized rolls eat warehouse space and slow down packers if they need to drag, cut, and re-cut constantly. A good bubble wrap comparison should account for the full picture:
- Material price per roll or per square foot
- Freight charges and accessorial fees
- Minimum order quantities from the supplier
- Waste rate from over-wrapping or wrong sizing
- Labor time spent packing each unit
- Breakage cost if protection is too weak
| Bubble Wrap Type | Typical Price Range | Best Use Case | Key Tradeoff |
|---|---|---|---|
| Standard small-bubble roll | $0.12–$0.20 per sq ft | Printed boxes, cosmetics, books | Less cushioning for heavy items |
| Heavy-duty large-bubble roll | $0.18–$0.32 per sq ft | Glassware, ceramics, bulky items | Higher cost and bulkier packages |
| Anti-static bubble wrap | $0.22–$0.40 per sq ft | Electronics and circuit boards | Specialty pricing, narrower supply base |
| Perforated sheet roll | $0.15–$0.28 per sq ft | Fast packing lines | Less flexible for odd dimensions |
That table is a starting point, not gospel. Freight from a West Coast distributor to a Midwest warehouse can add 8% to 22% depending on pallet count and zone. I’ve seen buyers get fooled by a low unit price and a brutal truck bill. The better bubble wrap comparison asks, “What does this roll cost delivered, stored, and actually used?”
One more thing: some suppliers quote by roll, some by weight, some by square footage, and some by case. I once had a negotiation with a Shanghai supplier where the quote looked 17% lower until we converted everything to usable square footage and added carton freight. Then the “cheap” offer became the middle one. Funny how math works when you force it to show up. It is almost rude, honestly, and that’s before you factor in a production schedule that promises samples in 7 business days and then quietly stretches to 18.
Bubble Wrap Comparison by Use Case: Small Bubbles, Large Bubbles, and Specialty Options
A useful bubble wrap comparison starts with the item, not the material catalog. If you’re shipping a glossy candle box, the threat is mostly scuffing and corner denting. If you’re shipping a hand-thrown ceramic vase, the threat is impact. If you’re shipping a controller board, the threat is static plus impact. Different problem. Different answer. Pretending otherwise is how warehouses end up redoing the same carton three times in a row at 4:30 p.m.
Small bubbles are usually best for surface protection. I use them for cosmetics, books, framed prints, retail boxes, and lightweight products where abrasion is the real enemy. They conform well and don’t build a giant shipping cube. That matters because dimensional weight charges can punish bulky packaging hard. Honestly, I think small-bubble wrap gets underestimated because it looks too simple to be useful. Packaging likes to be sneaky like that, especially when the item is a 350gsm C1S artboard carton with a glossy printed sleeve that scuffs if you blink at it too hard.
Large bubbles are better when the item needs more cushioning and shock absorption. Glass bottles, mugs, dense ceramics, and oddly shaped items usually benefit from larger air pockets. They also work nicely for void fill in some cases, although I would rather use a proper filler if the carton has a lot of empty space. Bubble wrap is not a magical substitute for bad box sizing. If the box is too big, the wrap just becomes expensive confetti.
Anti-static bubble wrap belongs in the electronics lane. If you’re shipping circuit boards, charging kits, sensors, or any item where electrostatic discharge could cause failure, don’t cheap out here. I’ve seen one bad decision around ESD protection create a $9,400 returns problem for a small electronics brand out of Taipei. That is not the kind of “savings” anyone wants, and nobody in the room was laughing except the one intern who clearly did not understand the budget.
Perforated rolls and on-demand sheets shine in high-speed packing environments. If your team is packing 500 to 1,200 orders a day, every 10 seconds matters. Perforated formats reduce cutting time and make the process more consistent. In a bubble wrap comparison, that labor savings can outweigh a 5% material premium in under a month. Time is money, and also apparently the one thing pack stations can never get enough of.
Here’s the simplest way I explain use cases to clients:
- Small bubbles = scratches, surface finish, light cushioning
- Large bubbles = heavier items, shock control, rough transit
- Anti-static = electronics and sensitive components
- Perforated sheets = fast packing and lower labor effort
- Heavy-duty film = sharp edges and demanding transit lanes
One factory in Dongguan taught me this the hard way. They were wrapping glass perfume bottles in tiny bubbles because the roll was cheaper by $0.02 per unit. The result was tiny surface protection and lousy impact performance. Once they switched to a larger-bubble, thicker-gauge wrap, their complaint rate dropped from 2.6% to 0.9% over the next six weeks. That’s what a good bubble wrap comparison should reveal: not just cost, but the quiet price of being wrong.
Step-by-Step Bubble Wrap Comparison Process for Choosing the Right Roll
If you want to stop guessing, use a process. A proper bubble wrap comparison is not just looking at three catalogs and picking the prettiest quote. It is a short, structured decision with real product samples and real test results, ideally logged on a worksheet by Thursday afternoon so nobody forgets what they approved.
- Measure the product. Write down length, width, height, and the weak points. Corners, lids, handles, glossy surfaces, and protruding parts matter more than the general shape.
- Map the shipping conditions. Parcel carrier, freight, international transit, warehouse storage, or moving truck all create different levels of abuse.
- Match bubble size to fragility. Don’t pick the thinnest option because it looks cheaper. That is how breakage gets invited to the party.
- Request samples from at least two suppliers. I like to test from different sources because formulation and film feel can vary even when the spec sheet looks identical.
- Run a real test. Drop it, shake it, stack it, or send it through a mini transit simulation. Use ISTA-oriented thinking, even if you don’t have a full lab.
- Calculate total landed cost. Include product price, freight, storage, labor time, and the cost of damage claims.
That is the backbone of a serious bubble wrap comparison. If you’re shipping 200 units a week, you may not need lab-grade testing. But you do need a repeatable trial. I usually recommend wrapping three to five sample units, then packing them into the final carton and doing a drop test from around 60 cm on each major face and corner. It is not elegant. It is useful. It also has the side benefit of revealing which team member wraps like they’re trying to win an escape room on the first try.
I also suggest testing pack-out time. A wrap that protects perfectly but takes 40 seconds longer per box might still be a bad choice for a busy e-commerce line. On one client project in Melbourne, switching from loose continuous roll to perforated sheets saved 11 seconds per carton. Their labor team loved it. Their accounting team loved it more, which was probably the real surprise. I did not expect accountants to get emotional about bubble wrap, but here we are.
If your company wants to be more disciplined about materials, the standards resources from EPA and FSC can also be useful, especially when you are considering recycled content, packaging waste, or sustainability claims. I am not saying bubble wrap is a moral philosophy. I am saying the source material and waste stream matter, and the planet probably does not appreciate us pretending they do not.
Common Bubble Wrap Mistakes That Waste Money or Cause Damage
The biggest mistake? Buying by price only. I’ve watched companies chase a $0.01-per-unit saving, then eat $3,000 in claims in a single quarter. That is not frugality. That is expensive self-sabotage. A real bubble wrap comparison includes the cost of failure, not just the cost of the roll, and sometimes that failure shows up only after 1,000 shipments instead of 10.
Another classic mistake is using small bubbles for heavy items. Small bubbles can be great for surface protection, but they do not always deliver enough cushioning for dense or breakable products. On the flip side, using large bubbles for delicate printed surfaces can create more package bulk than you need, which drives up shipping charges. The wrong format makes the carton bigger, heavier, and more expensive. Lovely.
People also over-wrap. They think two extra layers equal safety, then wonder why shipping costs climbed. If you add 1/2 inch all around to a carton on every side, your dimensional weight can jump quickly. Bubble wrap should protect the product, not inflate your carrier bill. I’ve had to say that sentence out loud in more meetings than I care to admit, usually while someone is holding a tape gun like it is evidence in a trial.
Skipping edge protection is another problem. Bubble wrap can cushion, but it is not always enough for sharp corners, metal brackets, or concentrated pressure points. I’ve seen this mistake on framed art and small appliances more than once. A few corner guards and the right carton size often outperform another layer of wrap. That is a smarter bubble wrap comparison outcome than “just add more plastic.”
Storage conditions matter too. Heat, humidity, and compression can flatten bubbles or weaken the film over time. If rolls sit under heavy pallets or near a hot dock door, performance may drop before the material ever hits a box. That is especially annoying because the roll still looks fine. Packaging likes hiding its problems until the shipping label is already on. I swear bubble wrap waits for the worst possible moment to become uncooperative, usually after a 14-day lead time and a Friday afternoon receiving window.
Here is a short reality check from a buyer meeting I sat in last year in Frankfurt: the team had six months of damage data, but they still wanted to switch to a thinner roll because the invoice looked prettier. I asked them one question: “Do you want a cheaper supply line or a cheaper shipping problem?” They kept the thicker wrap. Sometimes the most useful thing in a room is a mildly irritating question.
Expert Tips for Faster Packing, Lower Costs, and Better Protection
My first tip is simple: use bubble wrap as part of a system, not as the whole system. A box, some void fill, and the right wrap usually beat one oversized blanket of plastic. If you are doing a serious bubble wrap comparison, test how the wrap works with the carton size and internal fill, not in isolation. A 2-inch foam insert in a 10 x 8 x 6 carton may outperform a much larger wrap in a 14 x 12 x 10 carton, and the box maker in Qingdao will happily tell you the carton itself is the hero.
Second, standardize by SKU type. If your packers have to decide between three wrap sizes for every order, they will make inconsistent choices. Humans are expensive when they improvise. I’ve seen a warehouse cut waste by 12% just by assigning one approved wrap type to each product family and printing a simple packing chart at each station. Not glamorous. Very effective. Also easy to train in under 20 minutes, which matters when you have turnover every quarter.
Third, negotiate annual pricing, not random one-off buys. Suppliers like Uline, Pregis, and Sealed Air often respond better when volume is predictable. Ask for freight-inclusive quotes and compare them on a per-use basis. I’ve had suppliers shave $0.015 off a unit price and then try to recover it in freight. Cute, but no. I would rather drink bad office coffee than sit through that kind of “deal” again, especially when the sample turnaround was promised in 10 business days and landed 16 days later.
Fourth, test perforated sheets if labor is your biggest cost. If a packer spends 20 seconds cutting and measuring roll after roll, that time adds up. A perforated format can be the better choice even when the material price is slightly higher. In a realistic bubble wrap comparison, speed counts just as much as film thickness. Sometimes the fastest option is also the least annoying option, which feels like a miracle in a packing line.
Fifth, track damage claims and packing time together. Too many teams track one metric and ignore the other. A premium wrap that cuts claims from 2% to 0.7% may easily pay for itself. But if the same wrap slows your labor by 8 seconds per carton, the story changes. You need both numbers on the same sheet. Otherwise the spreadsheet will flatter the wrong decision, and spreadsheets are already far too confident.
“We thought we needed the cheapest roll. Then we ran the test and realized we needed the one that stopped returns.” — operations manager at a mid-sized DTC brand I worked with in Manchester
One more practical note: ask for sample rolls in the exact width your team will use. A 24-inch roll and a 12-inch roll may share the same film spec, but the packing experience is totally different. The wider roll may save time for oversized items, while the narrower one reduces waste for smaller products. That is why I never trust a bubble wrap comparison based on a spec sheet alone. I want to see the roll in somebody’s hands, not just in a PDF.
What to Do Next After Your Bubble Wrap Comparison
Once you finish your bubble wrap comparison, do not leave the decision floating around in someone’s inbox. Turn it into a matrix with real numbers. I like columns for bubble size, thickness, roll width, unit price, freight, pack time, and best use case. Add a column for damage rate if you have tested samples. That is the part that matters most. The rest is just decoration with decimals.
Then order samples from two or three suppliers and test them on your most fragile product, not some random low-risk item. That mistake happens all the time. A roll might protect a hoodie perfectly and still fail miserably on a ceramic mug or glass diffuser bottle. If your top-selling item is fragile, that is your test item. Simple. I remember one brand testing on a tote bag because it was convenient, then acting surprised when the actual product still arrived broken. Convenience is not a protection strategy.
Run a short trial and record three things: breakage, pack-out time, and shipping cost. Even a two-week test can tell you a lot if the volume is steady. I’ve seen clients change their minds after just 150 packed units because the time savings were obvious. I’ve also seen them stay with the thicker wrap because breakage risk was too expensive to tolerate. Both outcomes can be right. The point is to know which one you’re choosing.
Choose one standard roll for most orders and one specialty option for fragile or static-sensitive items. That keeps training simpler and reduces picking mistakes. A small catalog is usually better than a giant one. Your warehouse team does not need nine wrap options to make one carton. They need one obvious answer and one backup. If you give them nine, they will eventually pick the wrong one and blame the weather, the printer, or Mercury retrograde.
Review the results monthly, not once and never again. Shipping conditions change. Carriers change. Product designs change. Even a carton redesign can change how much wrap you need. Shipping does not care about your opinions, and a living bubble wrap comparison beats a dead spreadsheet every time.
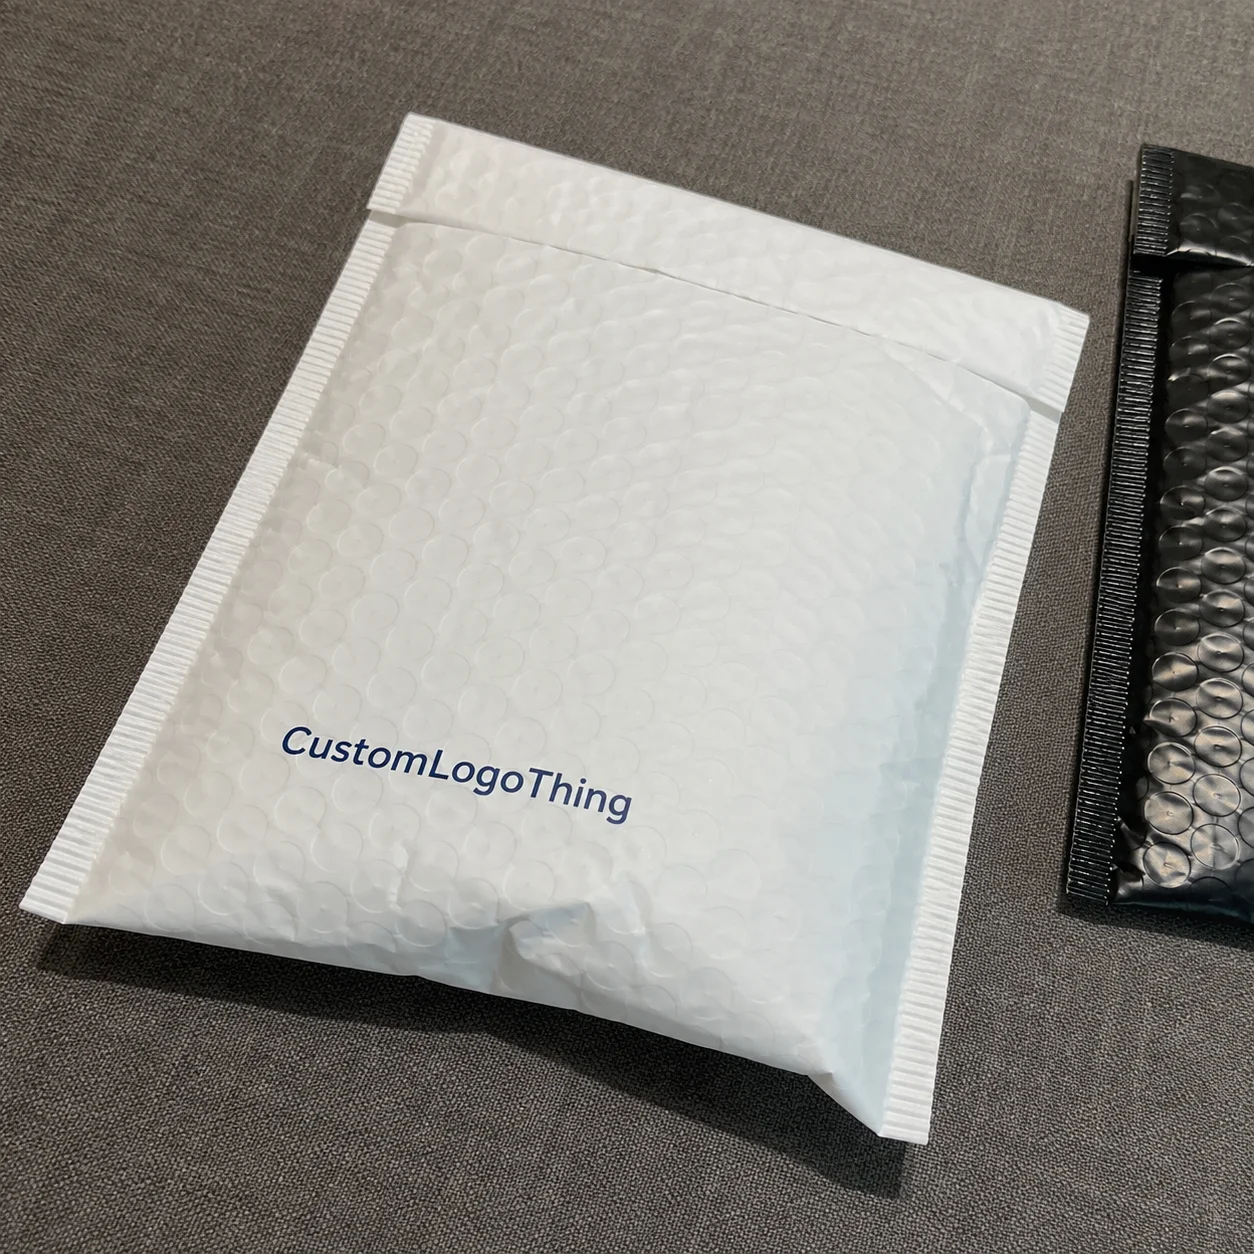
If you are building packaging for a branded product line at Custom Logo Things, this is where custom cartons, inserts, and the right protective wrap work together. I’ve seen beautiful printed boxes ruined by bad internal protection, and I’ve seen modest boxes look premium because the whole pack-out was clean, tight, and damage-free. That is what customers notice. They may not say “excellent bubble selection” in a review, but they absolutely notice when something arrives intact after a 12- to 15-business-day fulfillment cycle.
So the practical takeaway is simple: pick the roll that matches the product, the lane, and the labor, then verify it with a real shipment test before you lock in volume. That one habit saves more money than any bargain quote ever will.
FAQs
What is the best bubble wrap comparison for fragile items?
Compare bubble size, film thickness, and roll width first. For fragile surfaces, small bubbles usually protect against scratches better. For heavier or more breakable items, larger bubbles or heavier-gauge wrap usually performs better. In practice, a real bubble wrap comparison should also include a drop test on the actual product, not a generic sample box, ideally from 60 cm and 90 cm.
How do I compare bubble wrap prices correctly?
Look beyond the roll price and calculate total landed cost. Include freight, storage, waste from oversized rolls, and labor time. A cheaper roll can cost more if it causes damage or slows packing. I’ve seen a $0.03 savings per unit disappear fast once claims and labor were added into the bubble wrap comparison.
Which bubble wrap comparison matters most for electronics?
Anti-static protection matters most for sensitive electronics. Also compare bubble size and puncture resistance. If the item has sharp edges, thicker film is usually worth the extra cost. For boards, chargers, and sensors, I’d always put ESD performance near the top of the bubble wrap comparison, especially for shipments leaving coastal hubs like Shenzhen or Singapore.
Should I choose small bubbles or large bubbles for shipping?
Small bubbles are better for surface protection and lighter items. Large bubbles are better for shock absorption and heavier products. The right choice depends on fragility, weight, and shipping distance. If you are unsure, test both in a side-by-side bubble wrap comparison with the real product, packed into the final carton size.
How can I make a bubble wrap comparison faster for my team?
Use a simple scorecard with protection, cost, speed, and storage space. Test samples on real products and track damage rates. Standardize one primary roll type to reduce packing mistakes. A clean bubble wrap comparison sheet with four numbers beats a stack of vague opinions every time, especially when your sample quotes arrive in 5 business days instead of 15.
If you want the shortest possible answer, here it is: the best bubble wrap comparison is the one that protects the product, keeps labor sane, and does not inflate shipping costs by accident. I’ve spent enough time on factory floors in China, Malaysia, and the U.S. to know that “cheapest” is not a strategy. It is just a number with a surprise attached.
For Custom Logo Things, the smart path is to compare bubble size, thickness, roll format, and total landed cost, then test the winner on the real product. Do that, and your bubble wrap comparison stops being a guess and starts being a decision.
Related packaging resources
Use these related guides to compare specs, costs, quality checks, and buyer decisions before making the final call.
- Shipping Carton MOQ for Startups: Pricing and Lead Times
- Wholesale Box Dividers for Glassware: Specs and Pricing
- Branded Void Fill Kraft Paper: Smarter Shipping Basics
- Zipper Pouches with Logo: Shipping Packaging Guide