Custom Inserts for Packaging solve a problem that outer cartons cannot fix on their own: uncontrolled movement. A box can look clean, print well, and still fail in transit if the product slides, tips, rubs, or knocks into another component. Most damage does not begin with a dramatic collapse. It starts with a few millimeters of empty space and a product that keeps moving after the box is sealed.
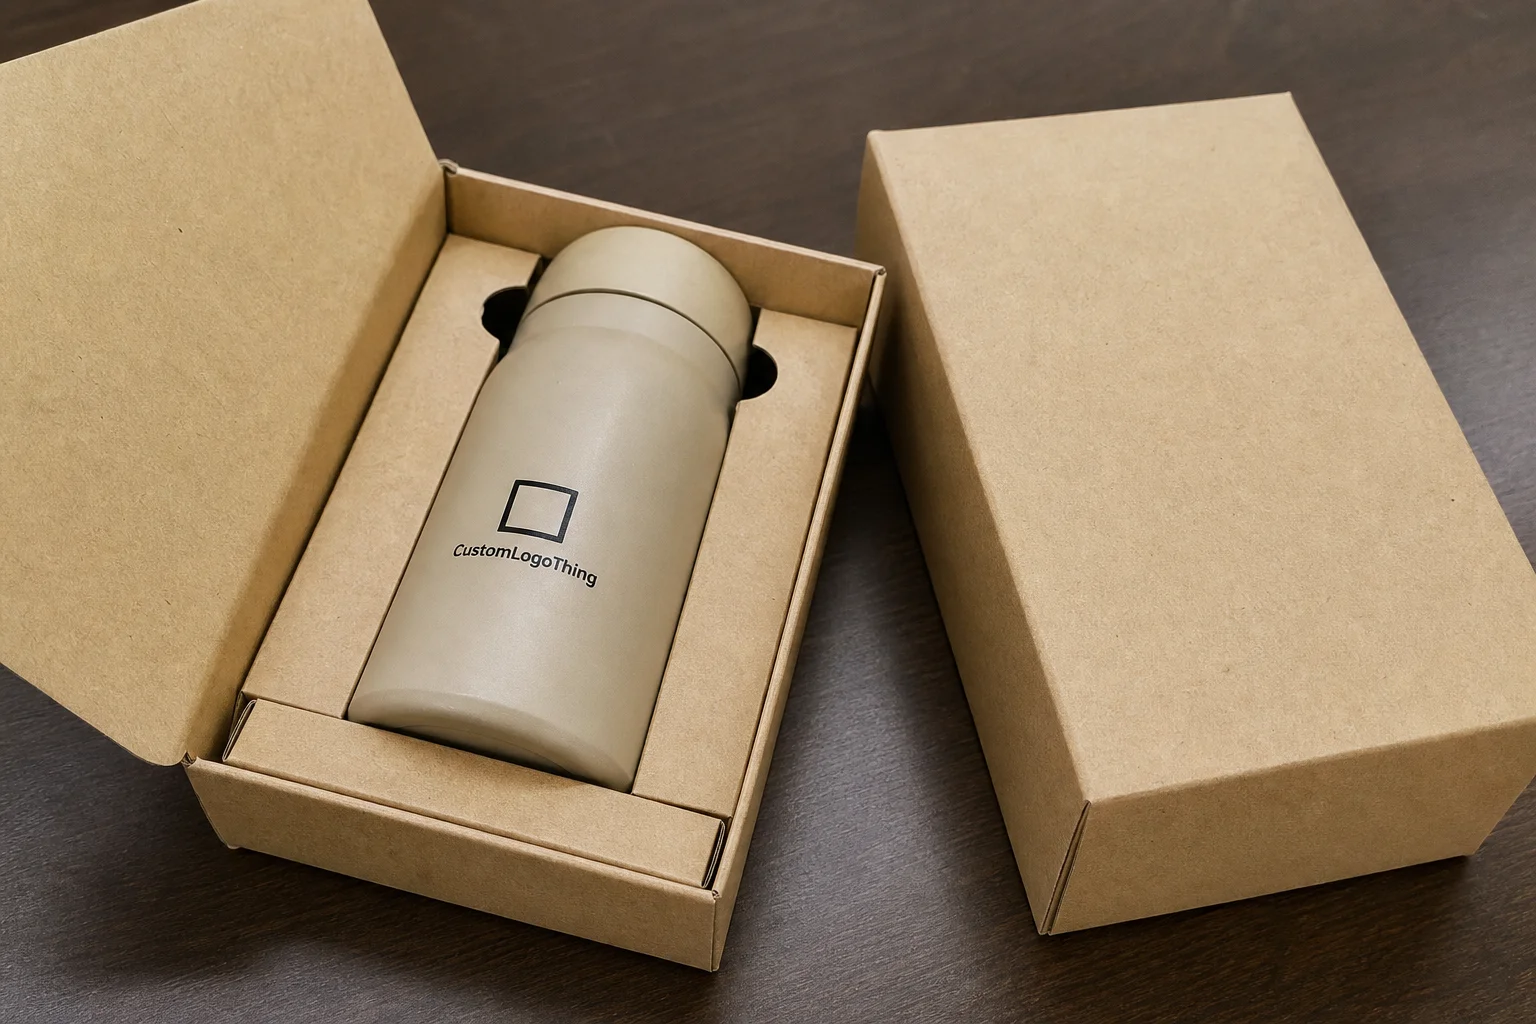
That is why inserts matter for both protection and presentation. They hold the product in position, separate delicate parts, and create the first interior view a customer gets when the package opens. For brands using Custom Packaging Products, the insert is part of the package experience, not an accessory added at the end.
A carton can survive a drop and still fail if the contents shift inside it. Internal movement is the quiet failure mode most teams underestimate.
What Custom Inserts for Packaging Actually Solve
The core job is mechanical: stop movement, distribute load, and keep parts from touching where they should not. That sounds basic, but packaging failures are often basic too. A bottle arrives with a chipped finish, a metal component comes in scratched, or a multi-piece kit opens with one accessory loose in the bottom of the box. The shipping carton may be intact. The product is not.
Custom inserts for packaging reduce that risk by controlling the interior geometry. They define where the product sits, how it is supported, and which surfaces carry the weight. They also reduce the amount of void fill needed in the outer carton, which matters for labor, material use, and consistency on the packing line.
There is also a presentation effect that teams sometimes treat as secondary until they compare a good opening sequence with a sloppy one. A well-fit insert makes the product feel deliberate. A poor one makes even premium packaging look improvised. The contrast is sharper than most mockups suggest.
Different product categories need different solutions. A cosmetic set may only need a folded board tray. A glass item may need foam or molded pulp. A heavier electronic device may need corrugated support with a precise cavity. The right choice depends on how the product behaves under vibration, compression, impact, and repeated handling, not just on how it looks on a screen.
One common mistake is assuming the outer box is doing most of the work. In practice, the outer carton provides the shell; the insert manages the position of the product inside that shell. If the interior is loose, the product can still strike the walls, rub against accessories, or shift enough to fail a drop test later. Protection is a system. The insert is one of its main controls.
How Custom Inserts for Packaging Work Inside the Package
A good insert creates support only where support is needed. It leaves space where pressure would create damage. The difficult part is balancing those two goals. Too much clearance and the product rattles. Too little and packout becomes difficult, finish damage increases, or the product is forced into a cavity it does not naturally fit.
In production terms, the insert must work in three different conditions at once: during packing, during transit, and during opening. A design that looks ideal in a render can still be awkward for operators if it takes too much force to place the product or requires precise alignment every single time. That adds labor and raises the chance of packing errors.
Common construction styles each have a specific use case:
- Folded paperboard inserts suit lighter products, presentation kits, and retail packaging where the insert is visible at opening.
- Foam inserts absorb impact well and protect finishes, which makes them useful for fragile or surface-sensitive products.
- Molded pulp offers fiber-based protection with a lower-plastic profile and works well for protective packaging with moderate structure needs.
- Corrugated structures provide strength, separation, and stacking support for larger or heavier items.
- Thermoformed plastic delivers precise cavities for multi-part sets and products with repeatable geometry.
Each format has tradeoffs. Foam can be excellent at cushioning but may not fit sustainability goals or the brand’s visual direction. Molded pulp is often more environmentally aligned, though the finish is less refined than a laminated board insert. Thermoformed plastic gives repeatability and strong fit control, but it can look generic if the brand wants a more premium or fiber-based appearance. The decision is rarely about one material being universally better. It is about which constraint matters most.
That choice has operational consequences too. A design that needs fewer packing adjustments usually improves throughput. If an insert allows a packer to place the product in one motion, the labor savings can be meaningful across thousands of units. A design that takes 15 to 20 extra seconds per pack can erase any savings from using a cheaper material. Small per-unit differences compound quickly.
For multi-piece kits, insert design also controls sequence. The main item may sit in one cavity, while manuals, cables, accessories, and samples occupy separate pockets. That keeps the customer from opening the package to find loose pieces mixed together. It also reduces surface damage from parts rubbing against each other during transit.
If you need a quick way to compare the main insert formats, this table is the useful version:
| Insert Type | Typical Use | Approx. Unit Cost at 5,000 Units | Main Tradeoff |
|---|---|---|---|
| Folded paperboard | Lighter retail packaging, kits, accessories | $0.18-$0.40 | Lower protection for heavy or fragile products |
| Corrugated | Shipping strength, support, dividers | $0.22-$0.55 | Bulkier than board, less premium visually |
| Molded pulp | Protective fiber-based packaging | $0.25-$0.60 | Tooling and mold setup can raise launch cost |
| Foam | Fragile items, finish-sensitive products | $0.30-$0.90 | Not always ideal for sustainability targets |
| Thermoformed plastic | Precise cavities, multi-part sets | $0.28-$0.75 | Tooling cost and presentation concerns |
Material, Fit, and Product Factors That Change the Spec
The spec should start with the product sample in hand, not the catalog drawing. Actual units vary. Paint thickness, labels, caps, hinges, closures, cable bulges, and molded features all affect the footprint. If the insert is based only on nominal dimensions, it is designed around an idealized version of the product that does not exist in production.
Three measurements matter most: the external dimensions of the product, the weight, and the tolerances across the lot. Then come the details that determine whether the package protects the product or simply holds it in place for the wrong kind of damage. Those details include surface finish, protrusions, weak points, and whether the product is symmetrical enough to sit reliably in a cavity.
- Dimensions: height, width, depth, and any protruding features.
- Weight: heavier products need firmer support and better load distribution.
- Surface finish: polished, coated, or soft-touch surfaces can scuff even if the item survives impact.
- Fragility: glass, ceramics, electronics, and coated parts fail differently.
- Clearance tolerance: enough room for insertion, but not enough room for shifting or rattling.
Finish damage is easy to overlook because the product may still function. A glossy bottle can come through with visible rub marks. Painted metal can pick up small scuffs. Soft-touch surfaces can show compression lines. Those issues are not dramatic failures, but they matter in premium packaging because the customer sees them immediately.
Orientation changes the spec as well. Some products can sit flat in a tray, but others need corner support, side rails, or a cradle that transfers weight away from weak points. If the insert presses against the wrong area, the load can move into a neck, hinge, edge, or seam that was never meant to carry it. That is where cracked parts and stress marks show up.
Sustainability is part of the material decision, but it should be treated as a real constraint, not a branding layer. Fiber-based options can support a lower-plastic profile, especially when paired with responsible sourcing. One common reference point is the FSC standard for forest-based materials. If the insert is visible on opening, the surface quality, color consistency, and stiffness matter as much as the source claim.
The inside of the package also needs to match the outside. If the carton is clean, printed well, and intended to feel premium, a flimsy or visibly rough insert can weaken the whole presentation. Conversely, a simple outer box can be elevated by an insert that fits tightly, closes cleanly, and keeps the product centered without extra fuss.
Cost, Pricing, and MOQ: What Drives the Quote
Pricing usually comes down to four things: material, complexity, quantity, and setup. Material is the obvious one. A basic paperboard insert is typically cheaper than foam or a custom thermoformed tray. Complexity comes next. More folds, tighter cavity tolerances, deeper pockets, mixed materials, and more assembly steps all increase cost.
Quantity affects everything because setup costs do not disappear. If the project needs a die, mold, or custom tooling, that cost has to be recovered somewhere. At low volumes, the unit price looks high because the setup charge is spread across fewer pieces. At higher volumes, the unit cost drops, but inventory risk increases and storage becomes part of the equation.
The rough pricing pattern most buyers see looks like this:
- Simple board insert: low setup, low unit cost, and suited to straightforward product packaging.
- Complex corrugated or pulp design: moderate setup, better structure, and stronger protection for larger items.
- Foam or thermoformed solution: higher tooling or setup, tighter fit control, and a stronger fit for fragile or shape-sensitive products.
Quotes can differ for reasons that are not obvious from the headline price. Some vendors quote the insert alone. Others include sampling, revision rounds, assembly, carton integration, finishing, and freight. Those differences are material. A quote that appears cheaper can become the more expensive option once the hidden items are added back in.
Use a like-for-like comparison. Ask whether the quote includes:
- Sampling and revision rounds
- Tooling or die charges
- Assembly of multi-piece inserts
- Packaging of inserts for shipment
- Freight to your warehouse or co-packer
For teams buying Custom Packaging Products, this is where apples-to-apples comparison matters most. A polished sample and a low advertised unit price do not tell you the final landed cost. The quote needs to be read as a system, not a single number.
Process and Lead Time: What Happens After Approval
Once the product spec is confirmed, the workflow usually follows a predictable sequence: measure the sample, choose the insert format, approve a dieline or prototype, review the fit, make revisions, then release production. The process looks simple because the steps are simple. The delays come from unclear inputs, revisions after approval, and products that are still changing while the insert is being finalized.
Approval checkpoints matter because each one protects the schedule. Early changes are manageable. Late changes are costly. If a cavity needs to move after tooling is cut, or if the product dimensions change after the sample is approved, the lead time expands fast. Small adjustments become expensive because they affect setup, material usage, and packing tests.
A realistic timeline for custom inserts for packaging often looks like this:
- Sampling: 3-7 business days for simple board or corrugated prototypes, longer for molded or thermoformed parts.
- Revision round: 2-5 business days, depending on how fast feedback returns.
- Production: usually 7-15 business days after approval, with complexity pushing that higher.
- Shipping: varies by freight method, distance, and whether the order moves by parcel or pallet.
The common bottlenecks are usually dull, which is why they repeat so often. Measurements are incomplete. The actual product sample is missing. Artwork is late. Packing requirements are still being debated after the insert is in review. Every one of those slows down the same path.
Testing helps prevent a costly surprise. The ISTA testing framework is a practical reference for distribution risk, and even a simple internal drop test or vibration check can expose movement that a visual review misses. A package does not need a lab test for every minor run, but it does need evidence that the product stays put under handling.
For retail packaging and direct-to-consumer shipping, consistency is the real target. A good insert keeps packout stable, reduces operator error, and preserves the same opening experience from one unit to the next. That consistency is where the return on the design shows up.
Common Mistakes That Make Inserts Expensive
Most expensive insert problems are not technical disasters. They are ordinary planning mistakes. The first one is measuring the wrong thing. Teams use nominal dimensions instead of the real sample, which ignores labels, closures, coatings, and unit-to-unit variation. The result is an insert that looks correct on paper and fails in production.
The second mistake is overengineering. More structure is not automatically more protection. Extra layers, extra folds, and extra cavities can raise material use, increase assembly time, and make packout slower. If the product only needs a simple cradle, adding a heavy structure may protect nothing and cost more on every shipment.
The third mistake is designing for the render instead of the carton line. A mockup can hide awkward hand assembly, impossible insertion angles, and load paths that do not make sense in transit. The insert has to work in the warehouse as well as the presentation deck. If operators need to fight it to close the package, the spec is wrong.
The fourth mistake is skipping test cycles. A quick drop test, corner drop, or vibration check can reveal movement that looks invisible in a sample photo. Even a basic internal test is better than shipping blind. A few millimeters of clearance can decide whether the product arrives clean or returns damaged.
The fifth mistake is assuming the product will stay exactly the same through the run. It often does not. If manufacturing variation is wider than the cavity tolerance, some units fit and others do not. That problem is not solved by forcing the insert tighter. It is solved by setting the tolerance correctly or changing the locking strategy.
Cost problems usually appear where teams stop asking questions. If the product has fragile edges, coating variation, mixed SKUs, or frequent accessory changes, the insert spec needs to reflect that reality. A cheap insert that fails in the field is not cheap. It is deferred cost.
Expert Tips and Next Steps for a Better Fit
Start with tolerances, not just dimensions. If the product varies by 1 to 2 mm across a production run, the insert has to account for that range. Otherwise, some units will fit cleanly and others will bind or rattle. That inconsistency turns into damage, operator friction, and unpredictable packout quality.
If several SKUs share a similar form, standardize the insert family where possible. One well-designed system can support multiple products with small adjustments. That is usually cheaper and easier to replenish than three separate builds. It also reduces approval cycles and keeps inventory simpler.
Use samples before committing to volume. That is especially true for fragile, expensive, or unusually shaped products. A sample shows whether the product locks in place, whether the finish rubs, whether accessories remain organized, and whether the insert closes without forcing the carton out of shape. A drawing can suggest those answers. A sample gives them.
If sustainability matters, choose the material early rather than treating it as a last-minute substitution. A recycled board tray, molded pulp form, or other fiber-based solution may work well if the product geometry supports it. If the package is meant to feel premium, the visible interior finish should be specified with the same care as the outer print and structure.
A practical buying sequence usually looks like this:
- Measure a real product sample.
- List every component in the packout, including accessories and paperwork.
- Decide which factor matters most: protection, presentation, speed, or sustainability.
- Request a sample and confirm fit before full production.
- Compare quotes on the same basis so tooling, assembly, and freight are all included.
Custom inserts for packaging stop being a guessing exercise once the product, the carton, and the packing process are treated as one system. That is the useful shift. Better fit. Less movement. Fewer returns. Cleaner opening. And packaging that supports the product instead of undermining it.
FAQ
What are custom inserts for packaging made from?
Common materials include corrugated board, foam, molded pulp, thermoformed plastic, and folded paperboard. The right choice depends on weight, fragility, finish sensitivity, and how visible the insert is when the box opens. If the insert is part of the presentation, surface quality matters more than teams often expect.
How do I choose the right size for custom packaging inserts?
Start with the actual product sample, not the catalog spec, and include every accessory, cable, or manual that shares the cavity. The fit should be snug enough to stop movement but not so tight that it slows packout or scratches the product. Loose inserts rattle; overly tight inserts create their own damage.
What affects the price of custom inserts for packaging?
Material, complexity, quantity, and whether tooling or a custom mold is required are the main drivers. Sampling, assembly, finishing, and freight can also change the final quote, so compare suppliers on the same basis. A low unit price can hide a high setup cost.
How long does it take to produce custom packaging inserts?
Lead time depends on the material, the approval speed, and whether the design needs sampling or revisions before production starts. Simple projects move faster, while molded or thermoformed parts usually take longer. The schedule also depends on how quickly the product team stops changing the spec.
Do custom inserts reduce damage enough to justify the cost?
Usually yes for fragile, high-value, or expensive-to-replace products, because fewer returns can offset the insert cost quickly. The real test is whether the insert stops movement and protects the product during a basic drop or vibration check. If it does, the cost often pays for itself in reduced damage and less rework.


