Custom Print Plastic bags do more than move a product from one place to another. For many retail, fulfillment, and promotional programs, they are the first physical brand touchpoint a customer actually handles, which means the bag starts shaping perception before the product is even fully seen.
That is why buyers who treat custom print plastic bags as part of the packaging system, not as a last-minute accessory, usually end up with fewer production surprises and a more consistent customer experience. The right bag can support shelf presence, reduce handling problems, and make the brand feel deliberate instead of improvised.
For Custom Packaging Products, the best orders usually begin with a clear specification, a realistic quantity, and an honest look at how the bag will actually be used.
Why Custom Print Plastic Bags Stand Out on the Shelf
A plain bag protects the product. A printed bag does that and adds recognition, which matters a great deal in retail packaging and promotional packaging. When a shopper sees the same logo, color palette, or short message across multiple touchpoints, the brand starts to feel more established, even if the product itself is simple.
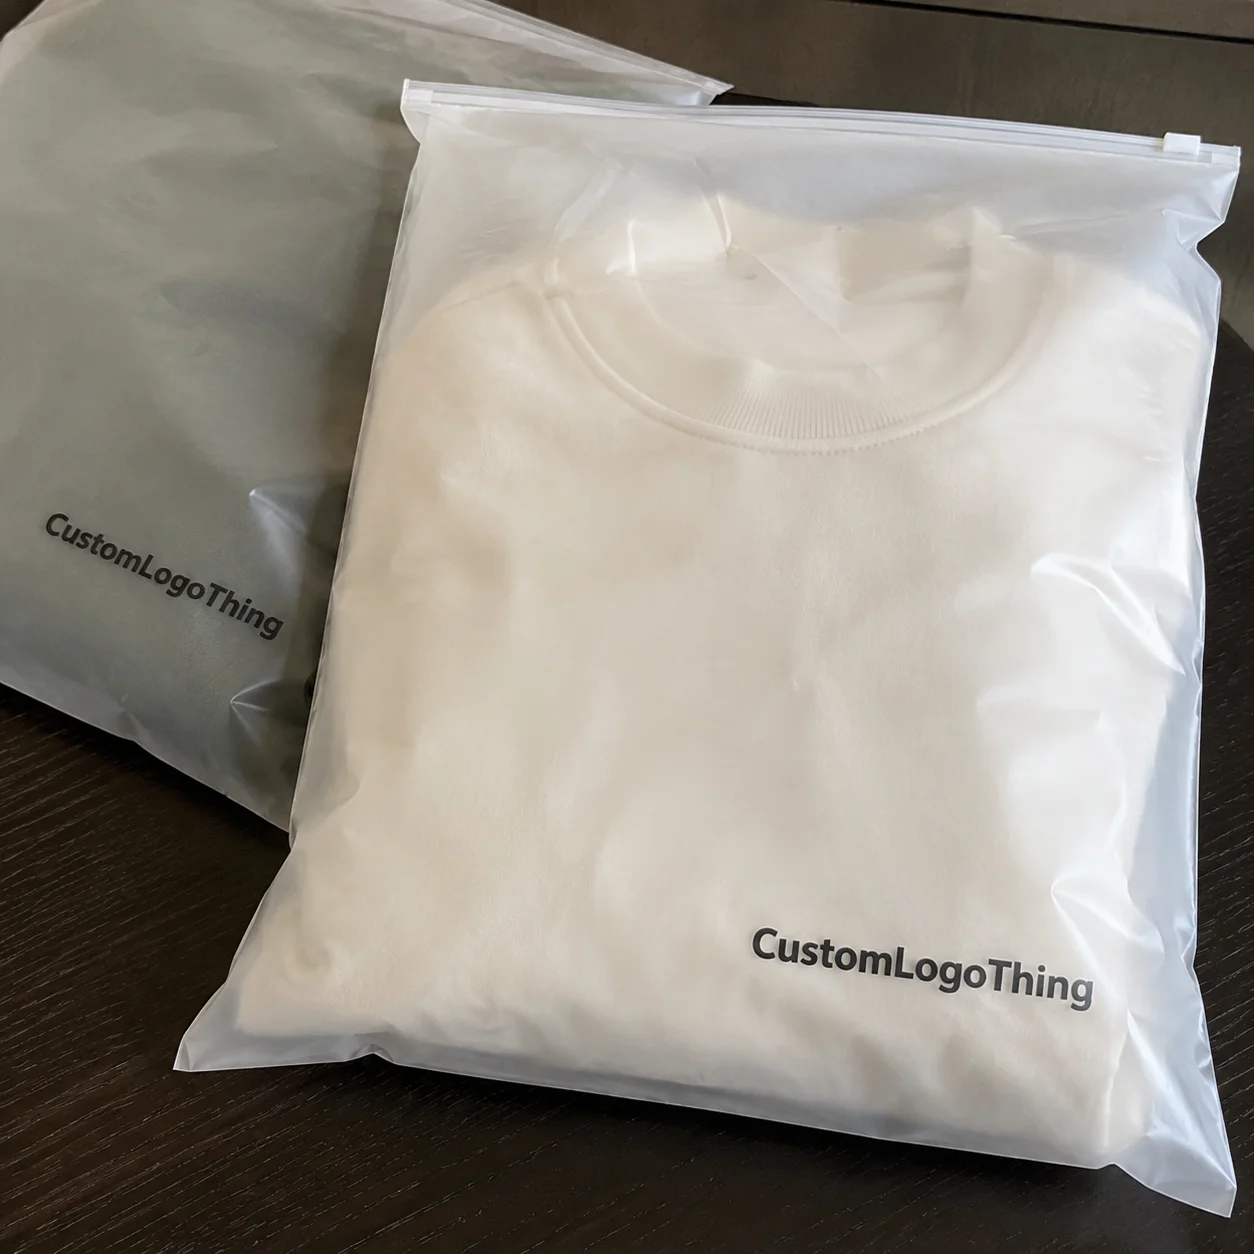
In practice, custom print plastic bags can act as a carrier, a display surface, and a brand cue at the same time. They are common in apparel, cosmetics, gifts, specialty foods, and event giveaways. They also show up in e-commerce programs where the outer pack still needs to look purposeful even if the item is moving into a carton or mailer afterward.
The difference between packaging that only functions and packaging that supports branding is not subtle. Functional bags focus on containment, seal strength, and load handling. Branding-heavy bags add larger print areas, tighter color control, and more attention to finish and surface clarity. Both approaches are valid, but they solve different problems. If the bag is going to sit at checkout, hang on a rack, or travel through a fulfillment line, the spec should reflect that reality.
Common formats include polyethylene bags, polypropylene bags, flat bags, gusseted bags, handled styles, and mailer-style formats. Each brings a different mix of cost, clarity, stiffness, and print behavior. Polyethylene remains the workhorse for carry bags and shipping sleeves because it balances flexibility and toughness well. Polypropylene usually gives a crisper, shinier appearance, which can be useful for retail presentation, though that same gloss can make handling marks and print inconsistencies more visible if the setup is weak.
There is also a practical question buyers should ask early: is this bag mainly carrying weight, or is it carrying brand perception too? The answer changes everything from film choice to print coverage.
“A bag can look inexpensive on paper and still become costly if it wrinkles badly, prints muddy, or fails under load.”
For multi-channel brands, consistency matters. A retail bag, a shipping sleeve, and a promotional giveaway bag do not need to be identical, but they should feel like they belong to the same family. That is the point where package branding becomes more than decoration.
How the Printing Process Works From File to Finished Bag
The production flow for printed bags is straightforward in theory, but there are enough steps that small mistakes can spread quickly. It usually starts with artwork prep, where the printer checks file format, dielines, color separation, resolution, and print area. Then come plate or screen creation, press setup, material loading, printing, curing or drying, finishing, packing, and shipment.
Most custom print plastic bags are produced using flexographic printing, screen printing, or digital printing. Flexographic printing is common for repeatable runs with solid logos, line art, and moderate-to-high quantities. Screen printing is often chosen when the design needs opaque ink, stronger color, or a heavier ink deposit on a particular surface. Digital printing is useful for shorter runs, frequent artwork changes, and designs with more variation, although the economics depend heavily on bag type and print width.
Artwork complexity matters more than many buyers expect. A one-color logo with clean edges is generally easier to control than a five-color design with gradients, tiny type, and layered transparency effects. More colors mean more setup, more registration work, and more chances for slight variation across the run. That does not make the project unworkable, but it does make prepress review more important.
Bag construction changes the print field as well. A flat bag offers the most predictable layout. A gusseted bag can wrap artwork around folds, which means the design must respect side panels, bottom panels, and seal zones. On handled bags, print placement also needs to avoid weak points around the handle patch or die-cut opening. A good proof should show those boundaries clearly instead of hiding them in the art.
Before full production, ask for a proof and, on larger orders, a preproduction sample. Those two steps catch the problems that are expensive to fix later: wrong size callouts, missing copy, poor contrast, and artwork that looked acceptable on a monitor but loses clarity on film.
That kind of front-end checking keeps custom print plastic bags aligned with the rest of the packaging program instead of turning them into a one-off correction job.
Key Specs That Affect Performance and Appearance
Material type and thickness are the first specs to lock down. Film gauge affects strength, feel, stretch, and how cleanly the print sits on the surface. A thin film may reduce cost, but if it stretches too much or tears at the seal, the savings disappear fast. A heavier gauge usually improves durability and perceived quality, though it adds cost and can make the bag feel less pliable.
Bag format is the next decision. A die-cut handle bag works well for retail carry. A patch handle style usually feels sturdier and is better suited to heavier loads. A T-shirt style bag is efficient for checkout use and high-volume distribution. Wicketed bags help speed handling in some fulfillment and produce applications. Flat pouches are better when containment and shelf presentation matter more than carry comfort.
Size is where many projects drift off course. Buyers sometimes choose a bag because it looks right in a mockup, only to find the product needs more width, more gusset depth, or more headspace for inserts and labels. A tighter fit can look more premium, but only if the item still goes in cleanly and does not stress the seal or wrinkle the print area.
Visual quality comes from color matching, ink opacity, finish, and print resolution. Dark inks on clear film behave differently than light inks on colored film. Matte finishes reduce glare and can make some artwork feel more controlled, while glossy surfaces increase visual punch but also show handling marks more easily. For logos with exact brand colors, ask how the printer handles color matching and whether they are working from PMS references, process builds, or a custom target.
Usage conditions matter too. If the bag touches food, the material and ink system need to fit food-contact expectations. If it is a carry bag, load rating and handle integrity matter more. If it is for shipping, seal strength and puncture resistance become critical. I also like to ask whether the bag will sit on a shelf, hang on a rack, or move through a fulfillment line, because each use puts different stress on the material.
- Material: polyethylene, polypropylene, or specialty film based on use.
- Thickness: matched to product weight and handling abuse.
- Format: handled, flat, gusseted, wicketed, or pouch style.
- Print area: sized around folds, seals, and edge clearances.
- Finish: matte, gloss, frosted, or clear depending on presentation.
That level of spec discipline is what separates decent custom print plastic bags from ones that feel intentional.
| Bag Type | Best For | Typical Strength | Visual Impact |
|---|---|---|---|
| Flat bag | Light retail, inner packaging, accessories | Moderate | Clean, simple print field |
| Gusseted bag | Bulkier products, folded apparel, kits | Moderate to high | More space, but folds affect layout |
| Handled bag | Retail carry and branded handoff | High if spec is right | Strong brand presence at checkout |
| Mailer-style bag | E-commerce and outbound shipping | High with correct film and seal | Professional, functional branding |
Cost, Pricing, and MOQ Factors to Compare
Pricing for custom print plastic bags usually comes down to a few variables: size, material thickness, print colors, number of sides printed, and total quantity. Special finishes, custom closures, and reinforced handles can change the quote quickly. If one supplier is much cheaper, compare the spec line by line before assuming the number is comparable.
Setup costs are a big reason small runs cost more per unit. Plates, screens, press setup, and color matching all take time, and those fixed costs get spread across the order. As the quantity increases, the unit cost usually falls because that setup is divided over more pieces. That is why a 1,000-piece run can look expensive next to a 10,000-piece run, even when the bag itself is not dramatically different.
MOQ, or minimum order quantity, is not just an arbitrary threshold. It usually reflects the economics of press setup and production efficiency. A bag that needs multiple print stations, a custom film structure, or a specialized finish may require a larger run to make production practical. Smaller orders are still possible in some cases, but the buyer should expect a higher unit price.
A useful way to compare quotes is to ignore the headline unit price for a moment and line up the actual specs: material, dimensions, print method, quantity, and packing form. One quote may assume a lighter film and a one-color logo, while another includes a thicker gauge, two-sided print, and a different finish. Those are not the same order.
| Pricing Driver | Why It Changes Cost | Buyer Checkpoint |
|---|---|---|
| Quantity | Fixed setup spreads over more units | Ask for break pricing at 5k, 10k, and 25k |
| Material thickness | More film usually means more raw material cost | Match gauge to product weight and handling |
| Print colors | More colors usually means more setup and passes | Keep artwork efficient where possible |
| Special features | Closures, handles, and finishes add process steps | Confirm whether extras are required or optional |
For planning purposes, many mid-size runs land somewhere around $0.18 to $0.28 per unit at roughly 5,000 pieces, depending on material, size, and print coverage. That is only a working range. Thin film, simple art, and larger volumes can come in lower, while heavier gauges, more colors, and custom features can move the price higher quickly.
Process, Timeline, and Lead Time Planning
A clean project timeline usually starts with quote approval, followed by artwork review, proofing, and any revisions. After proof sign-off, the job moves into setup, printing, finishing, inspection, packing, and shipment. For many orders, production often lands in the 12 to 15 business day range after proof approval, though the real timing depends on the bag structure, the supplier’s schedule, and whether the artwork was ready at the start.
Some steps slow projects down more than others. Missing dielines can stall artwork prep. Color changes can add another proof cycle. Unclear handle placement or a vague size callout can force the team to stop and ask questions. If speed matters, the best move is usually to send complete files and complete specs from the start.
Rush orders are possible in some cases, but they usually narrow material choices or increase cost. Specialty films, unusual print coverage, and complex finishing steps are harder to compress into a short timeline. That becomes more pronounced if the project also needs sample approval or if the order is tied to a seasonal retail launch.
Build cushion time for store openings, event giveaways, and promotional campaigns. Plenty of projects are technically on schedule at the factory and still late for the campaign because internal approval took too long. Buyers should ask for estimated lead time, proof turnaround, and ship date assumptions before they approve the job.
If the order needs compliance paperwork or sustainability documentation, ask early. For recycled content claims, packaging standards, and transit planning, references like the FSC and the ISTA can be helpful. For waste handling and broader environmental guidance, the EPA is also a useful reference point.
Common Ordering Mistakes That Lead to Waste
The most common mistake is choosing bag size before confirming what actually needs to fit inside. A bag that looks right on paper can be awkward in use if the opening is too tight, the gusset is too shallow, or the product has inserts that increase thickness.
Another frequent problem is artwork built for a screen, social post, or business card instead of print-ready packaging production. The file may look fine on a monitor, but tiny type, thin rules, and low-resolution logos often break down when printed on film. That is especially true on glossy or flexible substrates where small flaws show quickly.
Film thickness and seal strength are easy to overlook until bags start splitting, stretching, or failing under load. That is not really a design problem; it is a mismatch between product weight and packaging spec. If the contents are sharp, heavy, or awkwardly shaped, the film and seal need to be chosen for actual handling, not ideal handling.
Overcomplicated artwork is another trap. Too many colors, gradients, and tiny details can make the print muddy or inconsistent, especially on flexible film. Simpler artwork often prints cleaner and can look more premium because it feels deliberate.
Skipping samples is probably the most expensive mistake of all. One approved proof or preproduction sample can prevent a full run of unusable packaging, and that is a very cheap insurance policy compared with reprinting thousands of bags.
Expert Tips for Better Branding and Smoother Orders
Design for readability first. A logo that looks beautiful at full size but disappears from arm’s length is not doing its job. Strong contrast, clean spacing, and a logo size that survives normal handling matter more than decorative detail on most retail packaging.
Keep a master spec sheet for every successful order. Include the size, material, thickness, print colors, print area, closure style, and reorder notes. When those details are ready, future runs move faster and the odds of accidental spec drift drop a lot.
Coordinate the bag with the rest of the product packaging. Labels, inserts, tissue, cartons, and shipping materials should feel like part of the same brand system. They do not need to match exactly, but the tone should stay consistent. That is where package branding gets stronger without spending money in the wrong places.
Do not assume more artwork always looks better. In many cases, a one-color print on a well-chosen bag looks cleaner and more premium than a crowded design with five messages fighting for space. Simplicity can work in your favor when the substrate already does part of the visual work.
- Request a proof before approving production.
- Confirm dimensions in writing.
- Ask how the bags will be packed and shipped.
- Verify whether the artwork needs bleed, traps, or spot colors.
- Save the approved specs for the next reorder.
If you order custom print plastic bags regularly, these habits save time quickly. They reduce back-and-forth, shorten proof cycles, and help the final bag match the brand idea that started the project.
Next Steps for Choosing the Right Bag Specification
The cleanest approach is simple: define the product, choose the bag format, confirm the print requirements, and compare quotes using the same spec across suppliers. If that order gets scrambled, buyers usually end up comparing apples to oranges and choosing on price alone.
Before requesting pricing, gather a target size, artwork files, estimated quantity, and desired delivery date. If you also know whether the priority is cost control, premium presentation, or speed to delivery, the supplier can steer the quote toward the right material and process from the start.
For teams that want fewer revisions, fewer surprises, and better brand consistency, custom print plastic bags work best when durability, appearance, and production reality all line up early. That is the practical side of good packaging, and it is usually what separates an acceptable order from one that makes the whole product feel more finished.
What are custom print plastic bags used for in retail and shipping?
They are used to package, carry, and present products while reinforcing brand identity. Retail versions usually emphasize presentation and convenience, while shipping versions put more weight on protection, seal integrity, and handling.
How do I choose the right material for custom print plastic bags?
Match the film type and thickness to the product weight, handling needs, and desired appearance. Ask whether the bag needs more clarity, flexibility, puncture resistance, or a more premium feel before you finalize the spec.
What affects the price of custom printed plastic bags the most?
Quantity, bag size, material thickness, print colors, and special features are the biggest pricing drivers. Setup costs make small runs more expensive per unit, while larger runs usually improve unit cost.
How long does production usually take for custom print plastic bags?
Timeline depends on artwork approval, proofing, print setup, and the complexity of the bag. Build extra time into schedules for revisions, samples, and seasonal demand spikes so the order does not run into a launch date.
What should I send when requesting a quote for custom print plastic bags?
Provide the bag dimensions, material preference, quantity, artwork files, print colors, and target delivery date. Including usage details helps the manufacturer recommend a format that fits the product and budget.

