Custom suit labels are one of the smallest parts of a jacket and one of the easiest to get wrong. They sit inside the garment, so buyers may never consciously study them, yet they still shape the first physical impression of the piece. A label that lies flat, feels smooth, and reads clearly reinforces quality. A rough edge, weak contrast, or stiff backing can make a well-tailored jacket feel unfinished.
In practical terms, these are the interior branding, size, care, and identity labels used in suits, blazers, and other tailored garments. They are usually placed at the neck, along the lining, or in another discreet interior seam. Their job is not just identification. They have to hold up through wear, pressing, dry cleaning, and repeated handling without irritating the wearer or warping under heat.
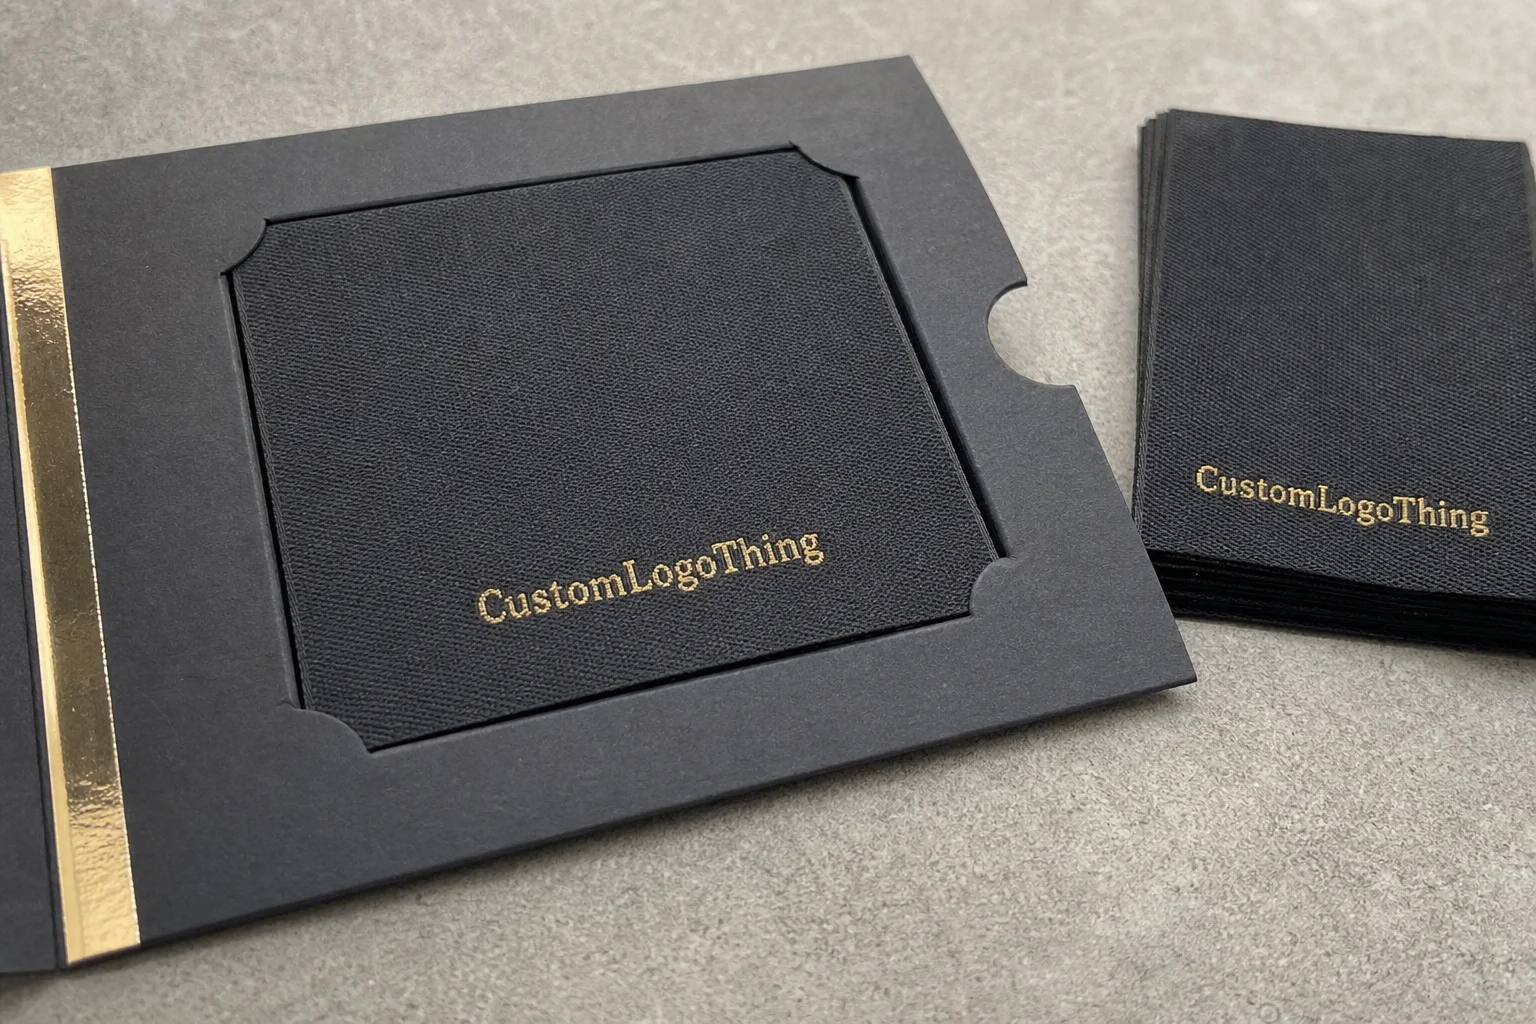
If the suit sits inside a larger branded product system, the label spec should match that system. A consistent interior label helps support the same visual language as your Custom Labels & Tags and the rest of your Custom Packaging Products. That connection matters more than many teams expect because buyers read small signals faster than they read marketing copy.
Custom Suit Labels: What They Are and Why They Matter
Custom suit labels are not decorative extras. They are functional identity markers, and in tailoring they often become one of the first tactile cues a customer notices after opening the jacket. That matters because suits are judged quickly. Fabric weight, lining quality, stitch regularity, and interior finishing all get sampled by the hand before the eye has time to analyze them.
A good label has three jobs. It identifies the brand or line. It carries required information such as size, fiber content, or care instructions. It also supports the emotional side of the purchase by making the inside of the jacket feel deliberate instead of improvised. A polished interior can elevate the entire garment story, even though it is hidden most of the time.
Placement matters as much as print quality. A neck label that scratches, a lining label that puckers, or a woven edge that feels rigid against the skin can undermine the jacket. Buyers often overfocus on the logo artwork and underfocus on how the label behaves once it is sewn in and worn. That is usually where quality reveals itself.
Brand position should shape the label spec. Formal tailoring usually benefits from a quieter label with restrained contrast and a refined weave. Fashion-led collections can carry stronger branding, but the finish still needs control. Loud is not the same thing as premium. A neat interior label supports the same standard you want from lapels, lining, button choice, and pocket construction.
There is also a practical compliance side. Depending on the market, the label may need size data, fiber content, origin information, or wash guidance. Those details are easy to neglect during design review because they feel secondary. In production, they are not secondary at all. Tiny copy, missing content, or inconsistent terminology can cause a proof cycle to stretch out or a finished batch to miss a retailer requirement.
How the Label Construction Process Works
The production path starts with artwork review, not manufacturing. A supplier should check dimensions, color count, text hierarchy, fold style, attachment method, and the amount of detail in the logo before anything is committed to a run. If a design has thin lines, tiny type, or gradients, that changes the production method right away. A file that looks clean on screen may fail once it is reduced to label size.
From there, the artwork is translated into a production spec. That spec usually includes width and height, seam allowance, edge finish, center fold or end fold, and any required compliance text. For buyers, this is the stage where a rough concept becomes something a production team can actually build without guessing.
Common construction types
- Woven damask for a clean, high-detail look with strong durability.
- Printed polyester or nylon for sharp artwork and lower unit cost in some runs.
- Satin for a softer hand-feel and a more classic, polished appearance.
- Heat-transfer for very light applications where a sewn-in label is not ideal.
Each method behaves differently once it is inside a tailored garment. Woven labels tend to feel more substantial and are often preferred for premium custom suit labels because the texture suggests permanence. Printed labels can show fine lines and small type well, but the surface may feel different against the skin. Satin gives a smooth finish, though it can read more delicate and less structured than a woven option.
Proofing is the control point that prevents expensive rework. A digital proof can catch spelling, spacing, crop issues, and color breaks before the label is produced. For more complex orders, a strike-off or sample is worth the time because it lets you check scale and legibility in the real world, not just on a screen. If you are approving a label for a dark navy or black lining, the contrast needs to be tested in actual light. A proof that looks balanced on a monitor can become unreadable once it is stitched into a garment.
Production teams also look at the practical limits of the chosen method. Microtype, very narrow borders, and tight registration across multiple colors all increase the chance of variation. Even with a strong file, a label that is too detailed for the material will lose clarity. That is not a design problem alone; it is a manufacturing constraint.
Material, Finish, and Placement Choices That Change the Result
Material choice affects three things at once: hand-feel, durability, and visual sharpness. In tailoring, those three are tied together. A label with too much body can feel stiff under a collar or along a lining seam. A very thin label may look good on day one and then curl, fray, or distort after wear and cleaning.
Woven damask is often the safest premium choice because it gives fine detail and a balanced feel. Satin can be elegant and comfortable, especially for formalwear, but it may not hold a crisp edge as well as a tighter weave. Printed materials make sense when the artwork is detail-heavy or the order needs to stay cost-conscious. Heat-transfer has a place in lighter constructions, though it is less common for traditional suits.
Finish changes perception more than many buyers expect. A matte woven label reads more restrained and tailored. A satin surface reflects more light and can feel dressier. A high-contrast print may improve visibility, but if the contrast is too strong against a dark lining, the label begins to look like a patch instead of a brand element. That is a subtle difference, but buyers notice it immediately once the jacket is in hand.
| Construction | Typical Feel | Best Use | Relative Cost |
|---|---|---|---|
| Woven damask | Soft, dense, refined | Premium tailoring, long wear | Medium |
| Printed polyester | Smoother, flatter | Fine detail, lower unit cost | Low to medium |
| Satin | Silky, lightweight | Formal interiors, softer hand-feel | Medium |
| Heat-transfer | Very light, minimal bulk | Special applications, low profile | Low to medium |
Placement is just as important as the label itself. A discreet label near the neck seam keeps branding visible at a glance and out of the way during wear. A larger interior panel can work if the collection is fashion-forward, but it needs enough lining space to lie flat. If the label also carries size data or care instructions, the type must remain readable after sewing and pressing. Tiny copy in a dark suit interior is a common regret, and it usually shows up only after the first sample is assembled.
Stitching method matters too. A label that is sewn with too much tension can ripple the surrounding fabric. A label attached too loosely can twist inside the garment. The cleaner result usually comes from a controlled stitch line, proper allowance, and a placement decision made with the garment pattern in hand rather than at the end of the process.
From a packaging design standpoint, the goal is consistency. The suit label should feel like part of the same visual language as the hang tag, garment bag, and any outer packaging used for the product line. That is where package branding stops feeling assembled and starts feeling intentional.
Cost, MOQ, and Unit Pricing for Suit Label Orders
Pricing for custom suit labels usually comes down to five variables: size, material, color count, finishing complexity, and quantity. A small woven label with one or two colors is easier to produce than a larger satin label with multiple details, special folds, or a custom edge finish. The quote should reflect that difference.
For reference, small production runs can land in a range such as $0.18 to $0.35 per unit for around 1,000 pieces, depending on method and artwork complexity. Larger runs often drop into the $0.06 to $0.15 per unit range once setup is spread across more pieces. Those are not fixed rates, but they are realistic enough to help a buyer judge whether a quote is in the right zone.
Minimum order quantity matters because the setup work is real. Artwork review, weaving or printing prep, proofing, and machine adjustment all happen before the first finished label is packed. If the design is stable and the style will repeat across multiple suit runs, a slightly larger order often makes more sense than reordering in very small batches. That is especially true for brands with steady retail packaging schedules or seasonal replenishment.
Cost should be compared as a complete package, not only as a unit line. Ask what is included for artwork help, proofs, samples, shipping, and revisions. A quote that looks cheaper can become more expensive fast if it excludes the steps needed to get the job approved and packed.
- Check whether sampling is included or billed separately.
- Confirm the exact label dimensions before comparing prices.
- Verify whether shipping is domestic or freight, since cartons can change the total significantly.
- Ask about rush fees if your calendar is already tight.
There is another factor that buyers often miss: yield loss. If the label is unusually narrow, heavily detailed, or requires close trimming, waste can creep into the cost structure. That is one reason a quote for a very small, exacting label may not be much cheaper than one for a slightly larger format. The production line still needs setup time, and the material still has to be handled carefully.
“The cheapest label is not always the least expensive one. If it causes a reprint, a delay, or a comfort issue inside the jacket, the real cost is much higher.”
Ordering Timeline, Proofing, and Production Steps
A clean order process keeps the project moving and reduces back-and-forth. The usual flow is straightforward: send specs and artwork, receive a quote, review a proof, approve the sample or strike-off, and then release the production run. That sequence sounds simple, but each step protects the next one.
- Send the logo file, dimensions, quantity, and intended placement.
- Review the supplier’s quote and confirm what is included.
- Approve the digital proof or sample after checking every detail.
- Release production only after color, spelling, and sizing are confirmed.
- Plan for packing and shipping separately from manufacturing time.
Timeline risk usually shows up in the same places. Artwork files arrive incomplete. Colors are described loosely instead of being specified. The buyer knows the logo, but not the exact label size. Or the garment team is still debating whether the label will sit in the neck area or lower in the lining. Any one of those gaps can stall approval.
A simple order may move faster after approval, especially if the chosen material and method are already in stock. More complex custom suit labels can take longer if they use multiple colors, special folds, or compliance text that needs careful typesetting. A realistic production window is often 12 to 15 business days after proof approval for a straightforward run, with shipping added on top. Rush orders are possible, but only if the supplier has the right stock and press capacity available.
Plan the review phase with the same discipline you would use for a garment sample. Check the exact spelling, punctuation, line breaks, and registration. Then check the label in context. A proof can look technically correct and still feel wrong once it is compared with the lining color or seam placement. That second look is where a lot of problems are caught.
If the label is part of a broader launch, coordinate it with the rest of the product packaging calendar. That keeps labels, hang tags, and outer cartons moving together rather than turning into separate deadlines that drag each other down.
Common Mistakes That Lead to Rework or Delays
The most common mistake is also the most expensive one: sending artwork that looks clean on a monitor but falls apart at actual label size. Thin lines disappear. Small text clogs. Fine serif details lose definition. That is why size testing matters before approval, especially on custom suit labels that need to stay readable inside a dark garment interior.
Another frequent problem is choosing a finish that clashes with the lining or feels too stiff against the skin. A jacket may fit beautifully, but if the interior label catches or scratches, the customer notices immediately. In apparel, comfort is not a side note. It is part of perceived quality.
Missing compliance details can also delay production. If the label needs care instructions, fabric content, country of origin, or size data, those details should be final before proof approval. Vague notes such as “add care text later” usually turn into hold-ups. The same goes for unclear attachment instructions. Sew-in, side seam, neck loop, or heat application are not interchangeable choices once production starts.
Another problem is assuming the label can be treated like a print-only project. It cannot. It interacts with fabric stretch, lining thickness, stitch placement, and heat exposure. Even the best artwork can fail if the attachment method and base material are mismatched. That is why experienced buyers ask for a sample before scaling up.
Before approving anything, check the proof like a buyer who has to live with the result, not like someone glancing at a mockup. Spelling, spacing, logo proportions, contrast, and fold orientation all matter. So does the way the label will sit on the garment once sewn. If the proof looks crowded or unbalanced, it will not improve on the line.
- Confirm the final label dimensions in inches or millimeters.
- Read every line of text, including tiny compliance copy.
- Check whether the logo is centered and scaled correctly.
- Verify the fold style and stitch allowance.
- Ask for a revised proof if anything feels off.
For brands building a broader packaging design system, this is where discipline pays off. The suit label should match the tone of the hang tag, garment bag, and any Custom Packaging Products you are using to present the line. A mismatch in one interior detail can weaken the whole branded packaging impression.
Expert Tips and Next Steps for a Smooth First Order
Start small if the design is new. A sample run or material swatch set gives you a chance to judge texture, edge behavior, and readability before you commit to a full order. That is especially useful for first-time buyers who are still deciding between woven damask, satin, or printed options for custom suit labels.
Build a simple spec sheet before requesting the final quote. Include the label size, artwork file type, material, finish, quantity, attachment method, and any required text. That document saves time because everyone is working from the same assumptions. It also makes it easier to compare suppliers fairly instead of guessing which quote is closest to what you need.
Match the label style to the suit’s market position. Formal tailoring usually benefits from a quiet, refined interior label with controlled contrast and clean edges. A fashion-led collection can go a little bolder, but the label still has to feel like part of the garment, not a separate object sewn into it.
There is value in being conservative on the first run. Not because the design has to be plain, but because production realities reward clarity. Simple folds are easier to sew. Medium-size type stays readable longer. Moderate contrast is less likely to fight the lining. Those choices reduce risk without making the label dull.
If you are ordering custom suit labels for the first time, the cleanest next move is simple:
- Gather the logo file in vector format if possible.
- Measure the available placement area inside the garment.
- Confirm whether the label needs size, care, or fiber content text.
- Decide on the label material and finish.
- Approve the proof only after checking every detail.
That approach keeps the project moving and reduces the chance of rework. It also gives the final label a better chance of doing what it should do: support the suit, not compete with it. For brands that care about finish, comfort, and repeatability, custom suit labels are a small piece of the garment with an outsized effect on how the whole piece is judged.
FAQs
What material works best for suit labels?
Woven damask and satin are common choices when the goal is a polished, premium look with good durability. Printed polyester or nylon can make sense when the artwork needs finer detail or when unit cost matters more than texture. The best option depends on the suit’s price point, lining fabric, and how visible the label will be inside the garment.
How much do branded suit labels usually cost?
Price depends on size, material, color count, finishing, and quantity, so there is no single flat rate. In practice, a small run may sit around $0.18 to $0.35 per unit, while larger runs often come down significantly. The unit price usually drops as order size increases because setup and proofing are spread across more pieces.
How long does production normally take?
The timeline includes proofing first, then production, then shipping, so each stage needs to be counted separately. Straightforward orders often move in about 12 to 15 business days after approval, while custom finishes, revisions, or compliance text can add time. Rush work may be possible if the material and method are already available.
Should suit labels be sewn in or heat applied?
Sewn-in labels are the standard choice for durable, permanent garment branding and a traditional tailored finish. Heat-applied versions can work for certain applications, but they are less common when the label has to survive long wear and cleaning. For most tailored garments, sewn construction is still the safer and more familiar route.
What do you need to request a quote for suit labels?
Send the label size, artwork, quantity, preferred material, finishing style, and any care or compliance text. A vector logo or high-resolution file helps avoid proof delays and makes the first quote more accurate. If you already know the placement area inside the jacket, include that too so the supplier can advise on readability and fold style.

