Buyer Fit Snapshot
| Best fit | to branded paper bag design buyer review for packaging buyers comparing material specs, print proof, MOQ, unit cost, freight, and repeat-order risk where brand print, material, artwork control, and repeat-order consistency matter. |
|---|---|
| Quote inputs | Share finished size, material target, print colors, finish, packing count, annual reorder estimate, and delivery region. |
| Proofing check | Approve dieline scale, logo placement, barcode or warning zones, color tolerance, and any recyclable or compostable wording before bulk production. |
| Main risk | Vague material claims, crowded artwork, or missing packing details can create delays even when the unit price looks attractive. |
Fast answer: To Branded Paper Bag Design Buyer Review: Film, Closure, Print, and Fulfillment should be specified like a repeatable production item. The safest quote includes material, print method, finish, artwork proof, carton packing, and reorder notes in one written spec.
What to confirm before approving the packaging proof
Check the product dimensions against the actual filled item, not only the sales mockup. Ask for tolerance on folds, seals, hang holes, label areas, and retail display edges. If the package carries a logo, QR code, warning copy, or legal claim, reserve that space before decorative graphics fill the panel.
How to compare quotes without losing quality
Compare board or film grade, print process, finish, sampling route, tooling charges, carton quantity, and freight assumptions side by side. A lower quote is only useful if the supplier can repeat the same color, closure quality, and packing count on the next order.
If you think a paper bag is “just packaging,” I’ve got news for you. I remember standing in our Shenzhen facility in Guangdong while a buyer compared two samples side by side: one plain kraft bag, one with a clean matte black logo, 350gsm C1S artboard, and cotton rope handles. The plain bag felt like a receipt holder. The branded one felt like a purchase worth 15% more. That, right there, is the point of a guide to branded paper bag design.
I’ve spent 12 years in custom printing, and I can tell you this: a bag can quietly do more brand work than a whole shelf of ads. People carry it down the street, into offices, onto trains, and through malls in Shanghai, Los Angeles, and London. That’s free exposure, sure. It’s also a signal. A guide to branded paper bag design is really a guide to how your packaging speaks before your staff does. Honestly, I think that’s why people underestimate it—they see paper, not perception, even though one shopper can expose a logo to 200 to 500 people in a single day of commuting.
At Custom Logo Things, I’ve seen brands overbuild a bag until it costs $0.95 a unit and still looks forgettable. I’ve also seen a simple $0.22 kraft bag with one color and the right handle style punch way above its weight. For reference, a 5,000-piece run on 120gsm kraft with twisted paper handles can land around $0.15 to $0.19 per unit, while the same order with matte lamination and cotton rope handles can jump to $0.38 to $0.62. The trick is not “more.” The trick is fit. And, annoyingly, fit is the part everyone wants to skip because it sounds unglamorous.
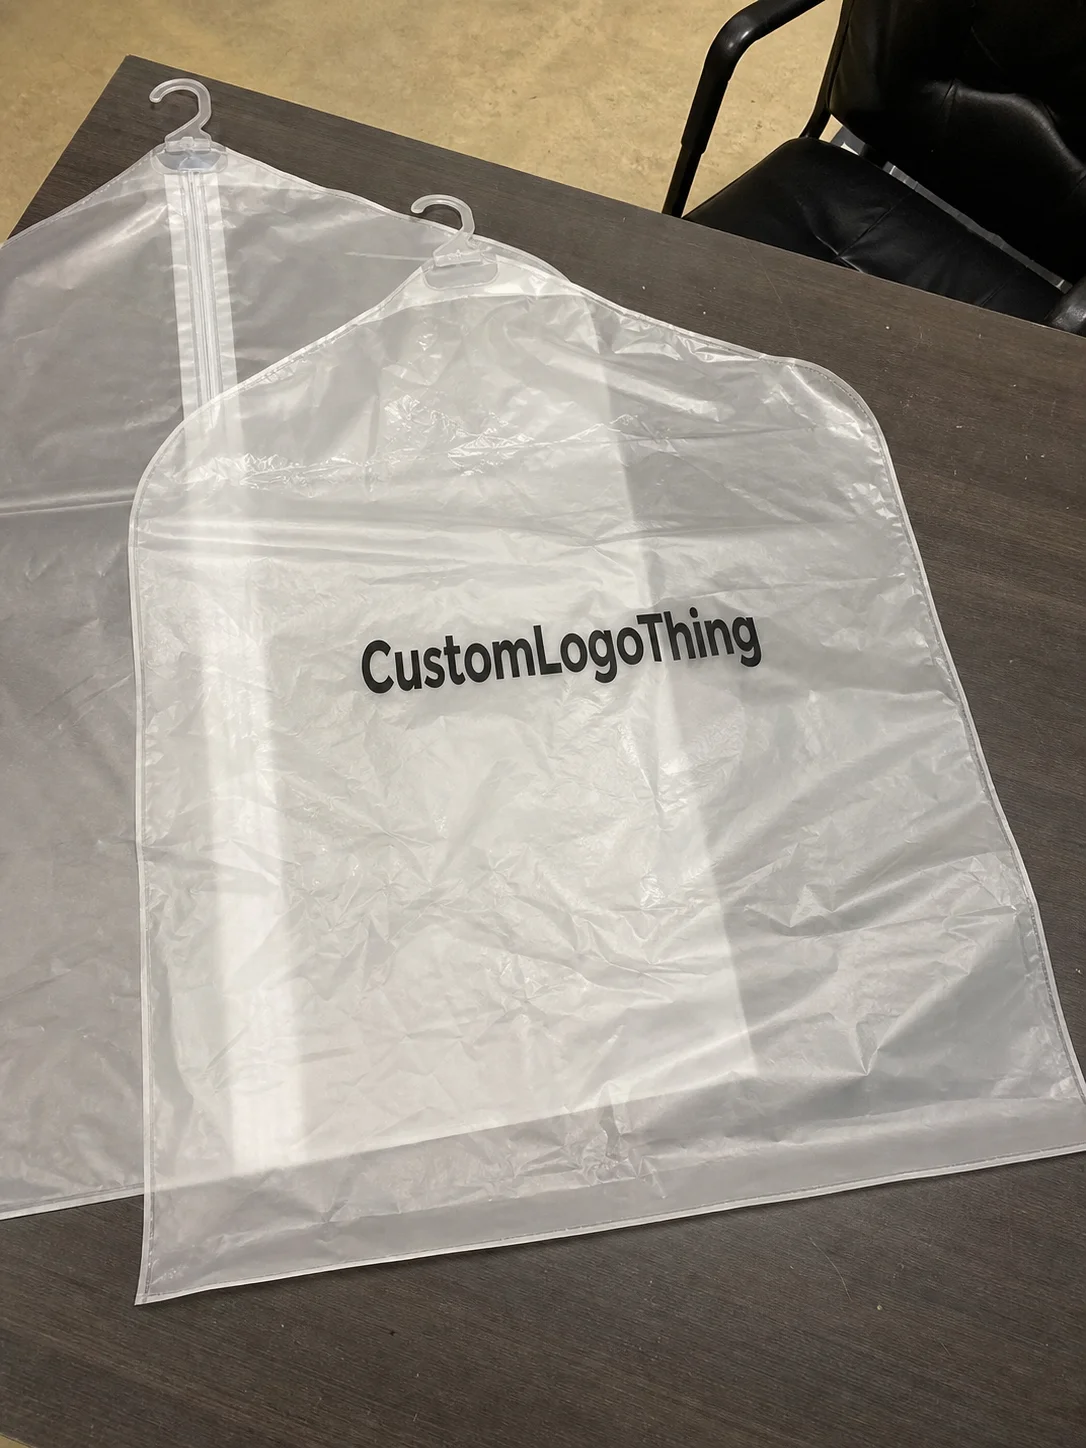
What Branded Paper Bag Design Really Means
A guide to branded paper bag design starts with the obvious and then gets practical. It’s not just slapping a logo on a bag. It’s the combination of logo placement, bag structure, finish, handle style, paper choice, and print limits working together so the bag does its job without falling apart or blowing up your budget. A typical retail bag might use 157gsm art paper with 1-color offset printing, while a premium gift bag may use 250gsm artboard, matte lamination, and a 10mm cotton cord handle with reinforced card inserts at the top and base.
One client in the specialty tea space came to me after using a thin 180gsm bag with a gold foil logo. It looked fancy on the sample. In store, the bottom bowed, the handles stretched, and the foil cracked at the folds after just 30 to 40 carries. That’s the part people miss. Good design is not only about appearance. It’s about the bag surviving real use. A proper guide to branded paper bag design has to talk about load weight, fold lines, and how the customer actually carries the thing. I’ve seen beautiful packaging implode because nobody asked, “Yes, but will it hold a jar and a candle and somebody’s impulse buy?”
There are different bag jobs, and they should not be treated the same way:
- Premium retail bags need strong presentation, usually with heavier stock such as 200-250gsm art paper, cleaner printing, and better handles like cotton rope or grosgrain ribbon.
- Promo bags care more about visibility and cost per unit, often using simpler kraft or white paper in the $0.12 to $0.25 range at 5,000 pieces.
- Event giveaway bags need enough strength for brochures, samples, and small merch, but nobody is paying for a luxury feel, so 150-200gsm stock is common.
- Restaurant bags need grease resistance, decent gussets, and enough board strength for takeout, often with 140-180gsm kraft plus a water-based coating.
That’s why the guide to branded paper bag design is not one-size-fits-all. A boutique candle brand in Los Angeles, a ramen shop in Austin, and a cosmetics startup in Singapore all need different choices. Copy-paste one format across all three, and the results get messy fast. Operations will notice first. Usually right before the launch date. Which, naturally, is when everyone says they “just need a small adjustment.”
“The bag was the first thing customers photographed,” one jewelry client told me after we switched from a generic brown sack to a 2-color matte laminated bag with cotton handles. “We didn’t change the product. We changed the presentation.” That’s packaging doing its job.
I think people underestimate paper bags because they’re familiar. Familiar doesn’t mean simple. The best guide to branded paper bag design balances visibility, durability, cost, and production reality. Leave one of those out, and you’ll feel it in the wallet or the returns pile. A 3,000-piece order that saves $0.04 per bag but fails on the sales floor can cost more than the “premium” option that starts at $0.31 per unit.
How Branded Paper Bag Design Works in Production
The production side of a guide to branded paper bag design is where dreams get measured in millimeters. It usually starts with a brief, then a dieline, then artwork setup, proofing, printing, finishing, and assembly. Skip any of those, and you invite a headache with shipping labels on top. In a typical factory in Dongguan or Ningbo, the first technical check is whether your logo stays 8mm away from the fold and 12mm from the cut line.
Here’s the normal flow I’ve used with factories in Guangdong and with domestic converters in the U.S., including Los Angeles and Chicago:
- Concept brief — size, product weight, target use, color direction, budget, and quantity.
- Dieline creation — the flat technical drawing showing folds, glue tabs, gussets, and handle punch points.
- Artwork setup — placing logos, text, patterns, and bleed correctly.
- Proofing — PDF proof first, then color proof or sample if the job justifies it.
- Printing — offset, flexographic, digital, foil stamping, embossing, or spot UV.
- Finishing — lamination, matte varnish, handle insertion, die-cutting, gluing.
- Assembly and QC — checking handle strength, color consistency, glue lines, and dimensions.
- Packing and shipping — flat-packed or assembled, depending on bag type and freight cost.
Now, the print methods. A decent guide to branded paper bag design should explain them without the usual marketing fluff. Offset printing gives sharp image quality and works well for medium to high quantities, especially if your bag uses multiple colors or fine detail. Flexographic printing is often better for simpler graphics, especially on kraft paper, and can be efficient at scale. Digital printing is useful for smaller runs and faster setup, but the unit cost can climb fast if you’re not careful. For example, a 500-piece digital run in Toronto can cost roughly 2 to 4 times more per unit than a 5,000-piece offset order in Shenzhen.
Then there’s the decoration stuff everybody loves to request at once. Foil stamping gives you shine and premium perception. Embossing creates raised texture. Spot UV adds a glossy contrast over a matte surface. All of them can look excellent. All of them can also make a bag more expensive and slower to produce. I’ve had clients want foil, emboss, matte lamination, and custom rope handles on a promo bag meant to ship in 8,000 units. That’s not design. That’s budget denial. Once you add all four finishes, a bag that started at $0.24 can creep toward $0.78 before freight.
Paper weight matters more than people think. A 157gsm art paper bag with lamination feels very different from a 200gsm kraft bag without coating. Add reinforcement at the top edge, a cardboard insert in the base, and a better handle attachment, and the bag starts behaving like packaging instead of a gamble. A useful guide to branded paper bag design always ties the visual idea to the physical build. If the product weighs 1.2 kg, then a 180gsm bag with a 2mm base board is usually a safer starting point than a thin 120gsm option.
Dielines deserve respect. I’ve seen brands send artwork built for a generic rectangle and then wonder why the logo disappears into the fold or the QR code lands on the gusset seam. A dieline tells you exactly where the design can live. Ignore it, and you pay for reprints. That’s not me being dramatic. That’s a factory invoice from a Suzhou run where 1,200 bags had to be remade because the website URL sat 5mm too close to the side seam.
Supplier coordination also affects the outcome. A domestic supplier may give faster communication and tighter approvals, while an overseas factory may offer better unit economics at scale, especially on larger orders. But color accuracy, handle supply, and freight timing all need active management. In one negotiation, I lost a week because a handle subcontractor in Foshan ran short of black cotton rope in 10mm width. A tiny component. A very real delay. A proper guide to branded paper bag design includes the boring stuff because the boring stuff is what ships the job.
For readers who want to compare packaging partners and see how different projects are handled, our Case Studies page shows a few real examples from retail and gifting work.
Key Factors in Branded Paper Bag Design: Cost, Materials, and Brand Fit
Every strong guide to branded paper bag design has to talk money. Not because it’s glamorous. Because packaging without budget control becomes a hobby, and hobbies don’t scale. Pricing depends on size, paper stock, handle type, color count, special finishes, order quantity, and shipping. Those variables can swing a job by 30% to 80% pretty easily, especially if you’re choosing between a 120gsm kraft bag and a 250gsm laminated gift bag with foil.
Here’s the basic reality I’ve seen across quotes. A simple kraft bag with one-color printing and twisted paper handles can be very economical at volume. A laminated bag with foil stamping, embossing, and cotton rope handles can multiply the unit cost fast. I’ve quoted jobs where the bag body was only $0.18 per unit, then the premium finishes pushed it to $0.74. Same shape. Very different bill. And yes, the budget conversation is usually the least charming meeting on the calendar.
| Bag Type | Typical Build | Approx. Unit Cost at 5,000 pcs | Best For |
|---|---|---|---|
| Basic Kraft Bag | 120-200gsm kraft, 1 color, paper twist handles | $0.16-$0.28 | Retail, events, eco-focused brands |
| Mid-Range Retail Bag | 157-200gsm art paper, matte lamination, rope handles | $0.32-$0.58 | Boutiques, cosmetics, gift shops |
| Premium Presentation Bag | 200-250gsm art paper, foil, embossing, reinforced top, ribbon or cotton handles | $0.65-$1.20 | Luxury, jewelry, high-value gifting |
That table is not a promise. It’s a working benchmark. Freight from Shenzhen to Dallas can add $0.03 to $0.11 per unit on a 5,000-piece order, and a carton spec that is 8% larger than necessary can raise pallet counts and freight charges faster than most teams expect. Paper supply, finishing complexity, and minimum order quantity can move those numbers. But if somebody quotes you a “luxury” bag at $0.11 with foil, lamination, and cotton rope, they’re either missing something or planning to surprise you later. Usually both. I’ve lived through that movie, and the ending is never cute.
Brand fit is where a lot of guide to branded paper bag design advice gets lazy. Luxury brands often need quieter design, heavy stock, and restrained color use. Eco-focused brands might favor recycled kraft, water-based inks, and minimal coating. Boutique retailers usually want something photogenic and upscale without looking stiff. Restaurants need strength, grease resistance, and practical handle choice. Event bags need visibility, quick turnaround, and enough room for inserts. A good fit for a beauty brand in Seoul might be 200gsm C1S artboard with matte lamination, while a bakery in Melbourne may be better served by 140gsm kraft with a water-based coating and flat handles.
Here’s the mistake: people think “premium” means “more effects.” Sometimes premium means less. A black logo on warm kraft, with a sharp die-cut and a strong gusset, can look more expensive than a bag shouting through foil and spot UV like it’s trying to win a trade show contest. I’ve seen a 1-color bag priced at $0.21 outperform a $0.68 bag because the simpler design matched the brand and the customer’s expectations.
Sustainability also affects design decisions. FSC-certified paper, recycled content, and water-based inks are all common asks now. If you want to check sourcing claims, look at the certification language from FSC. I’ve seen brands use the word “eco” like it’s a free pass. It isn’t. Recycled paper may have a different texture and print absorption, and some coatings can reduce recyclability. So yes, sustainable choices matter. They also affect cost and appearance, especially if you’re ordering 10,000 bags from a factory in Zhejiang or Vietnam.
There’s an environmental side to transport too. Heavier bags cost more to ship, and overpacking adds freight waste. The EPA’s materials and waste resources are useful if your team is trying to think beyond the surface level of packaging decisions: EPA packaging and waste guidance. Not glamorous, I know. But neither is paying extra because the carton spec was never checked, especially when a 2mm carton adjustment can save several hundred dollars on an LCL shipment from Ningbo to Long Beach.
Step-by-Step Guide to Branded Paper Bag Design
If you want the practical version of a guide to branded paper bag design, start here. I use the same sequence with startup founders and enterprise buyers because it cuts confusion and avoids expensive revisions. A well-run project in Guangzhou or Dallas usually follows the same pattern: define the product, lock the structure, approve the artwork, and confirm the sample before mass production.
Start with the bag’s actual job
Ask one question first: what is this bag supposed to do? Brand awareness? Product carry-out? Gifting? Event visibility? Protection during transport? If it’s carrying a 2.5 kg candle set, the design needs a different base board and handle spec than a bag for folded T-shirts. The guide to branded paper bag design falls apart when people design for the mockup instead of the product. A bag for a 900g ceramic mug set should not be built like a 200g jewelry pouch.
I once worked with a skincare brand that loved a slim vertical bag. Problem was the jar height, the box width, and the insert card all fought that shape. We switched to a wider format with 100mm gussets, and suddenly the whole thing felt intentional instead of cramped. The logo looked the same. The experience didn’t. That’s the weird little truth of packaging: small structural choices can change how expensive the whole brand feels. A 20mm wider panel can make a bag look 30% more premium without adding any decorative finish.
Pick the format, size, and handle style
Bag dimensions should match the product, not your mood board. Common handle types include paper twist, flat paper, cotton rope, ribbon, and die-cut handles. Paper twist is economical and reliable for many retail jobs. Cotton rope feels stronger and more premium. Ribbon is elegant but can be overkill unless the bag is gift-focused. Die-cut handles are useful when you want a clean profile and a lower assembly cost. In many factories, paper twist handles are the cheapest option at roughly $0.02 to $0.04 per bag in large runs, while cotton rope can add $0.06 to $0.14 depending on color and thickness.
As a rule, the heavier the product and the more “giftable” the bag needs to feel, the more you should lean into reinforced construction. In one factory visit in Dongguan, I watched a technician test a rope handle attachment by loading the bag with 3 kg of product and lifting it repeatedly for 30 cycles. That’s the sort of unglamorous check that saves embarrassment later. Frankly, it’s also the part that separates a real packaging program from a pretty rendering.
Build the artwork with restraint
A good guide to branded paper bag design will tell you to keep the artwork readable from 2 to 3 meters away. That means logo placement, contrast, safe margins, and typography matter more than a busy pattern. Use the front face for the primary brand mark. Use the back for a website, QR code, slogan, or social handle if you need extra utility. Keep the message hierarchy clean. A simple black logo on a white bag can outperform a seven-element layout every time a customer is walking through a mall in Singapore or Berlin.
Design files should respect bleed, trim, and fold zones. If your artwork crosses a fold, ask your supplier whether that’s acceptable on the selected paper and printing method. Some graphics can tolerate a seam. Some absolutely cannot. I’ve seen a QR code land half on the gusset and half on the panel. It looked clever in the file. It looked broken in the real world. I still get annoyed thinking about that one. A 3mm shift in the artwork can be the difference between a crisp bag and a reprint bill.
Request the dieline and proof before approval
This part saves money. A lot of money. The dieline shows the exact structure, and the proof shows how the artwork will sit on it. Always check logo position, handle holes, fold lines, and any text near the edge. If possible, ask for a physical sample, especially for premium orders. Digital proofs are useful, but they don’t tell you how the paper feels or whether the bag opens the way you intended. In most factories, the first PDF proof comes back within 24 to 48 hours; the sample can take 3 to 7 business days depending on whether it’s made in-house or sent to a separate sample room.
When I reviewed a premium wine bag order with a buyer from Melbourne, the first proof looked fine on screen. The physical sample told a different story: the neck of the bottle was pushing too hard against the top panel, and the handle holes were too close to the edge. We adjusted the die, raised the board thickness from 200gsm to 250gsm, and avoided a bad batch. That’s exactly why a guide to branded paper bag design should push samples, not just screenshots. One small adjustment saved a 2,000-piece order from becoming a warehouse problem.
Confirm specs, then lock the timeline
Before approval, confirm paper type, GSM or thickness, finish, handle material, carton packing style, and shipping method. Then set the timeline. If the brand launch is tied to an opening date or trade show, count backwards and leave room for proofing. A fancy bag that arrives after the event is just expensive inventory. For most standard jobs, production typically takes 12 to 15 business days from proof approval, and freight can add another 5 to 21 days depending on whether the order is shipping within the U.S. or from China.
Good production teams also document the final approved version in writing: artwork file name, exact Pantone references if applicable, quantity, packaging per carton, and any special notes. A guide to branded paper bag design is only useful if the order stays consistent from email to factory floor. If the spec says 157gsm art paper, 10mm cotton rope handles, matte lamination, and 500 pieces per carton, then that needs to be the version that ships out of the warehouse in Ningbo, not a “close enough” substitute.
Branded Paper Bag Design Timeline and Production Process
Time matters because bag jobs tend to get underestimated. Simple bags can move quickly if artwork is ready and the factory already stocks the paper. More complex jobs with custom shapes, imported paper, or special finishes take longer. A realistic guide to branded paper bag design should give you planning ranges, not fairy tales. If your supplier says foil, embossing, custom rope, and export packing will all happen in 5 business days, ask for a second quote and a calendar.
Here’s a typical production flow with rough timing:
- Design prep and dieline setup — 1 to 3 business days if the brief is clear.
- Artwork proofing and revisions — 2 to 5 business days, often longer if multiple stakeholders are involved.
- Sample approval — 3 to 7 business days for a digital sample or 7 to 12 for a physical sample, depending on location and method.
- Printing and finishing — 5 to 10 business days for standard jobs, longer for special coatings or complex assembly.
- Quality control and packing — 1 to 3 business days.
- Freight — highly variable, but plan several days domestically and longer for ocean freight.
Where do delays happen? Usually in the same places every time. Late artwork changes. Color corrections after proof approval. Handle shortages. Freight delays. Someone on the client side deciding the logo should “just be a bit bigger” after production has already started. I’ve heard that sentence so many times it should come with a warning label. One missed revision in a Bangkok project added four business days because the logo had to be repositioned 6mm left to clear the handle punch area.
Rush jobs cost more and narrow your options. If you need a fast turnaround, you may lose special finishes or a custom handle choice because the supplier needs to simplify the build. That’s not punishment. That’s physics plus scheduling. In the best guide to branded paper bag design, speed and perfection are never treated like they’re free. A rush order in Shenzhen might save a trade show deadline, but it can raise the unit cost by 15% to 30% if the factory has to switch paper stock or work overtime.
For retail launches, I recommend building backwards from the delivery date with at least one buffer week. For seasonal campaigns, order even earlier if your bag uses imported materials or you need print matching across multiple SKUs. For events, approve the final file only after you’ve checked the item count, insert size, and what the attendees actually need to carry. A bag for brochures should not be designed like a luxury hamper. If the giveaway set weighs 600g, a 150gsm bag with a reinforced base is often enough; if it weighs 2 kg, move up to a thicker stock and stronger handles.
And yes, quality standards matter. Packaging teams often refer to drop tests and transport testing aligned with organizations like ISTA. You won’t need the full lab suite for every paper bag, but if the bag is carrying fragile merchandise or going through courier networks, a basic load and drop check is sensible. I’ve seen too many elegant bags fail because nobody tested the handle attachment under real strain. A 1.5 kg load test in a warehouse in Hangzhou is cheaper than replacing 800 bags after a launch.
Common Mistakes in Branded Paper Bag Design
The biggest mistake? Treating the bag like a billboard with handles. A good guide to branded paper bag design warns against logo overload. If you cram the logo, slogan, website, social handle, QR code, and a product message into one small face, the bag stops being readable from a few feet away. That defeats the point. One front panel should usually carry the main mark, with a second panel reserved for practical info if needed.
Another common failure is paper thickness. A bag that looks nice in a mockup can tear fast if the stock is too thin for the weight. I’ve watched a cosmetics brand use 150gsm paper for boxed sets weighing 1.8 kg. The gusset split at the store counter. That cost them reprints, replacements, and a nice little dent in confidence. The guide to branded paper bag design only works when structure matches load. For that product weight, a 200gsm to 250gsm build would have been a far safer choice.
Contrast gets ignored more often than it should. Light gray logo on kraft paper? Good luck. Gold foil on warm white without enough contrast? Pretty, but not always legible. Safe zones and bleed matter too. If text sits too close to the edge, trimming can make the whole layout look sloppy. I’ve seen beautiful artwork ruined by a 4mm placement error. Four millimeters. That’s all it takes, especially on a bag with a 10mm wrap and a folded top edge.
People also chase premium finishes without checking minimum order quantities or budget impact. Foil stamping, embossing, and custom lamination each add cost and setup complexity. Stack too many effects and you can create a bag that looks expensive but feels overworked. Worse, you may price yourself out of the volume you actually need. I’ve quoted 3,000-piece runs where the addition of soft-touch lamination and embossed foil added $0.27 per unit and pushed the order over budget before artwork was even finalized.
Handle testing gets skipped a lot. Bad move. A cotton rope handle may feel luxurious, but if the attachment points are weak or the board around the hole is too thin, the bag can fail during normal carrying. That’s embarrassing in a shop. It’s worse at an event when 200 people are leaving at the same time and several bags start sagging. A quick pull test with a 2 kg load can expose problems long before cartons leave the factory in Dongguan or Suzhou.
One more thing: people forget the customer’s real use case. A bag for a candle store should open wide enough to fit boxed items. A bag for a fashion boutique needs a clean silhouette and easy carrying. A restaurant takeout bag needs stable base support and enough gusset depth for containers. A smart guide to branded paper bag design always starts with use, not just visuals. A 120mm gusset might be ideal for a bakery box; a narrow 60mm gusset may work better for apparel.
Expert Tips for Better Branded Paper Bag Design
Design for distance first. That sounds basic, but most people forget it. If your logo disappears when the bag is in someone’s hand, you’ve lost the walking-billboard effect. In my experience, the best guide to branded paper bag design keeps the main mark bold and the secondary info minimal. A logo that can be read at 3 meters in a café queue will usually outperform a decorative layout that only works on a flat file.
Keep one side simple. Put the logo on the front. Use the back for a website, QR code, or short slogan if you need it. That gives you a clean face for photos and a functional face for actual use. I’ve seen this work especially well for boutiques and cafés where the bag gets photographed on social media. A 1-color logo on a 180gsm kraft bag can look more premium than a back panel crowded with five lines of copy.
Ask for samples. Always. Compare the paper feel, handle strength, print clarity, and how the bag folds flat. A sample may reveal a slightly dull ink tone, a weak glue line, or handles that dig into the hand after a 5-minute walk. That’s useful information. Better to find it in a sample than in a customer complaint. On a recent run from a factory in Xiamen, a sample caught a misaligned top fold 4mm early, which saved 2,500 bags from being packed incorrectly.
Pick one standout finish, not five. If you want matte lamination and a foil logo, that may be enough. You do not need spot UV, embossing, soft-touch, and a metallic handle unless the whole brand system is built around that level of drama. I once sat through a meeting where a founder wanted every premium effect we could name. The final sample looked like a packaging boss battle. We simplified to one foil hit and a thicker board. Sales were happier. So was finance, especially once the unit cost dropped from $0.81 to $0.49 at 5,000 pieces.
Work with your supplier on print constraints instead of fighting them. Some colors behave differently on kraft paper than on coated stock. Some coatings change the way ink sits on the surface. Some bag shapes require a reinforced top edge to stay upright. A real guide to branded paper bag design respects production limits and uses them creatively. A 350gsm C1S artboard bag with matte lamination can handle richer blacks than a porous 120gsm kraft sheet, but it also changes the feel and the freight weight.
If you’re unsure where to start, audit the current packaging in three steps:
- Measure the items the bag must carry, including the tallest and widest SKU.
- Identify the bag’s primary job: sales, gifting, transport, or branding.
- Request 2 to 3 supplier quotes with the same specs so you can compare apples to apples.
Then order samples before final approval. Not after. Before. I know, shocking concept. If the supplier in Shenzhen quotes $0.19 per unit for 5,000 pieces and the one in Ho Chi Minh City quotes $0.27, compare the paper weight, handle spec, and packing format before making the call. Price alone rarely tells the full story.
For more examples of how packaging decisions play out in real client work, our Case Studies page shows the kind of tradeoffs that happen between cost, finish, and brand presentation. That’s the part no pretty mockup fully explains.
If you want a practical guide to branded paper bag design, my advice is simple: make the bag honest. Honest about weight. Honest about budget. Honest about the brand story. A bag that fits the product and the customer will always outperform one that just looks expensive in a render. And if you are planning a 10,000-piece order, getting the spec right on day one is far cheaper than correcting it after approval.
What should a guide to branded paper bag design include?
A strong guide to branded paper bag design should include structure, size, paper stock, handle style, print method, finish options, cost ranges, and production timing. It should also explain how the bag will be used, because a retail bag, a gift bag, and a takeaway bag all have different priorities. If you skip those details, the result may look fine on screen and fail in real use. The best guide to branded paper bag design connects branding decisions to physical performance, freight, and budget. That mix is what keeps the bag useful instead of decorative.
Frequently Asked Questions
What is the best paper type for branded paper bag design?
Kraft works well for eco-focused brands and casual retail because it looks natural and usually costs less. Coated or laminated stock suits premium presentation, but it raises the price and may change how the bag feels in hand. The right paper depends on product weight, brand tone, print method, and whether the bag needs to survive repeated use. For example, 120-180gsm kraft is common for light retail items, while 200-250gsm artboard or C1S stock is better for gift bags and luxury presentation. That’s why any honest guide to branded paper bag design starts with the product, not the paper catalog.
How much does branded paper bag design usually cost?
Cost depends on size, paper stock, color count, handle type, finish, shipping, and minimum order quantity. A simple custom bag can stay quite affordable at scale, while luxury finishes can push the unit price up fast. I’ve seen basic kraft bags around $0.16 to $0.28 per unit in larger runs, while premium presentation bags can land above $0.65 per unit depending on details. A 5,000-piece order with 157gsm stock and one-color printing might sit near $0.22 per unit, while foil, embossing, and cotton rope handles can move the same bag toward $0.60 or more. Shipping can matter just as much as print, especially on heavier paper or assembled bags.
How long does the branded paper bag design process take?
Simple projects can move quickly if your artwork is ready and the structure is standard. Custom shapes, special finishes, and sample approvals add time. In practice, a basic job may be ready in roughly 10 to 15 business days after proof approval, while more complex work can take longer. For standard production, it is common to see 12 to 15 business days from proof approval in factories in Guangdong, plus 5 to 14 days for domestic freight and longer for ocean shipping. Most delays come from revisions, color adjustments, and material sourcing, not the actual bag assembly.
What should I put on a branded paper bag besides my logo?
A website, QR code, slogan, or social handle can add utility without cluttering the design. Keep the layout clean so the branding is readable at a glance. Match the message to the bag’s purpose. A retail bag can carry a web address, while an event bag might do better with a QR code that leads to a landing page or product guide. A strong guide to branded paper bag design always keeps the message short, and on a 250mm x 320mm bag that often means one main logo, one secondary line, and plenty of white space.
What are the biggest mistakes in branded paper bag design?
Using weak paper for heavy products is the first big mistake. Overcomplicating the design with too many colors or finishes is another. Skipping sample checks for color, strength, and handle performance causes more damage than most people expect. I’ve seen a bag fail from a 1.5 kg load because the handle reinforcement wasn’t tested. That kind of error is easy to avoid with a proper sample review, especially if your supplier is in Shenzhen, Dongguan, or another export-focused manufacturing hub where structural testing can be done before mass production.
If you’re planning your own packaging run, keep this guide to branded paper bag design in mind: the best bag is the one that carries the product well, represents the brand clearly, and lands inside budget without drama. I’ve seen too many teams chase shiny extras and forget the basics. The basics are what customers actually hold. So start with the product weight, choose a paper and handle that can genuinely support it, and approve a physical sample before mass production. That one step saves more money than any glossy finish ever will.