Buyer Fit Snapshot
| Best fit | choose packaging materials work for packaging buyers comparing material specs, print proof, MOQ, unit cost, freight, and repeat-order risk where brand print, material, artwork control, and repeat-order consistency matter. |
|---|---|
| Quote inputs | Share finished size, material target, print colors, finish, packing count, annual reorder estimate, and delivery region. |
| Proofing check | Approve dieline scale, logo placement, barcode or warning zones, color tolerance, and any recyclable or compostable wording before bulk production. |
| Main risk | Vague material claims, crowded artwork, or missing packing details can create delays even when the unit price looks attractive. |
Fast answer: Choose Packaging Materials Work: Material, Print, MOQ, and Cost should be specified like a repeatable production item. The safest quote includes material, print method, finish, artwork proof, carton packing, and reorder notes in one written spec.
What to confirm before approving the packaging proof
Check the product dimensions against the actual filled item, not only the sales mockup. Ask for tolerance on folds, seals, hang holes, label areas, and retail display edges. If the package carries a logo, QR code, warning copy, or legal claim, reserve that space before decorative graphics fill the panel.
How to compare quotes without losing quality
Compare board or film grade, print process, finish, sampling route, tooling charges, carton quantity, and freight assumptions side by side. A lower quote is only useful if the supplier can repeat the same color, closure quality, and packing count on the next order.
If you want to know how to Choose Packaging Materials without learning the hard way, start with the part nobody likes to talk about: the box has to do more than look good in a render. I once watched a client approve a gorgeous magnetic rigid box with a 157gsm art paper wrap, matte black lamination, gold foil, and a foam insert that looked like it belonged in a luxury boutique in Milan. Two weeks later, 11% of the first shipment came back dented because the box failed compression testing at 180 lbs and collapsed in stacked pallet freight from Shenzhen to Los Angeles. Pretty on the shelf. Useless in a truck. That’s the part most people miss when they ask how to choose packaging materials.
Good how to Choose Packaging Materials decisions are never just about looks. They sit at the intersection of protection, branding, budget, and speed. In my years sourcing from Shenzhen, Dongguan, and a few factories outside Ningbo that smelled like glue and ambition, I’ve seen brands waste $8,000 on “premium” packaging that added 42 grams per unit and slowed packing by 9 seconds per order. At 30,000 units, that turns into 75 extra labor hours and a warehouse manager who suddenly needs more coffee than sleep. Fun times.
If you’re trying to figure out how to Choose Packaging Materials for custom printed boxes, retail packaging, or shipping cartons, you need a framework. Not vibes. Not whatever looks eco-friendly on a mood board. A framework built around board grade, print finish, transit conditions, and unit economics. That’s the boring part that keeps the business alive.
How to Choose Packaging Materials: What It Really Means
Plain English first. Packaging materials are the layers, structures, and inserts that protect, present, and ship a product. When people ask me how to Choose Packaging Materials, they often mean one thing and think three. Primary packaging touches the product directly. Secondary packaging groups or presents it. Transit packaging protects it during storage and shipping. Mix those up, and you end up paying luxury-box prices for a carton job that needed 32 ECT corrugated cardboard and a decent insert.
I learned that lesson on a cosmetics project years ago. The founder wanted rigid boxes with soft-touch lamination for every unit. Lovely finish. Expensive choice. During a factory visit in Dongguan, I watched the cartons get stacked eight high, and the bottom row bowed by nearly 4 mm under load. We switched the transit layer to E-flute corrugated with a Printed Kraft Paper wrap on the exterior, plus a 350gsm C1S folding carton for the retail pack. Damage dropped, freight got cheaper, and the packaging still looked on-brand. That’s how to Choose Packaging Materials in real life: not “what looks nicest,” but “what survives your actual route.”
The goal is to balance five things at once: protection, branding, sustainability, budget, and production speed. Miss one, and the rest start charging interest. The wrong material choice can quietly add higher freight charges, more returns, slower packing lines, and extra customer service tickets. Nobody budgets for those. Then they act surprised when the “cheap” option becomes the expensive one, which is adorable in a spreadsheet and painful in Q4.
Factory-floor truth: a beautiful box that collapses in compression testing is not premium. It’s expensive trash with foil on it.
So if you’re serious about how to choose packaging materials, think beyond the sample in your hand. Think about the warehouse in Suzhou, the carton stack, the parcel sorter in Kentucky, the pallet wrap, and the customer opening the box at home in Chicago or Manchester. That whole chain matters. Honestly, I think too many teams fall in love with the unboxing moment and forget the ugly bits in between.
How Packaging Materials Work in the Real World
Once you understand how to choose packaging materials, the next question is how each material behaves under stress. Packaging does a few jobs. It cushions. It blocks moisture. It resists crushing. It signals tamper evidence. It protects shelf appeal. And yes, it needs to survive somebody dropping a carton off a belt because they were scrolling on their phone. I’ve watched that happen twice in a warehouse outside Guangzhou. Same guy, different conveyor. Unreal.
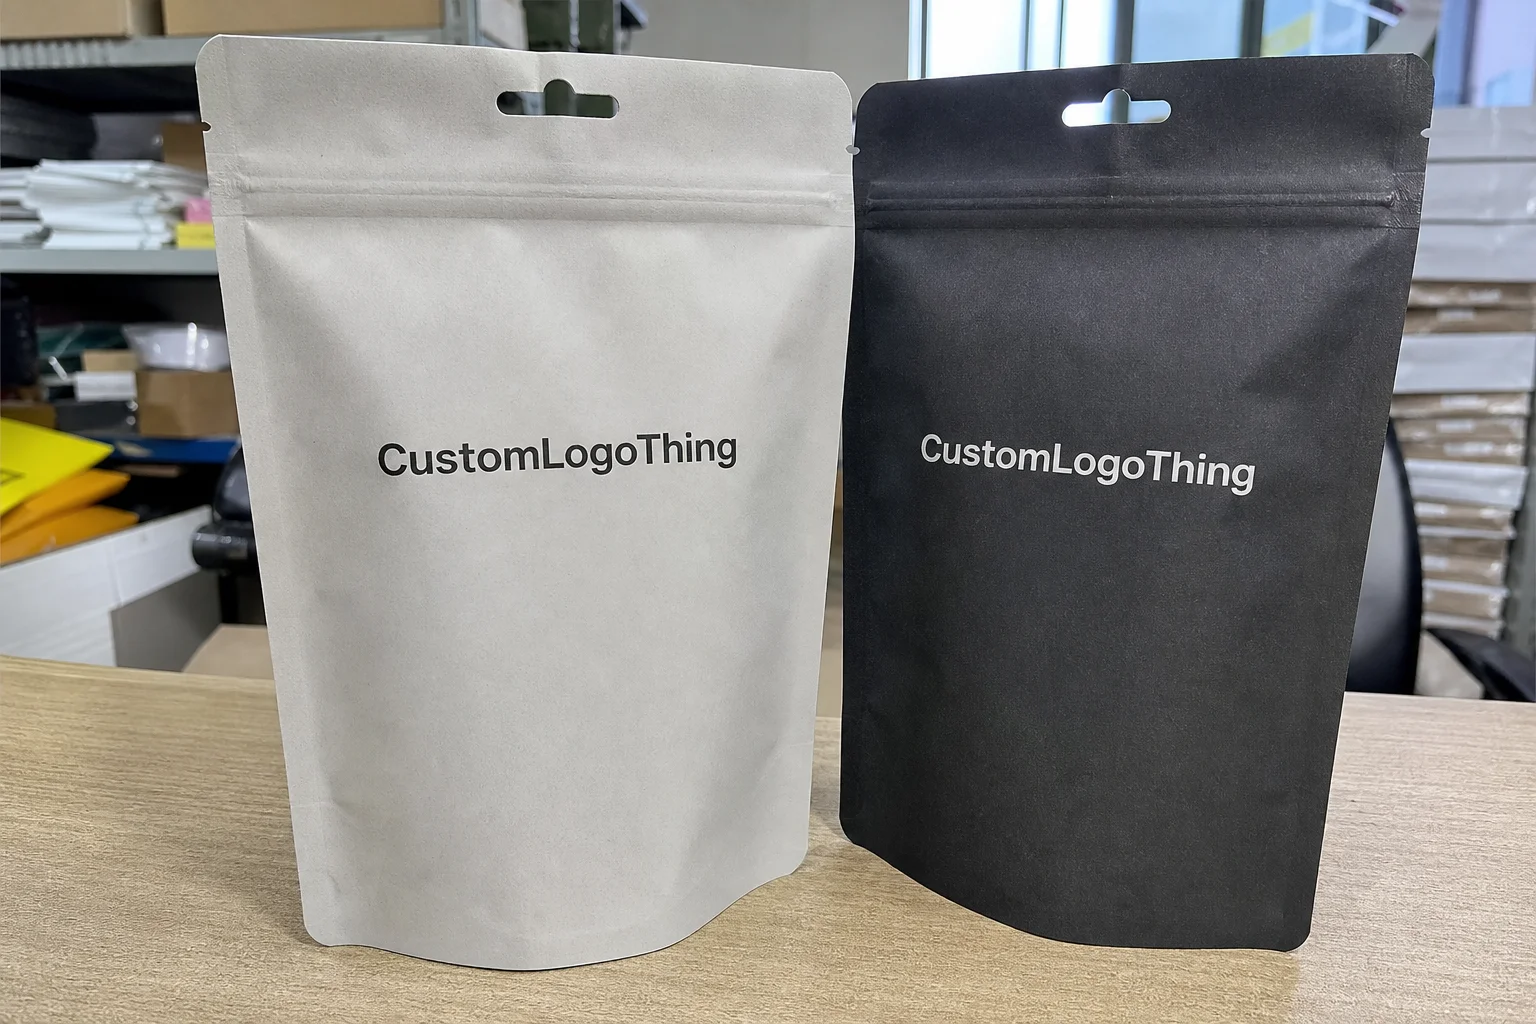
Corrugated board is the workhorse. It’s not glamorous, but I’ve seen B-flute and E-flute save products that would have been destroyed in a paperboard-only setup. A standard 32 ECT single-wall corrugated mailer can carry a 1.2 kg candle set across parcel networks much better than a thin folding carton. Paperboard is lighter and great for retail packaging, sleeves, and folding cartons, especially when your product is already stable. Rigid boxes bring the luxury feel, which is why they’re common in branded packaging for electronics, candles, and cosmetics. Molded pulp is gaining ground because it’s strong enough for inserts and has a solid sustainability story. Foam still wins in certain protective applications, though many brands are replacing it with paper-based alternatives. Flexible packaging is a different animal: light, efficient, and excellent for barrier protection, but not the answer for everything.
Temperature and humidity change everything. I’ve walked into a warehouse in Guangdong where paperboard samples felt perfect at 22°C and 55% humidity, then turned limp after a night in 88% humidity. If you’re learning how to choose packaging materials, you have to ask where the product will live. Dry warehouse in Nevada? Cold chain in Ontario? Monsoon humidity in Kerala? Long ocean freight from Yantian to Rotterdam? The material that performs on a designer’s desk may behave like a wet napkin after three weeks on a container ship.
Print finishes matter too. Soft-touch lamination feels premium, but it can hide scuffs better than matte aqueous coating in some cases and worse in others. UV spot, foil stamping, embossing, and varnish all change the surface behavior. Liners and inserts alter compression resistance and presentation. A 350gsm C1S folding carton with a snug 1.5 mm greyboard insert can outperform a thinner rigid setup if the geometry is right. That’s the annoying truth: the strongest-looking material is not always the best one.
Here’s a quick comparison I use when clients ask how to choose packaging materials for product packaging and retail packaging:
| Material | Typical Use | Strength | Brand Feel | Notes |
|---|---|---|---|---|
| Corrugated cardboard | Transit packaging, mailers | High | Practical | Good for parcel shipping and stacking |
| Paperboard | Folding cartons, sleeves | Medium | Clean, versatile | Best for lighter products and retail display |
| Rigid board | Premium custom printed boxes | High | Luxury | Higher cost, strong shelf impact |
| Molded pulp | Inserts, protective trays | Medium to high | Eco-forward | Great fit for sustainability goals |
| Foam | Protective inserts | High | Technical | Often replaced by paper-based alternatives |
| Flexible packaging | Pouches, sachets, refill packs | Variable | Modern | Lightweight with strong barrier options |
I’m not saying one material is “better” across the board. I’m saying how to choose packaging materials depends on what failure looks like for your product. A candle with a cracked jar is a problem. A protein powder pouch with a broken seal is another kind of problem. Different job, different structure, different answer. And yes, the wrong seal spec can turn a $0.22 pouch into a customer complaint factory.
Key Factors When You Choose Packaging Materials
If you want a practical method for how to choose packaging materials, start with the product itself. Weight, breakability, moisture sensitivity, and shape all matter. A 120g skincare jar needs different protection than a 2.4kg supplement tub. Sharp edges can puncture liners. Glass needs crush resistance. Powder products need barrier integrity. Weirdly shaped products often need custom inserts because “close enough” turns into rattling and dents by the time the box reaches the customer. I’ve seen a 68mm drop in headspace solve a return-rate problem in one round. That’s the kind of detail that pays rent.
Brand positioning matters just as much. Luxury, eco-conscious, mass-market, and industrial brands all send different signals. When I visited a Shanghai supplier in an industrial park off the outer ring road, the sales manager showed me the same box structure wrapped three ways: black paper for luxury, kraft paper for sustainability, and white SBS for retail. Same bones. Different story. That’s branding. Packaging design is not just print. It’s material choice, structure, finish, and the way the box feels in someone’s hand, whether that hand is in Paris, Pune, or Phoenix.
Shipping method changes the answer too. Parcel shipping punishes corners and edges. Pallet freight punishes compression. Air freight punishes weight. Retail shelf packaging punishes weak print and poor display. If you sell DTC, your package has to survive sorting systems and doorsteps. If you sell through retail, it has to survive shelf handling and repeated customer interaction. How to choose packaging materials is really about matching the route to the risk, whether the route starts in Shenzhen or Chicago.
Budget is where fantasy meets invoices. I’ve seen clients focus only on raw material cost, then get blindsided by tooling, print setup, freight by dimensional weight, and assembly labor. A box that costs $0.28 more per unit can still be cheaper overall if it reduces returns by 2% and cuts packing time by 6 seconds. That’s not theoretical. I’ve watched a fulfillment team save nearly $1,400 a month after we simplified a structure from a three-piece presentation box to a two-piece rigid setup with one insert. Less fiddling. Less waste. Fewer swear words.
Sustainability requirements are another filter. Recyclability, compostability, recycled content, and regional disposal rules are not the same thing. A material can sound green and still fail local recovery systems. If you care about eco claims, check documentation. FSC certification is useful for fiber sourcing, and the EPA has solid guidance on sustainable materials and waste reduction at epa.gov. If you’re choosing paper-based branded packaging, also look at what the Forest Stewardship Council says at fsc.org. Pretty claims on a sales sheet are not proof, especially not at 5,000 units and $0.19 per unit.
Compliance and safety can’t be ignored. Food contact, cosmetics, child-resistant requirements, and labeling regulations all affect the structure and substrate. For shipping validation, ISTA testing standards are useful; their site at ista.org is worth keeping bookmarked. If you’re selling anything that might touch skin, food, or medication, don’t let packaging aesthetics outrun compliance. A pretty box that fails California Proposition 65 labeling or food-contact documentation is still a problem, just with better typography.
One more thing: assembly time. A material can look perfect on paper and still be a disaster on the packing line. If your team has to fold 12 flaps, place 2 inserts, and align a sleeve just so, you’ve created a labor tax. And labor is not free. Not even close. So how to choose packaging materials needs to include labor reality, not just material specs. Ten extra seconds per unit on a 10,000-unit run is almost 28 hours of work. That is not “minor.” That is a payroll line item.
How to Choose Packaging Materials Step by Step
Let me give you the method I use when clients ask how to choose packaging materials without wasting three rounds of prototypes. It’s simple, but simple does not mean easy. It just means fewer bad decisions and fewer emergency calls at 9:40 p.m.
Step 1: Define the product specs
Write down the exact size, weight, fragility, and storage conditions. Not “small candle.” I mean 82mm diameter, 95mm tall, 410g filled weight, glass vessel, wax sensitive to heat above 30°C. That level of detail matters. The better the product brief, the better your packaging decision. When I was negotiating with a carton supplier in Dongguan, the first question they asked wasn’t “what color?” It was “what is the product weight and drop height?” Smart people ask that first. The not-so-smart ones send a Pinterest board and hope for miracles. I wish I were joking.
Step 2: Map the customer journey
Map every handoff: warehouse, outbound carton, carrier, doorstep, retail shelf, maybe even the return trip. If you’re selling DTC, the package probably gets tossed around a sorting center in Louisville or Memphis and then sits on a porch. If you’re selling in-store, the package gets handled by shoppers, staff, and display fixtures in Atlanta, Berlin, or Bangkok. Knowing the route makes how to choose packaging materials much less guessy. It also stops you from paying for protection you don’t need.
Step 3: Shortlist 2 to 4 material options
Don’t boil the ocean. Pick a few realistic options based on protection and branding. For example, you might compare kraft paper-wrapped rigid boxes, SBS paperboard cartons, E-flute mailers, and molded pulp inserts. If a material does not fit your budget or your brand story, drop it early. No need to fall in love with the wrong structure. A 157gsm art paper wrap on a 2 mm greyboard core might be perfect for one SKU and absurd for another.
Step 4: Request samples and compare them
Ask for real samples, not just renderings. Check fit, print quality, durability, and assembly speed. I like to time a pack-out on a stopwatch. If one structure takes 14 seconds per unit and another takes 22 seconds, that difference becomes painful at scale. Also inspect corners, glue points, edges, and coating scuffs. A sample can look great in a photo and still be a nightmare in the hand. I’ve had “premium” samples arrive with glue squeeze-out on the bottom flap. Not exactly the luxury moment we were selling.
Step 5: Run basic tests
Before ordering at scale, run a drop, crush, or vibration test. You do not need a full lab for every project, though ISTA protocols are a strong reference point. For a first pass, do a 3-foot drop test on corners and edges, stack samples under load for 24 hours, and shake them in transit cartons. Crude? Sure. Effective? Also yes. This is where how to choose packaging materials gets practical fast. If the insert shifts after two drops, it does not matter how pretty the foil is.
Step 6: Compare MOQ, lead times, and complexity
A material with a low unit cost but a 10,000-piece MOQ may be worse than a slightly pricier option with a 2,000-piece MOQ if you’re testing a new SKU. Lead times matter too. A stock corrugated mailer might take 7 to 10 business days. A custom printed box with special inserts might need 18 to 25 business days from proof approval. Custom structures require patience. And proof approval delays are often self-inflicted, usually by three people “just wanting one more tweak” to the logo size by 1.5 mm.
Step 7: Confirm with your printer or manufacturer
Before tooling is approved, confirm everything with the factory. Dieline, bleed, board grade, coating, insert fit, ink limits, glue areas, and pack-out sequence. I’ve seen projects derail because the designer spec’d a fine-line foil detail that the press could not hold consistently on 350gsm C1S stock. The factory can usually tell you what’s realistic. If they can’t, find a better factory. Seriously. A good manufacturer in Shenzhen, Suzhou, or Ho Chi Minh City will tell you the truth before the first press sheet is ruined.
One quick rule I repeat to clients: how to choose packaging materials is not about choosing the fanciest sample. It’s about choosing the one that survives the worst day in your supply chain and still makes the customer feel good when they open it. That usually means balancing board thickness, coating, fit, and the actual carrier route, not just the look on a designer’s screen.
Cost, Pricing, and Timeline Considerations
Material choice changes more than the unit price. It changes tooling cost, total landed cost, freight weight, labor, and damage rates. If you’re serious about how to choose packaging materials, you need to think beyond the quote sheet. A box at $0.42/unit can be smarter than a box at $0.29/unit if the cheaper one adds $0.08 in labor and creates 1.5% more breakage. That math gets ugly fast, especially at 20,000 units shipped from Dongguan to Dallas.
Here’s a common pricing pattern I see with custom printed boxes and retail packaging: paperboard cartons are often the most budget-friendly on first glance, rigid boxes sit in the middle to higher range, and molded pulp inserts can be cheap or expensive depending on tooling and volume. Then you add print finishes. Soft-touch lamination, foil stamping, embossing, spot UV, and specialty coatings each add cost. A 4-color print job with matte lamination might add $0.09 per unit, while foil and embossing can push that up by another $0.07 to $0.15 per unit. Nothing is free. The sales quote pretending otherwise is doing cosplay.
Below is a rough comparison I use for clients planning product packaging budgets. These numbers vary by size, artwork complexity, and volume, but they give you a real starting point.
| Option | Typical Unit Cost | Setup / Tooling | Lead Time | Best For |
|---|---|---|---|---|
| Stock corrugated mailer | $0.18–$0.42/unit at 5,000 pcs | Low | 7–12 business days | Fast DTC shipping |
| Custom paperboard carton | $0.22–$0.65/unit at 5,000 pcs | Moderate | 12–18 business days | Retail packaging and lightweight products |
| Rigid box with insert | $0.85–$2.40/unit at 3,000 pcs | Higher | 15–25 business days | Premium branded packaging |
| Molded pulp insert system | $0.12–$0.55/unit | Tooling varies | 18–30 business days | Eco-conscious protection |
| Flexible pouch with print | $0.08–$0.38/unit | Moderate | 10–20 business days | Lightweight, high-barrier product packaging |
Timing gets tricky when you switch from stock to custom. You’ll need dieline revisions, sample approval, proofing, and production scheduling. If you’re asking how to choose packaging materials for a launch, build buffer time. A “quick” custom job can stretch if artwork changes three times or if the supplier is waiting on a board grade from the mill. A typical custom carton run might be 12 to 15 business days from proof approval, while a rigid box project can run 18 to 25 business days if the wrap and insert are both custom. Raw material shortages still happen too. Keep a backup option in your pocket.
Freight can also ruin the budget. A heavier material increases dimensional weight and can push you into a higher shipping bracket. I once helped a client reduce carton weight by 36 grams by changing the insert design and trimming board thickness from 2.0 mm to 1.5 mm in the transit layer. The unit savings looked tiny until the monthly freight bill dropped by almost $900. That’s why how to choose packaging materials should include distribution math, not just packaging aesthetics. A 36-gram savings over 40,000 units is not “a little.” It is real money.
Sometimes the more expensive material saves money. If a sturdier structure reduces damage claims, lowers packing labor, and ships flatter or lighter, it can win on total cost. I’ve seen a $0.61 folding carton beat a $0.39 carton because the cheaper version needed tape, extra void fill, and a replacement rate that hit 3.2%. Cheap is only cheap if it stays cheap after the product leaves your warehouse.
Common Mistakes When Choosing Packaging Materials
The biggest mistake? Choosing based on looks alone. I’ve seen founders sign off on a beautiful uncoated paperboard sleeve because it photographed well, then discover it scuffed badly in transit and warped in humidity at 78% RH. Pretty is not a performance spec. If you’re learning how to choose packaging materials, stop treating the mockup as the final answer. It’s a sample, not a prophecy.
Overpackaging is another classic. A lightweight skincare bottle doesn’t need fortress-level corrugated unless the route demands it. If you overbuild, you waste money, create more trash, and annoy customers who need scissors, patience, and a little emotional support to get into the box. Underpackaging is just as bad. I’ve seen a high-end candle line ship in thin paperboard with no insert because the founder wanted a “clean” look. They spent more on replacements than they would have spent on proper inserts. A $0.16 insert would have been cheaper than a $7.80 replacement shipment.
Humidity, temperature, and rough handling get ignored far too often. A package that works in a climate-controlled warehouse can fail in summer freight or cold storage. If your product moves across regions, don’t assume the sample tells the whole story. That’s not how distribution works. Material behavior changes. A 250gsm card that feels crisp in Shanghai can turn soft after 21 days in a humid container to Houston.
Sustainability mistakes are especially common. Brands pick a compostable or recyclable material because it sounds good in a marketing meeting, then realize it doesn’t protect the product, costs double, or isn’t accepted in the customer’s local waste stream. You do not get points for intentions if the box fails. Better to use a well-documented recycled paperboard or FSC-certified corrugated cardboard than chase a trendy material that creates more waste through damage and returns.
Assembly time gets overlooked too. If the pack-out requires extra folding, insert placement, or tape, your labor cost climbs. A structure that saves 30 seconds per 100 units can save real money over a year. I’ve literally watched a fulfillment lead smile for the first time in a week after we simplified a box closure from five steps to two. Amazing what happens when packaging stops fighting the workers. On a 5,000-unit run, that can be 25,000 fewer hand movements. Your team will notice.
Finally, people skip supplier communication. They don’t ask about tolerances, print limits, board availability, or what happens if a coating doesn’t cure properly. Then they act shocked when the final product doesn’t match the render. Talk to your supplier. Get samples. Ask annoying questions. That’s part of how to choose packaging materials without expensive regrets. The factory in Dongguan will not magically read your mind, no matter how beautiful your PDF is.
Expert Tips for Smarter Packaging Material Decisions
If you want the practical version of how to choose packaging materials, here’s my short list from years of factory visits and supplier negotiations. First, use samples early. Not after the branding deck is finalized. Early. I’ve saved clients thousands by catching a structural mismatch before they approved a full print run. One sample can reveal glue problems, weak corners, bad fit, and ugly registration issues that no PDF will ever show you. I’ve seen a die line that looked perfect in Illustrator fail because the glue flap was 3 mm too narrow for the actual board thickness.
Second, ask for real-world test reports or a simulation of your actual route. A supplier can tell you a box is strong. Fine. I want to know if it survives parcel drop tests, compression load, and humidity exposure. If they can’t speak to those things, they’re selling surface-level confidence. Good packaging suppliers understand performance, not just print. Ask for ISTA 1A or 3A references, compression numbers in lbs or newtons, and board specs like 32 ECT or 200# test.
Third, choose the simplest structure that protects the product and supports the brand story. Simplicity often wins. A clever 6-part assembly isn’t impressive if it slows fulfillment by 15 minutes per case. A strong custom printed box with one well-designed insert can be better than a complicated setup with too many moving parts. I’m a fan of elegant restraint. Fancy only counts if it works, and if it closes in under 20 seconds without a fight.
Fourth, standardize sizes where possible. Standard dimensions reduce waste, simplify ordering, and make reorders easier. A modular system for product packaging can save you from constantly reinventing the box. I’ve seen brands with 14 different carton sizes when 6 would have done the job. That’s not sophistication. That’s inventory chaos with a label maker. A 200 x 150 x 60 mm mailer and a 250 x 180 x 80 mm mailer are easier to manage than a random rainbow of one-off sizes.
Fifth, keep a backup material option. Supply chains get weird. Mills change inventory. Freight gets delayed. A supplier’s lead time may jump from 14 days to 28 because a board grade ran short. If you have a second approved material, you can keep moving. In my experience, that kind of backup plan is boring right up until it saves a launch. The smart teams in Shenzhen and Ningbo always have Plan B.
Sixth, talk to your printer about compatibility. Coating, ink, adhesive, lamination, and substrate all have to play nicely together. The wrong combo can cause cracking, poor adhesion, or color shift. If your package branding depends on a very specific green or a tight foil detail, test it before you place a large order. Color management and print finishing are not places to improvise. A Pantone 7732 C that looks perfect on a calibrated screen can drift badly on uncoated kraft.
Seventh, verify sustainability claims with documentation. Ask for FSC certificates, recycled-content specs, and material declarations. Don’t trust pretty marketing language. If the supplier says “eco,” ask what that means in mill terms, recovery terms, and local disposal terms. The better brands I work with treat documentation as part of the packaging design process, not an afterthought. If they can’t send a certificate within 24 hours, I get suspicious.
If you’re still building your packaging lineup, explore Custom Packaging Products that match your product category and print needs. It saves time to start with structures that already fit your sales channel instead of forcing a square product into a round box because the render looked cool.
One more factory-floor story. A snack brand once insisted on a high-gloss finish for a kraft paper sleeve because they wanted it to “pop.” It did pop. Right off the shelf, because the gloss made the packaging look oily next to the natural texture of the product. We switched to matte varnish, added subtle embossing, and used a slightly heavier 300gsm paperboard. Sales reps liked it more, and the package finally matched the brand. That’s how to choose packaging materials: with your eyes open and your ego mostly out of the room.
And if you’re comparing branded packaging options, don’t forget the unglamorous stuff: glue lines, die-cut precision, carton tolerances, and how the material behaves after 500 units of packing. Those details are where good packaging becomes reliable packaging. That’s the difference between a pretty prototype and a package you can actually ship. A box that passes one sample review in Shenzhen but fails on a 10,000-unit run in Los Angeles was never really ready.
Frequently Asked Questions
How do I choose packaging materials for fragile products?
Prioritize cushioning, structural strength, and fit before appearance. For fragile products, I usually start with drop risk, weight, and edge protection, then decide between corrugated cardboard, rigid boxes, molded pulp, or foam alternatives. Test samples for drop, vibration, and crush resistance, and add inserts if the product has sharp corners, heavy glass, or extra movement inside the box. A 6-foot drop test on corners and edges is a good first check before you commit to 5,000 units.
What packaging material is cheapest for small businesses?
Plain corrugated or paperboard is often the lowest-cost starting point. But the cheapest option depends on size, print complexity, labor, and shipping weight. A low unit price can still become expensive if the package damages products or slows packing. At 5000 pieces, a simple folding carton can come in around $0.22 to $0.35 per unit, while a mailer might run $0.18 to $0.42 depending on board grade and print. Always compare total cost, not just the raw material quote.
How do I choose packaging materials for sustainable packaging?
Look for recyclable, recycled-content, or compostable options that still protect the product. Check local disposal rules, because a material that sounds sustainable may not fit your customers’ waste systems. Avoid overengineering too, since extra material can raise cost and create more environmental impact than a simpler structure. If you can get FSC-certified paperboard or corrugated from a mill in Guangdong or Jiangsu with the right documentation, that’s often a safer bet than a trendy material with no recovery path.
How long does it take to choose and approve packaging materials?
Simple stock-based projects can move quickly if samples are already available. Custom structures take longer because of sampling, revisions, proof approval, and production setup. A stock mailer can be ready in 7 to 10 business days, while a custom printed carton typically takes 12 to 15 business days from proof approval, and a rigid Box with Custom inserts may need 18 to 25 business days. Build extra time for testing, freight, and supplier back-and-forth, especially if you need custom printed boxes or special inserts.
How do I choose packaging materials for brand presentation?
Match the material feel to the brand position, whether that’s premium, eco-conscious, or practical. Consider texture, color, coating, opening experience, and how the package supports brand identity across the customer journey. Just make sure the visual appeal does not compromise protection or pack-out speed. A 157gsm art paper wrap on a 2 mm board can feel luxurious, but only if it survives the warehouse and still looks clean at the doorstep.
If you remember one thing, remember this: how to choose packaging materials is not a design-only decision. It’s a business decision. It affects returns, freight, labor, brand perception, and customer trust. I’ve seen the right packaging save a launch, and I’ve seen the wrong one sink margins by the thousand-dollar chunks nobody notices until the month-end report. So test early, ask hard questions, and choose the material That Actually Works. The most useful takeaway is simple: define the product, test the route, compare real costs, and only then pick the material that can survive the ugly day, not just the sample table.