A logo can look perfect on screen and still fall apart the moment paint hits a curved bottle, a powder-coated panel, a corrugated carton, or a finished wall. That gap between a clean proof and a messy finished mark is exactly why custom stencil stickers matter. These precision-cut adhesive masks block paint, ink, etching cream, or blast media everywhere except the areas that need to stay open, and the final result usually depends more on edge control than artistic skill.
A decorative sticker is made to stay in place and be seen. A stencil mask does the opposite job. It has to apply cleanly, hold through the coating process, and peel away without tearing fibers, leaving residue, or pulling up the finish underneath.
Most failed painted graphics come back to a short list of production realities: the wrong adhesive level, a film that will not conform, poor surface prep, too much paint in one pass, or artwork that asks for more detail than the surface can hold. Paint gets blamed first because it is visible. The real cause is often a lifted edge measured in fractions of a millimeter.
Custom stencil stickers show up across packaging mockups, bottles, tins, cartons, metal parts, walls, signs, maintenance markings, and sandblast work. The use cases vary, but the buying questions stay consistent. Which film works on the actual surface? How much tack is enough? How much detail is realistic? What will the run cost, and where does it usually go wrong?
The answers are less about marketing language and more about materials, process limits, and inspection. If the mark has to look crisp in the finished environment, the stencil needs to be specified as carefully as the coating itself.
Custom Stencil Stickers Explained Through Real-World Paint Problems
A common failure looks like this: the art is clean, the cut file is correct, and the mask weeds properly, yet the painted result shows feathered edges on a coated box or a faint halo on a stainless panel. The cutter may have done its job perfectly. The problem usually starts after application, once the mask meets a surface it cannot fully seal.
That is the first thing buyers tend to underestimate. Custom stencil stickers are not just adhesive shapes. They are a converting product with a specific job to do. The face film has to flex without shrinking back. The adhesive has to grab firmly enough to block bleed-under, but not so aggressively that it damages coatings, paper fibers, or softer plastics during removal. The liner has to stay stable through cutting and weeding so fine details do not distort before the mask is even used.
Packaging and display work make that balance harder. A single branded line might include gloss cartons, soft-touch coatings, UV varnish, glass bottles, flexible plastic tubes, and painted metal lids. A mask that performs well on glass can lift on matte aqueous-coated paperboard. One that seals nicely on steel may wrinkle or bridge over a squeezable container. Matching the stencil to the substrate matters far more than choosing the cheapest vinyl in stock.
There is also a persistent misunderstanding about what paint failure looks like. Many people assume the paint was too thin or too wet. Sometimes that is true, especially with heavy spray passes or a roller that pushes coating into the cut edge. Just as often, the paint behaves normally and the edge fails first. Once there is even slight lift along the cut line, capillary action can pull liquid paint underneath very quickly, especially on coated paperboard, unfinished wood, masonry, and other surfaces with tiny channels or irregular texture.
Important: A clean stencil result is a system, not a single material. Surface prep, adhesive level, film flexibility, paint viscosity, coat thickness, and peel timing all affect the final edge.
If the finish will be customer-facing, such as graphics used beside Custom Labels & Tags on premium packaging, a quick sample run is not optional. It is the fastest way to catch bleed, lifting, residue, and edge distortion before a larger order turns into scrap.
How Custom Stencil Stickers Work on Flat, Textured, and Curved Surfaces
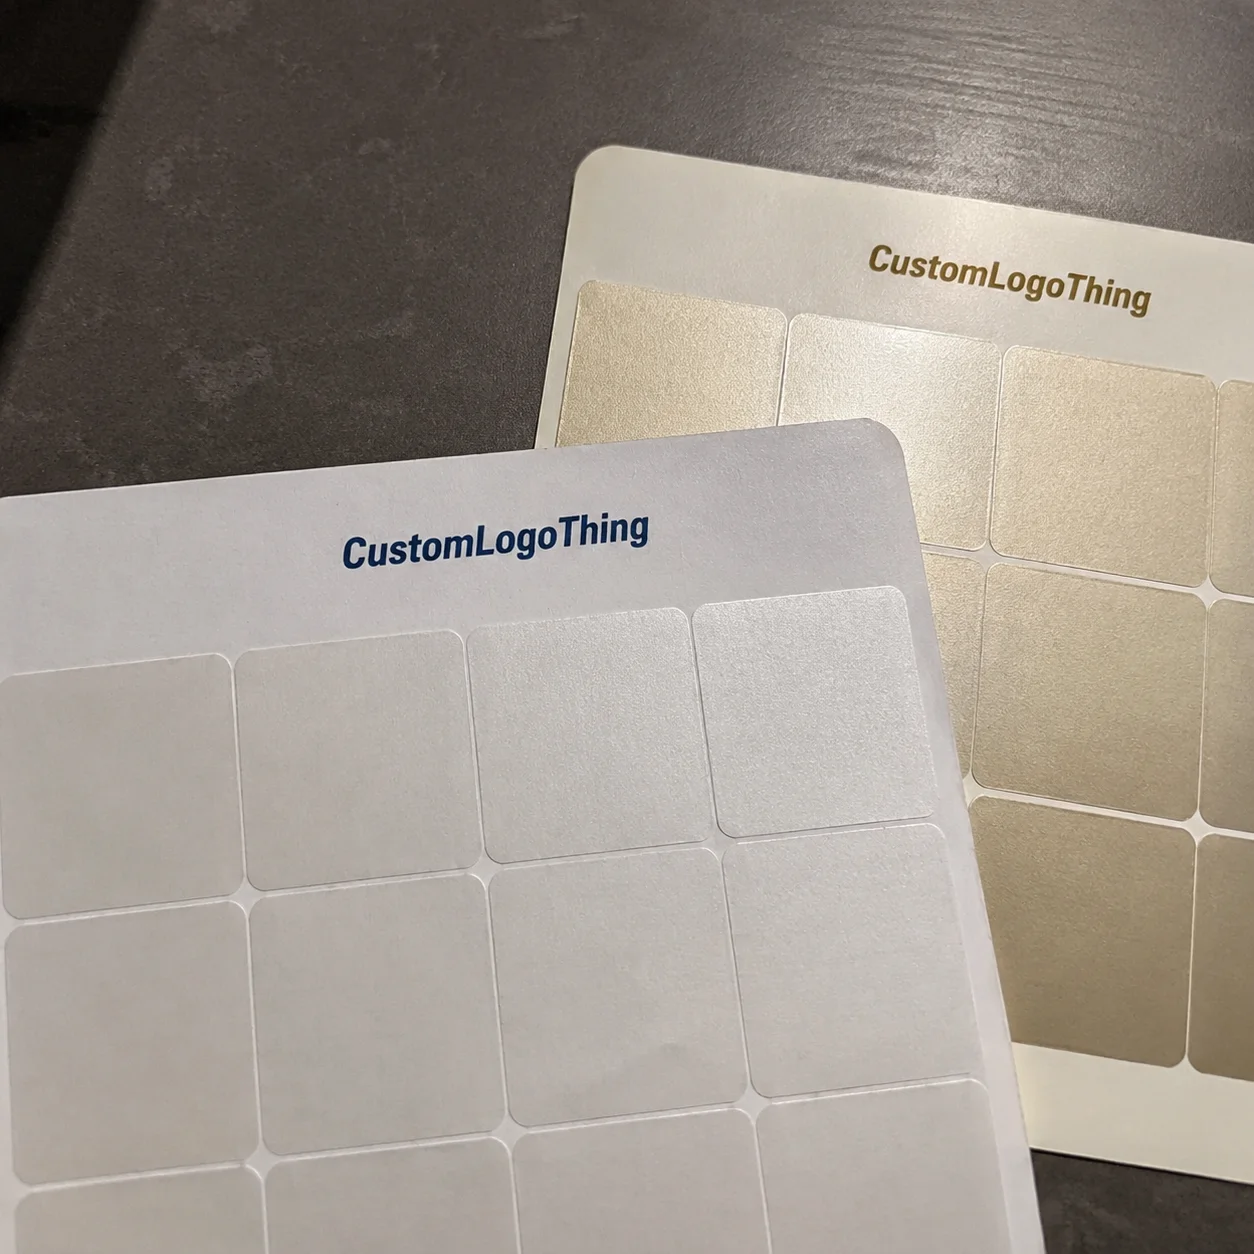
A typical stencil mask has four working parts: the face film, a pressure-sensitive adhesive, a release liner, and sometimes transfer tape. The film forms the body of the mask. The adhesive holds it against the target surface. The liner keeps the material stable during cutting and weeding. Transfer tape helps move detailed graphics into place without stretching or losing alignment.
Once applied, the mask covers the areas that need protection while the cut openings expose only the sections meant for paint, ink, acid etch, or abrasive blasting. Layout matters here. A positive stencil keeps the graphic itself and masks around it. A negative stencil removes the graphic area and leaves the surrounding field in place. Negative layouts often make fill application easier, while positive layouts can help with spacing and repeat placement.
Surface energy changes almost everything. Glass, enamel-coated metal, and many powder-coated surfaces tend to behave predictably. Corrugate, coated paperboard, HDPE, LDPE, raw wood, and masonry do not. A mask that seals well on a smooth panel may leak on a textured retail display or a rough shipping crate even if the artwork and paint stay exactly the same.
Film thickness matters too. Thin conformable films, often around 2 to 3 mil, handle curves and shallow compound shapes better than stiffer 4 to 6 mil films. They sit down more easily around bottle shoulders, rounded tins, and gentle contours. Thicker films can be useful when durability matters during handling, but they are less forgiving on tight radii and textured stock.
Adhesive choice is a tradeoff. Lower tack removable systems are safer on delicate coatings and easier to peel cleanly, but they can lift on curved or lightly textured surfaces. Higher tack systems usually improve edge hold, yet they raise the risk of residue, fiber tear, or coating pull. The right answer depends on the substrate, not on a universal rule.
Where different surfaces usually land
- Flat glass or metal: lowest risk, good for smaller details and sharper small type.
- Curved bottles and jars: flexible film matters more than aggressive adhesive; simpler artwork usually performs better.
- Coated paperboard and custom printed boxes: watch for coating compatibility, edge lift, and fiber pull during removal.
- Corrugate and masonry: expect softer edges unless the design is bold and the paint is applied very lightly.
- Unfinished wood: absorbency and grain often soften the line even if the mask seals well.
No stencil film works best everywhere. The value of properly specified custom stencil stickers is that they are selected for the real substrate, coating, and finish requirement rather than treated like a generic decal with a different name.
Material and Design Factors That Decide Edge Quality
Material selection usually starts with a few basic questions: how flexible the film needs to be, how strong the adhesive should be, whether transfer tape is required, and whether the mask is meant for one use or repeated cycles. In most premium finish work, single-use adhesive masks give the most consistent edge quality. Reusable stencils still have a place, especially for large simple graphics, but they are not automatically better just because they can be used more than once.
Artwork can quietly undermine a job before production starts. Hairline strokes, tiny counters, distressed textures, and narrow bridges may look sharp in vector form and still fail once paint is introduced. A plotter can cut very fine detail, but that does not mean the edge will survive application, paint loading, and removal.
On many surfaces, the practical minimum for dependable painted detail is wider than buyers expect. Line widths around 0.04 to 0.08 inch are often workable on smooth substrates with controlled spray application. Go below that, and the risk climbs quickly. Rougher surfaces, heavier paint, thicker films, and more aggressive handling all push that threshold upward.
Clean vector art remains the standard for good reason. AI, EPS, SVG, and press-ready PDF files usually provide the most accurate path data. Raster artwork can be rebuilt, but low-resolution images often create jagged cut lines, excess anchor points, and fragile interior details. That slows setup, increases weeding difficulty, and adds avoidable failure points.
Application method sets the real design limit. Brush and roller application can force paint under weak edges. Sponge dabbing works reasonably well on bold shapes. Spray paint and airbrush methods usually deliver the best finish on smooth surfaces if the coats stay light and flash properly between passes. Etching cream, solvent inks, and blast media place different demands on the mask, particularly around dwell time and film resistance.
Packaging adds its own complications. Curved labeling panels, squeezable bottles, corrugated fluting, soft-touch coatings, and slick UV finishes all reduce sealing consistency. If the mark will be visible to customers, test at least one sample on the exact substrate used in production. A digital proof cannot show how adhesive behaves on a coated carton after twenty seconds of wet paint exposure.
| Factor | Lower-Risk Choice | Higher-Risk Choice | What It Affects |
|---|---|---|---|
| Artwork detail | Bold shapes, wider strokes | Distressed art, tiny text | Cut stability and paint edge clarity |
| Film type | Flexible conformable mask | Stiff general vinyl | Curves, rivets, and light texture |
| Adhesive level | Matched to substrate | Too low or too aggressive | Bleed-under, residue, surface damage |
| Application method | Light spray or controlled dab | Heavy wet coats | Bleeding and edge flooding |
Good results come from designing for the process instead of assuming the screen preview will translate directly. That is true whether the order is a single prototype carton or a repeat run of custom stencil stickers for a production line.
What Is the Best Way to Order Custom Stencil Stickers for Clean Paint Results?
The best way to order custom stencil stickers is to begin with the real application surface, not the logo file. A supplier needs to know if the mask will be used on glass, powder-coated metal, HDPE, corrugate, coated paperboard, unfinished wood, painted drywall, or masonry. That single detail affects adhesive selection, film thickness, flexibility, and how much detail the artwork can realistically hold.
It also helps to define the coating system up front. Light spray paint, airbrush coatings, screen inks, etching cream, and blasting media all stress the stencil edge differently. The same design may work with two misted spray coats and fail under a heavy roller pass.
For the cleanest result, provide vector artwork, final dimensions, expected quantity, and a short note about whether the surface is flat, curved, textured, coated, or low energy. Mention if transfer tape is required for alignment and whether the mask is single-use or intended for repeated cycles. If the finish matters visually, ask for a sample or pilot run on the actual substrate rather than approving from proof alone.
That information helps a converter recommend the right mask construction and catch weak spots early. It also reduces the back-and-forth that slows quoting and increases the chance of an incorrect assumption.
Custom Stencil Sticker Process and Timeline From Artwork to Application
Most stencil orders follow a straightforward sequence: artwork review, material selection, proofing, cut setup, production cutting, weeding, transfer masking if needed, inspection, packing, and shipment. The equipment may vary, but the checkpoints are consistent because the goal is not just to cut shapes. The goal is to deliver custom stencil stickers That Apply Cleanly and remove without damage.
Quality control usually happens in small but important ways. Operators check whether fine bridges stay intact during weeding, whether the liner remains stable, whether transfer tape lifts and releases properly, and whether the cut depth is clean without cutting through the liner unintentionally. For detailed work, inspection often focuses less on the outer contour and more on the tiny internal features that fail first.
On the user side, application discipline matters just as much as production quality. Clean the surface with a method suited to the substrate. Isopropyl alcohol is common for glass and metal, but some coated paperboards and sensitive finishes are better handled with dry lint-free cleaning first. Position the mask carefully, tack one edge, and squeegee from the center outward to avoid trapped air. If the graphic is detailed, burnish the cut edges before painting.
Paint should go on in light passes. One wet coat is more likely to flood the edge than two or three lighter coats with proper flash time between them. Removal timing matters too. In many applications, the cleanest peel comes after the coating has set enough to avoid smearing but before it fully hardens into a brittle edge that can chip.
Buyers also tend to blur four different timing terms. Production time is the supplier's manufacturing window after approval. Lead time can include queue position and material availability. Transit time is shipping. Total turnaround includes all of that plus proof review, testing, and the actual decoration schedule on your side.
Delays usually come from familiar causes:
- Missing vector files or unclear artwork
- Dimension changes after proof approval
- No test panel on the real substrate
- Detailed designs that slow weeding and inspection
- Underestimated drying or cure time during application
For straightforward jobs using stocked materials, a prototype or small batch often moves in about 5 to 8 business days after proof approval. More detailed runs, specialty resist films, or heavier hand-finishing steps often land closer to 10 to 15 business days before shipping. Rush service may be possible, but it is usually more realistic on simple artwork than on fine-detail masks that need careful weeding and inspection.
If the order ties to a launch date, installation window, or line trial, ask early whether a pilot run or split shipment makes sense. A pilot can add a few days at the front and still save far more time than a full rerun later.
One detail that helps reorders more than buyers expect is process documentation. If multiple teams or sites will apply the same stencil, record the cleaning method, squeegee type, paint brand, number of passes, flash time, and peel timing. The more repeatable the install method, the more repeatable the finished mark.
Custom Stencil Sticker Cost, Pricing, and MOQ Basics
A quote for custom stencil stickers covers more than raw film. Material grade, sheet or roll size, cut complexity, weeding labor, transfer tape, quantity, packaging method, and waste allowance all affect price. A large simple logo can cost less per usable piece than a tiny detailed mark because the detailed version takes longer to cut, weed, inspect, and pack.
Quantity discounts are real, but they do not always scale neatly. Unit cost usually drops as volume rises, yet labor-heavy artwork can flatten the savings. If every piece contains fine internal cutouts or distressed texture, the job still needs hands-on finishing whether the order is 250 units or 5,000.
Minimum order quantities depend on process and material. Digitally cut prototypes are often flexible for short runs. Repeat production at higher volume may favor specific sheet layouts or roll formats. Specialty materials used for sandblast resist, higher heat, or harsher chemical exposure can push MOQs upward because sourcing and setup are less forgiving.
What usually changes the quote the most
- Material type: standard removable mask films cost less than specialty resist constructions.
- Size: larger masks use more material, though not always more labor.
- Detail level: fine internal cutouts and distressed art increase weeding time.
- Transfer tape: detailed layouts often need it, adding material and handling cost.
- Packing format: individually sorted or labeled sets cost more than bulk-packed sheets.
As a practical budgeting range, simple medium-size stencil masks in moderate quantities can land around the low-dollar-per-piece level, while highly detailed versions of the same footprint may cost two to four times more because of labor. Very small sample runs often carry a higher per-piece price simply because setup time is spread across fewer units. Large-format masks can also cost more in wasted material if the layout leaves unusable gaps on the sheet or roll.
Be cautious with quotes that seem unusually cheap until the construction is clear. Low pricing sometimes reflects a decorative vinyl assumption rather than a true paint-mask specification. That can mean the wrong adhesive, the wrong film thickness, or no allowance for transfer tape and hand finishing.
A useful RFQ should include dimensions, substrate, coating type, quantity, artwork file, indoor or outdoor exposure, deadline, and whether the masks will be applied to flat, curved, or textured surfaces. Mention if the job is for bottles, branded cartons, metal parts, walls, or retail displays. Those details shorten quote revisions and reduce the risk of mismatch.
If sustainability matters to your team, ask about liner disposal, packaging materials, and whether any paper components align with guidance from FSC. For products that will be shipped after decoration, distribution testing references from ISTA can help frame the level of abrasion or handling the finished mark may need to survive.
Common Mistakes That Ruin Painted Graphics and Surface Finish
The same problems show up again and again: dusty surfaces, skin oils, silicone residue, overstretched masks, heavy paint flooding, and poor peel timing. A stencil cannot hold a crisp edge if it never made full contact to begin with.
Low-tack material is another frequent trap. Buyers often assume gentler adhesive is automatically safer. On textured, curved, or coated surfaces, it can lift just enough to let paint creep under the edge. That does not mean high tack is always better. Too much adhesive can leave residue, pull paper fibers, or damage coatings. The right choice depends on the actual surface and the acceptable risk during removal.
Artwork issues become obvious fast in production. Unsupported islands, tiny counters, narrow bridges, and decorative films used in place of masking-grade material can turn a promising design into scrap. Multi-part graphics add alignment risk as well, especially on repeat jobs. Registration marks and transfer tape are simple safeguards that prevent a lot of avoidable waste.
Skipping test panels is one of the most expensive mistakes because it hides the exact variables most likely to cause trouble: coating chemistry, release agents, surface texture, and removal behavior. Digital proofs cannot show any of that. Environmental conditions matter too. Most pressure-sensitive systems apply best in a moderate window, often around 60 to 80 degrees Fahrenheit, and paint flow can change noticeably in humid conditions.
Practical rule: If the substrate is textured, coated, curved, or customer-facing, test on the real part. A ten-piece pilot is cheaper than remaking a thousand finished units.
Storage gets overlooked as well. Masks kept in heat, damp rooms, or direct sunlight can curl, lose release performance, or behave unpredictably during application. Good converting work can still fail after poor storage. Even well-made custom stencil stickers need reasonable handling conditions if consistent results matter from one batch to the next.
Expert Tips and Next Steps for Ordering a Better Stencil Run
A better stencil order usually starts with better information. Before requesting a quote, confirm the substrate, surface finish, coating system, exposure conditions, artwork format, quantity, and install method. Those are not minor notes added at the end of a form. They determine adhesive choice, film flexibility, workable detail, and whether the order should be tested before full production.
For customer-facing packaging, industrial markings with audit visibility, textured walls, or curved containers, validate with a short pilot batch first. A small run often reveals whether the mask needs a tack adjustment, a more conformable film, stronger transfer tape, or slightly simplified art. That is especially useful if different shifts or locations will apply the stencil and consistency matters across all of them.
The most useful supplier questions are technical and specific. Ask what adhesive range fits your substrate, how fine a detail level is dependable with your paint method, whether the selected film handles your radius or texture, and how the liner behaves during weeding on small internal cuts. Those questions tend to produce better recommendations than a price-only comparison.
It also helps to standardize the application process once the sample is approved. Record the cleaning method, application temperature, squeegee type, number of paint passes, flash time, and peel timing. Reorders go much more smoothly when the stencil spec and the install method are both documented.
- Gather art files: send vector files whenever possible.
- Measure the application zone: include flat panel size, radius, or textured area details.
- List the coating system: mention spray paint, airbrush, screen ink, etch cream, or blasting media.
- Plan a real test: request a sample or pilot if finish quality matters.
The main point is straightforward. Custom stencil stickers are precision masking tools, not ordinary decals cut into a new shape. The best results come from matching the film, adhesive, artwork, and application method to the actual surface and coating system. Get those details right early, and the finished mark has a much better chance of looking crisp, repeatable, and production-ready.
FAQ
What are custom stencil stickers best used for?
Custom stencil stickers work best for repeat graphics where paint, etching, or blasting needs clean boundaries on products, packaging, signs, walls, containers, and industrial parts. They are useful when the mark needs to be created directly on the surface rather than applied as a printed label. Performance still depends on matching the mask construction to the surface texture, curve, and coating.
Can custom stencil stickers work on curved bottles or textured packaging?
Yes, but curves and texture reduce margin for error. Conformable film, the right adhesive level, and simplified artwork usually matter more than aggressive tack alone. Testing one sample on the actual bottle, carton, or package is the safest way to confirm edge quality before a larger run.
How long does it take to produce stencil stickers for a project?
Timing depends on artwork readiness, material availability, cut complexity, proof approvals, and shipping distance. Simple sample or short-run jobs may move in about 5 to 8 business days after approval, while more detailed or specialty-material runs often take 10 to 15 business days before shipping. Pilot testing can add time at the start, but it usually reduces the risk of larger delays later.
What affects the price of custom paint mask stickers the most?
The biggest cost drivers are material type, size, quantity, cut detail, weeding labor, transfer tape, and packing format. Fine-detail artwork often costs more than larger simple shapes because it takes longer to finish and inspect. Clear vector files and accurate application specs help keep quoting and setup more efficient.
Are reusable stencil decals better than single-use adhesive masks?
Not always. Reusable stencils can work well for large simple graphics and repeated marking, but single-use adhesive masks usually give more consistent edge control on customer-facing or detail-sensitive surfaces. The better choice depends on the substrate, number of repeats, cleaning method, and finish quality required.