Buyer Fit Snapshot
| Best fit | Packaging Design Comparison projects where brand print, material claims, artwork control, MOQ, and repeat-order consistency need to be specified before quoting. |
|---|---|
| Quote inputs | Share finished size, material target, print colors, finish, packing count, annual reorder estimate, ship-to region, and any compliance wording. |
| Proofing check | Approve dieline scale, logo placement, barcode or warning zones, color tolerance, closure strength, and carton packing before bulk production. |
| Main risk | Vague material claims, crowded artwork, missing packing details, or unclear freight terms can make a low unit price expensive after revisions. |
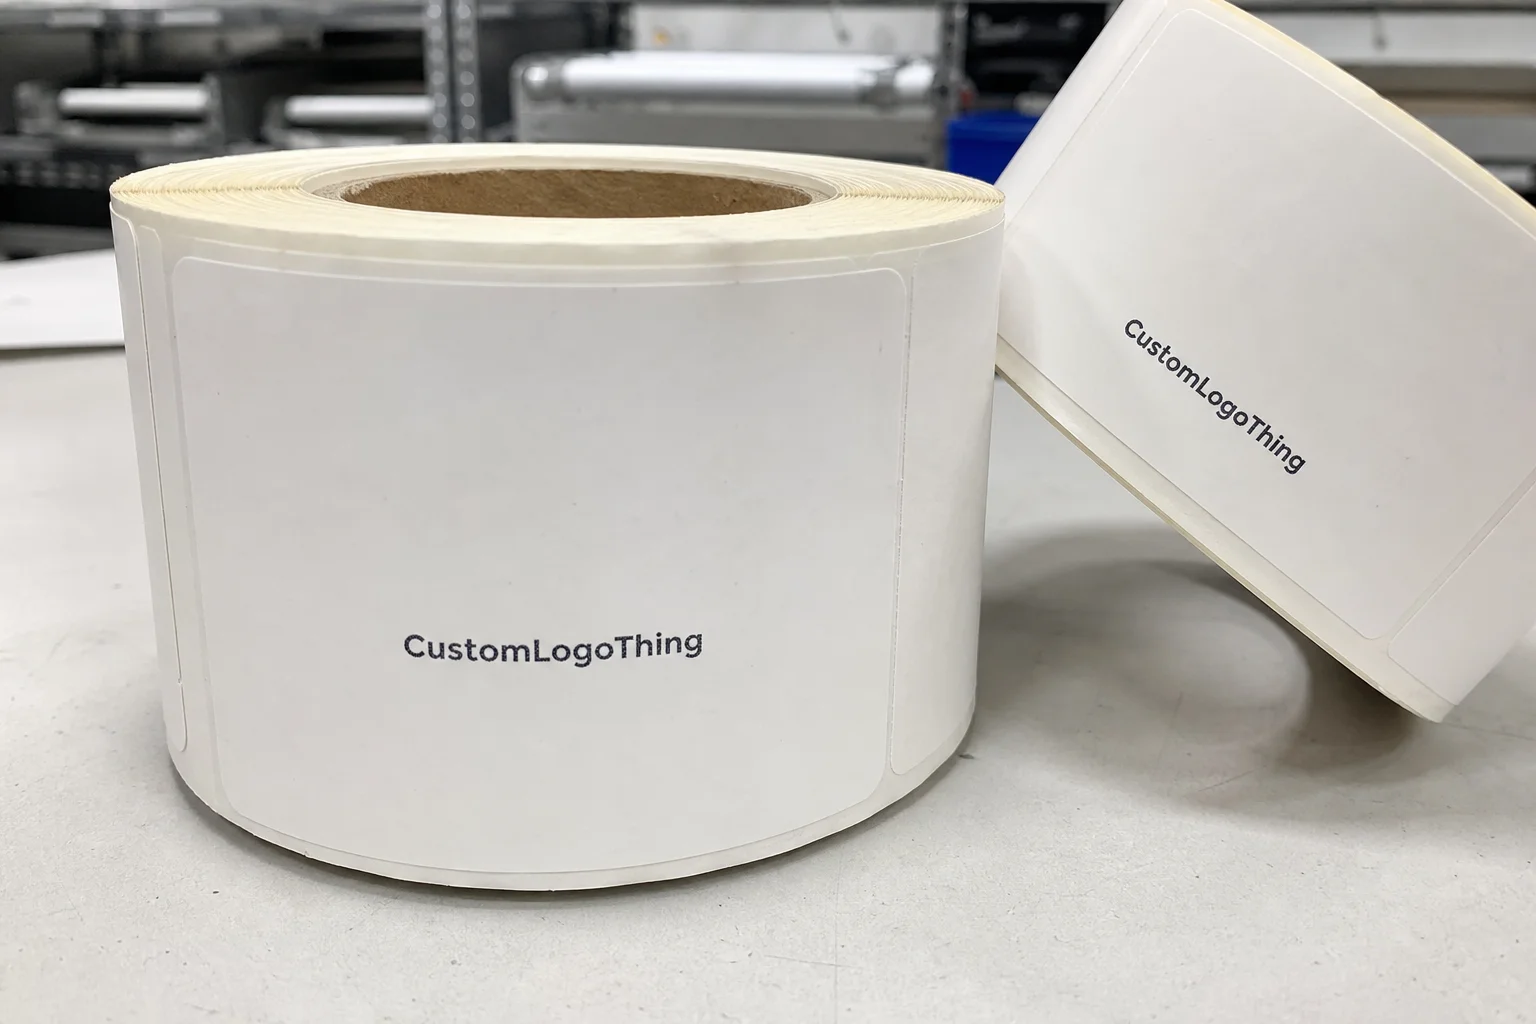
Fast answer: Packaging Design Comparison: Choose the Right Style should be specified like a repeatable production item. The safest quote records material, print method, finish, artwork proof, packing count, and reorder notes in one written spec.
Production checks before approval
Compare the actual filled-product size with the drawing, then confirm tolerance on folds, seals, hang holes, label areas, and retail display edges. Reserve space for logos, QR codes, warning copy, and material claims before decorative graphics fill the panel.
Quote comparison points
Review material grade, print process, finish, sampling route, tooling charges, carton quantity, and freight assumptions side by side. A quote is only useful when the supplier can repeat the same color, closure quality, and packing count on the next order.
If you’ve ever fallen in love with a mockup and then watched the first production sample arrive looking tired, expensive, or flat-out wrong, you already understand why packaging design comparison matters. I remember one launch in Guangzhou where the render looked like a luxury jewelry box and the first sample looked like it had spent a week in a damp warehouse, which, frankly, it had not yet earned the right to do. I’ve seen brands choose the prettiest concept, then discover the “simple” rigid box was actually a $1.85 unit cost at 5,000 pieces before inserts, freight, and that lovely little foil stamp surcharge nobody mentioned until week three. That’s not design strategy. That’s a budget surprise with a logo on it.
My name is Sarah Chen, and I’ve spent 12 years in custom printing, including enough factory-floor time in Shenzhen and Dongguan to know which packaging design comparison looks good in a slideshow and which one survives real production. I’ve stood next to the gluing line at a carton factory in Dongguan while a supervisor tapped a misfolded flap with the exhausted expression of someone who has seen one too many “small revision” requests, usually from a sales team in Shanghai asking for a color adjustment after the proof had already been signed. This post breaks down how to compare structures, materials, finishes, timelines, and costs without guessing, using the kind of details buyers actually need: 350gsm C1S artboard, 1200gsm greyboard, 12 to 15 business days from proof approval, and freight terms that do not mysteriously appear in week four. If you need branded packaging, custom printed boxes, or stronger package branding for retail packaging or ecommerce, this is the kind of comparison that saves you from expensive regret.
Packaging Design Comparison: Why the First Choice Usually Costs the Least
The biggest mistake I see in packaging design comparison is choosing the option that looks impressive on a screen but collapses under production reality. A folding carton made with 350gsm C1S artboard, one-color CMYK, and matte aqueous varnish might run $0.42 per unit at 10,000 pieces from a printer in Dongguan. A rigid setup with 1200gsm greyboard, wrapped text paper, EVA foam insert, foil stamping, and soft-touch lamination can land closer to $2.10 per unit before freight from Shenzhen to Los Angeles. Same logo. Very different invoice. Honestly, I think a lot of teams secretly know this and hope the quote email will somehow be kinder than the math. It never is.
So what does packaging design comparison actually mean? It means reviewing two or more packaging concepts side by side using the same product dimensions, the same fulfillment requirements, and the same business goal. You compare structure, print method, finishing, durability, shelf impact, assembly time, and total landed cost. That’s the whole point. Not who made the nicest mockup in Illustrator. I’ve seen gorgeous Illustrator files from a design studio in Los Angeles that would make a supply chain manager cry into a clipboard because the dieline ignored a 4mm glue flap and a 1.5mm score allowance.
Here’s the part people miss: packaging is not just decoration. It is protection, logistics, and brand communication packed into one box. A design that looks premium but slows down assembly by 18 seconds per unit can cost more in labor than a fancy finish ever earns back. I’ve watched a beverage client in Chicago switch from a complex sleeve-and-tray setup to a standard tuck-end carton and save $7,400 on one launch because the warehouse team could pack 900 more units per day. That is real money, not branding poetry.
Packaging design comparison also helps you stop making emotional decisions. I know, shocking. The prettier option is not always the better one. A smart comparison asks: will this box ship safely, fit the line speed, match the brand voice, and hold up through retail handling or ecommerce transit? If it fails any of those questions, the design is already costing you. And if someone says, “We can probably make it work,” I usually hear, “We will absolutely be revisiting this after someone gets a customer complaint in Nashville.”
“The sample that looks expensive is not the same thing as the sample that works.” I said that to a client in my second year in packaging, and I’ve repeated it more times than I can count.
By the end of a solid packaging design comparison, you should be able to explain why one option wins in dollars, minutes, and customer experience—not just in aesthetics. That’s how you buy packaging like an operator, not like someone shopping for wallpaper in Milan.
How Packaging Design Comparison Works in Real Production
A proper packaging design comparison usually starts with a brief, not a mood board. I want product dimensions, target quantity, shipping method, and the exact use case. Is this a 60ml skincare jar going into retail packaging in Toronto? A supplement bottle for ecommerce fulfillment in Austin? A candle set that needs an insert built from molded pulp in Qingdao? If you skip those details, the comparison turns into guesswork with a fancier font, and I have done enough guessing in my life to know it does not age well.
The workflow is usually straightforward. First, you review concept options. Then you choose structure types, like folding carton, corrugated mailer, rigid box, or display packaging. After that comes the quote stage, where you compare tooling, plates, setup fees, and shipping terms. Then you sample. Then you revise. Then you approve. Simple on paper. Less simple when your team changes the logo size three times and asks if foil can be “a little shinier,” usually right after the factory in Dongguan has already engraved the first die.
In factory visits, I’ve seen two vendors quote the same style very differently. One domestic carton converter in Ohio offered a 24pt SBS tuck box at $0.38 per unit for 5,000 pieces, with digital print and one PMS ink. Another supplier in Foshan quoted $0.44, but included proofing, die-cut setup, and a cleaner fold because their scoring equipment was newer. Same category. Different outcome. That is why packaging design comparison has to include process quality, not just headline price.
Prototypes matter more than people think. A digital render can hide weak folds, a misfit insert, or art that wraps awkwardly around a glue flap. I once saw a subscription box sample where the insert looked perfect on screen, but the bottle necks hit the lid by 3mm because the chipboard thickness changed during production. Three millimeters. That tiny gap would have turned into a very loud customer complaint in Minneapolis. And, yes, the customer would have blamed the brand, not the chipboard.
Vendors behave differently too. A supplier like Packlane may shine for low-volume custom printed boxes with fast digital runs, especially when you need 250 or 500 units for a pilot launch. Uline is convenient for standard stock and quick fulfillment from U.S. distribution centers. A domestic converter in New Jersey may be better for offset print, specialty coatings, or larger quantities where consistency matters more than speed. None of them are “best” across the board. That’s why packaging design comparison is really about matching the vendor to the job.
Here’s the simple workflow I use:
- Brief — define product size, quantity, ship method, and brand goal.
- Structure options — compare 2 to 4 box styles with the same dimensions.
- Quote comparison — request identical specs and landed cost.
- Sample review — inspect print, folds, inserts, and durability.
- Revisions — fix the issues that actually matter.
- Final approval — lock artwork and production files.
Shipping and warehousing are not side notes. They change the result. A design that nests flat can save 22% on freight versus a bulky rigid style, especially on pallets moving from Shenzhen to Long Beach. Assembly time can also swing wildly. If your fulfillment team can pack 300 folding cartons an hour but only 140 rigid boxes, the cheaper unit price may be fake savings. That’s why real packaging design comparison needs operational data, not just design opinions. I’ve seen one line worker in Texas become the unofficial “boxing expert” in a week simply because a bad structure made everyone slower. Nobody likes that kind of expertise.
Key Factors in Packaging Design Comparison
A serious packaging design comparison looks at six things: cost, materials, print and finish, brand fit, sustainability and compliance, and functionality. If you only compare one of those, you’re not comparing packaging. You’re browsing artwork, which is fun until the warehouse, the customer, or the finance team has opinions, usually in a spreadsheet with a dozen tabs.
Cost sounds obvious, but it’s the messiest category. A quote can show a low unit price and quietly omit tooling, sample fees, freight, inserts, and storage. I’ve seen a “cheap” mailer jump from $0.31 to $0.56 per unit after assembly labor and carton freight were added. Same box. Different story. In packaging design comparison, the sticker price is not the real price, and anyone who tells you otherwise usually has not paid a customs invoice in Qingdao before lunch.
Materials change everything. SBS is smooth and clean for retail packaging. A 350gsm C1S artboard gives you a printable front surface with a more economical back side, which is why it shows up so often in cosmetics and supplements. Kraft gives a natural, less polished look that works well for eco-friendly package branding. Corrugated is better for shipping strength. Rigid board gives you that premium feel, but it can also raise the unit cost fast. A 28pt folding carton and a 2mm rigid board are not remotely the same financial animal. I’ve watched brands pick rigid because it “felt luxury,” then realize the box weighed more, shipped slower, and took longer to assemble. Luxury is wonderful until it starts behaving like a brick.
Print and finish are where budgets go to dance. Offset printing is often better for larger runs with tight color control. Digital printing helps with shorter quantities and faster setup. Foil stamping, embossing, spot UV, soft-touch lamination, and aqueous coatings each add visual value, but each one also adds labor or setup cost. A single foil die can run $120 to $350 depending on size and complexity in a factory near Dongguan or Shenzhen. Multiply that across versions and suddenly your “simple” packaging design comparison is a line item parade.
Brand fit is where design either earns its keep or gets in the way. A premium skincare line may need clean white space, subtle embossing, and matte stock. A food brand might need bright shelf impact, compliance labeling, and grease resistance. Supplements often need clear typography and regulatory clarity. Ecommerce brands need protection and fast packing. The best packaging design comparison is the one that matches the buyer and the channel, not the one that wins a mood board vote from someone who has never packed a box at 6:30 a.m. in a warehouse outside Dallas.
Sustainability and compliance are not nice-to-have decorations. If you claim recycled content, make sure the board and coating support it. If you need food-safe packaging, ask for the relevant coating and substrate documentation. If your product has child-resistant requirements, that changes the structure. Standards matter. I point clients to resources like EPA packaging and sustainability guidance and FSC certification information when they want to verify claims instead of just trusting a supplier’s brochure. A FSC-certified folding carton from a factory in Guangdong is not the same as a generic white board with a green logo stamped on it.
Functionality is the category that gets ignored until something breaks. Does the box protect during drop testing? Does it stack on pallets? Does it open cleanly? Does it fit the line speed? A beautiful custom printed box that slows fulfillment by 15 seconds per unit may look smart in a pitch deck and stupid in a warehouse. That is the truth. Uncomfortable, but useful.
Here’s a quick way I score packaging design comparison options:
- Protection — will the product survive shipping and retail handling?
- Cost — what is the total landed cost, not just unit price?
- Brand impact — does it match the product’s positioning?
- Ease of assembly — can the team pack it fast?
- Compliance — do materials and claims hold up?
- Lead time — can you actually launch on schedule?
Honestly, this is where most people get their priorities scrambled. They’ll spend 20 minutes debating a matte finish and 2 minutes checking if the insert actually holds the bottle upright. That’s backward. A proper packaging design comparison keeps the box from becoming an expensive decorative problem.
Packaging Design Comparison: Cost and Pricing Breakdown
Let’s talk numbers, because otherwise this becomes a nice little branding sermon. In packaging design comparison, cost varies by structure, material, print method, finish, and quantity. A simple mailer, a folding carton, a rigid box, and display packaging all carry different cost drivers, and pretending they don’t is how budgets get torched.
For example, a corrugated mailer in E-flute might come in around $0.62 to $1.10 per unit at 3,000 pieces, depending on print coverage and dimensions. A folding carton in 18pt SBS may fall closer to $0.28 to $0.65 per unit at 10,000 pieces. A rigid box can jump from $1.40 to $3.20 per unit quickly, especially with magnets, foil, or inserts. Those are not fantasy numbers. I’ve negotiated versions of all three between suppliers in Shenzhen, Mexico City, and New Jersey, and I can tell you the rigid box always tries to look innocent while quietly eating your margin.
MOQ changes everything. If you order 500 rigid boxes, the per-unit cost can look absurd because setup and labor get spread over too few pieces. If you order 20,000 cartons, the same finish may suddenly make sense. That’s why packaging design comparison should always be done at the quantity you intend to buy, not the quantity that makes the quote spreadsheet look cute.
Here’s a practical comparison table based on common project types I’ve seen quoted for custom packaging products:
| Packaging Type | Typical Material | Common Unit Price Range | Best For | Main Cost Driver |
|---|---|---|---|---|
| Mailer Box | ECT corrugated | $0.62–$1.10 at 3,000 pcs | Ecommerce, subscription kits | Print coverage and board strength |
| Folding Carton | 18pt–24pt SBS | $0.28–$0.65 at 10,000 pcs | Retail packaging, cosmetics, supplements | Quantity and print method |
| Rigid Box | 1200gsm greyboard | $1.40–$3.20 at 3,000 pcs | Luxury sets, electronics, gifting | Hand assembly and finishing |
| Display Packaging | Corrugated or paperboard | $0.55–$1.25 at 5,000 pcs | Retail shelf display | Structural complexity |
Now add the extras. Foil stamping can add $0.06 to $0.18 per unit depending on area and complexity. Embossing may add a tooling charge of $80 to $250. Custom inserts can add $0.12 to $0.90 per unit depending on material and die-cutting. If you need a specific pantone match, expect extra setup or ink handling. In one supplier negotiation in Dongguan, I shaved $1,200 off a project by switching from a custom full-color insert to a single-color printed kraft insert. The client lost nothing in brand feel. They gained margin. That sort of trade-off is exactly why I love a good packaging design comparison; it turns “I want everything” into “we can actually afford this.”
Compare all quotes on landed cost, not unit cost alone. Landed cost includes production, tooling, samples, freight, import duty if applicable, and assembly. If a factory quote is $9,000 and freight adds $2,400, your “cheap” project just got a lot less charming. This is the part of packaging design comparison that people skip because it’s less glamorous than choosing foil, and then they act shocked when margin disappears.
Some suppliers quote aggressively low, then add charges later for revisions, packing, or insert assembly. Not every supplier does this, but enough do that I’ve made a habit of requesting a detailed breakdown every time. Ask for line items. Ask for freight terms. Ask whether samples are credited against production. Ask what happens if the dieline changes by 2mm. That’s not being difficult. That’s being paid to think.
For readers building out a new line of Custom Packaging Products, this breakdown matters even more because product families often share a box style but not a pricing structure. A serum carton and a candle carton may look similar, but a heavier item can force thicker board, stronger glue, or a different tuck lock. Same family. Different build. Different invoice.
Process and Timeline: From Comparison to Production
A realistic packaging design comparison timeline starts with clean inputs. If you send a supplier a box size, product weight, quantity, finish list, and target ship date, the comparison can move fast. If you send “make it premium,” it moves like a shopping cart with one bad wheel. I have physically watched a project stall for four days because the brief said “luxury, but approachable,” which is a very poetic way to say “please guess” to a factory team in Shenzhen.
Here’s a workable timeline I use for planning:
- Concept review: 1 to 3 business days
- Quote comparison: 2 to 5 business days
- Sample production: 7 to 15 business days
- Revisions and approval: 2 to 7 business days
- Mass production: 10 to 25 business days for simpler jobs, longer for specialty builds
- Freight and delivery: 3 to 40 days depending on origin and shipping method
That timeline changes fast when specialty finishes enter the chat. Foil stamping, embossing, magnetic closures, custom inserts, and new die tooling all add time. If you need a fresh die, I’ve seen that add 4 to 8 days before production even starts. If the artwork is missing bleed or the dieline is wrong, add more. One client came to me with a launch date that left exactly 11 business days for a box that needed a new structure. We fixed the structure, but the original timeline? Gone. That’s why packaging design comparison should happen early, not after the marketing campaign is already booked.
Domestic and overseas production have different clocks. A domestic converter in Pennsylvania may be faster for proofing and shipment, especially for short runs. An overseas factory in Shenzhen can be more cost-effective on larger quantities, but freight and customs add uncertainty. In my Shenzhen facility visits, I’ve seen a perfect production schedule get derailed by one skipped QC signoff or a typo in the shipping mark. One time, a pallet label was off by a single digit and suddenly everyone on the floor was moving with the energy of people who had just heard the fire alarm. That’s why buffer time matters. If the box launch is tied to product launch, build at least 10 to 15 business days of cushion. More if you’re doing retail packaging with a national rollout.
What speeds things up? Final artwork, standard materials, simple print, and one decision-maker. What slows things down? Structural revisions, finish changes, rushed proofs, and committee feedback from six people who each want their own opinion on the shade of black. Packaging design comparison works best when the brief is locked before sampling starts.
If you’re planning ecommerce packaging or custom printed boxes for a seasonal drop, I’d recommend ordering samples earlier than feels necessary. Waiting for the “perfect final design” usually costs more than sampling a good-enough structure now and refining it. I learned that the hard way with a candle brand in Portland that lost a holiday window because the insert depth changed twice. Pretty packaging. Very late packaging.
Step-by-Step Packaging Design Comparison Checklist
Use this packaging design comparison checklist when you want to make the decision with your head, not your ego.
- Define the goal. Are you trying to cut cost, improve shelf appeal, protect the product, or elevate package branding? Pick one primary goal first.
- Compare structure options. Keep product dimensions identical across all versions so the comparison stays fair.
- Compare quotes apples-to-apples. Same quantity, same material, same print method, same finish, same delivery terms.
- Review physical samples. Check strength, print alignment, color consistency, glue quality, and assembly speed.
- Score the options. Give each design numbers for cost, performance, brand fit, and timeline.
- Choose based on business value. The winner is the design that supports the product and margin, not the one with the flashiest mockup.
I like using a simple scoring matrix because it keeps everyone honest. For example, cost might be weighted at 35%, durability at 25%, brand impact at 20%, assembly speed at 10%, and lead time at 10%. If a luxury skincare brand wants a premium feel, brand impact may weigh more. If a food startup in Atlanta is fighting to stay profitable, cost may matter more. The weights change. The math still helps.
Here’s a quick mini-scorecard format I use in meetings:
- Option A: folding carton, 24pt SBS, matte AQ, $0.44/unit
- Option B: rigid box, 1200gsm board, soft-touch, $1.92/unit
- Option C: corrugated mailer, E-flute, one-color print, $0.78/unit
Then we ask: which one protects the product, fits the channel, and supports the target margin? That question strips out the fluff. It also makes packaging design comparison far easier to explain to executives who only care about numbers and deadline risk. Funny how a simple table can calm a room full of opinions. I wish more meetings were that easy; most of them are not, and someone always wants “just one more version” from a team in London or Singapore.
One more tip: test one variable at a time. If you change structure, coating, and insert material all at once, you won’t know what improved the result. I’ve seen teams “optimize” five things and end up unable to explain why the box cost $0.19 more. That is not optimization. That is confusion with a production file.
Common Mistakes in Packaging Design Comparison
The first mistake is obvious: choosing based on looks alone. A box can look beautiful in a render and still fail in transit, on shelf, or in a fulfillment center. I’ve watched this happen with cosmetic packaging that used a gorgeous soft-touch finish but showed scuffs after only a few hundred handlings. The brand loved the sample. The warehouse in New Jersey did not. The warehouse, as usual, had the final word.
The second mistake is comparing quotes without confirming what’s included. Tooling, inserts, freight, proofing, and storage can all be separate charges. If one quote includes them and the other doesn’t, the comparison is fake. That’s not harsh. It’s math, and math is usually less forgiving than the brand deck.
The third mistake is skipping samples. Digital visuals are useful, but they do not reveal score lines, tuck fit, glue tension, or whether the print will crack on a fold. I once saw a product packaging run in Suzhou where the artwork wrapped 1.5mm too far over the side panel. The digital file looked fine. The sample looked crooked. Guess which one got approved too early by a rushed team? Yep. The crooked one. Everyone suddenly became very interested in “tolerances,” which is packaging’s favorite word after “reprint.”
The fourth mistake is overcomplicating the box. Too many finishes can make the piece feel busy and raise cost without improving conversion. A lot of brands think more foil, more embossing, more coating equals better branding. Sometimes yes. Often no. Simpler custom printed boxes can perform better because the message is clearer and the production risk is lower, especially on a 10,000-piece run in Guangdong.
The fifth mistake is ignoring operations. If the box is a pain to assemble, it will annoy the warehouse. If it doesn’t stack well, it will annoy logistics. If it takes too long to pack, it will annoy everyone with a stopwatch. Good packaging design comparison includes the people who touch the box after the sale, not just the people who approve the artwork.
Expert Tips for Smarter Packaging Design Comparison
Ask for side-by-side quotes in the same format. I mean exactly the same. Same size, same board, same finish, same quantity, same shipping terms. If one supplier quotes FOB and another quotes DDP, you are not comparing anything useful yet. You’re comparing accounting styles. I have had to explain this in more meetings than I care to remember, usually while staring at a spreadsheet that looked like it had been assembled by committee and caffeine.
Keep one variable at a time. Change the material, not the structure, if you want to know whether the new board was worth it. Change the finish, not the artwork, if you want to isolate the premium effect. This sounds boring. It works. A factory in Dongguan will thank you for it, and so will your budget.
Use a weighted scoring matrix. I’ve seen teams save 12% on packaging spend simply by giving cost and assembly more weight than decorative finish. That doesn’t mean you strip the brand down to cardboard and hope for the best. It means you stop paying extra for details that don’t move the business result.
Negotiate before you cut quality. Ask whether the supplier can reduce cost through a different board grade, a lighter insert, or a simpler finish. In one negotiation, I saved a client $2,300 by switching from full-board foam inserts to molded pulp inserts, and the unboxing still felt premium because the print and fit were clean. Smart reduction beats random trimming every time. Honestly, I think “less expensive but well-executed” is usually more elegant than “all the finishes, please.”
If you can, visit the factory or request a live video review. I’ve stood on lines where the prototype looked pristine, but the production team was fighting a glue application issue that would have caused edge lift on 8,000 units. That sort of thing never shows up in a static PDF. A 10-minute video call can save a 10-day headache, especially if the factory is in Shenzhen and you’re trying to avoid a surprise during evening shift.
Use reputable standards to guide testing. For shipping durability, ISTA testing is worth asking about. You can read more at ISTA. For broader packaging sustainability guidance, the EPA has practical resources. Standards do not replace judgment, but they do stop teams from pretending a pretty box is automatically a strong one.
My final advice: keep the conversation grounded in your business model. A luxury launch in New York, a food subscription in Phoenix, and a supplements line in Toronto need different answers from the same packaging design comparison. That’s normal. What is not normal is forcing one design philosophy onto every product and then acting surprised when the costs don’t cooperate. Packaging has a way of humbling people that way.
FAQs
What should I compare first in packaging design comparison?
Start with product fit, protection, and total landed cost. If the box cannot protect the product or fit the workflow, the design is already failing, even if the render looks expensive. A 350gsm C1S carton that fits your bottle correctly is better than a premium-looking box that arrives 2mm too tight.
How do I compare packaging design cost quotes accurately?
Use the same specs for every quote: size, material, print, finish, quantity, and delivery terms. Ask whether tooling, samples, inserts, and freight are included so you do not compare fake apples to real oranges. If one quote is $0.44 per unit at 10,000 pieces and another is $0.52 with freight included, the lower price may not actually be cheaper.
How long does packaging design comparison usually take?
A basic comparison can take a few days if the brief is clear. If you need samples, revisions, or custom tooling, expect several weeks from first concept to final approval. A realistic factory timeline is usually 12 to 15 business days from proof approval for simpler runs, with longer lead times for rigid boxes and specialty finishes.
What is the biggest mistake in packaging design comparison?
The biggest mistake is choosing the prettiest design without testing cost, durability, and production speed. That is how brands end up paying more for a box that looks nice and performs badly, especially when the structure requires a $120 die setup and slower hand assembly.
Can packaging design comparison help reduce packaging costs?
Yes. Comparing structure, material, finish, and assembly requirements often reveals cheaper options with nearly the same brand impact. A simpler design can save money on printing, labor, freight, and damage claims, sometimes by 10% to 18% on a full launch order of 5,000 to 10,000 units.
If you want better results from packaging design comparison, stop treating packaging like an afterthought and start treating it like a production decision. The right structure can protect margin, speed up fulfillment, and make your brand feel more expensive without actually being more expensive. That’s the sweet spot. And yes, I’ve seen it happen with everything from luxury skincare to plain old ecommerce shipping cartons in Shenzhen, Chicago, and New Jersey. Compare smart, ask for real numbers, and your packaging design comparison will pay you back long after the launch party is over.
Related packaging resources
Use these related guides to compare specs, costs, quality checks, and buyer decisions before making the final call.