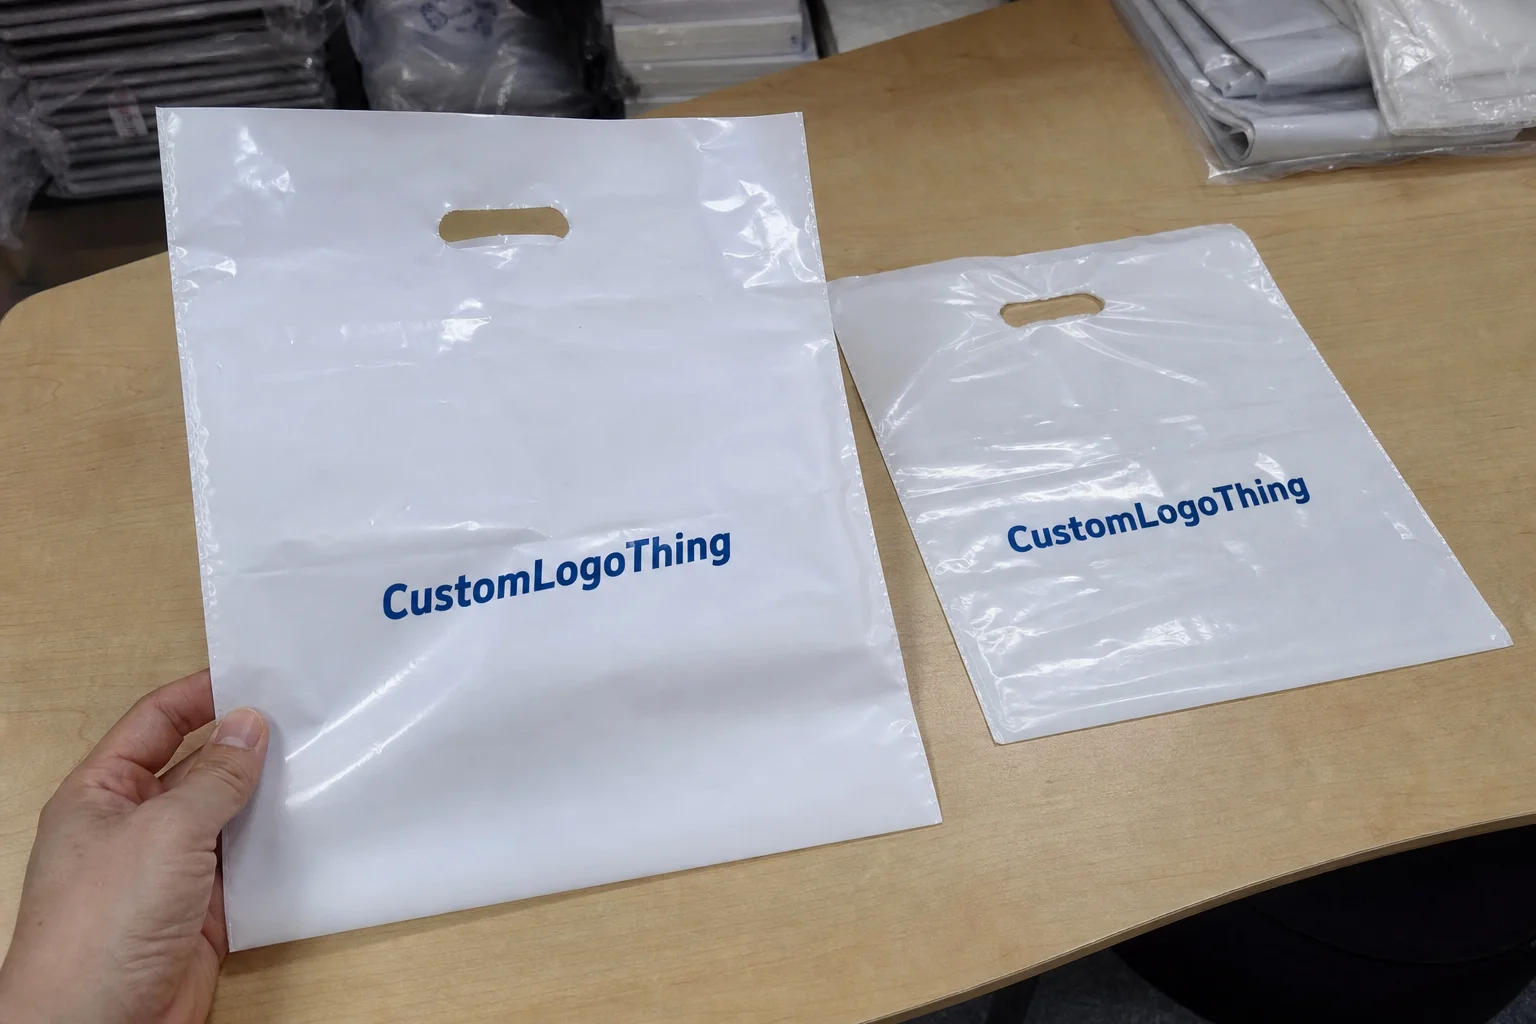
Printed polythene bags sit in an awkwardly practical part of packaging. They are not the most glamorous format on the shelf, but they do two jobs at once: protect the product and carry the brand in a space that gets handled, stacked, folded, and sometimes ignored. That combination is exactly why buying them well matters.
The best orders tend to start with a simple question: what is the bag actually expected to do? A bag for soft apparel, a bag for spare parts, and a bag for a retail insert may all share the same material family, but they do not need the same gauge, seal style, or print coverage. Treating them as interchangeable is where a lot of avoidable cost and disappointment begins.
The material itself is usually straightforward. The decisions around it are not. Film structure, ink system, artwork quality, seal strength, and handling route all influence whether the final bag feels cheap, looks crisp, or survives the trip to the customer. Buyers who understand those trade-offs tend to get better outcomes and fewer surprises.
Printed Polythene Bags in Real Packaging Situations
Printed polythene bags are used in more places than people assume. Retail apparel is the obvious example, but they also show up in hardware kits, foodservice liners, promotional packs, e-commerce inserts, warehouse protection, and simple product grouping. Their appeal is not subtle: low material usage, low weight, and a printable surface that can still look clean when the rest of the pack is working hard.
There is a reason experienced buyers often keep them in the mix even when they also use cartons or mailers. A carton protects well, but it uses more board, weighs more, and usually costs more to move. A bag can be the right answer when the product needs a lighter touch, especially if the product is already boxed or folded inside a larger shipper. For that reason, many teams pair them with other formats from Custom Packaging Products or use Custom Poly Mailers as the outer layer and the bag as the internal presentation piece.
The strongest bag designs are rarely the loudest. A modest, well-registered print on the right film can look more expensive than a heavy design printed on poor material. That is not a branding slogan. It is a production reality. If the film is clean, the print is aligned, and the seal is even, the package gives the impression of control, which is exactly what customers read subconsciously.
There is also a distribution angle. If the bag will sit in a warehouse, move through a parcel network, or be opened and reclosed by a customer, its role changes from “wrapper” to “handling surface.” In that setting, a weak seal or brittle film becomes visible quickly. A bag that performs well in a warehouse is usually the one that was specified with the full route in mind, not just the first impression.
A lighter bag can outperform a heavier one if the resin, seal profile, and print coverage are matched to the actual load and handling path.
That is why the best spec sheets are boring in a good way. They usually show a sensible size, a realistic thickness, a clean artwork file, and one or two extra checks that prevent trouble later. In practice, the boring order is often the profitable one.
How the Printing and Bag-Making Process Works
Most printed polythene bags begin as polyethylene resin, which is melted and formed into film. That film is cooled, wound into rolls, printed, and then converted into bags through cutting, folding, and sealing. The sequence sounds simple. The results depend on details that are easy to miss if you only look at the finished sample.
Flexographic printing is the standard workhorse for most bag runs. It uses flexible plates and inks designed for fast production on film. Once the setup is stable, flexo gives good consistency across repeated orders, which is why it remains the default for many custom packaging jobs. The trade-off is setup discipline. Plate-making, registration, and artwork prep matter more than they do on a casual print job, and sloppy files show up quickly.
Digital print has a place, especially for short runs or rapid prototyping, but it does not replace flexo for every buyer. On film, the economics still favor flexo when quantities rise and the artwork is stable. If the order is likely to repeat, or if the logo needs the same color profile across several production cycles, flexo usually gives the cleaner commercial path.
Artwork quality is not a minor input. Low-resolution images, unconverted fonts, missing dielines, and vague color references create the kind of back-and-forth that delays production before a roll of film is even touched. A clean vector file, a clear color target, and accurate bleed information save far more time than they cost. Suppliers ask for those things because plate-making and press time are expensive to correct once the job is underway.
Bag construction changes behavior just as much as the print does. Side seals, bottom seals, and gussets each create a different shape and load distribution. A gusset adds volume without forcing the footprint wider. A side seal can improve certain product fits. A bottom seal may be fine for lightweight applications but less suitable for sharp or bulky items. These are functional decisions, not cosmetic preferences.
Good suppliers also check the non-graphic details. Seal temperature, film tension, ink adhesion, and registration accuracy affect whether the finished bags stack properly and open the way they should. Basic quality control often includes dimensional checks, seal integrity testing, print registration review, and inspection for pinholes or contamination. Those checks do not make the product fancy. They make it usable.
For buyers with multiple packaging formats, keeping dimensions and visual language aligned can reduce waste across the board. If the outer mailer, the insert bag, and the carton all tell the same visual story, the pack feels deliberate instead of stitched together from three unrelated pieces.
Film Gauge, Seal Strength, and Finish Choices
Thickness is the first number many buyers ask for, but gauge alone does not determine performance. A thicker film can still fail if the seal is weak or the resin mix is wrong for the load. A lighter film can work well if the contents are soft, the edges are smooth, and the handling conditions are modest. In other words, thickness is only one variable in the system.
For general retail and light industrial use, many buyers look somewhere in the 30 to 100 micron range, though the useful range depends on product weight, shape, and how the bag will be handled. Light apparel and soft goods can often sit at the lower end. Sharp, dense, or awkward items usually need more material. If puncture risk is real, ask about tear resistance and dart impact as well as nominal thickness.
LDPE is common because it bends well, seals well, and gives a softer hand feel. HDPE is stiffer and can feel crisper, which some products benefit from, but it is less forgiving when stretch is needed. Blends are used when the buyer wants a balance of toughness, clarity, and processing stability. There is no universal winner. The right film depends on whether the package needs to flex, stack, hang, or resist abrasion.
Finish changes how the bag reads on shelf. Clear film supports visibility and works well when the product should be seen. Opaque film hides the contents and can make the pack feel more controlled or premium. Matte finishes reduce glare and can soften a graphic, but they also reduce visual punch if the design depends on bright contrast. Buyers sometimes choose on appearance alone and discover later that the finish interfered with legibility or stock visibility.
For product routes that involve shipping stress, it helps to think in testing terms. Transit methods such as those documented by ISTA are useful references even when a buyer does not commission formal lab testing. They frame the real question: will the bag survive compression, vibration, and handling, or only a neat bench test? That distinction matters more than a glossy proof.
Where regulations enter the picture, the conversation gets more specific. Food contact, migration risk, and material declarations should be checked explicitly rather than assumed. Resin grade, ink choice, and intended use all affect suitability. A supplier that answers those questions clearly is doing more than selling film; it is helping reduce compliance risk.
On sustainability claims, paper comparisons are sometimes easier to discuss than plastic ones, which is why references such as FSC can be useful for benchmarking other packaging components. It is not a plastics standard, but it helps keep conversations about alternatives grounded rather than rhetorical.
Cost, Pricing, MOQ, and Unit Cost Drivers
Pricing for printed polythene bags is usually driven by a small set of variables: bag size, film thickness, number of print colors, artwork coverage, quantity, and any special finishing or sealing requirements. That list looks simple, but each variable affects the others. A larger bag uses more film, a heavier gauge uses more material, and extra colors add plate and setup cost before the first usable bag appears.
MOQ is not a sales tactic so much as a production reality. Setup costs exist whether the order is 1,000 pieces or 50,000. Plates, registration, color matching, and machine changeover all need to be paid for somewhere. On small runs, those costs are spread across fewer units, so the unit price rises. That is normal. It is one reason a clean repeat order often prices much better than a one-off trial run.
As a practical buying pattern, 1,000-piece custom orders usually carry a clearly higher unit cost than 5,000 or 10,000-piece orders with the same spec. That gap is not mysterious. The production line does not care that the order is small. It still has to be set up, checked, and tuned before the run can start. In many cases, quantity lowers the per-unit price faster than a small reduction in thickness ever will.
Another cost trap is comparing quotes that are not built on the same assumptions. One supplier may include plates and basic proofing, while another lists them separately. Freight can be quoted ex-works or delivered. Carton packing, overage allowances, and artwork revisions may or may not be included. A quote is only useful if the buyer can tell what is actually inside it.
| Option | Typical Cost Impact | Best Fit | Buyer Tradeoff |
|---|---|---|---|
| Plain film, no print | Lowest | Internal packing, utility use | No branding, lower shelf value |
| 1 to 2 spot colors | Moderate | Retail, inserts, basic brand marking | Simple artwork only, but plates still apply |
| 3 to 4 colors or larger coverage | Higher | Promotional packs, stronger shelf presence | More setup, more ink, higher proofing risk |
| Thicker gauge or specialty finish | Higher | Heavier products, extra protection, better feel | More material cost and sometimes more lead time |
If budget is tight, reducing print complexity is often safer than reducing film performance. A thinner bag that fails in transit can erase the savings several times over once replacements, complaints, and waste enter the picture. The lowest initial quote is not always the cheapest purchase.
Freight and cartonization can also matter more than expected because bags are light but bulky. A low-value product can become expensive to ship if it is poorly packed or oversized cartons are used. Packaging buyers who think in landed cost rather than unit cost usually make better decisions.
Production Steps and Lead Time From Artwork to Delivery
A realistic lead time starts before production. The first gate is artwork and specification review. If the files are clean and the dimensions are fixed, the order can move quickly. If the artwork needs rebuilding, the size is still being debated, or the print count keeps changing, the schedule stalls before the press is involved.
Once the design is approved, the supplier prepares plates or print setup, confirms color targets, and schedules the run. After that comes printing, drying or curing as needed, conversion into bags, packing, carton labeling, and dispatch. The sequence is standard, but the timing depends heavily on quantity and complexity. Straightforward reorders tend to move faster than first-time custom work.
For many buyers, a sensible planning window is about 12 to 20 business days after proof approval. That can shrink on simple repeats and stretch on large or highly printed orders. Special finishes, tighter color control, or a busy factory schedule can extend it further. Rush work is possible in some cases, but it usually compresses review time and can raise cost for everyone involved.
The delays that hurt most are usually self-inflicted. A buyer who has not settled the final dimensions is still preventing plate work from beginning. A file without bleed or with missing font conversions creates another round of checks. If a launch, seasonal shipment, or trade event is driving the order, those decisions need to be locked early.
The sequence below is what a well-managed order generally looks like:
- Artwork and specifications submitted.
- Technical review for size, printability, and bag construction.
- Digital proof or sample approved.
- Setup, plate making, or print preparation completed.
- Production run carried out with in-line checks.
- Finishing, packing, and carton labeling completed.
- Shipment booked and delivered.
Buyers can shorten turnaround by sending the final bag dimensions, target thickness, artwork files, quantity, and required delivery date in the first message. If print accuracy matters, ask for a proof early enough to make corrections without affecting the launch schedule. That one habit avoids expensive scrambling later.
It also helps to ask how the supplier thinks about transit risk. A bag that is fine in a short-handled warehouse can still fail after repeated handoffs, compression, or vibration. If the route is demanding, the spec should reflect that from the start rather than being revised after a problem shows up.
Common Mistakes That Create Weak Bags or Poor Print
The most common mistake is specifying a film that is too light for the product. The failure mode is predictable: stretch, seal split, edge tear, or puncture. It is tempting to save a small amount per unit by reducing gauge, but the real cost often appears later in replacements, returns, and complaints. A cheap bag that fails is not a cheap bag.
Artwork problems come next. Low-resolution files, too many tiny elements, and overcomplicated gradients rarely survive film printing gracefully. On screen, they may look sharp. On bag stock, they can turn muddy or uneven. Bold type, disciplined color use, and simple contrast usually print better than intricate detail that has little chance of holding up in production.
Handling conditions are easy to overlook. Bags stored in heat, stacked for long periods, or filled with sharp components behave differently from bags used for soft folded goods. Manual packing and machine packing also change the stress profile. If the product will rub, shift, or press against the bag wall, that needs to be part of the spec discussion.
Sampling can mislead if the sample does not reflect the final process. A proof may show color and layout, but it may not prove the final seal performance. A hand-cut sample can help with fit, but it is not the same as a production bag made on the actual line. Buyers sometimes treat a mock-up as a performance guarantee and then wonder why the finished order behaves differently.
Useful habit: judge the proof against the real use case, not only against the art file. A visually accurate bag that cannot survive the load is still the wrong product.
Storage matters too. Film can take on fold memory, print can scuff, and dust can cling to the surface if cartons are handled badly. None of that sounds dramatic, but it affects how the product reaches the customer. Packaging is a material system. It does not stop being material just because it has a logo on it.
Expert Ordering Tips and Next Steps Before You Quote
If you want a clean quotation, send the essentials together: bag dimensions, target thickness, artwork files, quantity, print colors, closure style, and delivery date. That may sound basic, but it is the fastest way to avoid a quote built on assumptions. Assumptions are where budget drift starts.
For brand-sensitive work, ask whether the supplier can provide a production proof, print sample, or technical comment before the run starts. That matters most when the logo is small, color consistency is important, or the bag sits in a customer-facing setting. The point is not to be difficult. The point is to catch avoidable issues before plates are made and press time is committed.
Communication quality is often a better predictor of order success than the first price you are shown. A supplier that explains why a thicker film is needed, flags artwork risks, or warns that the requested timing is too tight is doing real work. A cheap quote without technical context may be less useful than a slightly higher one that reflects the actual production constraints.
If the order sits between a few options, ask for a recommendation tied to the use case, not a generic “best” answer. A retail display bag, a shipping insert bag, and a protective inner bag are different problems. Product weight, shelf presentation, packing method, and budget all change the right choice.
That is the practical test for printed polythene bags: match film, print, and seal to the route the bag will actually travel. Do that well, and the package carries the brand cleanly, protects the product properly, and stays inside budget without relying on luck.
Frequently Asked Questions
What are printed polythene bags made from?
They are typically made from polyethylene film, chosen for flexibility, sealability, and cost control. The final feel and strength depend on resin blend, film thickness, and whether the bag is LDPE, HDPE, or a blend.
How do I choose the right thickness for printed polythene bags?
Start with the product weight, edge sharpness, and handling route. Soft retail goods often work with lighter film, while heavier or sharper items usually need a stronger construction with better tear and puncture resistance.
What affects the cost of printed polythene bags the most?
Size, thickness, print colors, total quantity, and finishing details are the biggest drivers. Small orders usually cost more per unit because setup, plates, and proofing are spread across fewer bags.
How long does production usually take for printed polythene bags?
Lead time depends on artwork readiness, proof approval, quantity, and the current production queue. Clean files and final specifications usually shorten turnaround because there are fewer revisions before the run begins.
Can I order a small run of printed polythene bags?
Yes, but the unit price is usually higher because setup costs are divided across fewer pieces. If you are testing a new product or design, ask about MOQ, proofing, and whether a short run fits the budget and schedule.


