Buyer Fit Snapshot
| Best fit | Subscription Box Unboxing Photography projects where brand print, material claims, artwork control, MOQ, and repeat-order consistency need to be specified before quoting. |
|---|---|
| Quote inputs | Share finished size, material target, print colors, finish, packing count, annual reorder estimate, ship-to region, and any compliance wording. |
| Proofing check | Approve dieline scale, logo placement, barcode or warning zones, color tolerance, closure strength, and carton packing before bulk production. |
| Main risk | Vague material claims, crowded artwork, missing packing details, or unclear freight terms can make a low unit price expensive after revisions. |
Fast answer: Subscription Box Unboxing Photography: Board, Finish, Dieline, and Unit Cost should be specified like a repeatable production item. The safest quote records material, print method, finish, artwork proof, packing count, and reorder notes in one written spec.
Production checks before approval
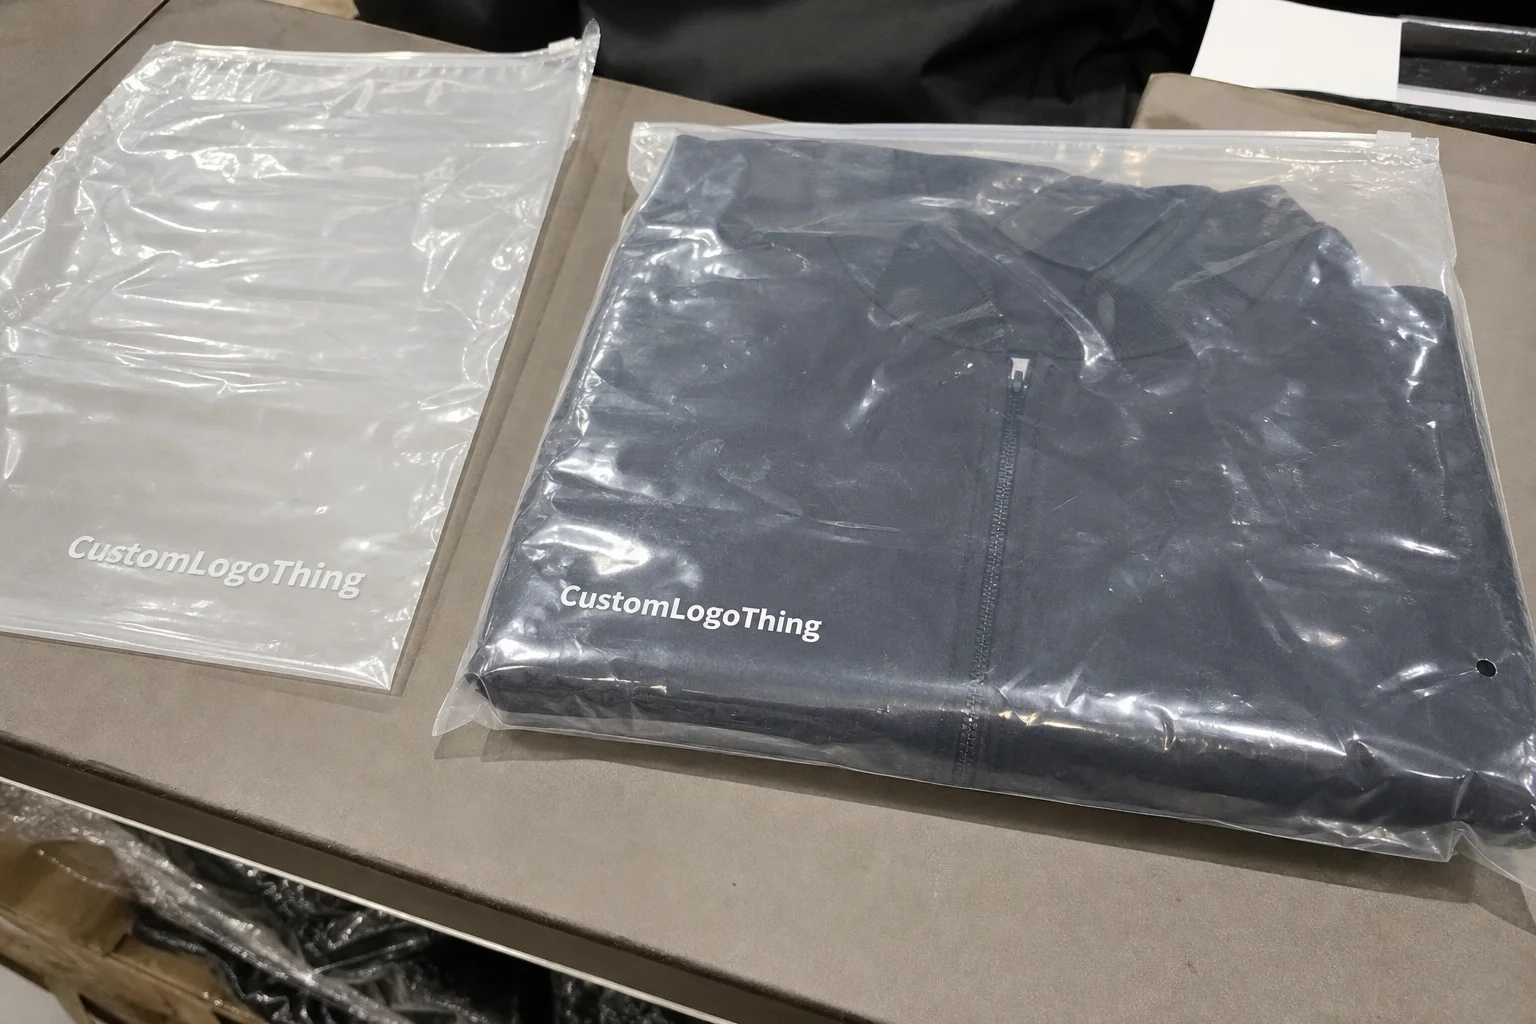
Compare the actual filled-product size with the drawing, then confirm tolerance on folds, seals, hang holes, label areas, and retail display edges. Reserve space for logos, QR codes, warning copy, and material claims before decorative graphics fill the panel.
Quote comparison points
Review material grade, print process, finish, sampling route, tooling charges, carton quantity, and freight assumptions side by side. A quote is only useful when the supplier can repeat the same color, closure quality, and packing count on the next order.
The fastest way to make a subscriber feel like they bought something premium is not a longer caption, a louder ad, or a bigger discount. It is stronger subscription box unboxing photography tips executed in the first frame, because most people decide how a box feels within seconds of seeing the opening sequence. I’ve watched that judgment happen on a factory floor in Jersey City, New Jersey, where a team spent three hours debating a matte black mailer with white foil against a kraft box with teal ink; the camera made the answer obvious. One looked like a $14 add-on. The other looked like a gift. And yes, the finance guy was very upset that the prettier one won.
That is why subscription box unboxing photography tips are really about visual storytelling, not just documentation. You are photographing the exterior, the reveal, the layers, the product arrangement, and the emotional reaction all at once. In my experience, the best images do more than show what shipped; they manufacture anticipation, and that changes everything for retention, referrals, and social proof. Honestly, if your photos make the box feel like an afterthought, people can smell that from a mile away.
Subscription Box Unboxing Photography Tips: Why First Impressions Matter
Most subscribers do not inspect a box like a packaging engineer. They react. A clean logo on the lid, a tight tissue fold, a branded sticker, and a single insert can push perceived value up fast. I’ve seen a beauty box with $18 worth of contents look like a $60 set simply because the internal structure was disciplined and the photography respected that structure. That is one of the most underrated subscription box unboxing photography tips: shoot the packaging as if it were a product with a margin attached, because it is.
Unboxing photography is the visual record of opening order. First the mailer or shipper. Then the seal. Then the lid lift. Then the reveal of tissue, crinkle paper, or molded pulp. Then the hero product frame. Finally, the full spread. The sequence matters because the eye reads hierarchy, and the camera captures that hierarchy whether the brand planned it or not. I remember one supplier review in Newark, New Jersey, where the brand team kept saying, “It’s just the inside.” Sure. And yet the inside is what gets photographed, shared, and judged.
Packaging design drives the image more than most teams expect. Color placement, insert copy, interior print, and brand marks all influence what the lens sees. A 350gsm C1S artboard insert with a soft-touch laminate catches light differently than uncoated SBS board, and that can affect whether a logo pops or disappears. Good subscription box unboxing photography tips start with that reality: the packaging must be photo-friendly before the shoot ever begins.
I remember a client meeting in Chicago, Illinois, where a subscription snack brand wanted “more premium” photography without changing the box. We tested three tissue colors, shifted the logo sticker from glossy to matte, and removed one filler layer. The photos immediately read cleaner. Honestly, I think many teams spend too much on cameras and too little on the object in front of the camera. A fancy lens cannot rescue a box that looks like it was assembled by someone late for lunch.
“A subscriber may never say it out loud, but the first photo tells them whether the brand respects detail.” That was a line a creative director told me during a supplier review in Portland, Oregon, and I’ve seen it hold up more times than I can count.
The commercial value is obvious. Strong visuals support paid media, landing pages, email flows, and referral posts. They also reduce friction in the buying journey because customers can picture what they will receive. In other words, subscription box unboxing photography tips are not decoration. They are conversion work. And if your photos are bland, well, so is your conversion rate (sorry, not sorry).
How Subscription Box Unboxing Photography Works
Think of the shoot like a sequence chart, not a scrapbook. The exterior shot should establish brand identity in one glance. The lid lift should reveal texture and structure. The mid-open frame should show organization. The detail shot should prove quality. The final spread should make the contents feel abundant without looking chaotic. This is where subscription box unboxing photography tips become operational, not inspirational.
Customers experience that sequence differently depending on the channel. On Instagram, they scan a square crop in less than a second. On TikTok, they expect motion and surprise, but they still pause on a still cover image. On ecommerce product pages, they want clarity and proof. In email campaigns, a horizontal image has to work with text above it, often in a 600px-wide layout. The same box can therefore need four visual treatments, and the photographer should plan for all four.
Natural light usually wins for packaging with gloss varnish, foil stamping, or metallic inks. Harsh overhead LEDs create hotspots, and I’ve seen them flatten a beautiful embossed logo into a shiny blur. A north-facing window with a diffuser often gives the best balance for corrugated mailers, kraft cartons, and matte-laminated sleeves. That said, studio lights have their place when you need repeatability across 12 SKUs or a full seasonal program. Good subscription box unboxing photography tips always start with the light source, because the wrong one can make premium packaging look cheap in one frame.
Framing matters just as much. A 4:5 crop is often ideal for feeds, while 9:16 vertical formats help stories and reels thumbnails. Side angles emphasize depth. Top-down shots are useful for layouts and contents. Eye-level angles tend to make a box feel more human and gift-like. Prop styling should support the brand story, not hijack it; a linen napkin can feel elegant, but five props, a plant, a candle, and a marble slab can turn a simple box into clutter.
Still photography and short-form video are not competitors. They are different jobs. A still image can freeze the exact moment the tissue peels back. A 7- to 12-second clip can show the reveal motion. A hybrid workflow often gives the best ROI, especially for subscription brands that need content across ads, landing pages, and organic social. If you only budget for one format, choose the one that supports your highest-value channel, then plan subscription box unboxing photography tips around that deliverable first.
Key Factors Behind Strong Subscription Box Unboxing Photography Tips
Lighting is the first variable I check. Diffused window light gives you soft shadow transitions, which helps corrugate, paper wrap, and matte coatings look richer. If the packaging includes foil, you may need a reflector at 30 to 45 degrees to control glare. In one supplier negotiation at a Shenzhen facility in Guangdong, the brand team was convinced the issue was print quality. It wasn’t. The foil looked fine under warehouse fluorescents, but it fell apart under bad photo light. That’s a classic reminder that subscription box unboxing photography tips are tied to material behavior, not just camera settings.
Backgrounds and surfaces should reinforce the brand. Kraft mailers usually look better on off-white plaster, pale oak, or textured stone. Black luxury mailers often need a lighter surface to keep the silhouette readable. Patterned backgrounds are risky unless they echo the brand system, because the viewer’s eye can only hold so much at once. I prefer one controlled surface and one supporting accent, not a busy set that competes with the pack.
Color theory is not optional. Warm neutrals tend to increase the perceived warmth of wellness, food, and self-care brands. Cooler palettes can make tech, stationery, and beauty boxes feel more precise. Seasonal accents should be subtle unless the campaign is explicitly seasonal. A red ribbon or gold pine sprig can be useful in a winter set, but if the brand palette is sage and ivory, the prop should not shout over the packaging. Smart subscription box unboxing photography tips use contrast to guide attention, not to create noise.
Packaging consistency is another point where teams slip. If the outer box says “minimalist luxury” but the interior is packed with mismatched fillers, the photo tells on you. The camera catches inconsistent typography, low-resolution inserts, and adhesive seams faster than most brand decks do. I’ve reviewed boxes where the exterior looked polished and the inside looked like a procurement compromise. The product was fine. The image was not. I wanted to scream into a crinkle-paper-filled void, but I kept it professional.
Pricing ranges depend on volume and intent. A DIY setup can be under $250 if you already have a phone with a decent sensor, a window, a white foam board, and a $20 backdrop. A mid-tier creator kit with light stands, two softboxes, and a tripod often lands around $500 to $1,200. Professional shoots can run $1,500 to $5,000 or more, especially if you need retouching, multiple versions, and licensing for ads. Here’s the practical test I use: spend the most where the images will be reused the most. That is one of the most commercially useful subscription box unboxing photography tips I can offer.
| Option | Typical Cost | Best For | Tradeoffs |
|---|---|---|---|
| DIY phone setup | $50-$250 | Testing, small launches, organic social | Less consistency, limited retouching, higher reshoots |
| Freelancer or creator kit | $300-$1,200 | Monthly content, ecommerce refreshes, email campaigns | Quality varies by operator, may need tighter direction |
| Professional studio shoot | $1,500-$5,000+ | Paid ads, launch assets, print and press kits | Higher upfront spend, scheduling lead time |
File quality matters because a beautiful image that exports at 1200px wide will age badly the moment the brand wants print or paid media. I recommend at least 3000px on the long edge for flexible web use, and higher if you expect cropping. Deliverables should include JPGs for daily use and layered TIFFs or high-quality masters for archival needs. If the client wants reuse across multiple channels, define usage rights before the shoot. That protects both sides, and it is one of those subscription box unboxing photography tips that saves arguments later. Trust me, nobody enjoys a licensing email chain that reads like a hostage negotiation.
For packaging and sustainability teams, a useful reference is the EPA recycling guidance, especially if the box is designed to highlight recycled content or curbside recyclability. If you want broader packaging context, the Packaging Machinery Manufacturers Institute site offers useful industry background. Both help frame decisions beyond aesthetics, which is where the best photography work begins.
How Do You Plan Subscription Box Unboxing Photography Tips for a Shoot?
Planning a shoot starts with the box, not the camera. I always ask what the image needs to do: sell on a landing page, support an Instagram carousel, feed paid ads, or document a new packaging structure. Once that goal is clear, the rest of the subscription box unboxing photography tips become easier to apply. A box built for conversion needs a different frame than one built for social shares, and pretending otherwise just burns budget.
The next step is deciding what must be visible in every frame. Maybe the logo mark needs to stay in the upper third. Maybe the insert copy is the hero. Maybe the tissue fold is the brand’s signature. I’ve sat through supplier meetings in Dallas, Texas, where a team argued for 40 minutes about whether the tissue should cover the product 100% or 80%. That sounds ridiculous until you see the photo impact. Small reveal choices change the whole perception of quality.
Then you need a shot hierarchy. Start with unopened box, move to opening sequence, then detail shots, then the full spread, then lifestyle or hand-in-frame images. That order keeps the narrative intact and prevents the classic “wait, did we forget the lid close-up?” problem. The best subscription box unboxing photography tips usually come down to structure. The prettier the setup, the more important structure becomes. Gorgeous chaos is still chaos.
Finally, build in a backup plan. Extra tissue. Extra sticker. Extra sample box. Extra insert. I have seen a single crushed corner or torn flap end a shoot early because nobody ordered a spare. If your packaging comes from a factory in Dongguan, China or Los Angeles, California, ask for at least one pristine sample for the camera and one production sample for stress testing. A little redundancy saves a lot of swearing.
Step-by-Step Process and Timeline for a Smooth Shoot
The cleanest shoots begin before the scissors come out. I like to start with a one-page shot list that includes exterior, opening, insert, detail, hero, and lifestyle frames. Add notes on which product needs the front face shown, which insert has the strongest copy, and whether the brand wants the lid fully open or partially angled. This simple step keeps everyone aligned and prevents the “we forgot the inside flap” problem that happens more often than teams admit. Strong subscription box unboxing photography tips are usually just disciplined pre-production.
Prep often takes longer than people expect. For a basic shoot, I budget 20 to 30 minutes to inspect the box, remove transit dents, test the surface, and place the light. If the set includes reflective packaging, I add another 15 minutes for angle checks. If the box includes fragile items, I open a second sample so we have a backup. That sounds fussy until you lose a hero product to a fingerprint or a torn tissue edge. And yes, someone will absolutely touch the glossy lid right before you yell “don’t touch it.”
Shot order matters because opening a box is irreversible. I usually capture the unopened exterior first, then the seal, then a 25% reveal, then a 50% reveal, then the full opening. After that, I move to details: print texture, insert messaging, tissue folds, product labels, and any custom logo elements on hang tags or stickers. Finally, I shoot a flat lay or group spread for use in email and the website. A repeatable order saves time and preserves narrative clarity, which is why I consider it one of the most valuable subscription box unboxing photography tips.
Editing should be practical, not theatrical. Culling removes duplicates and awkward hand positions. Color correction should bring packaging back to actual print output, not fantasy saturation. Cropping should be channel-specific, because a horizontal image that works in a blog header may fail in a social carousel. Consistency checks matter too; if the first three images show a warm white background and the last three drift blue, the set feels accidental. I’ve sat with clients in conference rooms in Brooklyn, New York, where the only difference between “approved” and “redo” was a 200 Kelvin shift. That tiny shift can make a box look either premium or tired.
Batching is where subscription brands save money. If a company ships three monthly variants, shoot them in one session using the same light, same surface, and same lens distance. That creates visual continuity and reduces labor. A 2-hour batch can replace three separate 45-minute sessions once the workflow is dialed in. For teams with recurring box drops, this is the difference between content that keeps up and content that lags a month behind.
Timeline expectations should stay realistic. A small DIY session might be done in 45 to 60 minutes. A freelancer-led set can take 2 to 4 hours. A full studio day may stretch to 6 or 8 hours if there are multiple box types, props, and editing notes. Delivery often happens within 2 to 5 business days for a simple job, or 7 to 12 business days when retouching and usage packages are involved. For custom packaging runs, proof approval to finished production typically takes 12-15 business days if the files are locked and the printer is in Los Angeles, California or Dongguan, China. The more variation you need, the more lead time you should build into the plan. Good subscription box unboxing photography tips always account for the calendar, not just the camera.
Common Mistakes That Ruin Unboxing Photos
Overcrowding is the fastest way to make a premium box feel cheap. Too many props, too many angles, too many colors. The packaging disappears. I’ve seen brands place candles, greenery, ribbon, notebooks, coffee cups, and a faux magazine around a box that was supposed to communicate simple wellness. The result looked like a department store display with no focal point. One of the bluntest subscription box unboxing photography tips I can give is this: if the props tell a louder story than the packaging, you have lost the shot.
Mixed lighting is another common failure. Daylight from the left, a tungsten lamp from the right, and a softbox overhead creates color shifts that are hard to fix later. Logos can tint green, white tissue can go beige, and black boxes can pick up purple shadows. If you must mix light sources, control them deliberately. Otherwise, stick to one source and one white balance setting.
Many teams ignore the interior because they think the customer cares mainly about the products. They do care about the products, but the inside of the box is where brand personality lives. Printed flaps, thank-you notes, QR codes, and custom inserts are often the most shareable details. In a client review in Toronto, Ontario, I watched a team debate whether the inner print was “worth the ink cost.” The photos settled it. The interior became the most reposted element in the campaign. Funny how that works.
Damaged packaging is tricky. A crushed corner or scuffed sleeve can happen in transit, especially on corrugated mailers with long ship routes. You can retouch minor flaws, but you cannot retouch a bad structure into a good one. If the box is consistently dented, the issue is likely board grade, tuck fit, or transit testing. This is where packaging standards like ISTA test methods matter; a box that fails handling tests will often fail the camera test too. For handling context, the ISTA site is a useful reference point.
Finally, skipping a shot list creates beautiful but unusable images. I’ve seen gorgeous content sets that lacked a clean hero frame, a crop-safe version, or a detail shot with readable typography. Pretty is not enough. Subscription box unboxing photography tips should support conversion, product pages, email, and social, or the content library becomes expensive wallpaper.
Expert Subscription Box Unboxing Photography Tips for Better Branding
Think like a merchandiser, not just a photographer. The strongest visual element should land where the eye goes first, usually the upper left in Western reading patterns or the center in a top-down spread. If the brand logo is subtle, let the box structure lead. If the insert carries the strongest claim, position it so the copy is visible without strain. That sort of arrangement is one of the most practical subscription box unboxing photography tips because it mirrors how real shoppers scan packaging.
Repeated brand cues build memory. Use the same logo placement, the same tissue print, the same insert border, and the same typographic rhythm across frames. Even a small element, like a navy edge strip or a metallic sticker, can tie a series together. I once worked with a stationery brand in Austin, Texas, that used a single coral dot on every insert and flap. It cost almost nothing to print, but in photos it became the anchor that made the whole system feel deliberate.
A strong content set should usually include four core frames: one hero image, one process image, one texture image, and one human-hand interaction shot. The hero image establishes value. The process image shows the reveal. The texture image proves material quality. The hand interaction shot adds scale and warmth. Without those four, the set can feel flat, even if the box itself is well made. That’s why subscription box unboxing photography tips need a shot taxonomy, not just a mood board.
Angle testing is worth repeating because it creates consistency across months of content. Use the same three angles every time: 45-degree front, straight-on eye level, and top-down. If one angle performs better in ads or on product pages, you will have data instead of guesswork. Honestly, I think too many brands chase novelty when they should be building a repeatable visual library. New angle, same box, same problem.
Premium perception rises when packaging is photographed as a product in its own right. That means clean edges, controlled shadows, and intentional negative space. It also means paying attention to tactile details like embossing, foil, deboss, uncoated textures, and magnetic closures. A custom logo on a rigid lid box can be much more persuasive in a photograph than a busy collage of contents, because the viewer sees confidence before they see quantity.
Mini style guides help teams repeat success. Document the preferred background color, lens distance, crop ratio, and retouching rules. Add notes like “keep tissue folds crisp” or “do not over-brighten kraft stock.” I’ve seen companies waste hours rediscovering what they already knew simply because nobody wrote it down. If a brand shoots monthly, a two-page guide can pay for itself in one session. These are the subscription box unboxing photography tips that turn one strong shoot into a repeatable system.
For packaging durability and material selection, FSC-certified board can also support sustainability messaging if the brand is using responsible sourcing. The Forest Stewardship Council site is useful for checking certification language. If a box is built to support a sustainability story, the photography should reflect that with honest textures and uncluttered framing, not green-themed noise.
Actionable Next Steps for Your Next Shoot
Start with a one-page shot list. Include exterior, reveal, detail, hero, lifestyle, and crop-safe versions. If you only write one thing down before the shoot, make it the opening sequence, because that sequence controls the rest of the story. Strong subscription box unboxing photography tips work best when the plan exists before the lid opens.
Audit the box for photo-friendly elements. Ask three blunt questions: Is the typography readable at 600px wide? Does the color contrast hold under soft light? Does the reveal order feel intentional? If the answer is no, fix the packaging or at least isolate the best pieces for the shoot. A small design correction can save a full reshoot later. I’ve seen a $0.15 per unit change on a 5,000-piece run — switching from a glossy seal to a matte paper sticker in Philadelphia, Pennsylvania — improve the entire frame because the glare stopped eating the logo.
Build a simple test scene with one window, one backdrop, and one prop. Shoot three angles. Keep one variable constant and change the others. That tells you more in 15 minutes than a messy 2-hour session. I like to compare a top-down, a 45-degree angle, and a front-facing frame because those three usually reveal whether the box has structural clarity. If you are producing packaging in Shenzhen, China, or Ho Chi Minh City, Vietnam, ask the supplier for one blank sample and one printed sample before final approval.
Choose your workflow budget based on frequency, not fantasy. If you need images once a quarter, a freelancer or studio may be efficient. If you need weekly content, a small in-house setup can be cheaper after month three. The right choice depends on output volume, approval speed, and how many channels need the same imagery. That is why subscription box unboxing photography tips should always be tied to marketing workload, not just aesthetics.
Create a folder system that makes reuse painless. I recommend folders for raw files, selects, finals, social crops, email crops, and archived masters. Name files with the box name, shot type, and month or campaign reference. A clean file structure sounds boring until a social team asks for a vertical crop at 4:55 p.m. and you have it in 30 seconds. If your printer is in Columbus, Ohio or Xiamen, China, keep the packaging dieline, proof PDF, and final photos in the same archive so nobody wastes a day hunting for a file named final_final2.
Review the last shoot honestly. Did the light flatten the logo? Did the insert wrinkle? Did the hero product sit too far back? Pick one packaging change and one lighting change for the next session. Small improvements compound, and that is the real advantage of treating subscription box unboxing photography tips as a process rather than a one-time task. For example, swapping from a 250gsm insert to a 350gsm C1S artboard card and moving the key light 18 inches left can make a box look calmer without changing the design at all.
FAQ
What are the best subscription box unboxing photography tips for beginners?
Start with soft natural light, a clean background, and one box at a time. Shoot the opening sequence in order so you do not miss the reveal. Use fewer props and focus on clear packaging details and brand elements. A white foam board, a $20 backdrop, and a north-facing window can outperform a fancy setup if the box is clean and the tissue folds are sharp.
How much should I budget for subscription box unboxing photography?
DIY setups can be low-cost if you already have a phone, window light, and a simple surface. Mid-level creator or freelancer shoots usually cost more because you are paying for setup, shooting time, and editing. Professional studio work makes sense when images will be reused across ads, web, and print. In many U.S. markets, a single polished shoot can range from $300 to $5,000 depending on whether you need retouching, licensing, and extra crops for Instagram, email, and paid media.
How long does a subscription box unboxing photo shoot usually take?
A simple session may take under an hour once the setup is ready. More elaborate branded shoots can take several hours if you need multiple angles, products, or seasonal versions. Planning the shot list before opening the box saves the most time. For delivered files, a small project may take 2 to 5 business days, while heavier retouching or versioning can take 7 to 12 business days after approval.
What makes subscription box unboxing photos look premium?
Consistent lighting, strong contrast, and packaging that photographs cleanly all help. Thoughtful reveal order makes each layer feel deliberate and visually organized. A restrained prop style supports the brand instead of distracting from it. Specific materials matter too: a 350gsm C1S artboard insert, matte lamination, and a crisp logo sticker will usually photograph better than flimsy stock with shiny glare.
How can I reuse subscription box unboxing photography across marketing channels?
Crop hero shots for social posts, keep vertical versions for stories, and use wide frames for email and blog headers. Create a library of detail shots for product pages, ads, and press kits. Maintain consistent naming and file organization so the same shoot can serve multiple teams. If you are planning a quarterly launch calendar, one shoot can easily feed a homepage banner, three Instagram posts, two email banners, and a product page refresh.
Good subscription box unboxing photography tips are really packaging strategy in disguise. They connect structure, print, light, and storytelling into one visual asset that can sell, reassure, and get shared. I’ve seen boxes with average contents outperform better ones because the presentation was clearer and the photo plan was sharper. If you want the next unboxing to work harder, treat the packaging like a stage, the camera like a buyer, and the reveal like a promise kept. Start with one shot list, one clean light setup, and one clear sequence, then keep refining what the lens shows before you ever touch the edit. That is where strong subscription box unboxing photography tips actually pay off.
Related packaging resources
Use these related guides to compare specs, costs, quality checks, and buyer decisions before making the final call.