If you’re shopping for Custom Cat Stickers, the cute part is rarely the problem. The real test is whether the artwork prints cleanly, survives handling, and still looks good after shipping, storage, and a little everyday abuse. A cat illustration can win attention in a second; a poor material choice, fuzzy file, or weak finish can undo that just as quickly.
That is why buyers usually need more than a pretty mockup. The right sticker depends on the surface it will live on, how long it needs to last, and whether it is meant for packaging, merch, giveaways, or retail sale. A sticker made for a laptop does not need the same build as one used on product cartons or a water bottle.
Below is the practical side of ordering: what affects print quality, where the costs come from, how turnaround usually works, and which mistakes cause the most trouble once production starts.
Why custom cat stickers work when cute alone is not enough
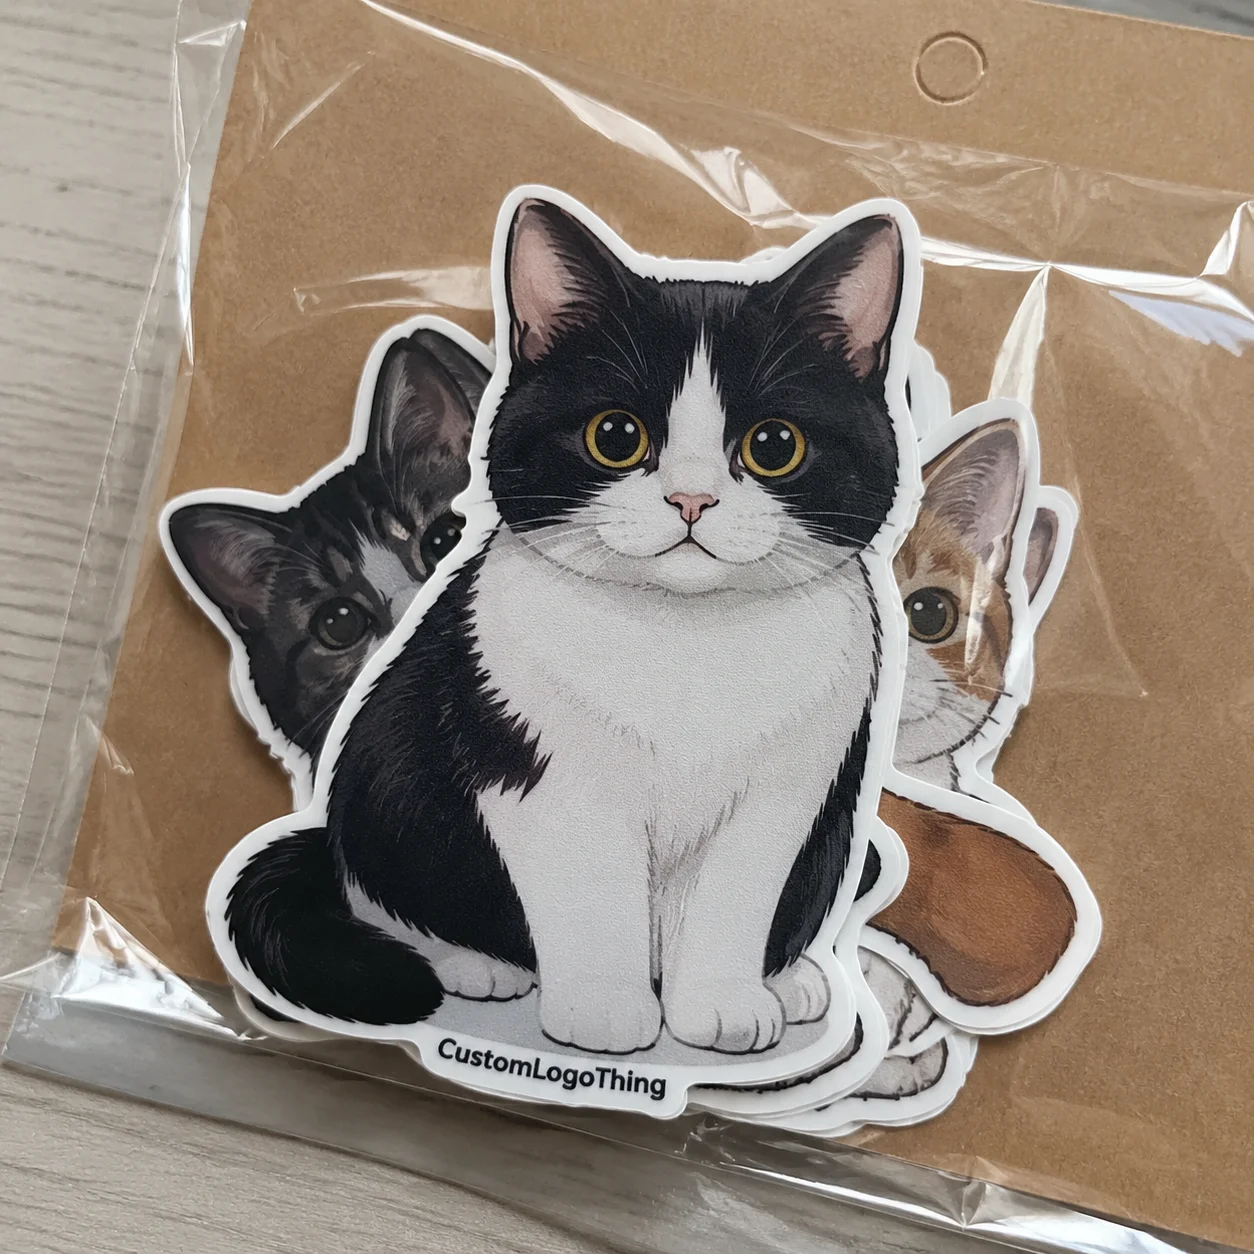
Custom cat stickers are popular because cat art has immediate visual appeal. People notice cats fast, and that reaction makes them useful for small brands, artists, shelters, event merch, and packaging programs that need something friendly without a large production budget. The design can be playful, elegant, sarcastic, or minimal; the category has enough range to fit a lot of different buyers.
In real use, these stickers show up on laptops, bottles, notebooks, shipping boxes, thank-you inserts, adoption packets, and product packaging. They are often sold as standalone merch, but they also work as add-ons for orders that already include Custom Packaging Products or a matching set of Custom Labels & Tags. The art gets the first glance. Print consistency gets the repeat order.
The biggest mistake is assuming all sticker stocks perform the same way. Paper is fine for short indoor use and low-cost promotional packs, but it can scuff, wrinkle, or lose its finish faster than buyers expect. Vinyl is the safer choice for handling, moisture, and anything that needs to hold up after shipping. Matte softens the look and can feel more editorial. Gloss gives brighter color and stronger contrast. Kiss-cut stickers stay on a backing sheet, while die-cut stickers are trimmed to the shape of the artwork. Those choices change both the appearance and the actual use case.
“A cat sticker can be charming and still be practical. If it cannot survive shipping, storage, or a water bottle, it is just paper with confidence.”
How the printing and finishing process works
The production flow is simple on paper: artwork prep, proofing, color setup, printing, finishing, cutting, and packing. In practice, each step can affect the final result. Skip file checks or rush proof approval, and the job usually pays for it later in waste, delays, or reprints. Thin borders, missing bleed, and inconsistent cut paths are some of the most common causes of trouble.
File quality is where most sticker jobs are won or lost. Vector art is ideal because it keeps edges clean at any size. If the design is raster-based, 300 dpi at final print size is the minimum sensible target. That is especially important for whiskers, outlines, eyes, and any text. Tiny details That Look Sharp on a screen can disappear when they are reduced to a 2-inch sticker.
Finish changes more than appearance. Gloss tends to make colors pop and can offer a little extra resistance to moisture and surface wear. Matte gives a calmer, more illustrated look and often reads as more premium for art-led brands. Lamination adds a stronger barrier against scratches, fingerprints, and frequent handling. For bottles, outdoor placements, or anything that will be touched often, laminated vinyl is usually the safer choice.
Format matters too:
- Sheet stickers work well for multiple small designs, giveaways, and storage-friendly packs.
- Die-cut stickers suit merch, branding, and retail presentation because the shape is part of the appeal.
- Roll labels fit high-volume packaging lines where fast application matters more than display value.
Proofing deserves careful attention. Check spelling, cut lines, border thickness, and color expectations before production begins. If the proof looks slightly off, ask for a correction. It is much cheaper to fix a digital file than to discover the mistake after a full run is printed.
| Format | Best For | Typical Strength | Common Tradeoff |
|---|---|---|---|
| Sheet stickers | Sets, freebies, small art drops | Easy to store and distribute | Less premium for resale |
| Die-cut stickers | Merch, branding, retail packs | Clean presentation | Needs tighter artwork prep |
| Roll labels | Packaging lines, batch labeling | Fast application | Not ideal as standalone merch |
Cost, pricing, and MOQ factors to compare
Sticker pricing usually comes down to five variables: size, quantity, material, finish, and cut style. Artwork cleanup can add cost if the file needs tracing, color correction, or rebuilding around the edges. Small orders often look expensive because setup work is spread over fewer pieces, while larger runs usually lower the unit price in a way that becomes obvious very quickly.
For simple custom cat stickers, small-batch paper options may fall around $0.18-$0.35 per unit at moderate quantities, depending on dimensions and coverage. Vinyl versions often sit closer to $0.28-$0.60 per unit. Premium laminated die-cuts for resale can go higher, especially if the design uses specialty stock, complex outlines, or additional proofing. Those are not fixed numbers, and they should not be treated like a menu. Pricing shifts with quantity and production details.
Minimum order quantity matters because not every shop is set up for the same type of run. A low MOQ is useful for testing a new design or seasonal drop. A larger run usually makes better sense once a design has already proven itself. The important number is total landed cost, not just the sticker unit price.
Ask for quotes that separate the major cost pieces:
- Product cost
- Artwork cleanup or setup
- Proofing fees, if any
- Shipping or freight
- Optional upgrades such as laminate or specialty cut lines
That level of detail makes comparison much easier. It also prevents a quote that looks low on paper from becoming much less attractive after shipping or setup is added. In sticker work, the number that matters is usually the one at the end, not the one in the headline.
Step-by-step ordering and turnaround timeline
The ordering process is straightforward, but the timing depends on file quality and how quickly the proof is approved. A normal path looks like this: choose the size and finish, upload artwork, review the proof, approve it, then print, cut, pack, and ship. Clean jobs can move fairly quickly. A typical turnaround is about 7-12 business days after proof approval. Jobs that need more artwork work, special materials, or schedule adjustments may take 12-18 business days or longer.
The most common delays are also predictable. Missing bleed slows proofs. Low-resolution artwork causes edge problems. Color corrections add time. Late approvals add more time than most buyers expect. Small revision requests are another frequent culprit; one minor change can trigger a second proof cycle and push the whole order back several days.
If the stickers are tied to a launch, market date, subscription box, or restock window, add buffer time before production even starts. It is easier to store finished stickers for a week than to explain why they are still in production after the deadline.
Fast orders usually come from clean files and clear decisions. Confirm the quantity early, label multiple cat versions clearly, and answer proof questions without dragging things out. That is one of the simplest ways to keep a run moving.
Material, adhesive, and finish choices that affect durability
Not every sticker needs the same level of durability. Paper is suitable for short-term indoor use, handouts, inserts, and low-cost promotional packs. Vinyl is the better choice for daily handling, bottles, laptops, and most retail packaging where the sticker should still look good after shipping and repeat touch. Specialty stocks can add texture or a more premium surface, but they usually cost more and sometimes give up some durability.
Adhesive type matters just as much. Removable adhesive is useful when the sticker should come off cleanly or be repositioned. Permanent adhesive is better for long-term application and stronger hold. The surface itself changes performance too. Smooth glass is easier than textured cardboard. Curved bottles behave differently than flat boxes. Powder-coated metal can be more demanding than a plain notebook cover. A sticker that holds well on one surface may fail on another if the adhesive and finish are not matched properly.
Water resistance and scratch resistance are where laminate earns its keep. A protective layer helps with bottles, sinks, rain, and repeated handling. It also helps with UV exposure, which matters if the sticker will sit near sunlight for long periods. If the goal is to keep the art readable and attractive for months, not days, protective finishing is worth the added cost.
Matte and gloss create different buying impressions as well. Matte cuts glare and can make text easier to read under bright light. Gloss makes color richer and often suits a playful or more retail-oriented look. For branded packaging, choose the finish that supports the product line rather than the one that looks best in a single digital mockup.
For broader packaging standards and sustainability context, the Institute of Packaging Professionals and EPA are useful references when comparing materials and waste considerations.
Common mistakes buyers make with cat sticker artwork
The most common artwork mistake is trying to fit too much detail into a small sticker. Whiskers, fur texture, tiny highlights, and thin text all start competing with one another once the design shrinks to a few inches. A clear silhouette with a strong expression usually prints better than a crowded image that only works at full screen size.
Low contrast is another problem that shows up often. Soft pastel art can look appealing on a monitor and then lose definition in print if the values are too close together. Thin outlines are also risky, especially on matte stock. If the design depends on very fine line work, a proof or small sample run is the safest way to check how much detail survives production.
Bleed and safe area are easy to overlook and expensive to ignore. When the cut line sits too close to the art, the result can be clipped ears, uneven borders, or awkward spacing. RGB-only files, screenshots, and low-resolution exports cause similar problems. So do missing fonts and layered files that are not packaged properly. Each of those issues slows production and can push a job back.
It also helps to keep revisions disciplined. Multiple versions sound harmless until every proof, count, and label has to change with them. A clean master file is usually more valuable than endless small edits.
- Use stronger outlines for small sizes.
- Keep text large enough to read at arm’s length.
- Leave room for the cut path.
- Check contrast on both light and dark backgrounds.
Expert tips for cleaner art and better sell-through
If the goal is better sell-through, design for instant recognition. A cat sticker should read clearly in a second or less. Bold shapes, expressive eyes, and a simple pose usually perform better than overworked art packed with tiny visual details. That is true whether the stickers are sold as merch or included as packaging extras.
Mockups are useful, but they need to be checked in real contexts. Put the design on a laptop, a water bottle, and a package insert. If it feels awkward in those places, the final product will probably feel awkward too. Small format problems are much easier to catch before a full run is printed.
Sets often sell better than single designs. A group of related cats, a seasonal theme, or a breed-based series can make the offering feel more collectible. That can raise average order value without increasing production complexity very much. For merch or retail packaging, a backer card, QR code, or thank-you insert can also raise the perceived value of the sticker without adding much cost.
For launches or new audiences, a small test batch is a practical move. It reveals whether the art reads well, whether the finish suits the design, and whether the audience actually wants the piece before a larger run is committed. One design that people keep is usually more valuable than several designs that sit in storage.
For businesses building out packaging design, these stickers can act as a low-cost extension of the brand system. They can echo a logo, support custom printed boxes, or tie into retail packaging and inserts without requiring a full redesign. That kind of consistency matters because packaging is usually judged in a few seconds, not after a careful read.
Next steps: choose specs, request quotes, and proof the artwork
Start with the use case. Decide whether the sticker is meant for merch, packaging, giveaways, or resale, then choose the size, material, finish, and quantity around that decision. Starting with price alone usually leads to a spec that does not fit the job.
When comparing quotes, make sure the specs are identical. Same size. Same finish. Same quantity. Same cut style. Otherwise the numbers are not really comparable. Ask for a proof and inspect the border, cut line, spelling, and color direction carefully before approving production.
If the stickers are intended for resale, events, or a brand launch, a sample or short run is usually worth it. That smaller spend can prevent a much larger mistake. And if the design needs to support package branding or a broader retail campaign, make sure it fits the rest of the packaging system instead of sitting beside it as an unrelated extra.
The strongest custom cat stickers are not the fanciest ones. They are the ones matched to the job: correct material, correct finish, correct size, and a proof that was checked with care. Get those parts right, and the sticker does what it is supposed to do — stick, sell, and stay presentable long after the first impression has passed.
What are custom cat stickers best used for?
They are commonly used for merch, packaging inserts, giveaways, laptop decals, bottle stickers, and pet-themed promotions. The best version depends on material, finish, and how much handling the sticker needs to survive.
How much do custom cat stickers usually cost?
Price depends on size, quantity, material, finish, and cut style. Lower quantities usually cost more per unit because setup is spread across fewer pieces, while larger runs usually bring the unit price down.
How long does it take to make custom cat stickers?
Simple orders can move quickly after proof approval, while custom artwork, special finishes, or revision cycles add time. A typical turnaround is about 7-12 business days after approval, though more complex jobs can take longer.
What file type should I send for custom cat stickers?
Vector files are best for clean edges, but high-resolution PNG or PDF files can also work. Make sure the artwork is sharp at final size and that the cut line has enough room around the design.
Are custom cat stickers waterproof?
Vinyl stickers with the right finish handle water much better than paper stickers. For bottles, sinks, or outdoor use, ask for laminate or another protective coating instead of assuming every sticker is water-safe.

