Most people treat custom christmas boxes as seasonal decoration. That is a narrow view. A holiday box is also a shipping component, a merchandising tool, and, in many cases, the last line of defense between a product and a return. If the carton looks festive but fails in transit, the extra print is not an asset. It is a costly way to disguise a packaging problem.
Holiday packaging carries more pressure than a standard retail box. It has to protect fragile items, feel gift-ready on first opening, and keep a fulfillment team moving during the busiest weeks of the year. A candle set that rattles inside the carton, an ornament assortment with no insert, or a premium kit packed into a board grade that collapses under stacking pressure can all look fine on a screen. They rarely look fine after the carrier has handled them twice.
The mistake most buyers make is starting with graphics and ending with structure. In practice, the order should be reversed. Fit, board strength, closure style, and insert design affect cost, speed, and damage rates far more than the artwork does. Once those choices are fixed, the design can do its job instead of compensating for bad engineering.
Why Holiday Packaging Fails Before the Product Does
Holiday packaging usually fails for ordinary reasons. The box is too large, too weak, or too expensive to ship. The print looks polished, but the interior has no restraint. The structure was approved from a render, not from a packed sample. None of that is dramatic. It is just what happens when packaging decisions are made in the wrong sequence.
There is also a hidden cost that many teams underestimate: labor. A box that arrives flat but takes too long to assemble can slow down a warehouse line. A gift kit that needs hand-stuffing or extra taping starts to eat margin one carton at a time. Once you multiply that by a seasonal order volume, the difference between a clean structure and a fussy one becomes obvious.
Holiday packaging also works under tighter timing than normal production. Artwork has to be approved while campaigns are still shifting. Freight slots tighten. Material availability moves. A single delay can push the whole order into the wrong week, and holiday windows are unforgiving. By the time the customer sees a late launch, the packaging delay has already done the damage.
A box that looks premium but fails transit testing is not premium. It is expensive damage with ribbon on it.
If the product is fragile, oddly shaped, or sold as a bundle, the structure deserves more attention than the graphic file. Holiday packaging is not just a surface treatment. It is a mechanical system that needs to survive handling, movement, and stacking before it ever reaches a gift table.
What Makes Custom Christmas Boxes Truly Custom
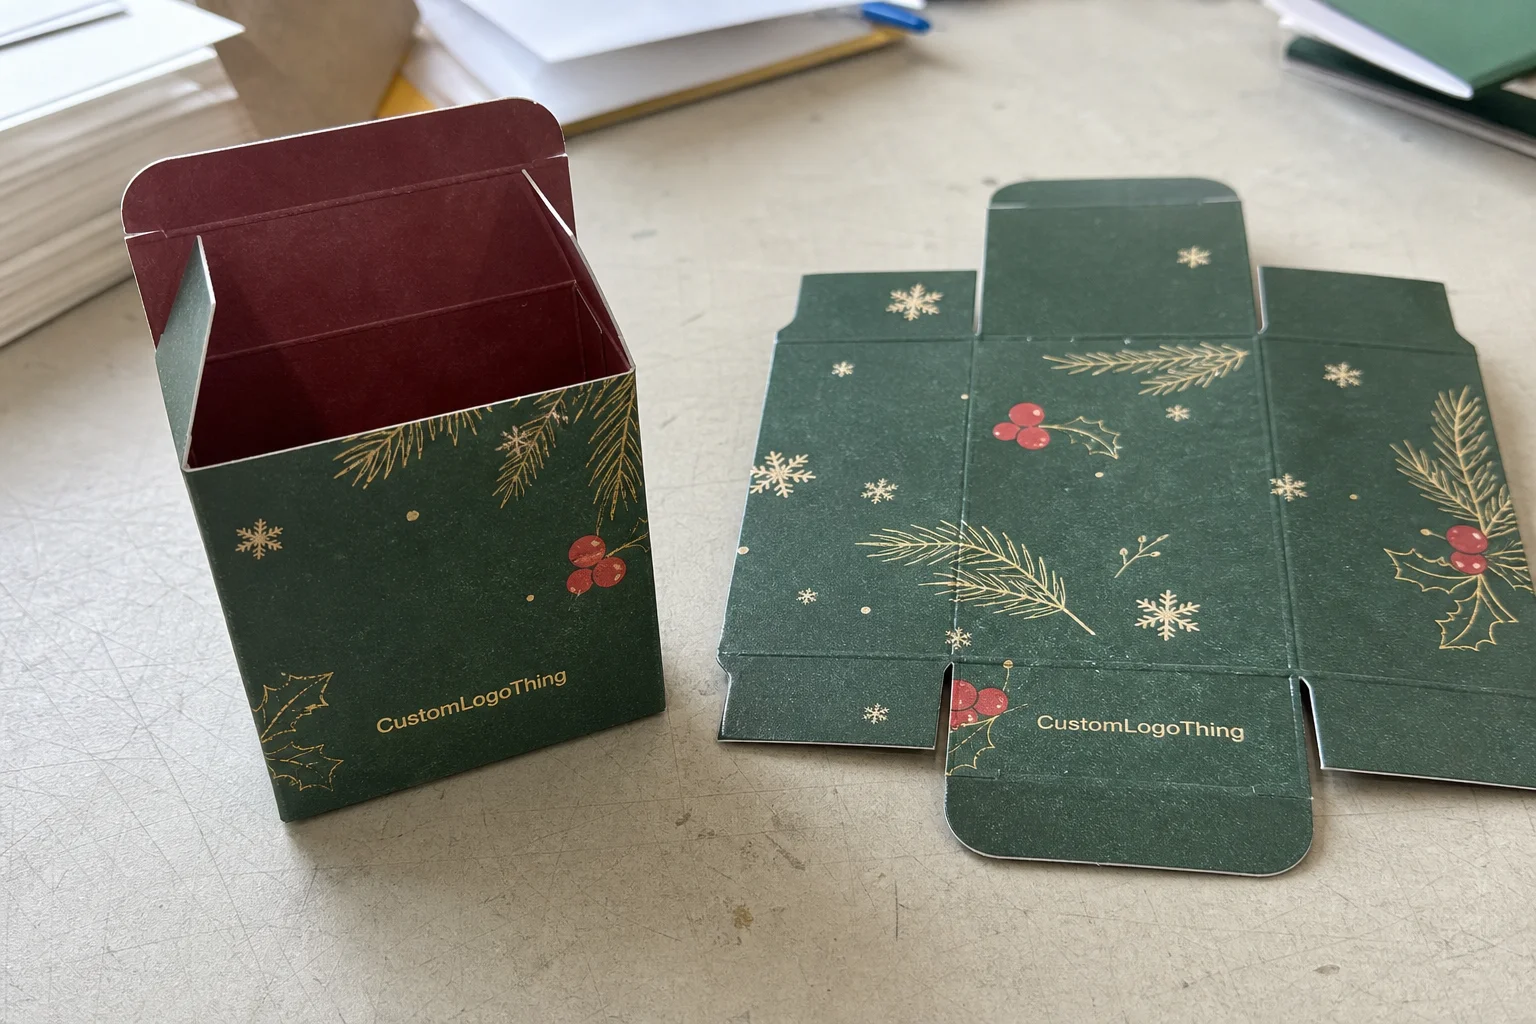
Printing a snowflake pattern on a stock carton does not make it custom. Real customization reaches into dimensions, structure, closure, board grade, print coverage, insert design, and finishing. Those are the decisions that control how the box behaves in the real world.
Three common box families cover most holiday use cases. Folding cartons are efficient for lighter retail items like ornaments, small candles, and cosmetic-sized gifts. Mailer boxes are better for ecommerce shipments and curated sets because they hold up better under parcel handling. Rigid boxes sit at the premium end of the range; they cost more, but they deliver a stronger unboxing moment and usually give the product more physical protection.
The buyer brief should be specific about the job the box has to do. Is it shelf display first, ecommerce shipping first, or gift presentation first? Does the box need to open from the top, the side, or with a sleeve? Should the closure be tuck-top, crash-lock, magnetic, or a slipcase? Those are structural decisions, not styling preferences. A good dieline begins there.
Standardizing the base structure can save money if the product line changes from year to year. Many teams keep one carton family and vary the artwork, insert, or internal layout instead of redesigning every SKU. That approach reduces tool changes, simplifies reordering, and keeps holiday branding consistent across a range of items.
If the structure is still undecided, it helps to start from a known packaging format rather than inventing one from scratch. A broad catalog of packaging formats can be a faster starting point than an open-ended custom brief. You can review base structures using Custom Packaging Products and then narrow the spec to the product and shipping method.
Materials, Finishes, and Structural Choices
Material selection is where holiday projects either stay controlled or drift into expensive overdesign. A box can look right in mockup and still fail because the board is too light, the insert allows movement, or the finish shows every scuff once production starts handling real cartons.
For lighter items, paperboard in the 16pt to 24pt range can be enough, especially for shelf display or low-abuse shipping. For ecommerce kits or heavier gifts, corrugated stock is usually the better move. E-flute is common for mailer-style boxes because it prints well and adds more cushioning than a plain carton. Rigid boxes use dense chipboard, often wrapped with printed or specialty paper, and that construction creates a more substantial feel as well as better crush resistance.
There is a tradeoff here that buyers often miss. Thicker is not automatically better. Overspecifying the board can increase cost, create poor folding behavior, or make the box harder to close cleanly. Under-specifying it does the opposite: crushed corners, bowed panels, and a carton that looks tired before it has even reached the customer.
Finishes change both perception and handling. Matte coating gives a restrained, modern look and hides minor fingerprints better than gloss. Gloss makes holiday colors feel brighter and can improve shelf visibility. Soft-touch adds a velvety surface that fits luxury gifting, though it can show rubbing if the carton is handled repeatedly. Foil stamping, embossing, and spot UV should be used with intent. They work best as accents, not as a substitute for a weak layout.
- Matte lamination for a clean, understated presentation.
- Gloss coating for stronger color saturation and shelf impact.
- Soft-touch for premium gift boxes with a tactile finish.
- Foil stamping for logos, borders, and seasonal accents.
- Embossing or debossing for depth without adding much visual clutter.
- Inserts and dividers for preventing movement in bundled or fragile sets.
Inserts deserve more attention than they usually get. A paperboard insert, molded tray, or corrugated divider keeps items from sliding, reduces scuffing, and makes the unboxing feel deliberate instead of improvised. Without restraint inside the box, even good print work can read as unfinished the moment the product shifts.
For shipping use, transit testing matters more than most buyers expect. The ISTA test framework is a useful reference for vibration, drop, and compression behavior. If sustainability claims are part of the brand story, FSC certification is worth confirming for paper and board sources. Neither one fixes a bad design, but both help validate a packaging choice once the structure is otherwise sound.
The practical rule is simple: choose the structure for the product and shipping method first, then style the box around that decision. If the box cannot survive handling, the finish does not matter.
Custom Christmas Boxes Pricing: What Drives Cost
Pricing for custom christmas boxes is driven by a small set of variables, and nearly all of them are easy to misread if the buyer only compares the final number. Dimensions, board grade, print coverage, insert complexity, coating, finishing, quantity, and lead time all affect the quote. A simple carton and a premium rigid gift box may both be called “holiday packaging,” but they are not even close to the same production job.
Quantity changes the economics immediately. Short runs carry heavier setup costs per box because proofing, tooling, and machine setup are spread across fewer units. Larger runs usually lower the unit cost, but only if the specification stays stable. If the dimensions change, the finish changes, or the insert needs to be rebuilt, the quote moves again.
Artwork complexity matters too. A single-color exterior on a standard board is much easier to produce than a full-coverage design with interior printing, foil, spot UV, and a specialty coating. Each additional layer adds handling, setup time, and the chance of rework. That is not a design criticism. It is just how print production behaves.
For practical planning, many buyers see plain folding cartons land in the low tens of cents to around a dollar at volume, while short-run rigid gift Boxes with Inserts and specialty finishes can move into several dollars per unit. Those are broad ranges, not promises. The actual price depends on the exact spec, quantity, and freight profile. Still, they are useful as a reality check before a team locks a budget based on a mockup.
| Box Type | Typical Use | Relative Cost | Notes |
|---|---|---|---|
| Folding carton | Light retail items, ornaments, small gifts | Lowest | Efficient at scale, but limited protection |
| Mailer box | Ecommerce gifts, subscription-style kits | Moderate | Better shipping performance, good branding surface |
| Rigid box | Premium sets, luxury holiday gifting | Highest | Strong presentation value, higher material and labor cost |
There are also hidden line items that rarely show up in a quick comparison. Freight can be meaningful, especially if cartons are bulky. Sampling adds time and cost, but skipping it can be more expensive. Dieline revisions are another common surprise. Rush fees tend to appear once a project has already lost schedule margin. Add all of that up, and the cheapest quote can become the most expensive option by the time the goods arrive.
A reliable comparison requires identical specs. Same dimensions. Same material. Same finish. Same insert. Same quantity. Same delivery window. Without that, the price list is just a stack of unrelated numbers dressed up as a choice.
Production Process and Lead Times
A clean production process starts with a complete brief. The essentials are product dimensions, product weight, fragility, packaging style, quantity, target ship date, and destination. From there the vendor should build or confirm the dieline, review artwork, produce a proof or sample if needed, and move into production only after the physical fit has been checked.
Simple packaging jobs can move quickly once artwork is approved. More complex holiday projects need more room. A plain folding carton might move through production in a relatively short window after sign-off, while rigid boxes, specialty coatings, and custom inserts can require several more weeks. The exact timing depends on the factory schedule and the number of steps involved, but the pattern is consistent: every added process adds lead time.
Most delays happen for predictable reasons. Missing measurements. Late artwork revisions. Color expectations that were never written down. Sample approvals that ignore closure tension or insert fit. Teams often treat these as minor issues, then discover the delays are cumulative. By the time the order slips, the holiday calendar has already become less forgiving.
Freight adds another layer of risk. Seasonal shipping is busy, carrier networks are crowded, and any rework can push the delivery past the launch date. If the product needs to hit a promotion, the packaging schedule should begin before the campaign is locked. Waiting until the last minute is not a strategy; it is a guess with a deadline attached.
The best time to request a sample is before the order is in production, not after. A sample reveals whether the closure works, whether the insert grips the product properly, and whether the finished box still looks clean after handling. A PDF cannot show any of that.
A useful pre-production checklist looks like this:
- Confirm product dimensions, weight, and fragile areas.
- Review the dieline against the actual product and insert.
- Approve artwork with bleed, color expectations, and finish notes.
- Request a sample or printed proof if fit and color matter.
- Test the packed box in a shipper or basic transit simulation.
That sequence may feel cautious. It is. Seasonal packaging has very little slack once the season starts, and small mistakes become expensive quickly.
Common Mistakes That Waste Budget and Time
The most common mistake is building the artwork before the structure. A design may look strong on screen, then fail once the product is inserted, the lid closes, or the carton enters a shipping carton. At that point the graphics are not solving the problem. They are just sitting on top of it.
Overbuilding is another easy way to lose budget. Too many finishes, too many colors, too much special treatment, and the box starts carrying decoration that does little for performance. A focused design with one clear visual idea usually ages better than a crowded package trying to prove it was expensive.
Ignoring shipping reality is especially risky for holiday packaging. A box that crushes in transit does not create a premium experience. It creates a return request. That is true whether the shipment went through parcel networks, bulk warehouse handling, or a retail backroom.
Proofing mistakes are smaller but still costly. Bleed set incorrectly. Foil placed too close to a fold. A Pantone target that was never clarified. An insert approved without checking whether the product can be removed without damaging the box. These are not dramatic errors, but they are the kind that produce rework and delay.
Timing is the final trap. Teams often wait until demand is already rising, then try to Order Custom Printed boxes as though production slots are waiting in reserve. They are not. Holiday manufacturing gets crowded early, and late approvals can move a project into the wrong freight cycle. By then, the issue is no longer packaging. It is lost sales.
If several holiday SKUs are being launched at once, standardizing one or two base structures is usually the smarter move. Keep the carton family stable and vary the graphics, insert, or internal arrangement. That lowers complexity, keeps package branding consistent, and makes reorders easier to manage under seasonal pressure.
Next Steps: Build a Quote-Ready Box Spec
The fastest way to get a useful quote is to send a complete spec. Include product dimensions, product weight, quantity, target ship date, destination, insert requirements, finish preferences, and any shelf or ecommerce constraints. If half the inputs are missing, the quote will be vague, and the follow-up thread will get longer than it should.
It also helps to request more than one material option in the same inquiry. A lighter option, a mid-grade option, and a premium version give you a real cost comparison instead of a guess. That matters because the right choice is often not the cheapest box or the fanciest one. It is the one that protects the product, fits the budget, and supports the selling channel.
Before production, ask for a sample or printed proof whenever color accuracy, fit, or finish quality matters. Holiday red, in particular, can shift more than people expect depending on substrate and coating. Metallic accents can also change appearance once they are printed on actual board rather than viewed in a mockup. A sample catches those issues early.
Then test the box the way it will actually be used. Pack it. Move it. Open it. If possible, ship a short run through the intended channel. Look for movement, corner wear, scuffing, closure tension, and how the presentation holds up after handling. That test costs far less than reworking a run of custom christmas boxes that looked right in prepress and failed on the dock.
One clean spec sheet, one sample, and one practical shipping check will solve more problems than a dozen rounds of subjective feedback. That is usually the difference between a holiday box that supports the product and one that gets in its way.
For seasonal launches, the best outcome is simple: the box protects the contents, carries the brand clearly, and reaches the customer on time. The rest is decoration.
How far ahead should I order custom Christmas boxes?
Start early enough to cover spec review, artwork, proofing, sampling, production, and freight. Simple folding cartons can move faster than rigid boxes or specialty finishes, but holiday schedules tighten quickly. If a launch date matters, the packaging timeline should be set before the promotional calendar becomes fixed.
What minimum order quantity is normal for custom holiday boxes?
MOQ depends on structure, print complexity, and material choice. Smaller quantities are possible, but the per-unit price usually rises because setup costs are spread across fewer boxes. Ask for tiered pricing so you can see where the volume breakpoints are before choosing a run size.
Which finish works best for custom Christmas boxes?
Matte is a safe choice for a refined look. Gloss suits brighter holiday palettes and stronger shelf visibility. Foil and embossing work best as accents. The finish should support the package design and the product category, not compensate for weak structure or weak artwork.
Can I reuse one box style for different holiday SKUs?
Yes, if the product sizes and weights stay within a similar fit range. Standardizing one carton family or one insert style can reduce complexity and simplify reordering. The box still needs to pass a transit test for each SKU, though, because fit and presentation can change even when the outer dimensions stay close.
How do I keep custom Christmas boxes from getting damaged in shipping?
Match the board strength to the product weight and shipping method, use inserts or dividers to stop internal movement, and test the packed box before production. If the carton cannot survive drops, vibration, and compression in a small test, it is not ready for a seasonal launch.

