Custom honey jar labels need to look clean on screen and survive the real world: curved glass, condensation, repeated handling, shipping, and the occasional sticky spill. Honey is stable. The packaging is usually the weak point.
That is why the buying decision should start with the jar and the environment, not the artwork. A label that works on a dry shelf may fail on a chilled display or a jar that gets wiped down often. Pressure-sensitive labels can be built for a rustic paper look, a moisture-resistant film, or a premium finish, but the spec has to match the use case. If you also need matching Custom Labels & Tags or broader Custom Packaging Products, the same rule applies: measure first, design second.
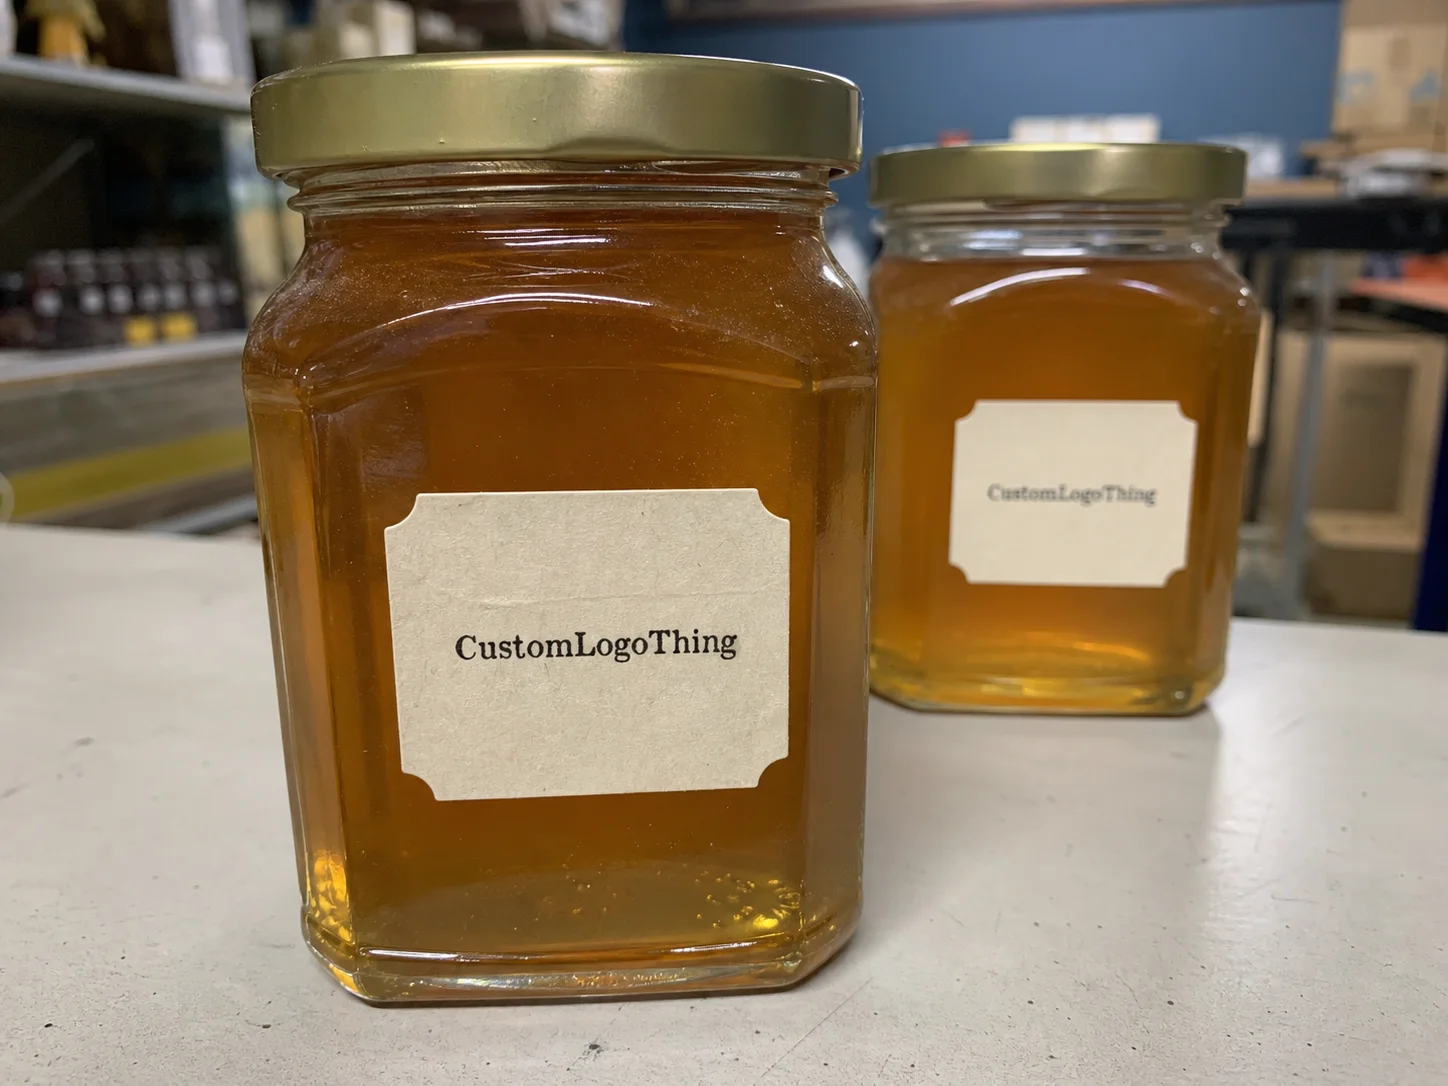
The jar is not flat. That is the detail behind most label problems. A design can be centered on screen and still wrinkle, lift, or look skewed once it wraps real glass.
What custom honey jar labels have to survive
A honey label is part brand marker, part information panel, and part durability test. It has to carry the look of the product while surviving temperature swings, damp hands, friction in transit, and contact with sticky residue near the cap.
Most are pressure-sensitive labels printed on paper or film and cut to fit the body, lid, or neck of the jar. Paper gives a softer, handmade appearance. Film stocks, especially BOPP-style materials, are better when jars may see moisture or frequent handling. That difference becomes obvious when a corner curls or the surface picks up scuffs after a few market trips.
Different sellers need different specs. A hobby beekeeper may want a small run with a lower minimum and a natural paper feel. A farm stand needs labels that still look good after customers handle them. Gift packaging needs stronger shelf appeal. Retail-ready jars need cleaner hierarchy and enough space for producer or compliance details without feeling crowded.
If your honey stays at room temperature, paper may be enough and usually costs less. If the jars are refrigerated, shipped with cold packs, or displayed where condensation is common, film is the safer choice. That is not a design preference. It is a practical constraint.
How the label actually works on glass and curved jars
Adhesion on glass is simple in theory and less simple in practice. Smooth glass helps, but curvature creates tension at the edges if the label is too wide, too stiff, or too close to a shoulder or ridge. A label that looks fine on a flat proof can still fail if the dimensions were guessed instead of measured.
For round jars, a wrap label needs small clearances so the edges do not overlap or buckle. The top and bottom should stay clear of any shoulder curve, taper, or molded ring. Hex jars are easier because the flat faces help the label sit more predictably, but the corners still matter. Push a label too high or too wide and the problem shows immediately.
Material choice changes the result. Paper stock reads warm and artisanal, which works well for small-batch honey and local retail. Film stock resists moisture better and usually handles scuffing more cleanly. Specialty papers can elevate the package, but only if the rest of the design supports that direction. A busy illustration on a textured stock often looks confused rather than premium.
Finish matters more than many buyers expect. Matte usually feels more natural and handmade. Gloss adds contrast and makes amber tones, dark type, and fine linework stand out more sharply. Soft-touch can feel expensive, though it only makes sense if the design is restrained enough to justify it.
Front labels, wrap labels, neck seals, and lid stickers each do a separate job. The front label sells. The back or side panel handles ingredients, weight, producer information, and any required compliance copy. Neck seals can provide tamper evidence and a more finished presentation. Lid stickers help with gift packs or sampler sets, but they should not replace core product information.
For buyers who need labels to survive shipping as well as display, it helps to think in terms of distribution stress rather than visual appeal alone. The Packaging Machinery Manufacturers Institute is useful for packaging terminology and process context, while ISTA is the more relevant reference if the jars need to be evaluated for transit rather than just photographed on a worktable.
Custom honey jar labels pricing: what changes the quote
Label pricing is driven by a few predictable variables: size, quantity, material, finish, and whether the shape is standard or custom. The artwork may be identical from one order to the next, yet the price can shift dramatically just because the run is 500 labels instead of 5,000. Setup costs do not disappear. They get spread across more units.
Small orders usually feel expensive because the printer still has to check files, build a proof, load the stock, and run the cut. Larger runs generally lower the unit cost once the setup is absorbed. That is why the first production order often costs the most and the reorder looks better on paper.
| Label type | Typical unit range | Best for | Main tradeoff |
|---|---|---|---|
| Simple paper label | $0.14-$0.30 at 1,000 pieces, lower at 5,000+ | Dry storage, handmade look, low-cost launches | Less moisture resistance |
| Moisture-resistant film label | $0.18-$0.38 at 1,000 pieces, lower at higher volume | Chilled display, shipping stress, frequent handling | Slightly higher cost, less paper-like feel |
| Premium textured or specialty stock | $0.24-$0.50 at 1,000 pieces | Gift packs, premium retail packaging, elevated shelf presentation | Can be overkill for casual sales |
| Short run custom die-cut | $0.30-$0.70 at very low quantity | Test launches, seasonal flavors, local markets | Highest per-unit cost |
These are broad ranges, not a quote. Ink coverage, foil, spot varnish, white underprint, and custom cutting can all move the price. Rush scheduling can do the same. A rush fee of 10% to 25% is common when production has to be reshuffled. If a supplier gives a number that seems too good for a complex label, ask what is missing.
The cheapest order is not always the least expensive decision. A label that peels in cold storage or smudges during handling creates replacement costs, labor waste, and a worse customer impression.
Production steps and turnaround from proof to delivery
The production sequence is usually straightforward: file review, dieline placement, proof, approval, print, cut, finish, pack, ship. Most delays do not come from the press. They come from missing or inconsistent information.
The cleanest jobs start with exact jar measurements. Not estimates. Give the label provider the jar diameter, usable panel width, usable height, shoulder curve, and any ribbing or embossing. If the final quantity and finish are already defined, the proofing round tends to move faster.
Common delay points repeat for a reason. Low-resolution artwork slows file prep. Copy changes after proof approval can reset production. Missing net weight, ingredients, or batch information creates another round of revisions. A surprise request for a different shape after the proof has been built is one of the easiest ways to add avoidable time.
Typical lead times depend on complexity, but a practical range looks like this:
- Proofing: 1-2 business days for clean files
- Simple reorders: often 5-8 business days after approval
- New custom shapes or new artwork: often 10-15 business days
- Special finishes or complex setups: 12-18 business days or more
Application conditions matter too. Labels should go onto clean, dry jars, ideally at room temperature. If jars come straight from refrigeration or cold filling, condensation needs time to clear before application. Moisture at that stage turns a normal adhesive job into a problem.
If the labels are going into distribution, ask how they are packed and what kind of handling the finished product can tolerate. ISTA style testing is useful because it focuses attention on vibration, drop, and transport stress rather than only on how the label looked during approval.
Specs that decide whether the label fits, sticks, and lasts
Labels fail for dull reasons. The width is off by a fraction. The jar curves sooner than expected. The adhesive is fine, but the surface is damp. The face stock is attractive, but it was never meant for chilled storage. All of that affects the result.
Dimension checks should start with the container, not the artwork. Measure the flat front area and any wrap area separately. Leave room around the shoulder and base. If the jar has a narrow panel, do not force a larger layout onto it just because the design looks balanced on a screen.
Copy density is another constraint. Honey labels often need the product name, flavor, net weight, ingredients, producer information, and sometimes lot or batch coding. That is a lot for a small package. If everything goes onto one panel, the label starts looking overloaded. Move support copy to the back, side, or neck area and keep the front legible from a normal viewing distance.
Storage conditions should be written into the spec. Room temperature is the easiest environment. Refrigeration, ice bucket display, and high humidity call for stronger adhesive and a more tolerant face stock. If the jars are shipped long distance, ask for scuff resistance too. A label can be technically acceptable and still arrive looking tired.
Sustainability claims should stay accurate. If you want paper stock from a certified chain of custody, ask for the documentation. Do not assume every stock described as “eco” performs the same way. For buyers who care about certified sourcing, FSC is a useful reference point, but the label still has to fit the jar and the storage environment.
- Measure jar diameter and label panel width.
- Confirm storage conditions and handling.
- List every required copy element before proofing.
- Choose finish based on shelf behavior, not just taste.
Mistakes that make honey labels peel, wrinkle, or look cheap
The fastest way to make a honey label look amateur is to size it by eye. A wrap that is too wide on curved glass will buckle or lift at the edges. A label that is too short looks unfinished. Both problems are visible from across a table.
Material mismatch comes next. Basic paper on a damp or refrigerated jar is a shortcut to curling corners, staining, and edge lift. It may be acceptable for dry shelf storage, but if the jars move through coolers, markets, or shipping environments with temperature swings, paper is usually the wrong choice.
Design errors can be just as expensive. Too many fonts create noise. Low contrast makes the label harder to read on amber glass. Tiny ingredient text turns compliance into a struggle and makes the whole package feel cramped. The label is not a scrapbook page. It has a job.
Testing has to happen on the actual jar and under actual conditions. A label that looks fine on a flat sample can fail after the jar is filled, chilled, wiped down, or handled with damp hands. A print proof alone is not enough. Apply a sample to the real container, fill it, and see how the edges behave after a few hours in the environment the product will actually see.
Mismatching the label with the rest of the packaging system is another common issue. If the honey goes into a gift box or sampler set, the label should feel like part of the same family. Otherwise the jar looks sourced from one business and the outer package from another.
Measure first, design second. It is a plain rule. It also prevents the most expensive mistakes.
Expert tips and next steps before you order
Start with a clean input list. Give the printer the jar dimensions, order quantity, storage conditions, finish preference, and exact copy. If one of those pieces is missing, the quote gets less precise and the proofing process takes longer.
Review the proof on the actual jar, not only on screen. Screen geometry lies in subtle ways. A label can appear centered in the file and still sit awkwardly on the container because the curve starts earlier than expected or the panel is narrower than the design implied. Tape a sample in place, step back, and view it at arm’s length.
Use quantity tiers as a planning tool. A short run makes sense for seasonal flavors or launch testing. A mid-size run usually offers the best balance between cost and flexibility for small producers. A large run only makes sense if demand is stable enough that the labels will not sit in storage while the line changes again.
If you are building out a broader shelf presentation, compare the label plan with the rest of the line. A jar label, carton, and any insert or sleeve should work together as one system. That is where Custom Labels & Tags and the rest of your Custom Packaging Products should support each other rather than arrive as separate design exercises.
Before you order, check three things: the text reads clearly from arm’s length, the label survives the storage condition you actually use, and the size fits the real jar with a little margin for production variance. If those three pass, the order is probably ready. If they do not, fix the spec now.
What size should custom honey jar labels be for my jars?
Measure the flat front panel and the curved area separately, then leave a small margin so the edges do not lift. If possible, test one printed sample on the filled jar, not just on an empty mockup, because the curve and fill level change the fit.
What material works best for custom honey jar labels?
Paper works well if the jars stay dry and at room temperature and you want a handmade look. A moisture-resistant film stock is the safer choice if condensation, refrigeration, or shipping stress is part of the real use case.
How much do custom honey jar labels cost?
Price depends most on quantity, size, material, finish, and whether the cut is standard or custom. Smaller runs cost more per label, while larger orders lower the unit cost after setup is spread across the order.
How long does it take to produce custom honey jar labels?
The timeline usually depends on artwork approval, print complexity, and whether the order needs special finishing or a custom shape. Fast reorders move quicker than first-time jobs, especially when the dieline and copy are already approved.
Do I need waterproof custom honey jar labels?
If the jars will see condensation, refrigeration, or wet handling, water-resistant labels are the safer choice. Even if the honey itself is stable, the label still has to survive the environment around it.


