FedEx custom boxes have to do a practical job before they do a branding job. They need to survive sortation, withstand vibration on conveyor systems, stack without collapsing, and still arrive looking intentional. If the carton saves a product but arrives dented and scuffed, the package has only done half its work. The useful benchmark is not visual neatness on a desk. It is how the box behaves after handling, compression, and a few unavoidable impacts.
Most shipping damage is cumulative. A corner strike weakens a panel, vibration works a loose insert free, and a small gap lets the contents shift until the next drop finishes the job. That is why custom-sized corrugated mailers and cartons usually outperform generic stock boxes with a logo printed on top. The better package is the one that fits the product, fits the packing line, and fits the carrier path without adding labor friction.
For buyers comparing product packaging options, the first questions are mechanical, not aesthetic. How heavy is the item? How fragile? How many times will it ship? Does the warehouse have room for flat cartons, or does it need a compact, foldable format? Those answers influence board grade, closure style, insert design, and whether print should be direct on the box or carried by labels and wraps. If you want to compare structural options more broadly, the wider Custom Packaging Products catalog is the fastest place to sort through formats.
What FedEx Custom Boxes Need to Survive the Sort
Parcel networks are rougher than most packaging mockups suggest. Boxes are reoriented, dropped from short transitions, pushed against other freight, and compressed in stacks. A carton that looks sturdy in a photo can fail quickly once it moves through a real sortation chain. The goal is not just to ship the item. The goal is to keep the contents stable through every handling step between the pack bench and the recipient.
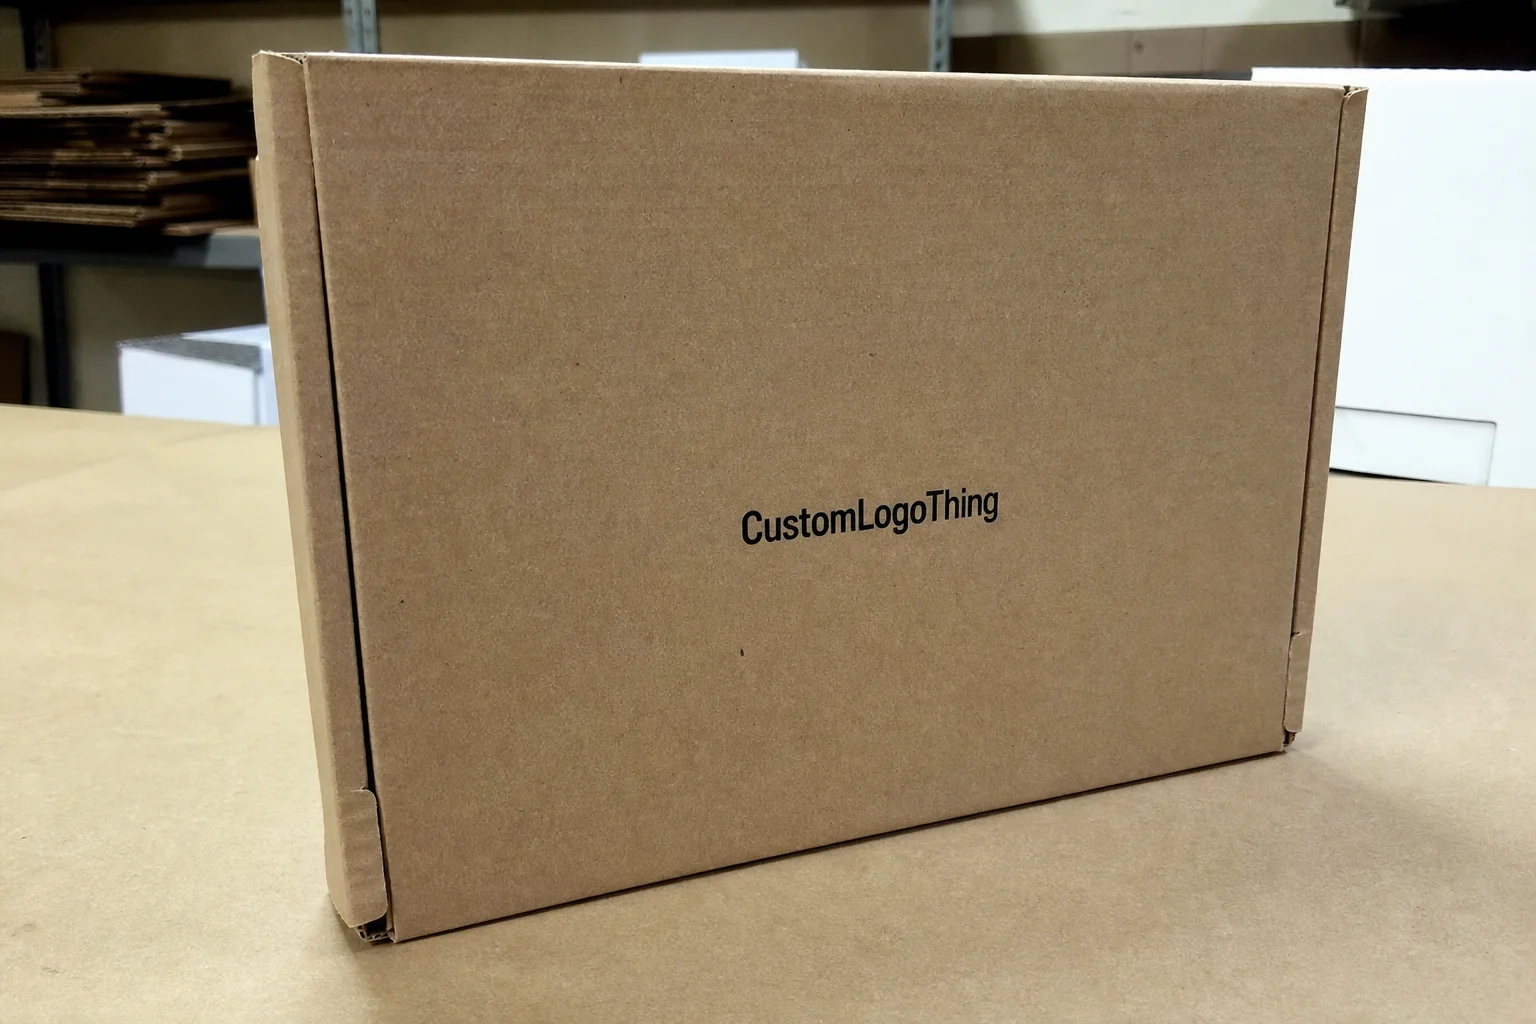
A useful definition of FedEx custom boxes is simple: cartons or mailers built around a specific product, a specific transit profile, and a specific presentation standard. That is different from buying a stock size and adding branding later. Custom sizing changes fit, but it also changes compression behavior, pack-out speed, and how much protection can be built into the structure without overstuffing the box.
Good packaging has to solve three jobs at once. It must protect the contents. It must present the brand cleanly. It must be easy to assemble at speed. If any one of those fails, the carton becomes a cost center. The best designs are often the least dramatic ones, because they remove unnecessary movement, reduce wasted space, and close in a way that operators can repeat all day without improvising.
Before anyone quotes the job, the buyer should define the product dimensions, packed weight, fragility, shipping frequency, and warehouse constraints. A box for a lightweight accessory is not the same as one for a dense 6-pound part, even when the outside footprint looks similar. One may only need a self-locking mailer. The other may need a heavier corrugated carton with inserts, stronger flaps, or reinforced closure points.
If a carton only works in the prototype stage, the spec is incomplete. The packaging needs to survive real labels, real operators, and real carrier handling, not just a clean mockup.
Materials, Board Grades, and Print Choices That Change Performance
Corrugated board is the main structural decision, and it deserves more attention than it usually gets. Single-wall board is common for lighter parcel shipments, but heavier or more fragile goods often need better compression resistance, higher stiffness, or a different flute combination. Buyers often assume thicker is automatically better. It is not. The right board depends on weight, panel size, stacking pressure, shipping distance, and whether the box will spend time in storage before it ships.
In practice, board grade and flute selection work together. E-flute gives a cleaner print surface and is often used where presentation matters and the contents are not overly heavy. B-flute tends to offer better crush resistance and is common when the carton needs more body. C-flute is a traditional shipping workhorse. Double-wall constructions, such as BC or EB combinations, are worth considering when the contents are dense, fragile, or likely to see compression during long transit or warehouse stacking. There is no universal winner. The right choice depends on what the box has to endure.
Kraft liners and white liners each solve a different problem. Kraft is practical, hides handling marks better, and tends to look honest on shipping-focused packaging. White liners improve contrast and give custom printed boxes a cleaner finish, which matters when the carton doubles as branded packaging. If the box will move through several touchpoints before delivery, scuff visibility becomes more important than many teams expect. A box can look premium in a sample and still show wear after the first rough conveyor pass.
Print method also changes both economics and durability. Flexographic print usually makes sense for longer runs and simpler art. Digital print is better for shorter runs, frequent artwork changes, or jobs that need variable messaging. Labels, wraps, and belly bands can cover some of the same territory when full-coverage printing would be too expensive or too limiting for a program that changes often. The right answer is sometimes a restrained one: clean branding on a strong shipper, not a fully printed carton that looks great and behaves badly.
Finishes matter more than people expect. Matte coatings reduce glare and hide minor scuffs. Gloss can deepen contrast, but it also shows abrasion faster. Water resistance matters if boxes may sit in humid storage or near damp loading areas. Glue performance matters too. A well-designed carton is still a bad carton if the seam opens because the adhesive or fold geometry was chosen without considering how the box will actually be used.
For teams that need to frame material standards more formally, ISTA is a useful reference for transit-testing methods, and FSC is relevant when fiber certification or sourcing claims matter. Those references do not replace a proper structural spec, but they keep the conversation grounded.
A practical way to narrow the material choice is this:
- Single-wall kraft for lighter, cost-sensitive parcel shipments.
- Single-wall white for cleaner print contrast and a more finished retail appearance.
- B-flute or C-flute when the carton needs more body and better crush resistance.
- Double-wall board for heavier, fragile, or higher-value contents.
- Special coatings for moisture resistance, scuff control, or higher visual polish.
Cost, Pricing, MOQ, and Quote Factors Buyers Should Expect
Packaging price is driven by a handful of variables that are easy to miss if the quote is viewed as just a per-box number. Size matters, but so do board grade, print coverage, insert complexity, coating, and whether the design needs Custom Die Cutting or a special fold style. A simple kraft mailer with one-color print is a different economic object from a fully printed shipper with a die-cut insert set and a premium finish. Setup time and material use show up fast.
Quantity changes the unit price quickly. The larger the run, the more setup cost gets spread across the order, and the lower the per-box number tends to be. Small runs still make sense for product launches, seasonal campaigns, or limited SKU tests, but they usually carry a higher unit cost. That is normal. The real question is whether the box supports the product strategy well enough to justify the spend.
Minimum order quantity, or MOQ, can widen the gap between options. Lower MOQs help when a team wants to test a structure or launch a new product without tying up cash in inventory. The tradeoff is that low volumes often narrow the choice of board grades, print methods, or finishing options. Buyers should compare quotes only after confirming the same size, same board, same print coverage, and same insert count. A mismatch there makes the comparison meaningless.
The ranges below are directional and assume production runs large enough to absorb setup cost. Short runs are usually higher.
| Option | Typical Use | Relative Unit Cost | Notes |
|---|---|---|---|
| Simple kraft mailer, one-color print | Light e-commerce items | $0.18-$0.32 | Best when speed and durability matter more than premium presentation |
| White-liner custom carton, two-color print | Retail-ready shipper | $0.28-$0.55 | Cleaner visual impact, better for package branding and unboxing |
| Die-cut box with insert set | Fragile or premium product | $0.45-$1.10 | Higher setup and material cost, but better product control in transit |
| Heavy-duty corrugated carton | Dense or high-value goods | $0.60-$1.50 | Often chosen for compression resistance and rougher shipping conditions |
Those numbers are only part of the picture. Freight, pack-out labor, storage, and assembly time can matter as much as the carton itself. A box that saves two cents but adds a slow fold sequence may cost more overall than a better-engineered design that packs faster and arrives intact more often. In packaging, the cheapest unit price is not always the lowest system cost.
One of the more common quote problems is comparing a sample to a production spec that is not actually the same. Board grade gets changed, print coverage gets expanded, or inserts are added later, and the price no longer means anything. If the spec changes, the quote changes with it. That sounds obvious, but it is where many packaging decisions go sideways.
Process, Timeline, and Production Steps From Art to Delivery
The cleanest projects start with measurements, not artwork. Confirm the product dimensions, packed weight, ship method, quantity, and any packing constraints before anyone builds a dieline or prices the run. If the product will ship with tissue, foam, corrugated inserts, bubble, or a rigid tray, that needs to be specified early. Otherwise the inside dimensions can be wrong even if the outside box looks fine.
The usual production path is predictable. Structural design comes first. Then dieline approval. Then artwork prep and prepress proofing. Then a sample or prototype. Full production starts only after the spec is locked. Skipping one of those steps usually creates rework. The most common delays are not mysterious, either. They are late approvals, missing artwork files, unclear dimensions, and a last-minute board change after the proof is already built.
Manufacturing usually follows a fixed sequence: sheet conversion, die cutting, printing, folding or gluing, inspection, and packing for shipment. Good suppliers check dimension consistency, glue placement, and print registration during the run, not only at the end. That matters because a small change in score depth or seam alignment can make the carton awkward on the pack line long before it becomes visible to the customer.
Testing should happen before the order is committed to inventory. For parcel shipments, that often means a combination of drop tests, vibration checks, and compression checks based on the product’s risk profile. You do not need a lab report to know whether a design is weak, but you do need to test the filled box, not just the empty carton. An empty sample can hide the exact failure that shows up once the product is inside.
Lead time usually splits into two parts: sample turnaround and production lead time. Simple samples can be produced quickly if the artwork is ready and the structure is straightforward. Production takes longer because the job has to be scheduled, printed, converted, inspected, and shipped. Rush jobs are possible when the spec is simple and the artwork file is clean, but speed always depends on available material and plant capacity.
A good buyer sends complete inputs on the first pass: product measurements, realistic packed weight, logo files, barcode placement, and the target ship date. That does more for schedule reliability than a long thread of back-and-forth questions. Most packaging delays come from missing information, not from the machinery.
Sizing, Inserts, and Closure Details That Prevent Damage
Internal size matters more than the outside impression. A carton can look right in a sketch and still fail if the product is too tight, too loose, or unable to accommodate the protective materials inside. Buyers should always work from inside dimensions and verify them against the actual packed item, not just the display dimensions or the outside carton spec.
Inserts are worth the money when a product shifts, tips, scratches, or needs to stay in a fixed position. Paperboard dividers, corrugated pads, die-cut nests, and molded supports all have a place. Void fill works for some items, but if the contents are dense, fragile, or premium, a shaped insert often protects better and creates a more controlled unpacking sequence. It also tends to reduce pack-out guesswork, which is useful on busy lines.
Closure style affects both speed and transit performance. Tuck-top mailers are common for presentation-oriented shipments. Roll-end mailers improve closure strength. Regular slotted cartons remain the workhorse for a broad range of shipping jobs. Self-locking designs can speed assembly when the product is not too heavy and the pack line needs consistency. The best choice depends on how fast the team works, how secure the contents need to be, and whether the box also needs to support returns.
Label planning is not cosmetic. A clean flat zone for the shipping label avoids wrinkles and scan issues. Barcode placement should stay clear of fold lines and seams. If the artwork is pushed too close to the edge, the label can cover important branding or create a noisy scan area. Good layout protects carrier workflow and keeps the package readable at a glance.
There is also a storage angle. A well-designed carton should collapse efficiently, stack cleanly in the warehouse, and avoid wasting cube in transit. That reduces handling pain and keeps product packaging practical. Good boxes disappear into the workflow. Bad ones keep asking for attention.
- Use the correct inside dimension for the product plus protection.
- Add inserts when movement, abrasion, or breakage is a risk.
- Choose a closure that matches pack speed and product weight.
- Keep label zones clean so scanning and delivery stay reliable.
Branding, Print, and Label Layout That Stays Legible in Transit
Branding works best when it respects the structure underneath it. Heavy ink coverage on a weak panel can crack during folding. Fine type near a score line can distort once the box is assembled. A full-bleed design may look striking in a render, but the real carton has flaps, folds, and seams that need room to move.
Contrast matters more than many teams expect. On kraft board, darker inks and larger type usually hold up better than delicate detail. On white liners, small typography and subtle logos are easier to read, but only if the print registration is controlled. If the artwork depends on tiny type or hairline rules, ask whether the print method can hold that detail at production speed. Some can. Some cannot.
There is a similar tradeoff with finishes. Matte tends to hide wear and fingerprints. Gloss can sharpen color but reveals scuffs quickly, especially on cartons that move through multiple hands. Soft-touch effects may look premium, yet they are not always worth the added cost on a shipping box that will spend its life in transit. The best branding decision is the one that survives handling, not just photography.
Label and barcode placement should be planned alongside the artwork, not after it. A box can have excellent print and still fail operationally if the label lands over a fold or a barcode sits on a curved surface. That creates re-scans, delays, or manual overrides. In practical terms, the cleanest branded shipper is usually the one with disciplined blank zones where the carrier needs them.
Some programs also need sustainability claims or material documentation. If recycled content, FSC certification, or compliance language is part of the package, that should be defined before sampling. Those details can affect board selection and print setup, and they are easier to validate upfront than to correct after production is underway.
Common Mistakes That Make Custom Shipping Boxes Fail
The most common structural mistake is choosing the carton for appearance instead of transit performance. That leads to crushed corners, popped seams, or damaged product on arrival. A box can look premium in a sales deck and still be the wrong design for a conveyor drop or truck compression. Form matters, but the structure has to survive first.
Artwork mistakes are just as common. Printing too close to fold lines can crack the ink. Covering barcode areas slows scanning. Dark backgrounds can make shipping labels harder to read. These are not minor issues. They show up later in the warehouse, or worse, with the customer waiting on a replacement.
Another mistake is ignoring the pack-out process. A box that works in a mockup can become a problem when an operator has to close hundreds of units a day. If the closure is awkward, the insert is fussy, or the dimensions are too tight, the line slows down and labor cost rises. That is a packaging design problem, not just a carton problem.
Overbuilding can hurt the budget too. Extra board thickness, oversized dimensions, and unnecessary inserts raise material cost, but they also raise shipping cost and sometimes assembly time. The heavier spec is justified only when the product genuinely needs it. A more disciplined choice is to test the box against the actual product and choose the minimum structure that still protects it.
Finally, skipping sample approvals or drop tests is an expensive shortcut. A small trial often catches the exact failure point before a full run is ordered. That is especially true for fragile items, premium goods, and anything with a high replacement cost. One day of testing is cheaper than a pallet of returns.
A shipping box should be judged by how it behaves after ten touches, two label scans, a short drop, and a warehouse stack, not by how it looks in the first photo.
Next Steps to Spec, Sample, and Place the Order
If the order is moving forward, start with a clean spec sheet. Measure the product, note the packed weight, confirm the ship method, list any inserts or closures needed, and gather logo, barcode, and compliance files before requesting a quote. That gives the supplier enough information to price the job honestly and build the right structure the first time.
For fragile, premium, or unusually shaped products, ask for a structural sample or prototype. That is the fastest way to confirm fit and pack speed. A sample also shows whether the opening and closing sequence makes sense on the line. A lot of packaging mistakes disappear the moment someone handles a real mockup instead of guessing from a drawing.
Review the first proof against actual packing conditions, not just the art file. Check label zones, panel orientation, opening direction, and whether the finish still makes sense under warehouse lighting. If the box will sit in storage, travel through multiple channels, or be reordered regularly, the board choice and print method should be evaluated for durability as well as appearance. Reorder planning matters, so set a trigger based on usage rate and lead time instead of waiting until the last pallet is gone.
For teams that need more than one carton style, it helps to keep a small packaging library. That makes it easier to compare future runs, maintain consistent branded packaging, and keep the same visual language across custom printed boxes and other shipping formats. If the program expands, the broader Custom Packaging Products catalog can help organize the next round of packaging decisions.
FedEx custom boxes work best when size, strength, print, and pack-out are aligned before production starts. Correcting those variables after damage reports begin is always more expensive, and usually less elegant.
FAQ
What size should FedEx custom boxes be for my product?
Base the inside dimensions on the product plus any protective material, not on the outside appearance of the carton. Leave enough clearance for inserts or void fill, but avoid extra empty space that lets the item shift during transit.
Are FedEx custom boxes different from standard corrugated boxes?
Yes. Custom boxes are built around a specific product, packing method, and branding requirement instead of a generic stock size. The differences usually show up in fit, closure style, print placement, and transit performance, not only in the logo.
How much do custom FedEx shipping boxes cost?
Price depends on size, board grade, print coverage, quantity, inserts, and whether the design needs special cutting or finishing. Per-unit cost usually drops as quantity rises, but freight, labor, and assembly time should also be included in the comparison.
What is the typical lead time for FedEx custom boxes?
Lead time depends on whether artwork is ready, whether a sample is needed, and how complex the structure and print are. Simple jobs move faster; custom structural work, special board grades, or approval cycles usually add time before production can start.
Can I print logos and shipping labels on FedEx custom boxes?
Yes, but the artwork should leave clean label zones and avoid critical folds, seams, or barcode areas. Good layout keeps branding visible while still giving the carrier a flat, readable surface for processing.
Do I need inserts for every custom shipping box?
No. Inserts make sense when the product can move, scratch, tip, or break inside the carton. If the item is stable and the fit is already tight, extra insert material may add cost without improving protection.

