Glitter does not automatically mean loud, cheap, or craft-table chaos. Done well, glitter stickers custom made for a brand can make a candle jar, cosmetic carton, bakery seal, influencer kit, or mailer insert look more expensive almost instantly.
The catch: a glitter sticker is not one simple spec. It is a stack of decisions. Glitter vinyl or glitter paper. Digital print or specialty print. Permanent, removable, freezer-grade, or high-tack adhesive. Gloss laminate, matte laminate, varnish, or no coating. Roll labels, kiss-cut sheets, or die-cut singles. Each choice changes shine, durability, cost, color accuracy, and whether small type survives production without looking chewed.
For brands using Custom Labels & Tags, sparkle works best as a packaging design tool, not a personality replacement. Use it to catch light, frame a logo, signal a limited edition, or make a simple kraft mailer feel planned. Put it everywhere and the effect gets noisy fast.
What Glitter Stickers Custom Buyers Should Know First
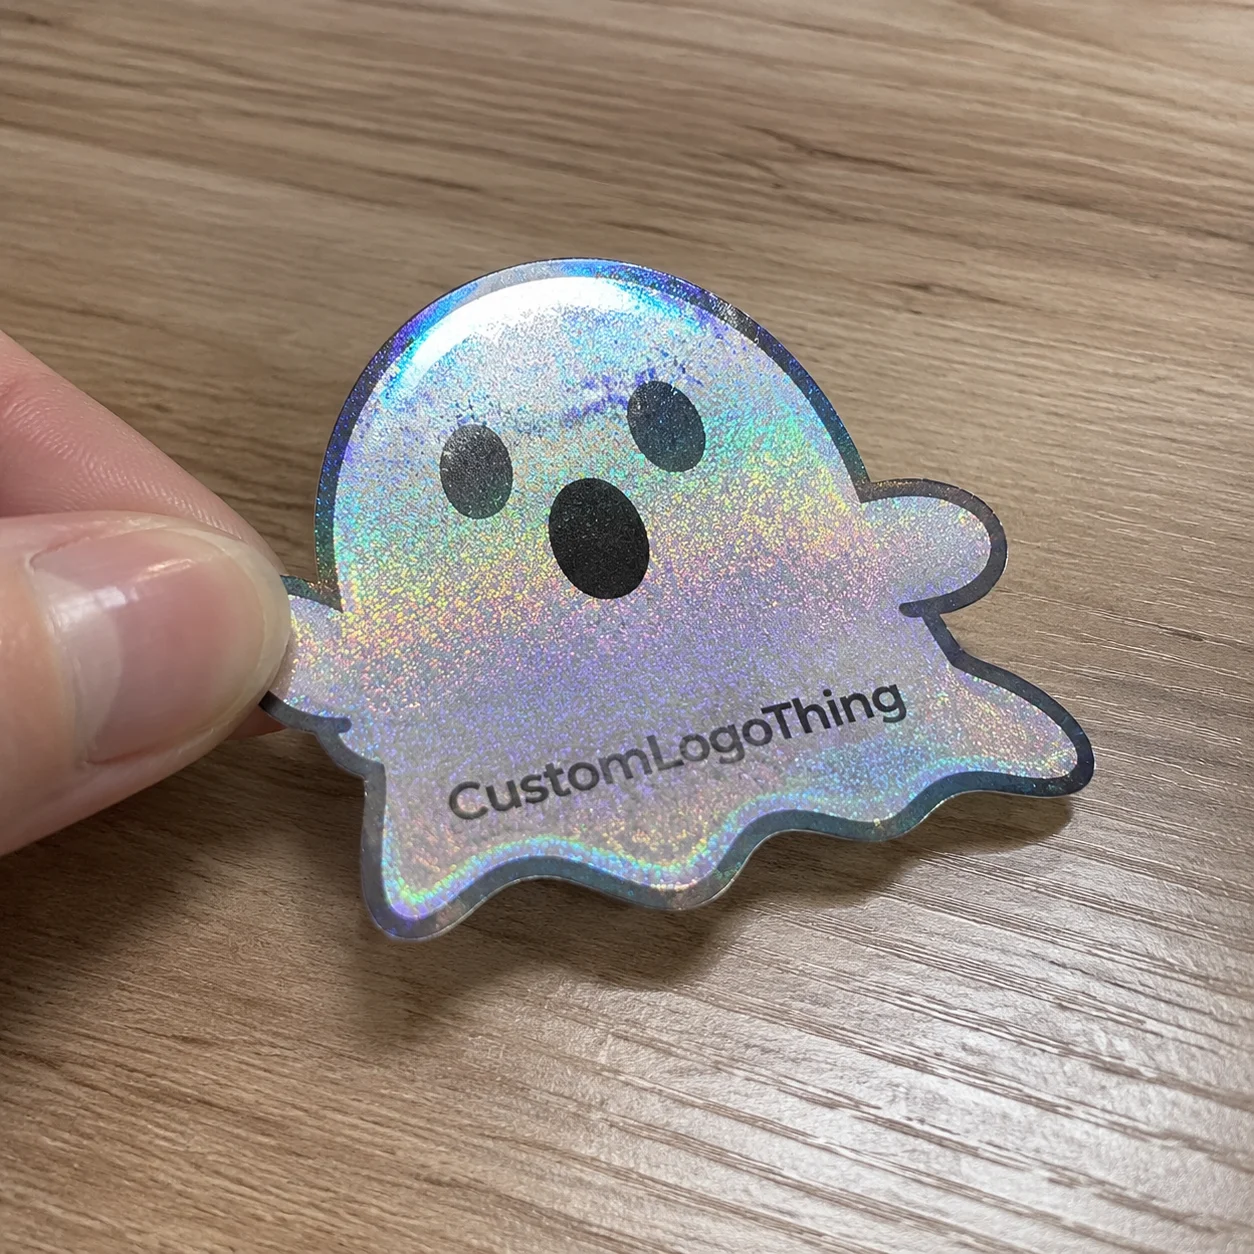
The first distinction is real glitter stock versus a printed glitter effect. Real glitter stock reflects light from the face material itself. A printed glitter effect is ink trying to imitate sparkle. One is shine. The other is a picture of shine. Cute, sometimes useful, but not the same product.
Most glitter stickers custom projects depend on three early decisions:
- Material: glitter vinyl for tougher use, glitter paper for economical indoor packaging.
- Print method: digital printing for lower quantities and varied artwork, screen or specialty methods for certain high-volume or high-opacity jobs.
- Finish: gloss, matte, varnished, or uncoated depending on handling, moisture, budget, and brand style.
Good uses include product packaging, retail seals, promotional stickers, event giveaways, subscription boxes, kids products, cosmetics, boutique food brands, Custom Printed Boxes, and seasonal drops. A glitter logo sticker on a plain kraft mailer can look intentional. A glitter-covered ingredient panel on a tiny cosmetic tube can look like someone lost a bet.
Readability is the boring issue that saves money. Glitter competes with small type, thin fonts, pale colors, QR codes, and barcodes. If the sticker carries legal copy, scent names, batch numbers, ingredients, promo codes, or scan codes, those areas need strong contrast. Often that means an opaque white ink layer under the functional parts.
Practical rule: use sparkle where it sells, not where it has a job to do. Logos, borders, backgrounds, and decorative accents are fair game. Barcodes and tiny compliance text deserve a calmer surface.
Start with the use case before asking for a quote. A laptop giveaway sticker, a bath bomb label, a freezer pouch seal, and a candle warning label should not use the same construction. Shocking, I know.
How Sparkly Sticker Materials and Printing Actually Work
A glitter sticker is built in layers: adhesive backing, glitter face stock, printed artwork, optional laminate or coating, and release liner. The buyer sees sparkle. The printer is watching adhesion, registration, cutting tolerance, ink opacity, rub resistance, and whether the finished piece peels cleanly. Glamorous, obviously.
Glitter vinyl is the tougher option. It is usually better for handled products, bottles, jars, mailers, cosmetics, party favors, drinkware, and anything that may face moisture or abrasion. Add a gloss laminate and it can handle far more rubbing than uncoated paper. Not magic armor. Still the better starting point for durability.
Glitter paper is usually more economical. It works well for dry indoor product packaging, gift seals, envelope stickers, retail inserts, bakery boxes, party favors, and short promotions. If the sticker will be peeled, rubbed, chilled, splashed, or shipped through rough conditions, paper needs a reality check.
Print behavior matters more on glitter than on standard white stock. Transparent or lightly printed artwork allows sparkle to show through. Heavy ink and opaque white layers block it. That can be useful. If your logo must stay crisp, your QR code must scan, or your brand color needs to stay close to a Pantone reference, white ink is your friend.
Without white ink, colors can turn metallic, darker, warmer, or slightly unpredictable. Sometimes that is the whole point. A pink logo over silver glitter may look playful and premium. A regulated product label where the warning text shifts into low-contrast mush? Less fun. More reprint.
Finish changes both appearance and performance. Gloss laminate gives maximum shine and better rub protection. Matte laminate softens the sparkle and can look more controlled for cosmetics or boutique retail packaging. No laminate saves money for indoor, low-touch uses, but it leaves the print more exposed.
Cut style changes the buying decision too. Kiss-cut sheets work well for sticker packs, inserts, and mixed designs. Die-cut singles are strong for giveaways and unboxing extras. Roll labels are efficient for production lines or repetitive hand application. Custom shapes look more branded, but very intricate edges can slow peeling, create tiny tear points, and make fulfillment less friendly.
If your packaging program includes more than stickers, compare materials across your wider Custom Packaging Products. A glitter seal, printed tissue, and custom box should look like one packaging system, not three vendors yelling at each other.
Key Specs That Decide Durability, Shine, and Readability
A clean quote starts with clean specs. Define the finished size, shape, material, adhesive, finish, quantity, number of designs, packaging format, and indoor or outdoor use. Leave those open and suppliers either ask ten follow-up questions or quote the safest expensive option. Neither is ideal.
Adhesive is not a footnote. Standard permanent adhesive works for most boxes, mailers, paper bags, cartons, and smooth retail packaging. Removable adhesive is better for temporary promos, glassware, or items customers may want to peel cleanly. Freezer-grade adhesive may be needed for cold storage. High-tack adhesive can help with textured paper, low-energy plastics, or slightly curved surfaces.
The surface matters as much as the adhesive label on a spec sheet. Frosted glass, oily tubes, textured kraft, coated cartons, flexible pouches, and curved tins all behave differently. A sticker that bonds neatly to a flat paperboard box can lift on a squeeze tube after a week of handling.
Durability comes from material and finish together. Vinyl plus laminate handles moisture, rubbing, stacking, and frequent handling better than uncoated glitter paper. For cosmetics, beverages, candles, bath products, party favors, or anything customers touch often, skipping protection can be penny-wise and label-stupid.
Readability needs deliberate contrast. Glitter backgrounds can overpower thin fonts and light colors. For QR codes, barcodes, legal copy, ingredients, and promo codes, use a white ink panel or solid printed block behind the information. Also leave enough quiet space around codes. A QR code crammed against a die line is not clever. It is a support ticket waiting to happen.
Size and shape bring tradeoffs. A 1.5-inch sticker can look adorable on a digital proof and then murder every fine detail in production. A 3-inch sticker gives more room for a logo, scent name, and decorative sparkle. Complex die cuts feel custom, but they may require extra setup, slower stripping, and more careful application.
For quality checks, packaging buyers often borrow thinking from broader transit and material standards. ISTA procedures focus on distribution testing, while ASTM methods are often used for adhesion, abrasion, and material performance. You do not need a lab report for every sticker order, but “sticks fine” is not a technical spec.
| Spec Choice | Best For | Tradeoff | Typical Buying Note |
|---|---|---|---|
| Glitter vinyl with gloss laminate | Cosmetics, jars, bottles, handled packaging | Higher unit cost | Often worth it for moisture and rub resistance |
| Glitter paper, no laminate | Gift seals, dry boxes, inserts, short promos | Lower durability | Good for budget indoor jobs |
| White ink under print | Logos, QR codes, barcodes, brand colors | Can reduce visible sparkle | Use only where opacity matters |
| Custom die-cut shape | Logo stickers, seals, giveaways | May add setup complexity | Avoid tiny points that tear or peel slowly |
Pricing, MOQ, and Unit Cost Tradeoffs for Glitter Labels
Pricing depends on material type, sticker size, quantity, number of designs, print coverage, white ink usage, laminate, adhesive, die-cut complexity, roll or sheet format, proofing, packing, and shipping. Anyone offering one universal price without those details is guessing. Maybe confidently. Still guessing.
Small runs have higher unit costs because setup, artwork review, proofing, printing, cutting, and packing happen whether you order 100 or 10,000. Economies of scale are annoying but real. A 2-inch glitter sticker might land around $0.18 to $0.45 per piece at mid-volume, while very small runs can climb above $0.80 to $1.50 per piece depending on size and finish. Large laminated singles, complex custom shapes, and specialty adhesives cost more. Rolls can become efficient at higher quantities.
Minimum order quantity depends on production method. Digital printing can support lower MOQs for tests, limited drops, and seasonal packaging. Specialty glitter stocks, roll labels, custom adhesives, physical proofs, or offset-style production may require higher minimums because setup has to justify press time.
Ask for two or three quantity breaks. For example, 500 pieces may look expensive, 1,000 may cost only modestly more, and 5,000 may bring the unit cost down enough to justify inventory. Math: still undefeated.
The cheapest quote is not always the best quote. Low-cost glitter labels may use thinner stock, weaker adhesive, muddy print, rough cutting, or no protective coating. Nobody brags about saving three cents after the labels peel off in transit.
For a useful quote, request these details in writing:
- Finished size, shape, and quantity breaks such as 500, 1,000, and 5,000 pieces.
- Material name, adhesive type, and whether the stock is paper, vinyl, or film.
- Finish, including gloss laminate, matte laminate, varnish, or no coating.
- White ink setup for logos, text, QR codes, barcodes, or color-critical areas.
- Roll, sheet, or die-cut single format, plus core size and unwind direction if using rolls.
- Proofing method, production time after approval, shipping method, and setup fees.
Hidden cost traps are dull until they hit your launch date. Wrong adhesive, unreadable artwork, untested barcode scans, color shifts over glitter, and ordering too few units before a campaign scales can all cost more than a proper proof or pilot run.
Process and Timeline From Artwork to Finished Stickers
The typical production flow is simple on paper: quote request, artwork review, digital proof, approval, printing, lamination or coating, cutting, quality check, packing, and shipping. The clock usually starts after proof approval, not after your first email. Somehow files do not fix themselves overnight.
Simple digital glitter stickers custom jobs can often move through production in about 5 to 10 business days after proof approval, depending on the supplier’s queue. More complex roll labels, specialty adhesives, physical proofs, custom shapes, large quantities, or color matching can push production toward 10 to 20 business days before transit. Shipping adds its own little circus.
Artwork issues slow everything down. Missing bleed, low-resolution images, unoutlined fonts, unclear cut lines, and no white ink instructions all create back-and-forth. If there are multiple SKUs, name every file clearly. “Final_final_REAL_v7.pdf” is not a production system. It is a cry for help.
A digital proof confirms layout, size, cut line, crop, and basic placement. It is useful and fast. A physical proof or sample is better when sparkle level, opacity, color accuracy, adhesive performance, or barcode scanning matters. If the sticker is part of a retail shipment, influencer mailer, or product launch, a sample is not overkill. It is insurance.
Proof approval needs adult supervision. Check spelling, dimensions, cut lines, logo position, barcode placement, QR scans, bleed, white ink, and whether important copy has enough contrast. A proof is not for vibes-only decision-making. Once approved, mistakes often become your inventory.
Build timeline buffer. If stickers are going onto 3,000 candle tins before a holiday drop, do not order them five business days before packing. Allow time for receiving, testing, application, packing, and replacement if something is wrong. Retail packaging punishes optimism. Efficiently.
Step-by-Step Guide to Ordering the Right Sparkly Stickers
- Define the job. Write down where the sticker will go, how long it needs to last, what surface it sticks to, and whether customers will handle it often.
- Choose the format. Pick roll labels for production application, sheets for variety packs or inserts, and die-cut singles for giveaways, events, or unboxing extras.
- Set the size and shape. Measure the actual packaging surface. Leave room for curves, seams, lid edges, and human hands applying the sticker at speed.
- Prepare artwork correctly. Use vector logos when possible, add 0.125 inch bleed if requested, define cut lines, outline fonts, and supply high-resolution images at 300 DPI at final size.
- Mark white ink clearly. Tell the printer where opacity is needed under text, logos, QR codes, barcodes, and brand-color areas.
- Pick material and finish. Choose glitter vinyl for durability, glitter paper for economical indoor use, gloss laminate for punchy shine, or matte laminate for a controlled premium look.
- Request a complete quote. Include size, quantity, material, finish, adhesive, number of designs, format, deadline, delivery location, and proofing needs.
- Review the proof like a mildly suspicious adult. Check spelling, crop, contrast, cut line, white ink, and scan codes before approving production.
- Test on real packaging. Apply samples to the actual jar, box, pouch, bag, tube, tin, or mailer so adhesion and appearance are not theoretical.
This process works whether you are ordering a few hundred promotional stickers or building a full product packaging program with labels, inserts, boxes, and seals. The supplier can make better recommendations when the brief includes the real use case, not just a pretty PDF floating in space.
If sustainability claims matter to your brand, ask about paper sources, recyclability limits, and certified materials. For paper-based packaging, FSC certification is one recognized chain-of-custody standard. Glitter films and laminates can complicate recycling, so avoid broad environmental claims unless the exact construction supports them.
Common Mistakes That Make Glitter Stickers Look Cheap
Mistake 1: Putting thin white or pastel text directly over glitter. It may look fine on screen and become unreadable in real lighting. Use stronger contrast, heavier type, or a white ink block behind important copy.
Mistake 2: Forgetting the actual surface. A sticker that works beautifully on a smooth box may fail on textured kraft paper, curved plastic, frosted glass, oily cosmetic tubes, or chilled packaging. Adhesive needs to match the surface and environment.
Mistake 3: Treating glitter as the whole design strategy. Sparkle should support the brand message, not bury the logo under a disco emergency. Use it as a finish, accent, or background, not a substitute for good packaging design.
Mistake 4: Ordering without checking scale. A detailed illustration may lose impact at 1.5 inches. Fine borders, tiny icons, and micro text can vanish once printed and cut. Print a paper mockup at actual size before sending files.
Mistake 5: Skipping laminate for handled products. Candles, cosmetics, drinkware, party favors, and mailers get rubbed, packed, stacked, and photographed. A protective finish often costs less than a bad first impression.
Mistake 6: Assuming colors will match a normal paper label. Glitter surfaces reflect light differently. Use white ink under brand colors or request a physical proof when accuracy matters.
Mistake 7: Buying only on cheapest unit cost. Thin stock, weak adhesive, poor cutting, and muddy print are not savings. They are delayed disappointment with tracking numbers.
Next Steps Before You Send a Sticker Quote Request
Create a simple spec checklist before contacting a manufacturer. Include finished size, shape, quantity, material preference, adhesive need, finish, artwork file type, number of designs, packaging format, deadline, and delivery address. That one page can prevent a week of email ping-pong.
Take photos and measurements of the product surface. A supplier can recommend better materials when they know whether the sticker goes on a kraft mailer, glass jar, squeeze tube, candle tin, pouch, bakery box, or retail carton. Include whether the surface is flat, curved, textured, cold, oily, or handled often.
Decide what must stay readable. Mark logos, legal text, QR codes, barcodes, ingredients, scent names, shade names, batch numbers, or promo codes that need solid contrast. Glitter is decoration. Functional information still has a job to do.
Prepare artwork with bleed, outlined fonts, vector logos, and a separate cut line. If white ink is needed, label it clearly instead of hoping the printer reads your mind. Printers are good. Psychics charge extra.
Ask for quantity breaks and at least one recommended material alternative. You might compare glitter vinyl with laminate against glitter paper without laminate, or roll labels against sheeted stickers. That gives you a real view of budget, durability, and finish without restarting the quote process three times.
If the stickers support a launch, order samples or a short pilot run first. Apply them, rub them, scan them, photograph them, pack them, and ship-test a few if the order matters. For branded packaging, small tests catch the expensive nonsense early.
Order glitter packaging like you would order any premium finish: with specs, testing, and timing. Sparkle can raise perceived value quickly. It can also expose every weak file, rushed proof, and bargain adhesive in the room.
FAQs
Are glitter custom stickers waterproof?
Glitter vinyl stickers with a protective laminate can be water-resistant and suitable for handled packaging, bottles, jars, or damp environments. Glitter paper stickers are usually better for dry indoor use, gift seals, inserts, and short-term promotions. Confirm the exact material, adhesive, and laminate because “waterproof” gets tossed around way too casually.
Can glitter stickers custom made for packaging include QR codes?
Yes, but the QR code should usually sit on a solid white or high-contrast printed area, not directly over exposed glitter. Test the code from the final proof or sample using multiple phones before approving a large run. Leave enough quiet space around the QR code so the cut line, shine, or nearby graphics do not interfere with scanning.
What is the best file format for custom glitter sticker artwork?
Vector files such as AI, EPS, or print-ready PDF are usually best for logos, cut lines, and clean typography. Use high-resolution raster images only when needed, ideally at 300 DPI at final print size. Include bleed, outlined fonts, separate cut lines, and clear white ink instructions if parts of the design need opacity.
How much do custom glitter labels usually cost?
Cost depends on size, quantity, material, adhesive, finish, shape, white ink, and whether the stickers are rolls, sheets, or singles. Small runs have higher unit costs because setup and proofing are spread across fewer pieces. Ask for quantity breaks at a few volumes so you can see where the unit cost starts making sense.
How long does glitter sticker production take?
Production timing depends on artwork readiness, proof approval, material availability, quantity, finishing, cutting, and shipping method. Simple digital jobs can move faster, while custom shapes, roll labels, physical proofs, or specialty adhesives take longer. Build buffer time before launches, events, or retail shipments because rushed packaging is where expensive mistakes go to party.


