Buyer Fit Snapshot
| Best fit | Box Styles for Products projects where brand print, material claims, artwork control, MOQ, and repeat-order consistency need to be specified before quoting. |
|---|---|
| Quote inputs | Share finished size, material target, print colors, finish, packing count, annual reorder estimate, ship-to region, and any compliance wording. |
| Proofing check | Approve dieline scale, logo placement, barcode or warning zones, color tolerance, closure strength, and carton packing before bulk production. |
| Main risk | Vague material claims, crowded artwork, missing packing details, or unclear freight terms can make a low unit price expensive after revisions. |
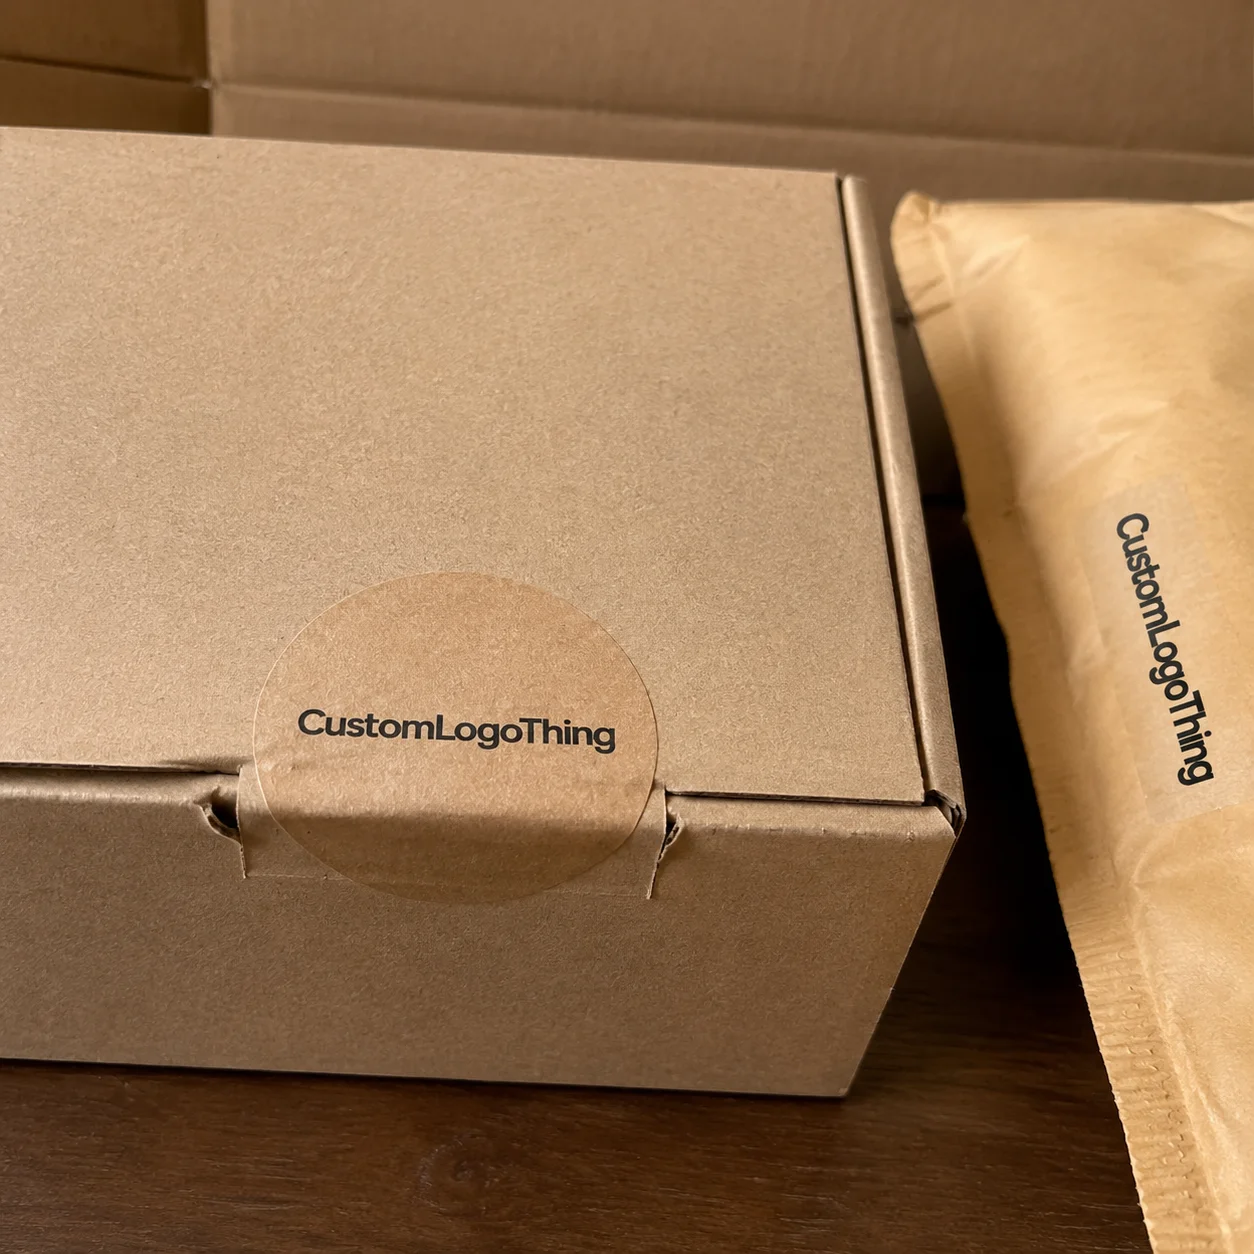
Fast answer: Box Styles for Products: Material, Print, Proofing, and Reorder Risk should be specified like a repeatable production item. The safest quote records material, print method, finish, artwork proof, packing count, and reorder notes in one written spec.
Production checks before approval
Compare the actual filled-product size with the drawing, then confirm tolerance on folds, seals, hang holes, label areas, and retail display edges. Reserve space for logos, QR codes, warning copy, and material claims before decorative graphics fill the panel.
Quote comparison points
Review material grade, print process, finish, sampling route, tooling charges, carton quantity, and freight assumptions side by side. A quote is only useful when the supplier can repeat the same color, closure quality, and packing count on the next order.
How to Choose Box Styles for Products: What Most Brands Miss
I still remember one Monday morning in our Shenzhen facility when a client’s “pretty” carton turned into a shipping headache by lunch. Their product was a 420g skincare set, and the team had picked a tall, narrow folding carton because it looked elegant on the render. Cute. The problem was that the box left 18mm of vertical empty space, so the bottles shifted, the inserts rattled, and the courier damage rate jumped to 7.8% in the first carton test run. That’s the kind of mess that makes how to choose box styles for products a real business decision, not a design preference. In packaging, 18mm is not “a little extra room.” It is the difference between a clean unboxing and a replacement order.
Box style means more than shape. It covers structure, opening method, board type, closure, and intended use. A mailer box is not just a mailer box because somebody typed it into a quote sheet. It may be made from E-flute corrugated board, scored for a tuck-and-lock closure, and built to survive parcel shipping from Shenzhen to Los Angeles in 12 to 15 business days on ocean freight plus local fulfillment, while a rigid setup box could use 1200gsm greyboard wrapped in art paper for a premium retail feel. Different jobs. Different outcomes. Different failure points, too.
The best-looking box is often not the best-performing one. I’ve watched brands spend $1.20/unit on a rigid lid-and-base box for a $14 accessory, then complain when margin vanished after freight and hand assembly. I’ve also seen a $0.38 folding carton outperform a much pricier setup box because the product was light, dry, and sold mostly through retail shelves in Chicago, Dallas, and Atlanta. How to choose box styles for products starts with function, then moves to branding, then cost. Flip that order and you buy expensive mistakes. Usually in quantities of 3,000 pieces.
Most brands waste money because they start with Pinterest boards and end with structural problems. If you want fewer samples, faster approvals, and less nonsense from suppliers, use a practical filter. That’s the one I use when I quote projects, walk factory floors in Dongguan and Foshan, and argue with production teams over 2mm of headspace. How to choose box styles for products really means matching the box to the product, the shipping method, and the selling environment before the artwork ever opens in Illustrator.
How Box Styles Work in Real Packaging Production
In production, box styles fall into a few main families: folding cartons, rigid boxes, mailer boxes, Corrugated Shipping Boxes, sleeves, and inserts. Each one behaves differently on the line. A folding carton might be made from 300gsm C1S artboard, shipped flat, and glue-closed at the factory in Shenzhen or Dongguan. A rigid box might use 900gsm to 1500gsm greyboard, wrapped manually or semi-manually, and arrive fully assembled. A mailer box often uses 1.5mm to 2.5mm corrugated board and a self-locking structure that fits e-commerce far better than a flimsy paperboard carton.
When I was walking a folding line in Dongguan, the operator showed me why a 1mm difference in score depth matters. Too shallow and the flap cracks. Too deep and the structure collapses during packing. That tiny manufacturing detail changes assembly speed, carton integrity, and how your customer feels when opening the package. How to choose box styles for products is not about choosing a “type”; it is about choosing a build logic the factory can reproduce 10,000 times without drama. On a good day, that logic saves you a week of sampling. On a bad day, it saves your launch.
Dielines are the blueprint. Board thickness changes the whole outcome. Closure style changes the speed. A straight tuck end carton packs faster than a crash-lock bottom when the line is busy, but the crash-lock bottom gives better load support for heavier items. A magnetic closure box feels premium, sure, but it also adds cost, labor, and a little more room for inconsistency. I always ask: will this box be packed by hand, machine, or both? If the answer is “hand-packed in a small warehouse in Shenzhen,” avoid structures that require a monk’s patience.
Product size, weight, and fragility decide structural needs more than branding mood boards do. A 60g soap bar can live happily in a lightweight folding carton. A glass serum bottle, not so much. It may need an inner tray, a paper pulp insert, or a corrugated mailer with a snug cavity. For fragile shipments, I like to reference drop testing concepts from ISTA, because real transit is not a polite little desk test. Boxes get tossed, stacked, and crushed in sorting hubs from Guangzhou to Long Beach. That is the daily reality.
Sampling matters because digital mockups lie. I’ve seen a structure look perfect in a PDF and fail the fit test by 4mm because the product shoulder was not accounted for. Before full production, I always recommend a sample pack with the actual item inside, then a basic transit test. If it is an e-commerce item, do a drop test from waist height and a corner compression check. If it is retail, check shelf presence and how easily the customer removes the product without tearing the box open like a raccoon. A sample round usually takes 7 to 10 business days from dieline approval in a packaging plant near Shenzhen.
Here is a simple way to compare common styles:
| Box Style | Typical Material | Best Use | Common Cost Range | Notes |
|---|---|---|---|---|
| Folding carton | 250gsm-400gsm paperboard | Light retail products | $0.18-$0.55/unit at 5,000 pcs | Ships flat, low storage cost |
| Mailer box | E-flute corrugated | E-commerce, subscription kits | $0.42-$1.10/unit at 3,000 pcs | Better transit protection |
| Rigid box | 900gsm-1500gsm greyboard | Premium gifting, luxury products | $1.20-$4.80/unit at 2,000 pcs | Highest perceived value, higher labor |
| Corrugated shipping box | B-flute or E-flute corrugated | Heavier or fragile shipping | $0.35-$1.25/unit at 5,000 pcs | Strong, practical, less fancy |
If you are doing how to choose box styles for products well, you do not pick the box style first. You pick the production logic first. That keeps you from paying for beauty when you actually needed strength.
Key Factors That Shape the Right Box Style
The first factor is product dimensions. I want the exact length, width, height, and any extra parts like caps, droppers, handles, cables, or inserts. A box for a 180ml bottle is not the same as a box for a flat compact mirror, even if both weigh under 250g. Internal dimensions matter more than outer dimensions, because a 2mm board wall on each side changes the cavity fast. Skip this part and you are basically guessing with money. And packaging quotes do not forgive guessing.
Weight comes next. A lightweight cosmetic tube can work in a paperboard carton with a tuck-end closure, while a 1.2kg candle set may need a corrugated mailer or a rigid structure with reinforced support. Fragility matters too. Glass, ceramics, and high-gloss finishes often need inserts or a tighter fit. I once negotiated a packaging spec for a candle brand in Ningbo where the client wanted a thin carton to save $0.06/unit. We tested it. Three units cracked in a 24-pack transit simulation. That “saving” would have become a $2.40 replacement problem per damaged order. Smart math beats optimistic math. Every time.
Brand positioning changes the answer a lot. If the product sits in a mass retail channel, the box should load quickly, print clearly, and survive shelf handling in stores across California or Texas. If the product is a gift set, subscription item, or premium launch, the box becomes part of the experience. You may want a magnetic closure, an inside print, or a paperboard insert. That said, fancy finishes do not fix a weak structure. Soft-touch lamination, foil stamping, embossing, and spot UV are nice, but they do not stop a box from crushing if the board is too light.
Shipping method is another fork in the road. If a product goes direct-to-consumer, the package has to survive parcel carriers, conveyor handling, and the occasional drop that somehow seems personal. If it is wholesale or retail, you may care more about pallet stacking and shelf display. E-commerce often favors mailer boxes or corrugated shippers. Retail often favors folding cartons. Luxury gifting often favors rigid boxes. How to choose box styles for products gets easier once you stop asking, “What looks best?” and ask, “Where does this box live most of the time?”
Sustainability goals can narrow the field, too. FSC-certified paperboard is a strong choice if you want responsible sourcing. You can learn more from the FSC site if you need the certification basics. I’ve had clients switch from mixed-material setups to a recyclable paperboard structure with a kraft mailer sleeve, and that reduced packaging confusion at the warehouse in Suzhou. It also helped them tell a cleaner story on the product page. Not every sustainable choice is cheaper, though. Sometimes recycled board costs more, and specialty coatings can complicate recyclability.
Budget is the part everybody wants to ignore until the quote lands. A simple folding carton with 4-color printing might sit around $0.22/unit at 10,000 pieces. Add a custom insert, foil, and matte lamination, and you can push that number much higher. Add a rigid box and hand assembly? Now you are in a different conversation entirely. How to choose box styles for products means balancing what the product deserves with what the margin can actually survive. If your gross margin is 55%, a packaging jump from $0.24 to $0.84 can hurt fast.
Compliance can matter a lot. Food packaging, cosmetic packaging, and some medical or supplement products may require material choices that are cleaner, safer, or easier to document. I am not saying every carton needs a compliance binder the size of a textbook, but you do need to ask whether the product needs food-safe inks, odor control, or a specific barrier layer. Do not assume. Ask the supplier for the exact spec sheet and material construction. If the supplier is in Guangzhou or Yiwu, ask for photos of the finished board stack, too.
Three details I always ask for before I recommend a style:
- Exact product dimensions including accessories and closures.
- Product weight with the item fully assembled or filled.
- Shipping route whether it is retail, DTC, or palletized freight.
How to Choose Box Styles for Products Step by Step
Step one is simple: start with the product, not the art. I know that sounds obvious, but you would be shocked how often teams build around a brand story first and the dimensions second. Pull the actual product, a ruler, and a scale. Measure it three times. If the item has uneven edges, curved shoulders, or a removable lid, capture those details. This is the foundation of how to choose box styles for products without wasting sample rounds. A 3mm measurement error can mean a completely different structural choice.
Step two is defining the use case. Is this box for shelf display, parcel shipping, gift presentation, or a subscription unboxing moment? A shelf-ready carton can prioritize front-panel graphics and compact fit. An e-commerce box can prioritize structural strength and easy packing. A premium presentation box can prioritize the opening experience, internal fit, and finish. If you try to make one box do all three jobs perfectly, you usually get a compromise that does none of them well. I have seen that compromise in factories from Shenzhen to Shanghai, and it always costs more later.
Step three is matching the box style to order volume and packing speed. A small brand shipping 200 units a month can tolerate a box that takes 20 seconds to assemble. A warehouse packing 6,000 units a week cannot. I’ve sat in supplier meetings where the quote looked great until we asked about manual assembly time. Suddenly the “cheap” box had hidden labor attached. If the line worker needs to fight the structure, your real cost is no longer cheap. It is just delayed pain.
Step four is requesting dielines and comparing 2 to 3 structures side by side. Not one. Not six. Just enough to compare a folding carton, a mailer box, and a rigid or corrugated alternative if the product needs it. I like to review internal dimensions, board thickness, glue flaps, and closure style together. That keeps the decision grounded. If your supplier cannot provide a clean dieline, that is a signal, not a coincidence. It usually means the factory is still making the guesswork for you.
Step five is prototyping. Print the structural sample, pack the real product, and test it. I mean real product, not a foam dummy. I once watched a beauty brand approve a fit based on an empty sample and then discover that the serum pump tilted the product 6mm off center. The insert looked fine until the first shipment arrived with scuffed caps. A 20-minute test pack would have saved two weeks of blaming each other in email threads. That is a cheap lesson compared with a 5,000-piece reprint.
Step six is testing protection and presentation together. If it is an e-commerce item, do a basic drop test and a compression check. If it is retail, place it on a shelf, open it, close it, and see whether the flaps wear out after three cycles. If you want a structure that can handle shipping, a line worker, and a customer opening it with one hand, test all three. How to choose box styles for products means thinking like the warehouse, the buyer, and the customer in one pass.
Step seven is finalizing artwork only after structure approval. I cannot stress this enough. People love to send final print files before the board is locked. Then somebody changes the board thickness from 300gsm to 350gsm, the dieline shifts by a few millimeters, and the barcode lands in the wrong place. That is how you end up paying for reprints. Structure first. Artwork second. Always. Reprints in Dongguan are never “fun.”
Here is a simple decision flow I use with clients:
- Measure the product and weight.
- Choose the shipping method.
- Decide whether the goal is protection, presentation, or both.
- Select 2-3 box styles that fit the use case.
- Request dielines and compare board specs.
- Prototype, test, and revise.
- Approve structure before artwork lock.
That process sounds basic because it is basic. Basic is good. Basic prevents expensive mistakes. If you are serious about how to choose box styles for products, the boring steps are the ones that save you the most money. The flashy parts can wait until the structure stops lying to you.
Cost and Pricing: What Different Box Styles Really Change
Rigid boxes usually cost more than folding cartons or mailers because the build is slower and more manual. You are paying for greyboard, wrap paper, magnetic closures if used, and hand labor. A premium rigid box might land at $1.80/unit for 2,000 pieces in Shenzhen, while a folding carton for a similar-sized product could be under $0.45/unit at 10,000 pieces. That gap is not random. It reflects material, labor, and assembly complexity. It also reflects how much human time the box consumes on the line.
Custom inserts also change the number fast. A paper pulp insert may add a modest amount, but EVA foam, thermoformed trays, or multi-piece paperboard dividers can push unit cost up quickly. Specialty finishes do the same thing. Foil stamping, embossing, soft-touch lamination, and spot UV all add time and setup. I’ve had a supplier quote a box at $0.62/unit, then the client asked for gold foil, and the number climbed to $0.91/unit before we even discussed inserts. That is real life. Packaging does not magically stay cheap because the mood board is expensive.
Hidden costs matter more than the quote line people obsess over. Dimensional Weight Shipping can punish oversized boxes. Storage space can get eaten alive by rigid boxes that do not ship flat. Setup fees can make small runs awkward. Minimum order quantities can force you to order 3,000 units when you only wanted 800. If you are trying to master how to choose box styles for products, you need to look beyond unit price and ask what the total landed cost will be across storage, freight, and damage. A box at $0.30 that causes $1.50 in returns is not a bargain. It is a trap with a barcode.
Damage reduction can justify a higher box price. Cheap packaging that fails in transit is not cheap. It is merely delayed expense. I worked with a client selling glass toners who insisted on a lower-cost carton to hit a retail target. After a trial run, their breakage rate sat at 4.6%. Once we switched to a stronger mailer box with a paperboard insert, the damage rate dropped below 1%. The box cost increased by $0.29/unit, but replacement returns, support time, and refund leakage dropped enough to make the switch worthwhile. That is the kind of math that keeps a business alive.
Perceived value matters, too. A product that sells for $28 can sometimes support a $0.60 package that makes it feel premium. A $120 product may need a more luxurious structure to match buyer expectations. But I’ll say it plainly: do not build a $4.00 box for a $16 product unless the box itself is part of the value proposition. That is not premium. That is a margin hostage situation. In practical terms, a 12% packaging-to-retail ratio is already pushing it for many consumer goods.
If you want a quick cost comparison, here is the rough pattern I have seen in supplier quotes for custom packaging runs:
- Folding carton: lowest setup cost, best for lightweight products, fast assembly.
- Mailer box: mid-range cost, stronger shipping performance, good for DTC.
- Rigid box: highest cost, strongest premium feel, often hand-finished.
- Corrugated shipper: practical cost-to-strength balance, less retail-friendly.
The right answer in how to choose box styles for products is rarely “pick the most expensive one.” It is “pick the one that protects margin, product, and brand at the same time.”
Process and Timeline: From Sample to Production
The normal workflow starts with a quote request. You send the product dimensions, quantity, target style, printing needs, and finishing preferences. Then the supplier creates or confirms the dieline, gives you a price, and asks for artwork. If the structure is custom, there may be a sample round before final production. That sounds straightforward because it is straightforward. The delays come from revisions, not from the idea itself. A clean brief from the start can shave 3 to 5 business days off the back-and-forth.
Artwork changes slow everything down. So do structural revisions. A 2mm change to the cavity can mean a new cut line and another sample. Specialty coatings can also add time because they may require extra testing or limited machine availability. If you want an honest timeline, ask for two numbers: sample lead time and production lead time. For a simple folding carton, I would expect a sample in about 7-10 business days and production in 12-15 business days after proof approval, depending on quantity. For a rigid box with custom inserts, the process can take longer because more hand work is involved. In a Guangzhou factory, rigid jobs often need an extra week just for manual wrapping and quality checks.
Supplier communication affects lead times more than people think. I’ve seen a job stall for four days because one email asked for “matte black” and the plant wanted Pantone Black C or a coated CMYK build. That tiny ambiguity created a delay that no one had budgeted for. If you are learning how to choose box styles for products, you also need to learn how to communicate like a packaging buyer: exact specs, exact quantities, exact deadlines. “ASAP” is not a deadline. It is a cry for help.
Seasonal demand matters too. Before peak shipping periods, factories get busy. That can push sampling and production slots out by a week or more, especially for rigid boxes and complex finishing work. If you need a launch date that cannot move, build buffer time into your plan. I tell clients to leave at least 10 to 14 extra days if the project has new tooling, special inserts, or a new supplier. You may not need it. But if you do, you will be glad it is there. Chinese New Year adds another 10 to 20 days of chaos if you miss the cutoff.
One thing I always recommend is approving one sample thoroughly before scaling. Do not rush past the sample because it “looks close enough.” Open and close it 10 times. Pack the real product. Shake it. Stack it. Put it in an outer shipper. If the box is for retail, hand it to someone who has never seen the product and watch how they interact with it. I’ve learned more from watching a customer fumble with a box for 15 seconds than from any polished presentation slide. That awkward pause tells you what your buyer will feel.
For brands working with sustainability requirements, production timelines can also depend on certified material availability. FSC-certified board may be easy to source, or it may not, depending on the spec and region. If you want to understand FSC claims better, their official guidance at fsc.org is a useful reference. If you care about broader packaging and environmental considerations, the EPA’s packaging waste resources at epa.gov are worth a look, especially when you are trying to reduce material without wrecking performance. Sometimes a recyclable board in Shanghai is available faster than a specialty laminated option in Ningbo.
The short version? How to choose box styles for products is faster when you treat the process like a sequence of approvals, not a creative guessing game. Measure, select, sample, test, approve, then print.
Common Mistakes, Expert Tips, and What to Do Next
The biggest mistake is choosing by appearance only. I get it. Everyone wants the beautiful box. But beauty without fit is just expensive theater. Another common mistake is ignoring shipping tests. A box that survives on a desk may still fail in a courier network where it gets dropped, stacked, and bounced around like it owes someone money. The third mistake is underestimating assembly labor. A structure that takes 30 seconds to fold can destroy a packing station’s output if the team is moving 800 units a day. In a warehouse in Suzhou, I watched output drop 14% because one carton required too many folding steps.
Here is a mistake I have seen more than once: a brand approves an outer dimension without confirming the internal dimension. That is how a “perfect fit” ends up too tight after board thickness is added. Another classic: someone chooses a premium rigid box, then forgets the product will ship in an outer carton anyway. That means the pretty box is being protected by another box, which can be smart, but it also adds freight and storage cost. Nothing is free. Not even elegance. Especially not elegance shipped by air from Shenzhen.
One of my factory-floor rules is this: ask for the board spec in writing. Not “strong board.” Not “premium paper.” I want the exact spec, like 350gsm C1S artboard, 1.5mm greyboard, or E-flute corrugated. That one habit saved a client from ordering a carton that looked identical on screen but arrived 15% weaker than expected. On another job, I sat through a supplier negotiation where the price changed by $0.07/unit simply because the board caliper was increased by 0.2mm. That is why details matter. Small specs, big consequences. Paper thickness in packaging is not a vibe.
My second tip is to test with real units, not placeholders. A cosmetic jar with a heavy glass base behaves differently from a light sample bottle. A charger box with accessories is not the same as an empty shell. A cookie carton is not a candle carton. Obviously, right? Yet people skip this all the time. How to choose box styles for products works best when you test the actual product in the actual box under actual packing conditions. Use the same insert, the same tape, the same outer shipper, and the same packing team if you can.
My third tip is to compare at least three styles. You may think you know what you want, but a folding carton, a mailer box, and a corrugated shipper can solve the same problem in different ways. One may be cheaper. One may ship better. One may present better. If you only request one quote, you are letting the first idea win by default. That is not a strategy. That is inertia. And inertia loves budget overruns.
Here is a clean comparison to help narrow choices:
| Priority | Best Box Style | Why It Works |
|---|---|---|
| Lowest unit cost | Folding carton | Low material use, ships flat, efficient for lightweight products |
| Better transit protection | Mailer box | Corrugated strength and self-locking structure help in parcel shipping |
| Premium presentation | Rigid box | Strong perceived value, ideal for gifts and high-margin products |
| Heavy or fragile products | Corrugated shipper | Strongest practical protection for tough shipping conditions |
What should you do next? Measure your product. Write down the shipping method. Decide whether the box needs to sell, protect, or both. Ask for two to three dielines. Request samples with the real product inside. Then make your decision using a checklist instead of a mood board. If you need help, a good supplier should be able to explain board thickness, closure options, and finishing tradeoffs in plain language. If they cannot, that is not “mystery.” That is poor communication, usually from a plant that is too busy or too vague.
I’ve spent enough time on factory floors to know this: the best packaging decisions are rarely flashy. They are specific. They are tested. They respect the product, the warehouse, and the customer. That is why how to choose box styles for products should always end with one simple question: will this box do its job every time, at the cost my business can actually support?
If the answer is yes, you have probably found the right structure. If the answer is “it looks nice,” keep going.
How to choose box styles for products is not about picking the prettiest option. It is about picking the structure that fits, protects, ships, and sells without wrecking your budget. Start with the product, check the specs, test the sample, and let the numbers make the final call.
FAQs
How do I choose box styles for products that ship fragile items?
Use a style with enough structural strength and pair it with inserts or cushioning. For glass, ceramics, or delicate electronics, I’d rather see a corrugated mailer or reinforced shipper than a thin paperboard carton. Test drop protection with the real product weight, not a dummy sample, because a 220g bottle and a 480g bottle behave very differently in transit. If you are sourcing in Shenzhen or Dongguan, ask for a 1.5mm or 2.0mm corrugated sample and run a basic corner-drop test before you approve 5,000 pieces.
What box style is cheapest for small products?
Folding cartons are often the lowest-cost option when the product is lightweight and needs minimal protection. For e-commerce, mailers can still be cost-effective if you need sturdier transit performance. I’ve seen simple cartons land around $0.18 to $0.55 per unit depending on quantity, board choice, and print coverage. At 5,000 pieces in Shenzhen, a 300gsm C1S carton with 4-color printing can be a very different number from a 1,000-piece rush order in Shanghai.
How do I know if a rigid box is worth the cost?
Choose rigid boxes when presentation, premium branding, or giftability matters more than ultra-low unit cost. They usually make sense for high-margin products where unboxing affects perceived value. If the product sells for $80 or more, a $1.50 to $3.50 box can be reasonable. If the product sells for $12, that same box can crush margin like a forklift on cardboard. Add in hand assembly time and you can easily add 3 to 5 business days to production.
What dimensions do I need before asking for a box style recommendation?
Measure the product’s exact length, width, and height, plus any closures, inserts, or accessories. Provide the product’s weight so the structure can be matched to real shipping conditions. If you can, also share whether the item is retail display, e-commerce, or gift packaging, because that changes the box recommendation a lot. I also want the cap height or handle depth if the product is irregular, because 2mm can be the difference between a clean fit and a crushed flap.
How long does it take to finalize box styles for products?
The timeline depends on sampling, revisions, and production complexity. Simple structures move faster; custom rigid or specialty-finish boxes usually take longer because more approval steps are involved. A straightforward folding carton can move from sample to production in roughly 2 to 4 weeks, while a more complex project can take longer if the structure, inserts, or finishes need multiple revisions. In practical terms, many suppliers in Shenzhen or Dongguan quote 7 to 10 business days for sampling and 12 to 15 business days from proof approval for production on a standard carton run.