Buyer Fit Snapshot
| Best fit | Create Branded Packaging on Budget projects where brand print, material claims, artwork control, MOQ, and repeat-order consistency need to be specified before quoting. |
|---|---|
| Quote inputs | Share finished size, material target, print colors, finish, packing count, annual reorder estimate, ship-to region, and any compliance wording. |
| Proofing check | Approve dieline scale, logo placement, barcode or warning zones, color tolerance, closure strength, and carton packing before bulk production. |
| Main risk | Vague material claims, crowded artwork, missing packing details, or unclear freight terms can make a low unit price expensive after revisions. |
Fast answer: Create Branded Packaging on Budget: Quote Scope, Sample Proof, MOQ, and Lead Time should be specified like a repeatable production item. The safest quote records material, print method, finish, artwork proof, packing count, and reorder notes in one written spec.
Production checks before approval
Compare the actual filled-product size with the drawing, then confirm tolerance on folds, seals, hang holes, label areas, and retail display edges. Reserve space for logos, QR codes, warning copy, and material claims before decorative graphics fill the panel.
Quote comparison points
Review material grade, print process, finish, sampling route, tooling charges, carton quantity, and freight assumptions side by side. A quote is only useful when the supplier can repeat the same color, closure quality, and packing count on the next order.
I’ve spent enough time on packaging floors to know this: how to Create Branded Packaging on budget is not really a design problem. It’s a decision-making problem, and the numbers show up quickly once you get into a plant in Ohio, New Jersey, or Guangdong. I remember standing beside a case erector in a corrugated facility near Columbus while a beauty brand approved an $18,000 rigid box with a magnetic closure, foil stamping, embossing, and a soft-touch wrap, then asked why their customers still remembered the competitor with the plain kraft mailer and excellent logo placement. Honestly, I think that was the moment the room understood the difference between “expensive” and “smart.” The expensive box looked busy; the cheaper one looked intentional.
That mismatch shows up constantly. Brands often confuse “more finishes” with “more premium,” though the two rarely travel together when a package is printed in Shenzhen, Chicago, or Monterrey. A one-color box with a consistent dieline, the right board grade, and a clean print setup can outperform a flashy package that fights itself visually and eats margin. If you want how to Create Branded Packaging on budget to actually work, start by treating packaging as a system: structure, print, inserts, labels, and the small details customers touch first. (The little stuff is weirdly powerful. Also annoying, because it’s the little stuff that usually breaks first, especially in a hand-pack line running 700 units an hour.)
Most teams overspend in the same three places: custom sizes, unnecessary finishes, and revisions that should have been caught on a one-page brief. The smartest brands I’ve worked with don’t try to decorate every surface. They choose the few brand signals customers notice in the first three seconds and execute those well, usually with a limited palette, a standard carton size, and a print spec that stays under $0.25 per unit at 5,000 pieces.
Why Branded Packaging Feels Expensive—and How to Reframe It
Branded packaging can feel expensive because it exposes every decision. If the logo is off by 4 mm, people notice. If the box is 15% too large, freight notices. If the finish is flashy but the structure sags, the customer notices. That’s why how to create branded packaging on budget starts with reframing the job: you are not buying “fancy packaging,” you are buying a few well-chosen signals that help customers recognize, trust, and remember your brand, whether that package is a 350gsm C1S artboard carton in Toronto or a kraft mailer sourced from a converter in Nashville.
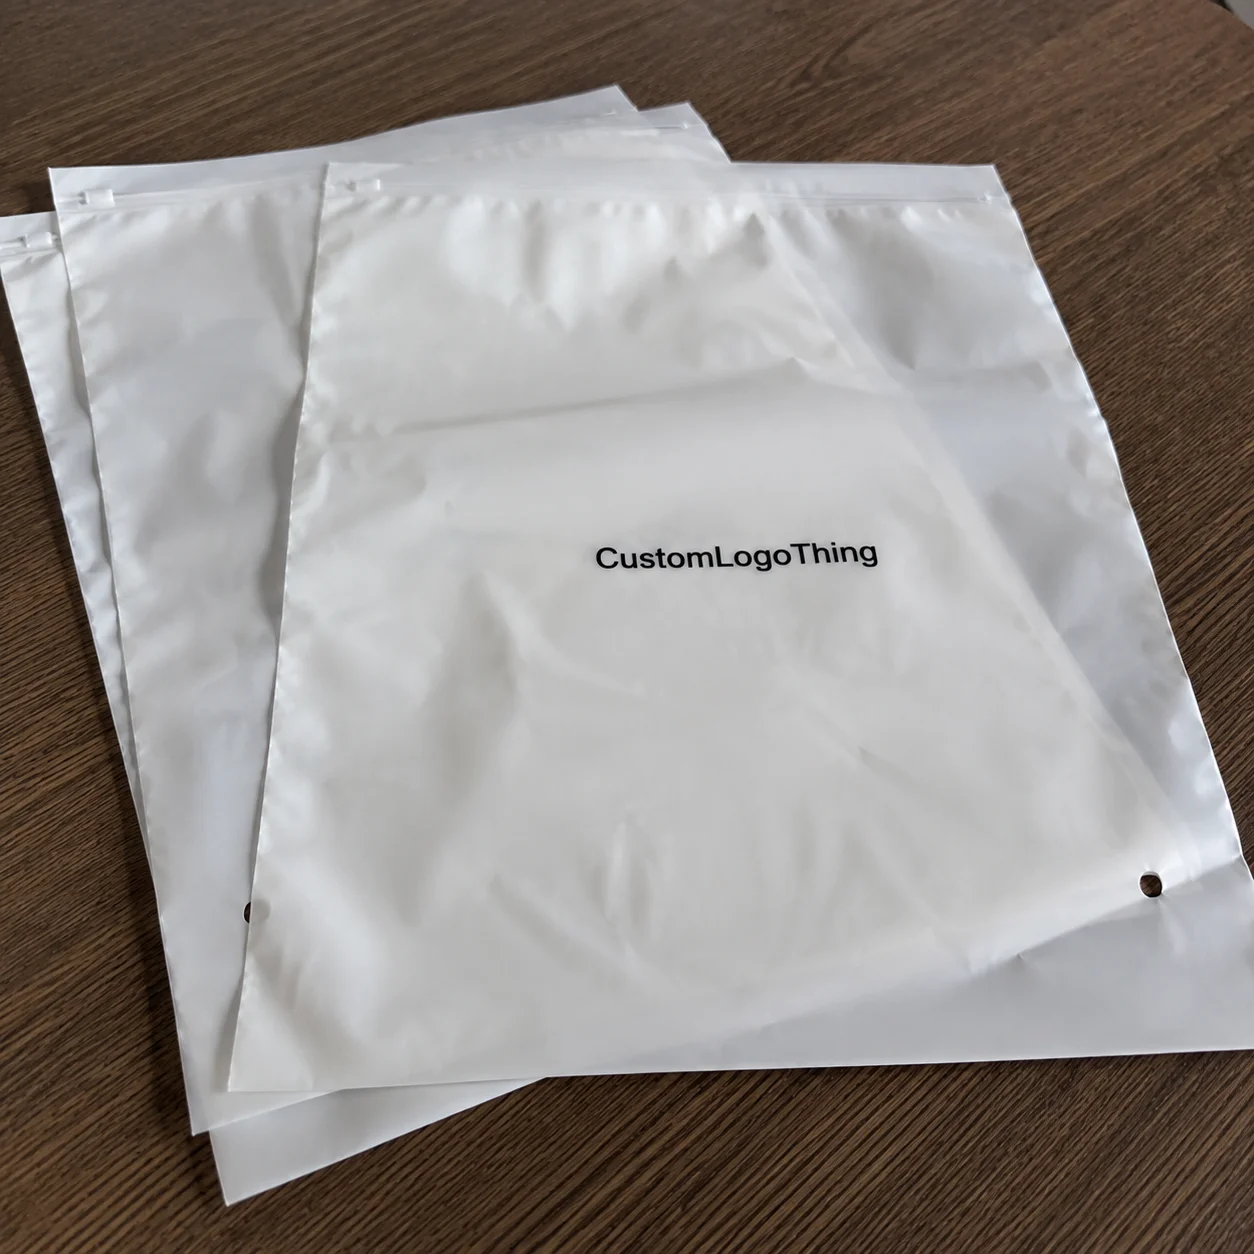
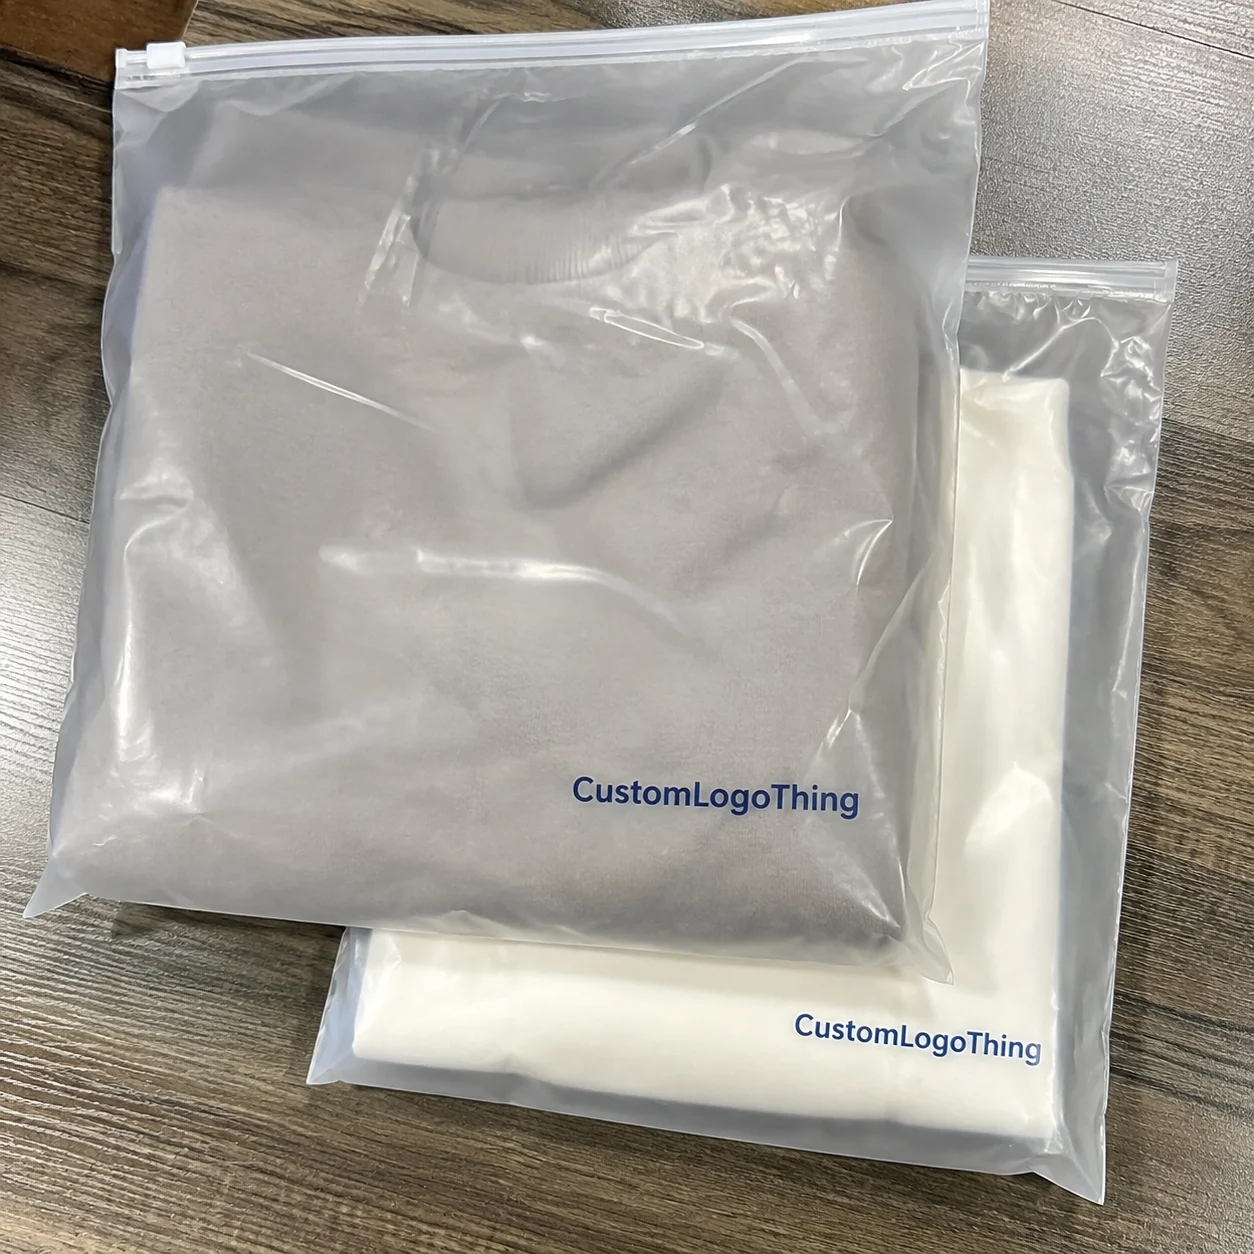
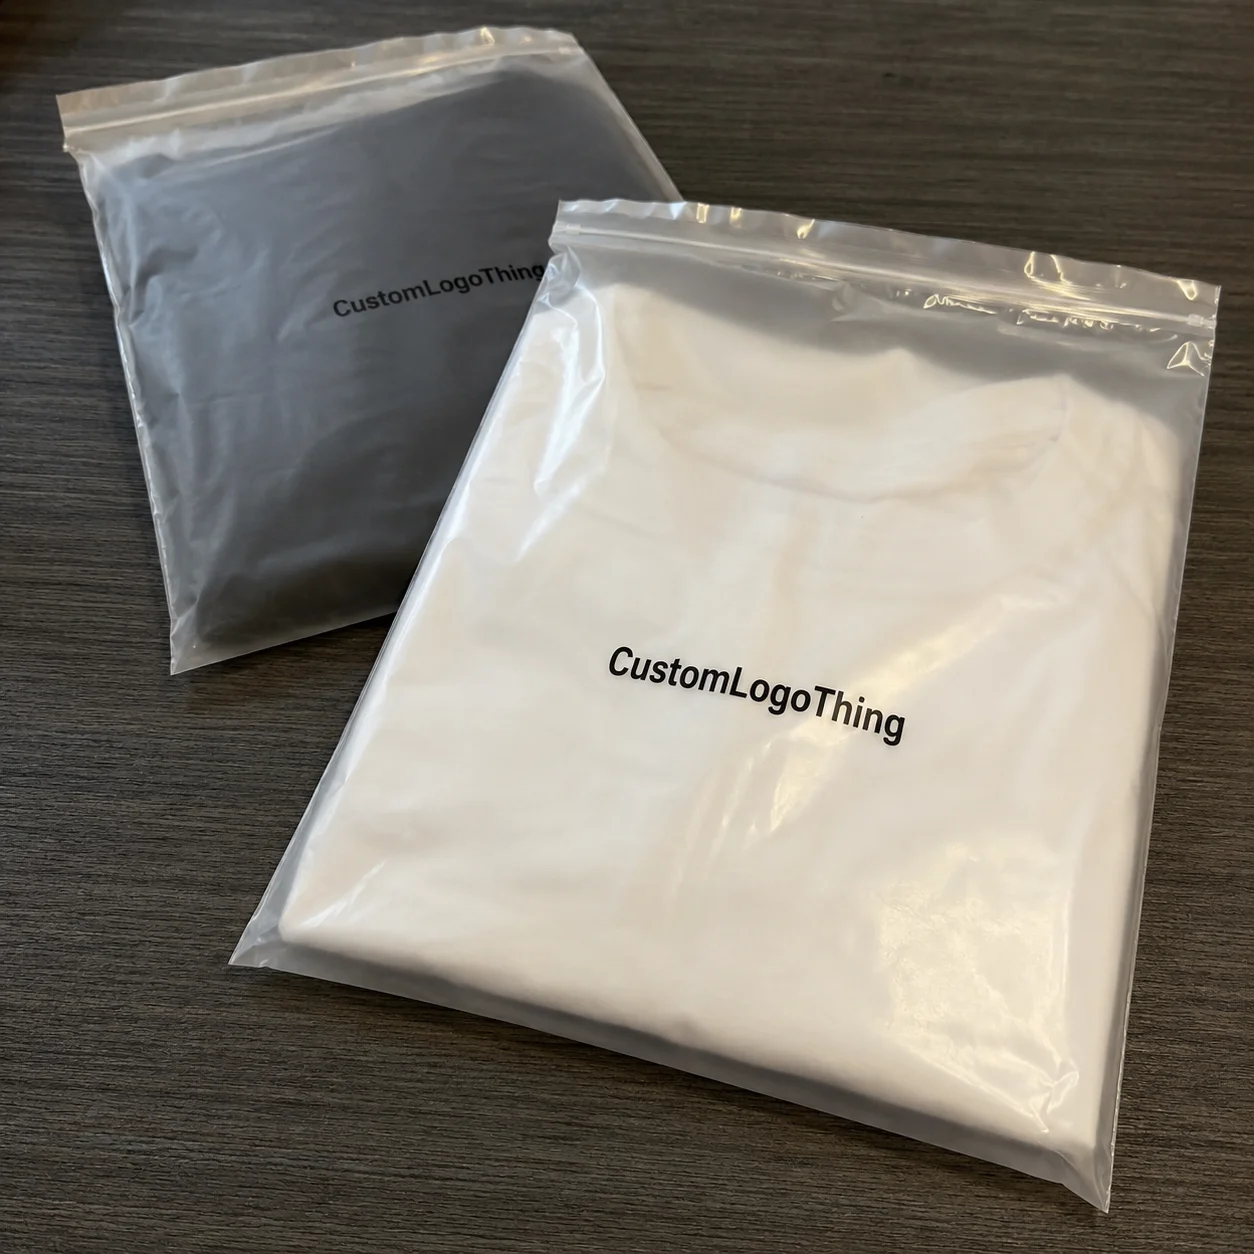
Here’s the plain-language version. Branded packaging includes the materials, the structure, the print method, the insert, the label, and the unboxing sequence. For some brands, that means custom printed boxes. For others, it means a stock mailer with a branded sticker, tissue, and a printed thank-you card. That second option can still feel highly considered if the components match the brand story, and I’ll be blunt: I’ve seen far more polished results from that approach than from a rigid box trying a little too hard, especially when the ticket is kept around $0.60–$1.10 per unit at 2,500 to 5,000 units.
Budget branding is not “cheap packaging.” Cheap packaging usually looks like a compromise made under pressure. Budget branding is deliberate. It says, “We chose the right 20% of elements that do 80% of the work.” That distinction matters, because customers do not measure value by how many decorations you added. They measure it by fit, clarity, and consistency across the package, plus whether the box arrives undamaged after a 3 to 5 day transit from a warehouse in Dallas or Atlanta.
“We cut the unit cost by 27% simply by dropping a custom drawer and going to a standard tuck-top mailer,” a subscription client told me after a supplier review in Los Angeles. “Customer complaints stayed flat, and our social photos actually improved.”
I’ve seen that exact result more than once. The core thesis behind how to create branded packaging on budget is simple: reduce complexity, standardize sizes, and prioritize the touchpoints customers actually see. That usually means choosing a stock format first, then applying brand identity with restraint and precision, which can keep a project in the $0.15 per unit range for labels and simple wraps when you’re ordering 5,000 pieces from a converter in the Midwest.
There’s also a perception trap. A package can look expensive because the print is controlled, the proportions are right, and the materials are honest. Kraft paperboard with a black one-color logo often reads cleaner than a four-color process print with spot gloss, foil, and a metallic flood. The latter costs more per unit, yes. But if the visual hierarchy is weak, it can still look less premium, especially when the board is only 250–300gsm and the graphics try to do too much.
For packaging teams, this is where package branding gets practical. You do not need every surface to “perform.” You need one or two surfaces to carry the identity strongly enough that the rest of the package can stay quiet, whether that means a 1200 micron rigid insert tray or a simple 18pt paperboard sleeve made in a plant outside Ho Chi Minh City.
One more real-world example: I visited a contract packer in New Jersey that was running two similar SKUs for a nutraceutical client. The only difference was board thickness and print coverage. The heavier, fully printed carton cost 38% more, but customers in retail never saw the extra ink; they saw shelf clutter. The simpler carton, with a strong logo and better typography, won the conversation. That is how how to create branded packaging on budget works in practice, and it is why a $0.22 one-color print on a 350gsm C1S artboard often outperforms a $1.80 multi-finish box.
How to Create Branded Packaging on Budget: The Core Process
If you want how to create branded packaging on budget to stay predictable, follow the process in order. I’ve watched brands design first, quote later, and then spend two weeks unpicking a package that never fit the budget in the first place. A cleaner workflow saves money before production even starts, which is the part people tend to skip because it feels less exciting than choosing foil (and yes, foil does look nice, but it is not a personality, and a standard hot-stamp die in Dongguan can add $85 to $140 before you even print the first 1,000 units).
Start with a brand audit and packaging brief
Begin with three questions: What does the package need to do, what must the customer see first, and what is the maximum spend per unit? I ask clients to define the job in one sentence. Example: “Protect a 9 oz glass jar, ship in a 10 x 7 x 5 mailer, and communicate natural, premium, and giftable for under $0.72 per pack at 5,000 units.” That single sentence prevents a lot of expensive wandering, and it gives your supplier in Chicago or Shenzhen a spec they can price in 24 to 48 hours.
A packaging brief should include dimensions, target quantity, product weight, channels, and any compliance notes. If you sell on Amazon, you may care about drop resistance and barcode placement. If you sell in retail, shelf impact and hanging options matter more. The brief is where how to create branded packaging on budget becomes a measurable job instead of a vague creative wish, and it should also list board grade, print count, and whether you want a gloss aqueous, matte varnish, or no coating at all.
Choose structure before graphics
Structure is where money is won or lost. A stock mailer, a standard tuck box, or an off-the-shelf corrugated shipper can save tooling costs immediately. Custom dies and tooling are not inherently bad, but they make sense only when the product genuinely needs them. I’ve seen teams approve a custom insert that added $0.18/unit, then discover the product already shipped securely in a standard partition with one paperboard sleeve. That kind of thing makes me want to gently shake a spreadsheet in a plant office in Ohio.
That’s why the first structural choice should almost always be: stock, semi-custom, or fully custom. Stock formats have the lowest setup burden. Semi-custom options let you modify one dimension or one panel. Fully custom formats can be beautiful, but they usually make sense only at higher volumes or when the product experience depends on the structure. In practical terms, a stock mailer might land at $0.42 to $0.78 per unit, while a custom rigid setup can move to $2.10 to $4.50 per unit at 1,000 pieces depending on material and finish.
| Packaging option | Typical use case | Approximate cost behavior | Best for |
|---|---|---|---|
| Stock mailer or box | E-commerce, samples, starter kits | Lowest setup, often $0.45–$1.10/unit depending on size and print | Fast launches and tighter budgets |
| Semi-custom carton | Retail packaging, subscription, bundles | Moderate setup, often $0.60–$1.80/unit at mid volumes | Brands that need a closer fit without full tooling |
| Fully custom rigid or corrugated | Gift sets, premium launches, fragile goods | Highest setup, often $1.50–$4.50/unit and up | High-perceived-value products |
Match print method to quantity
Print choice matters more than many founders expect. Digital printing is usually best for short runs, because it avoids plates and keeps setup lighter. Offset can be more economical for larger volumes, especially if you need tighter color control across thousands of units. Flexographic printing often makes sense for simple graphics on corrugated or flexible substrates, particularly when you are scaling from 2,000 to 20,000 units out of a facility in Dallas, Mexicali, or Suzhou.
If you only need one logo and one color, resist the urge to overcomplicate the artwork. Full-coverage graphics often cost more because they increase ink usage, setup time, and the chance of registration problems. For how to create branded packaging on budget, a restrained design is not a compromise. It is a cost control strategy, and on a 350gsm C1S artboard carton, that can keep print spend near $0.08 to $0.19 per unit at 10,000 pieces.
Build a realistic timeline
Here’s the pacing I usually recommend for a standard printed carton ordered from a converter in North Carolina, Guangdong, or Ontario:
- 3 days: Brand audit, budget ceiling, size targets, and supplier shortlist.
- 1 week: Dieline selection, artwork draft, and one round of pricing.
- 2 to 4 weeks: Sampling, revision, print proof approval, and final PO.
- Rush order: Costs can rise 10% to 30% depending on material and press availability.
That timeline depends on complexity, of course. A stock box with label branding can move quickly. A custom rigid carton with inserts, foil, and an inner tray will take longer, especially if color matching matters. Planning ahead is one of the most reliable ways how to create branded packaging on budget stays under control, and most teams should expect 12 to 15 business days from proof approval to finished cartons on a standard production slot.
For teams that need inspiration, I often point them to our Case Studies page. Seeing how another brand solved a similar packaging problem saves time because you can borrow structure, not just style, and that can cut two full revision cycles off a project in Melbourne or Minneapolis.
For broader technical guidance, industry bodies such as the International Safe Transit Association provide useful testing frameworks, and the Institute of Packaging Professionals is a solid source for packaging education and standards language.
Key Cost Factors in Branded Packaging
If you strip away the jargon, the price of branded packaging comes down to seven levers: material grade, size, print colors, finishing, inserts, order quantity, and freight. Every one of those can move the unit cost. Some move it by pennies. Some move it by whole dollars, especially if you are switching from a stock mailer in Texas to a fully custom insert system in Vietnam or Poland.
Material grade is the first lever. A lighter corrugated board may cost less than heavy-gauge board, but only if it still protects the product. I’ve seen teams over-spec materials out of fear, then pay for thicker board, larger freight cube, and more storage space. That is a classic hidden-cost spiral. If the product is under 1 lb and ships in an outer shipper anyway, you may not need the heavier internal box. A 32 ECT corrugated mailer or 350gsm C1S artboard carton is often enough for cosmetics, supplements, and lightweight accessories.
Box style also changes cost behavior. A simple mailer usually costs less than a rigid box with a separate lid and base. A paperboard carton can be inexpensive at scale, while a custom insert adds labor and often extra material waste. Flexible packaging can be efficient for certain categories, especially lightweight products, but it is not a universal answer. A stand-up pouch with a zipper might land at $0.11 to $0.24 per unit in large runs, while a rigid presentation box can easily push past $2.00 before freight.
Size may be the most underrated cost factor. A box footprint affects not only material usage but also void fill, pallet efficiency, and freight charges. In one supplier negotiation in Illinois, a client shaved 11% off shipping costs simply by reducing the box length by 0.75 inches and reorienting the product inside. They did not change the logo. They changed the geometry, which is why how to create branded packaging on budget often starts with a ruler instead of a render.
Color count matters more than founders expect. One color can be elegant and inexpensive. Three to four colors may be fine. But once you start adding special inks, gradients, and full-coverage art, the cost and complexity rise together. That is why how to create branded packaging on budget usually favors a limited palette with strong contrast, such as black on kraft or navy on white, rather than a full CMYK flood on every panel.
Finishing is where budgets often go to die. Foil, embossing, debossing, soft-touch coating, spot UV, and lamination all add cost. Some are worth it. Many are not. A good rule is this: if a finish does not improve durability, readability, or conversion, question it hard. A matte aqueous coating on 18pt SBS might add only $0.03 to $0.07 per unit, while soft-touch film on a rigid box can add $0.40 to $0.90 per unit before assembly.
Minimum order quantity changes the economics dramatically. A run of 500 units may have a higher unit price than 5,000 units because setup is spread across fewer pieces. That is why fragmented ordering is expensive. If you keep reordering multiple SKUs in tiny batches, you lose volume leverage every time, and that can turn a $0.19 carton into a $0.44 carton faster than most finance teams expect.
Freight is the last piece people forget. Flat-pack cartons ship more efficiently than assembled rigid boxes. Lightweight packaging saves cubic space. A small reduction in carton height can improve pallet count. I have seen brands save more on freight than they saved on print method selection. That surprises people, but it happens often, particularly on lanes from Shenzhen to Los Angeles or from Toronto to Chicago where cubic volume pricing matters as much as box weight.
Where hidden costs sneak in
There are four hidden line items I always watch: design revisions, plate or setup fees, sample iterations, and lead-time surcharges. Revisions are especially expensive when they start after the spec has already been quoted. If your artwork is still moving, your price is still moving, and a single extra proof round can add 3 to 7 business days depending on the supplier in question.
If you want to stay disciplined with how to create branded packaging on budget, quote against a locked spec sheet. Same dimensions. Same board grade. Same print count. Same finish. Otherwise you are comparing apples to oranges and calling it procurement, which is how a project in Atlanta suddenly becomes a project in crisis.
For teams exploring more standard options, our Custom Packaging Products page is a useful starting point because it shows how stock-like formats can still be branded well without blowing up the budget.
Step-by-Step: How to Create Branded Packaging on Budget
Here’s the process I recommend when a client asks me how to create branded packaging on budget without making the package look like an afterthought. It is not glamorous. It is just disciplined. And discipline saves money, especially when a 5,000-piece run is being printed in one color on 350gsm C1S artboard or 32 ECT corrugated in a plant outside Indianapolis.
- Audit the customer touchpoints. Decide what packaging must do: protect the product, explain the product, and signal brand value. If it does not serve one of those jobs, question it.
- Choose one or two signature brand elements. That may be the logo, a spot color, a repeating pattern, or a short message. More is not better.
- Start with standard dimensions. Stock packaging and common dielines reduce tooling costs and speed up quoting.
- Keep the print layout simple. One- or two-color artwork is often enough. Use white space. It is cheaper to print and often looks sharper.
- Limit finishes. Choose coating or lamination only if it adds durability or a genuine tactile benefit.
- Quote from at least three suppliers. Give each supplier the same spec sheet. If the specs differ, the prices are not comparable.
- Approve samples with a checklist. Confirm fit, print clarity, assembly time, and shipping efficiency before you place the full order.
That last point saves more headaches than almost anything else. A sample is not just a mini version of the box. It is a test of tolerances, color balance, and whether the structure behaves the way the line team expects. I’ve been in a plant where a 1.5 mm flap difference caused a run of 8,000 cartons to slow down by 20 minutes per hour because the auto-erector kept misfeeding. Tiny numbers matter, which is deeply unfair, because tiny numbers are also the easiest ones to ignore.
Another practical decision: decide where the branding should live. For e-commerce, the exterior mailer may matter most because it is what the customer sees on the porch and in transit. For retail packaging, the front panel and top edge might matter more because that is what shows at shelf height. If you spread the branding too evenly, it loses force. The goal is not coverage. The goal is recognition, and sometimes that means one 1.25-inch logo on a kraft mailer does more than six decorated panels ever could.
When I visited a corrugated converter in Guangdong, the production manager pulled out three versions of the same mailer. One had a full flood print, one had a border and logo, and one had a single-color mark with a printed interior panel. The lightest design cost least and photographed best because the product inside was colorful. That is a good reminder that packaging design should work with the product, not compete with it, especially when the SKU is already spending $0.09 on an insert card and $0.04 on a printed tissue wrap.
One useful habit: ask for a quote tiering sheet. I like to see three options side by side:
- Lowest-cost viable option: standard size, one color, stock material.
- Balanced option: standard size, limited branding, one low-cost finish if needed.
- Premium option: custom dimension or premium finish for comparison.
That comparison helps you separate needs from wants. It also makes internal approvals easier because the finance team can see the trade-offs in writing. If you are serious about how to create branded packaging on budget, this kind of tiered quoting is indispensable, and it is often the fastest way to get a clear yes from a founder in Seattle or a procurement manager in Toronto.
I also recommend checking supplier sample speed. Some vendors can turn a white mockup in 48 hours. Others need a week. A fast sample is not always the best sample, but it is often the best way to catch fit problems early, especially before you commit to a 12- to 15-business-day production slot after proof approval.
If your packaging will face transit stress, reference ISTA test methods and request transit simulation where appropriate. That is especially relevant for fragile product packaging or any box that will ship through multiple handling points. A nice-looking box that fails in transit is not budget-friendly. It is expensive in disguise, and a single failure on a 2,000-unit run can wipe out the savings from choosing a cheaper board.
Common Mistakes That Make Budget Packaging Cost More
The biggest mistake I see is designing before setting the budget. It sounds obvious, but it happens constantly. A founder falls in love with a rigid box mockup, then discovers the target unit price was only $0.65 at 3,000 units. That gap is not a small adjustment. It is a different package entirely, often one that requires a switch to stock mailers, printed labels, or a 350gsm C1S artboard tuck box.
Oversized packaging is another classic. Too much empty space means more board, more filler, more freight, and a bigger box footprint. It can also make the product look smaller than it is. I’ve sat in meetings where a client insisted on “premium breathing room,” then paid to ship air across three distribution centers in Ohio, New Jersey, and Georgia. That is not positioning. That is waste with better lighting.
Too many finishes can backfire visually and financially. A matte coating, foil logo, emboss, and spot UV in one layout can look busy rather than premium. Each additional finish adds cost, but it also adds another chance for inconsistency. The more processes involved, the more room there is for variation. That is one reason simple packaging design often wins, especially when a supplier is printing in one pass on a single 4-color press.
Fragmented ordering is the fourth trap. If you split one design into five tiny SKUs and reorder each separately, you dilute your purchase power. Volume matters. Even if you cannot consolidate everything, grouping similar sizes or graphics can help. This is especially true for retail packaging where small differences in dimensions can create separate tooling or separate print plates, which is why a 500-unit order often costs materially more than a 5,000-unit order from the same factory in Shenzhen or Illinois.
There’s also a subtle mistake many teams make: ignoring assembly time. A pack that takes 18 seconds to build instead of 8 seconds can create real labor cost at scale. I watched a fulfillment team in Ohio lose margin on a “beautiful” folder-style carton because the manual folding sequence added nearly two full labor hours per 1,000 units. The box itself was fine. The labor was the problem, and at $18 to $22 per hour, that adds up faster than people expect.
Finally, avoid buying packaging that looks good only in a render. A mockup can hide print issues, weak corners, or poor closure alignment. Physical samples matter. Always, especially when your supplier says the 1.2 mm difference in flap tolerance is “within normal range” and you can already see it will annoy the pack line.
Expert Tips to Make Branded Packaging Look Premium on a Budget
Premium does not always mean expensive. A package can feel high-end because it is controlled. That means strong contrast, good spacing, smart structure, and a deliberate reveal. In my experience, customers usually remember three things: color, fit, and the first thing they touch. Use that to your advantage, whether the package is a $0.58 mailer from a converter in Michigan or a $2.40 rigid set from a plant in Dongguan.
Use contrast strategically. A single black logo on natural kraft stock can look more expensive than a full-color layout that lacks hierarchy. White stock with one deep color can do the same. The point is to make the eye land where you want it, not everywhere at once, and a 1-color flexographic print on 32 ECT board can often do that better than a crowded CMYK sheet.
Let typography do more work. Good type spacing, a restrained font choice, and consistent alignment can raise perceived value without adding a penny in finishing cost. I once helped a beverage client replace a busy icon set with a better type system and a single illustration line. Their unit cost dropped by $0.14, and the package looked calmer and more upscale. Frankly, the old version looked like three people had argued with a design file and all won a little.
Use low-cost brand cues inside the box. Tissue paper, stickers, stamps, insert cards, and printed tape are all relatively inexpensive ways to support package branding. A $0.03 sticker can have a bigger emotional effect than a $0.40 coating if it is used in the right place, and a 2 x 3 inch printed card sourced in bulk from a printer in Atlanta can do more than an expensive exterior finish on its own.
Design the unboxing order. This is one of the easiest ways to make budget packaging feel premium. If the outer mailer is plain but the first reveal is a branded insert card, followed by clean tissue and a neatly positioned product, the experience feels intentional. Sequence matters, and a 15-second reveal can feel more polished than a 45-second one packed with too many materials.
Test with a small audience before scaling. A handful of customer reviews or 10 to 20 internal testers can expose weak points before you commit to 10,000 units. I’ve seen brands save thousands by changing only the insert size after a small pilot. That is exactly what smart how to create branded packaging on budget planning looks like, and it often costs less than $200 to run a meaningful pilot in-house.
One more practical tip: avoid overprinting the interior if the product itself is photogenic. Sometimes the best premium cue is contrast between a simple exterior and a clean, branded interior. That approach works especially well for gift sets and subscription packaging, where the reveal carries emotional weight and the inner panel can be printed for $0.05 to $0.12 per unit at scale.
And if you need proof that restrained branding can still work, look at some of the best-performing DTC packs. The strongest ones usually do not shout. They communicate with order. That is a useful model for anyone learning how to create branded packaging on budget, especially if your goal is to keep the complete pack under $1.00 per unit while still feeling polished.
If you want a broader view of what’s possible at different spend levels, our Case Studies page shows how brands balance structure, print, and cost without sacrificing identity.
Next Steps: Build a Lean Packaging Plan That Actually Works
The fastest way to move forward is to build a one-page packaging brief. Keep it simple. List the product weight, product dimensions, shipping channel, order volume, budget ceiling, and the two or three brand elements that must appear. If you can fit the whole plan on one page, you are more likely to use it, and your supplier in California, Ohio, or Guangdong will be able to quote it in a single pass.
Then ask your supplier for three quote tiers. I like this because it forces comparison. You see the lowest-cost viable option, the balanced option, and the premium option in the same format. That makes how to create branded packaging on budget a concrete decision instead of a debate about taste, and it can reveal whether a $0.16 label solution is enough or whether you really need a $1.20 printed carton.
Request samples or dielines before you place the full order. A dieline can tell you whether your logo sits too close to a fold or whether the interior insert steals too much space from the product. A sample confirms whether the box closes properly and whether the print looks as good in real light as it did on screen, ideally with a proof approved 12 to 15 business days before production completion.
Work backward from your launch date. If you need boxes in the warehouse by the 18th, subtract artwork approval, sampling, production, and freight. Leave room for one revision round. If you don’t, rush fees can wipe out the savings you worked so hard to create, and a 15% expedite charge can turn a smart plan into an avoidable headache.
Finally, review each packaging choice against three questions:
- Does it reduce cost?
- Does it protect the product?
- Does it improve brand perception?
If an item does none of those three well, remove it. That is the discipline behind how to create branded packaging on budget. Not every idea deserves a place in the final spec, and a clean 350gsm C1S artboard carton with one strong logo often outperforms a louder box that costs twice as much.
From a supplier standpoint, the cleanest projects are the ones with clear specs, limited revisions, and realistic expectations. From a brand standpoint, the best projects are the ones that feel aligned from the first touch to the last reveal. You do not need a luxury budget to create strong branded packaging. You need a smart structure, a tight brief, and enough restraint to let the good parts breathe.
That is the real answer to how to create branded packaging on budget: choose fewer things, choose them better, and make sure every dollar does visible work. In my experience, that approach almost always beats the loudest box on the shelf, whether the order ships from Pennsylvania, Shenzhen, or Guadalajara.
Frequently Asked Questions
How do I create branded packaging on budget without looking cheap?
Focus on clean layout, correct sizing, and one strong brand cue instead of layering on every finish. Standard packaging formats, limited colors, and disciplined typography usually look more polished than a busy package with five effects, and a 350gsm C1S artboard box with one-color print can look sharper than a crowded four-color design.
What is the cheapest way to brand packaging for a small business?
Start with stock boxes or mailers, then add branding through labels, stamps, printed tape, or insert cards. Keeping the print simple and ordering the most efficient quantity your supplier offers usually gives the best unit cost, especially at 1,000 to 5,000 units where a $0.12 label or a $0.03 stamp can do a lot of heavy lifting.
How much does branded packaging usually cost?
Costs vary widely by material, size, quantity, and print method. A simple stock-based branded mailer may cost well under a dollar per unit, while Custom Rigid Boxes with specialty finishes can move into several dollars each, especially at low volumes. As a rough example, a 5,000-piece run of a one-color mailer might land around $0.45 to $0.78 per unit before freight.
How long does it take to make branded packaging?
Simple stock-based packaging can move quickly, but custom packaging usually needs time for artwork, sampling, approval, and production. In many plants, the timeline is typically 12 to 15 business days from proof approval for standard runs, while rush timelines often increase costs, so planning ahead is one of the best budget-saving moves.
What packaging elements give the best return on a tight budget?
Logo placement, consistent color use, and a well-fitting box usually deliver more value than expensive coatings. Internal details like inserts, tissue, or a thank-you card can also raise perceived value without major cost increases, and a simple printed insert card often costs less than $0.10 per unit when ordered in bulk from a printer in Chicago or Nashville.