People tap, swipe, hand over, and pull out cards far more often than most brands measure. That turns a credit-card-size surface into a strange little advertising channel: roughly 3.375 by 2.125 inches, handled again and again, often in a wallet, sleeve, mailer, event check-in line, or retail counter moment.
For buyers searching for Credit Card Stickers custom enough to fit a campaign rather than a hobby drawer, the difference is not just artwork. It is material behavior, adhesive choice, cut tolerance, finish, packing format, and whether the sticker still looks intentional after real handling.
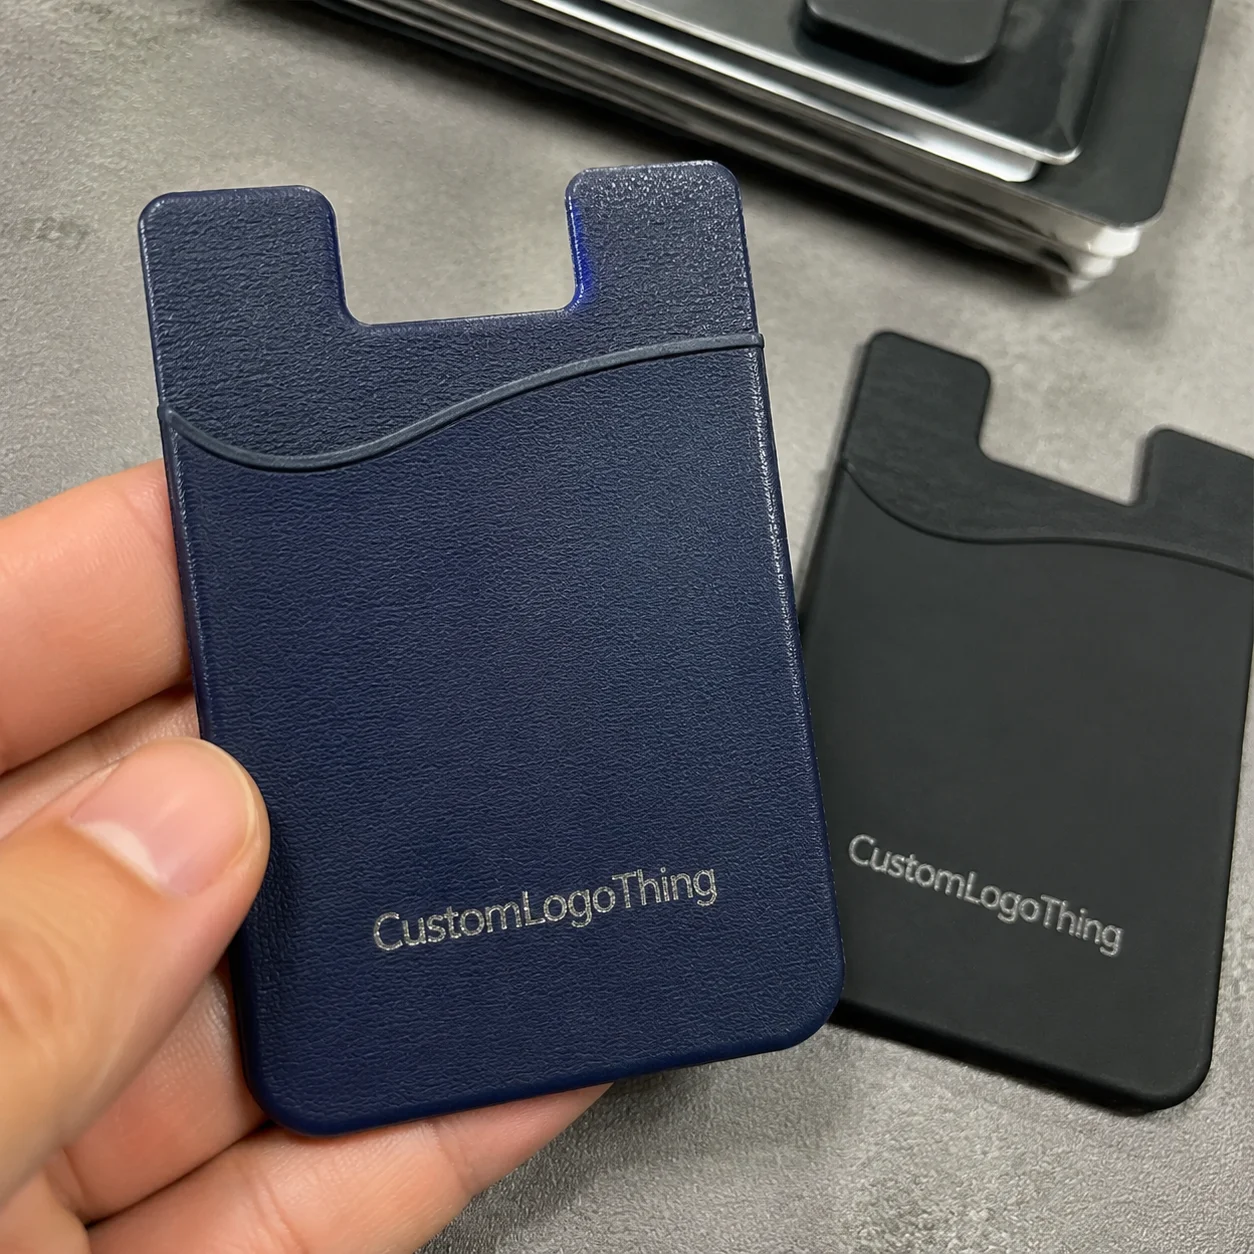
Why custom credit card stickers are more than decoration
At the simplest level, custom credit card stickers are thin adhesive overlays designed to personalize cards, gift cards, membership cards, sample cards, hotel-style key cards, or promotional card-shaped inserts. A business-grade version has to survive handling, align with rounded corners, stay readable at a small size, and avoid interfering with any part of the card that still needs to function.
That last point matters. A card-shaped surface can support brand recall, creator merch, event access, loyalty programs, employee identification, product launch mailers, and campaign inserts. In packaging terms, it behaves like a miniature billboard with a tactile job. The buyer is not only buying ink and adhesive. They are buying a repeatable brand impression.
One common mistake is comparing decorative consumer skins with production-grade stickers as if they are the same product. They are not. Business orders usually need tighter size control, predictable adhesive behavior, consistent color from sheet to sheet, finish options that match the wider branded packaging system, and packing formats that fulfillment teams can use without improvising.
A useful order brief answers seven questions before a quote is worth much: what card surface is being covered, what areas must stay exposed, what quantity is needed, what finish is expected, how long the sticker needs to last, whether the sticker ships loose or applied, and what deadline the campaign has. Miss one of those, and the quote may still arrive. It just may not describe the product you actually need.
Packaging buyer’s rule of thumb: if a sticker will be handled like a card, specify it like a functional packaging component, not like a giveaway decal.
How card stickers work on real cards and inserts
A typical card sticker has four layers: printed face stock, adhesive, release liner, and sometimes a protective laminate. The face stock carries the design. The adhesive controls the bond. The liner protects the adhesive until application. Lamination adds scuff resistance, changes the feel, and can make a small card look more polished under store, office, or event lighting.
Custom card stickers can be applied to blank PVC cards, gift cards, membership cards, loyalty cards, faux card inserts, direct-mail cards, and promotional mailers. Some people use them on real payment cards for personal decoration, but that requires caution. Stickers should not cover chips, magnetic stripes, embossed numbers, signature panels, QR codes, barcodes, or contactless payment areas unless the card is decorative only.
Full-face overlays create the strongest visual transformation because they cover nearly the entire card face. Partial decals are safer for active cards because they leave functional elements visible. Logo corner stickers, nameplate-style labels, and small campaign strips can also work well when the brand wants visibility without creating reader problems.
Adhesive choice changes the user experience more than buyers expect. Removable adhesive is easier to reposition and may be preferred for short-term campaigns, but it can peel faster in a wallet. Permanent adhesive stays put longer, though the first application has to be accurate because lifting and reapplying can stretch the film or mark the card surface.
Application format deserves a separate thought. Sheets are simple for short runs and hand application. Rolls may fit automated labeling equipment, but only if the unwind direction, gap, liner strength, and core size are correct. Individually cut stickers look tidy in kits, yet they add handling cost and can slow down assembly. The least expensive format on a quote is not always the least expensive format in production.
There is also a packaging angle. A card sticker placed inside a custom sleeve, envelope, or printed insert feels more deliberate than a loose sticker tossed into a box. That controlled reveal is the same psychology used in premium Custom Packaging Products: the product looks more valuable when the opening sequence is designed.
Material, finish, and sizing choices that affect performance
Material selection starts with the card’s use case. Vinyl is common because it is flexible, water resistant, and forgiving during application. BOPP is thin, stable, and often used for labels that need a clean retail look. Polyester is tougher and more dimensionally stable, which helps when durability matters. Paper-based stock can work for short-term inserts or low-touch promotions, but it is usually the wrong choice for cards that live in wallets.
Finish affects both perception and function. Gloss laminate makes color pop but can increase glare. Matte looks more restrained and often improves readability. Soft-touch feels premium, though it can show oils from fingers. Holographic and metallic films are attention magnets, but small text can suffer if contrast is poor. Clear films can look sharp on colored cards, provided the artwork is tested against the actual card background.
| Option | Best Use | Typical Watchout | Common Cost Impact |
|---|---|---|---|
| White vinyl with matte laminate | Durable loyalty cards, creator merch, employee cards | Needs clean alignment on full-face designs | Moderate |
| BOPP with gloss finish | Promotional inserts and retail-ready card campaigns | Glare can reduce small-text readability | Low to moderate |
| Polyester film | Higher-wear cards and long-term handling | Can feel less forgiving during application | Moderate to high |
| Holographic or metallic film | Launch kits, event drops, premium merch | Fine lines and QR codes need extra contrast | High |
Thickness is a quiet performance issue. A sticker that feels substantial in hand can still create edge lifting if it is too thick for the card’s environment. Wallet friction, card slots, stacked gift card carriers, and tight mailers all punish raised edges. Many card sticker projects land in a thin film range around 2 to 4 mil before liner, though the right spec depends on material, adhesive, laminate, and handling life.
Sizing needs the same discipline as packaging dielines. A standard payment card is about 85.6 mm by 53.98 mm, or 3.375 by 2.125 inches, with rounded corners. Artwork should include bleed, safe zones, and a realistic tolerance for die cutting. A 1/16-inch bleed and a similar safe margin are common starting points, but small cards expose tiny shifts quickly. One half-millimeter of misalignment can look sloppy on a full-face border.
Corner radius is another detail that gets brushed aside until samples arrive. If the sticker’s corner radius does not match the card, the eye catches it immediately. The sticker can be perfectly printed and still look cheap because the corners feel “almost” right. For full-face stickers, ask for the dieline, not just the finished size.
Digital printing is practical for short runs, test orders, and variable designs. Offset or flexographic production may make sense at larger quantities where color consistency and unit economics improve. Spot foil, raised varnish, metallic ink, or specialty film can elevate a campaign, but they also add proofing steps. If sustainability claims are part of the project, ask about certified paper options and responsible sourcing; the Forest Stewardship Council is one recognized reference point for fiber-based materials.
Do not imply that a sticker protects payment data, improves card security, changes bank card function, or has approval from a card network unless that is explicitly documented. Decoration and branding are valid goals. Compliance claims need evidence.
Cost, pricing, and MOQ factors buyers should compare
Pricing usually depends on quantity, size, face stock, adhesive, finish, die-cut complexity, color coverage, lamination, proofing, packaging, and kitting. A plain rounded-rectangle sticker costs less than a holographic multi-piece set packed into individual sleeves. Obvious, yes. Still, quote comparisons often hide those differences in one-line pricing.
Minimum order quantity is not just a supplier rule. It is an economic signal. A 100-piece test order absorbs artwork handling, proofing, setup, and cutting time across very few units, so the per-piece cost can look high. A 5,000-piece campaign spreads those fixed costs across more pieces, often dropping the unit price sharply. Higher MOQ can still create inventory risk if the design, campaign date, or card spec might change.
For a simple digital run, buyers may see broad ranges such as $0.35 to $1.20 per sticker at very low quantities, depending on finish and setup. Around 1,000 to 5,000 pieces, many standard film stickers may fall closer to $0.12 to $0.45 per unit. Specialty foil, holographic film, custom kitting, or variable data can push costs higher. These are planning ranges, not universal pricing; material availability, artwork complexity, and packing format can swing the quote.
Credit card stickers custom programs often carry add-ons that buyers miss during early budgeting: custom dies, foil stamping, specialty films, color matching, variable names or codes, individual bagging, retail headers, application labor, printed sleeves, shipping cartons, and freight. If the sticker is part of retail packaging, the packed presentation may matter as much as the sticker itself.
Ask for two or three quantity breaks in the same quote. For example: 500, 2,500, and 5,000 pieces. The price curve will show whether the next tier creates meaningful savings or just more inventory. Also quote the full delivered program, not only the sticker. Sticker plus card insert, sleeve, mailer, assembly labor, and freight can change campaign economics by 20% or more.
Watch for vague quote language. “Premium vinyl” is not a specification. “Matte finish” may mean matte face stock, matte laminate, or matte varnish. “Card size” may mean close to credit card size, not a matched dieline. Ask suppliers to list material, adhesive type, laminate or coating, finished size, tolerance, proofing method, packing format, and estimated lead time after approval.
Process and timeline from artwork to finished sticker order
A clean order starts with a defined use case. Is the sticker for a real card, a blank PVC card, a gift card, or a promotional insert? Next comes exact sizing, material, finish, adhesive, artwork, proofing, print production, die cutting, inspection, packing, and shipping. The sequence is simple. Skipping one step is how campaigns lose days.
Simple digital runs can move quickly once artwork is approved. A straightforward order may take about 5 to 10 business days after proof approval, while specialty materials, tooling, high-volume production, variable data, or packaging assembly can move the timeline toward 12 to 20 business days or longer. Supplier capacity and freight lanes matter. Proof approval is the key clock many buyers forget.
During proofing, the manufacturer checks trim lines, bleed, resolution, color mode, font handling, and whether important elements sit too close to rounded corners. If a sticker needs to avoid a chip, stripe, QR code, or barcode, those no-cover areas should be marked directly in the file or on a template layer. A vague note in an email is easy to miss.
Digital proofs are fast and useful for confirming layout, spelling, and cut lines. Physical samples are better when finish, adhesive feel, opacity, metallic effects, or color accuracy matter. More buyers should sample unusual finishes. A holographic mockup on a bright monitor tells you very little about glare in a hotel lobby, trade show hall, or retail aisle.
Quality control should include more than counting boxes. Check finished size, corner radius, color consistency, registration, laminate adhesion, edge quality, liner release, and scuff resistance. For QR codes or barcodes, scan printed samples from several positions on the sheet or roll. For full-face overlays, apply samples to the actual card stock and inspect the border under normal lighting.
For shipping and transit testing, especially if card stickers are packed into kits, cartons, or mailers, references such as ISTA can help teams think about distribution stress. A sticker may be perfect at the press and still arrive curled, scuffed, or heat-stressed if the packaging format is poorly chosen.
Build in buffer for stakeholder approvals, holiday demand spikes, supplier backlogs, assembly labor, and parcel delays. A realistic launch schedule includes artwork lock, proof review, production, packing, freight, and receiving inspection. That part is less glamorous than the design phase. It is also where missed launch dates usually begin.
Common mistakes that make card stickers look cheap or fail early
The most common failure is edge-to-edge artwork without enough bleed or safe margin. A full border around a card sticker can look elegant on screen and crooked in production because tiny shifts become obvious. If the design has to bleed, extend the background beyond the cut line. Keep logos, QR codes, legal text, and faces away from the edge.
Another mistake is covering functional areas. Chips, magnetic stripes, embossed numbers, signature panels, barcodes, QR codes, and contactless symbols exist for a reason. Even a thin film can interfere with readers or make staff reject a card. For active bank cards, partial stickers are usually safer than full overlays.
Finish selection creates surprises too. Gloss, matte, holographic, metallic, and soft-touch finishes all behave differently under real light. Metallic stock can make black type look crisp, but low-contrast colors may disappear. Soft-touch can feel premium, yet fingerprints may show. Clear film may vanish beautifully on one card and look cloudy on another.
Adhesive mismatch is more expensive than it sounds. Removable adhesive can peel in a wallet after repeated friction. Aggressive permanent adhesive can be difficult to remove from sensitive card surfaces. Textured, coated, and unusually slick cards may need testing because surface energy affects bond strength. In plain English: some plastics like adhesive more than others.
Overcrowding is the design mistake that appears again and again in small-format packaging design. A card-sized surface does not have room for three logos, two slogans, a QR code, social icons, a legal line, and a gradient background. Prioritize one message. Maybe two. Use contrast. Leave air.
Color management can also trip up otherwise careful orders. Backlit screens make saturated colors look cleaner than ink on film. A deep navy may print nearly black. A pale gray line may disappear on metallic stock. If brand color matters, ask about color targets, drawdowns, or physical proofs before approving a large run.
Before scaling an order, test application on the actual card or insert stock. Apply a few samples, place them in a wallet or sleeve, rub the edges, expose them to normal handling, and inspect after 24 to 72 hours. That small pilot can reveal edge lift, scuffing, color mismatch, or QR readability issues before 5,000 pieces are printed.
Actionable next steps before requesting a quote
A strong quote request is specific. Start with the intended use: real payment card, decorative card, loyalty card, gift card, event pass, mailer insert, or sample card. Then provide exact dimensions, quantity range, preferred material, finish, adhesive type, packaging needs, and deadline. If the material is undecided, describe the handling conditions instead: wallet use, one-time event, mailed promotion, retail display, or employee issue.
Prepare artwork files with vector logos, outlined or embedded fonts, high-resolution images, bleed, safe zones, and marked no-cover areas. For most print work, 300 dpi images at final size are a useful minimum. Logos should be vector whenever possible. QR codes need enough quiet space and contrast to scan after printing and cutting, not just on screen.
- Use case: active card, decorative card, gift card, membership card, or promotional insert.
- Dimensions: exact width, height, corner radius, and any areas that must stay exposed.
- Build: material, adhesive, laminate, finish, and expected handling life.
- Quantity: target order plus at least two alternate quantity breaks.
- Packaging: loose sheets, rolls, individual bags, sleeves, mailer kits, or applied cards.
- Deadline: proof approval date, in-hand date, and shipping destination.
Send photos or samples of the card, insert, or packaging component the sticker will touch. A supplier can judge fit and adhesive compatibility faster with real context. If the sticker is part of a broader product packaging system, include notes about custom printed boxes, mailers, sleeves, or inserts so the visual direction stays consistent. The Custom Labels & Tags category is also relevant if the project needs matching seals, QR labels, or branded closure stickers.
Ask the supplier for quantity breaks, proofing method, estimated lead time after approval, shipping options, and whether kitting or application support is available. Application labor can be worth quoting separately if alignment is critical or if internal staff would spend hours applying stickers by hand.
A small pilot run is smart for a new design, unusual finish, slick card surface, or high-visibility launch. Real handling reveals issues a screen mockup cannot: edge lift, glare, scuffing, adhesive residue, poor contrast, or packaging rub. Before ordering credit card stickers custom for a launch, confirm fit, finish, adhesive, artwork, packing format, and timeline in writing.
FAQ
Are custom credit card stickers safe to put on a real payment card?
They can be used carefully, but they should not cover the chip, magnetic stripe, card number, signature panel, contactless area, barcode, or required issuer information. For active bank cards, partial designs are usually safer than full overlays because they reduce the chance of interfering with payment terminals or card readers. Decorative, gift, loyalty, or promotional cards give buyers more design freedom because payment functionality is not involved.
What material is best for custom card stickers?
Vinyl and polyester are common choices when durability, flexibility, and moisture resistance matter. BOPP can work well for clean promotional pieces and retail-style inserts. Paper-based materials are better for short-term promotions than for cards handled daily. The best choice depends on the card surface, expected handling, finish preference, and whether the sticker needs to be removable.
How much do credit card size stickers custom orders usually cost?
Cost depends on quantity, material, finish, die-cut shape, lamination, packaging, and proofing requirements. Unit cost usually drops as order volume increases because setup and production costs are spread across more stickers. Buyers should request multiple quantity breaks and include packaging or kitting needs in the same quote for a realistic delivered price.
What artwork specs are needed for credit card sticker printing?
Artwork should include the correct card dimensions, bleed, safe margin, high-resolution images, vector logos, and outlined or embedded fonts. Designs should keep important text, QR codes, and logos away from cut edges and rounded corners. If the sticker must avoid chips, stripes, numbers, or barcodes, those no-print or no-cover areas should be clearly marked.
How long does it take to produce custom credit card decals?
Timeline depends on proofing speed, order quantity, material availability, finish complexity, and whether the order includes packaging or assembly. Simple orders may take about 5 to 10 business days after proof approval, while specialty or high-volume work can take longer. Rush jobs are easier when the buyer provides final artwork, exact dimensions, and clear approval authority upfront.


