Buyer Fit Snapshot
| Best fit | Packaging Design Premium Quality projects where brand print, material claims, artwork control, MOQ, and repeat-order consistency need to be specified before quoting. |
|---|---|
| Quote inputs | Share finished size, material target, print colors, finish, packing count, annual reorder estimate, ship-to region, and any compliance wording. |
| Proofing check | Approve dieline scale, logo placement, barcode or warning zones, color tolerance, closure strength, and carton packing before bulk production. |
| Main risk | Vague material claims, crowded artwork, missing packing details, or unclear freight terms can make a low unit price expensive after revisions. |
Fast answer: Packaging Design Premium Quality: Material, Print, Proofing, and Reorder Risk should be specified like a repeatable production item. The safest quote records material, print method, finish, artwork proof, packing count, and reorder notes in one written spec.
Production checks before approval
Compare the actual filled-product size with the drawing, then confirm tolerance on folds, seals, hang holes, label areas, and retail display edges. Reserve space for logos, QR codes, warning copy, and material claims before decorative graphics fill the panel.
Quote comparison points
Review material grade, print process, finish, sampling route, tooling charges, carton quantity, and freight assumptions side by side. A quote is only useful when the supplier can repeat the same color, closure quality, and packing count on the next order.
Packaging design premium quality is one of those phrases people toss around right up until the invoice lands. Then everybody suddenly discovers their inner poet and starts talking about “luxury feel” and “brand elevation” like the factory should throw those in for free. I’ve spent enough time on factory floors in Shenzhen, Dongguan, and Xiamen, and on supplier calls with paper mills like APP and FSC-certified converters, to know the truth: packaging design premium quality is not a logo, and it is not a pretty mockup. It is a stack of decisions that either make a box feel expensive in a customer’s hands or make it feel like a rushed afterthought.
I’ve watched a $0.12 paper stock change turn a plain carton from “fine” into “wait, this feels expensive.” That happened during a visit to a folding carton plant in Shenzhen where a client was debating two SBS boards: 300gsm and 350gsm C1S artboard. The cheaper sheet printed okay on screen. In person, it felt thin, flabby, and slightly dead. The heavier board had better stiffness, cleaner folding, and a sharper edge on the tuck flap. Same artwork. Same dimensions. Completely different story. That’s packaging design premium quality in real life.
If you want your Custom Printed Boxes to support brand trust, higher conversion, and repeat purchase behavior, you need more than nice-looking files. You need structure, materials, print precision, finishing, and consistency working together. That is what buyers actually notice. Not the adjective you used in the brand deck. On a 5,000-piece run, a better board choice might cost only $0.15 to $0.28 per unit more, which is usually cheaper than one reprint and a week of freight delays.
Packaging Design Premium Quality: What It Really Means
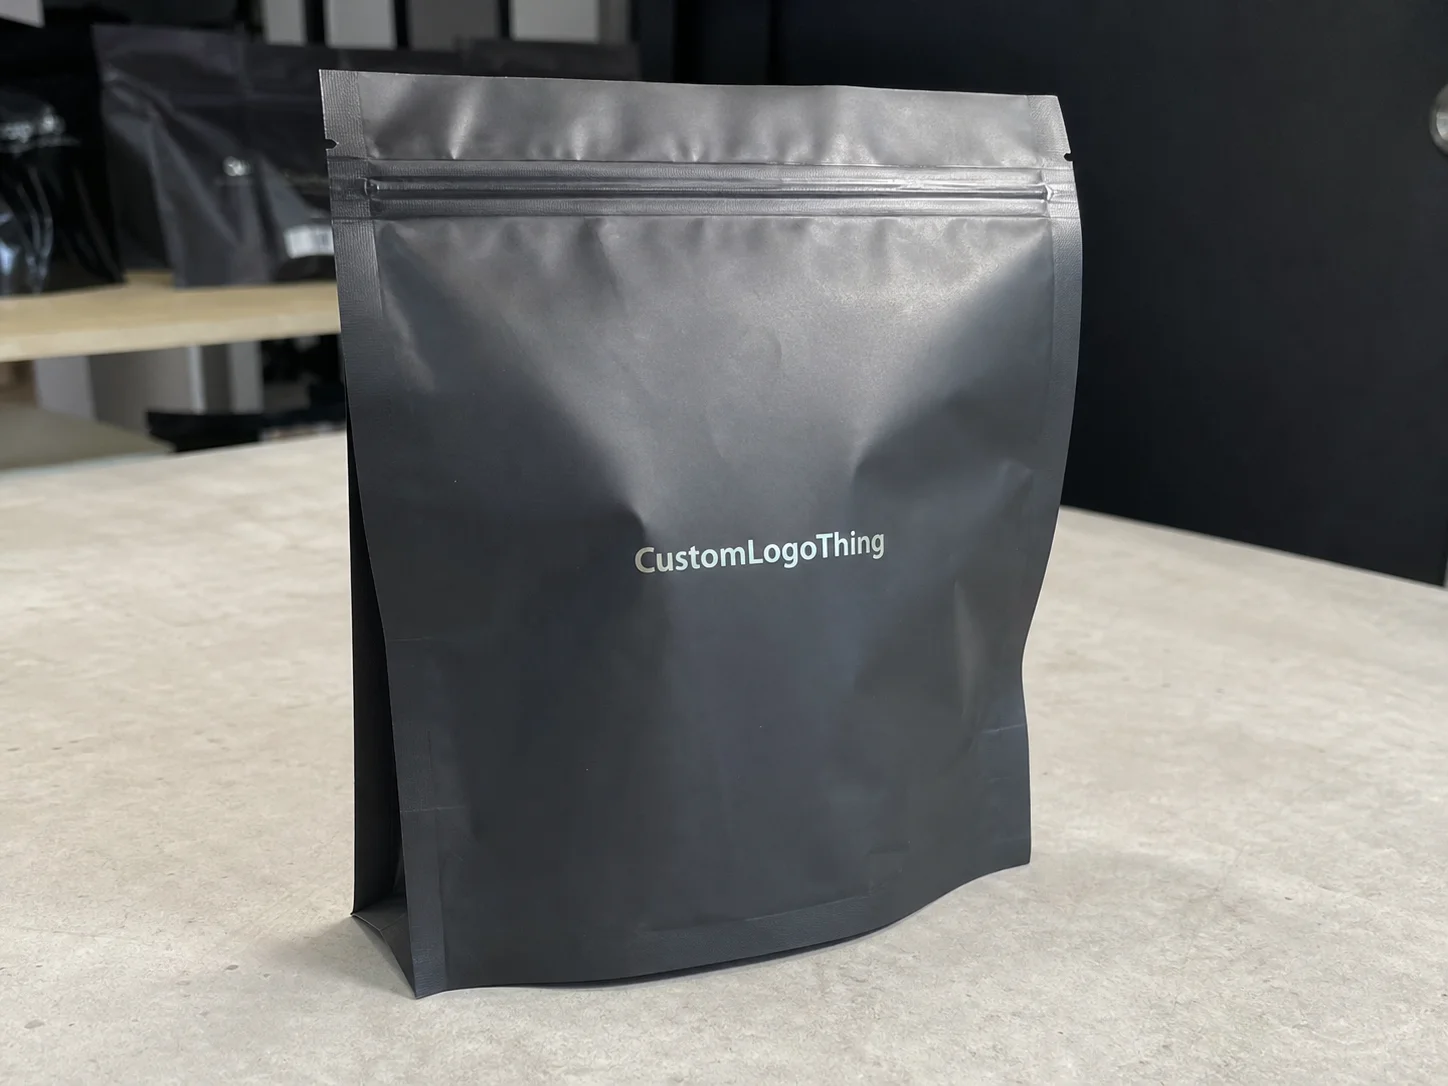
People often confuse premium with expensive. Not the same thing. Packaging design premium quality means the package feels deliberate from the first touch to the last fold. The material has the right weight. The ink lays down cleanly. The coating does not scuff the minute it touches another carton. The box opens the way it should. The insert holds the product snugly. The brand message shows up without yelling at the customer like a terrible sales rep. If you’ve ever handled a box built on 350gsm C1S artboard with a 1.5 mm rigid insert and a matte aqueous coating, you know the difference immediately.
I remember standing beside a converting line in Dongguan where a cosmetics client had approved a beautiful render with gold foil and a soft-touch finish. On the computer, it looked like a $48 serum box. On the sample table, the stock was too light and the foil registration was off by maybe 0.8 mm. Tiny on paper. Huge in hand. That is the difference between looking premium on screen and actually delivering packaging design premium quality in the real world. The fix was not complicated: upgrade to 400gsm SBS, tighten the foil tolerance, and allow one more proof round. Cost? About $0.22 more per unit at 8,000 pieces. Worth it.
Here’s what most people get wrong: they think premium quality is a visual style. It is not. It is a system. A system of material selection, print controls, structural fit, and finishing consistency. For packaging design to read as premium, the package must feel stable and intentional. If the lid bows, the edge crushes, or the color drifts between runs, customers notice. They may not say, “The caliper tolerance is off.” They will say, “This feels cheap.” Brutal, but fair. I’ve seen a 2 mm gap at the lid turn a polished rigid box into a $1,200 headache in less than five minutes.
Premium packaging supports package branding because people use packaging as a shortcut for trust. If your retail packaging feels sturdy and refined, customers assume the product inside is worth more. That influence is real. I’ve seen small DTC brands raise perceived value with a better board grade and one clean foil detail, not by adding five more design effects. Packaging design premium quality sells the story before the product is even touched, especially on shelves in Los Angeles, New York, and Singapore where the first impression window is about three seconds.
Premium does not always mean expensive. It does mean intentional. You can build a refined unboxing experience with a smart structure, the right stock, and disciplined finishing choices. You just cannot fake it with a random glossy screenshot and hope the factory does the rest. A well-planned mailer made from 350gsm kraft-lined corrugated board can look premium at $0.65 per unit for 5,000 pieces if the print, fold, and closure are clean.
“The box felt right the moment we lifted the lid.” That was a client telling me the sample was approved in Shanghai. Not because it was flashy. Because packaging design premium quality was obvious in the first three seconds.
For brands selling skincare, candles, supplements, or electronics, packaging design premium quality can affect conversion rate and repeat orders. If the customer buys online, the box becomes the first physical proof that the brand means what it says. If the customer buys in-store, the box has to compete on shelf in under five seconds. That is not only a design problem. That is a business problem. A $32 candle in a rigid box with soft-touch lamination and foil accents can feel like a $50 item before the wick is even lit.
For more product-specific options, I usually point teams toward Custom Packaging Products when they want to compare structures before locking artwork. Saves a lot of back-and-forth later. And yes, it saves money too, which is nice for everyone except the print machine that loves rework. If you are comparing box styles, start with exact specs like 280gsm C1S card + 1200gsm greyboard, because vague briefs produce vague quotes.
How Packaging Design Premium Quality Is Built
Packaging design premium quality is built in phases. The bad news? You cannot skip half of them and expect magic. The good news? Once you know the workflow, it becomes much easier to control cost and quality. A proper project in Guangzhou or Shenzhen typically moves from brief to approved sample in 12-15 business days from proof approval for a standard folding carton, not counting shipping time for physical samples to the U.S. or EU.
The process usually starts with a concept brief. Not a mood board alone. A real brief. Product dimensions, target audience, sales channel, shipping method, budget range, and any compliance needs. If the product ships individually in a mailer, that affects the board choice. If it sits on a retail shelf, shelf impact matters more. If it is a rigid gift box, the closure style becomes part of the experience. Design decisions change fast once the functional requirements are clear. For example, a 250 ml glass bottle needs a different insert depth than a 30 ml serum bottle, and that difference can add $0.10 to $0.40 per unit depending on the insert material.
Then comes the dieline. I’ve watched more projects get delayed by bad dielines than by bad artwork. A nice visual wrapped around a structurally weak box is still a weak box. Structural design and print design need each other. A 350gsm C1S artboard with a locking tab will behave differently than a 1200gsm rigid board wrapped in printed paper. If the artwork ignores the fold sequence, the result is ugly little surprises at the seams. Premium? Not even close. In one Foshan plant, a client had to rework a sleeve because the barcode sat 4 mm too close to the score line. That “small” mistake cost two days and a second proof.
After that, pre-press checks matter. Color profiles. Bleed. Safe zone. Foil layers. Spot UV separation. Die lines on their own layer. Nothing glamorous here. Just the boring part that prevents expensive mistakes. Packaging design premium quality is often decided by whether someone in pre-press actually did their job. Boring people save brands money. That’s the truth. I always ask for a PDF proof, an outlined AI file, and a hardcopy proof under D50 lighting before we sign off.
Factory input matters too. Paper mills affect brightness, stiffness, and surface smoothness. Coating vendors affect how a soft-touch lamination behaves under heat and pressure. Folding carton factories affect registration, folding precision, and glue alignment. If one supplier is sloppy, the final product pays the price. I once negotiated with a converter in Shenzhen that wanted to use a cheaper coating substitute because their usual supplier had a delayed shipment. The replacement saved them maybe $180 on the run. It cost the client two more days of testing because the surface scratched too easily. Great trade. Really inspiring.
Sample rounds are normal. First prototype? Usually not final. It may expose weak fold lines, color shifts, or a finish that looks good under showroom lighting but bad under warehouse LEDs. I tell clients to budget for at least one physical sample, sometimes two if the box has unusual inserts or multi-part construction. Packaging design premium quality is a process of refinement, not wishful thinking. For a rigid box with a magnet closure and paper insert, expect an extra 3-5 business days just for tooling and wrap adjustments.
Here’s a realistic timeline breakdown:
| Project Type | Typical Steps | Lead Time From Brief to Approved Sample | Production Time After Approval |
|---|---|---|---|
| Standard folding carton | Dieline, print proof, one sample round | 7-12 business days | 10-15 business days |
| Custom rigid box | Structure mockup, wrap sample, finish test | 12-18 business days | 15-25 business days |
| Complex retail packaging with inserts | Multiple prototype rounds, color matching, QC sign-off | 18-30 business days | 20-35 business days |
Those ranges are real-world ranges, not fairy tale promises. If a supplier says they can do a fully custom structure with foil, embossing, and inserts in one week, ask them what they forgot to mention. Usually something expensive. Also ask where the factory is located. A plant in Dongguan with in-house die-cutting will move faster than a trading company bouncing files between three vendors in different provinces.
For teams building branded packaging, I recommend treating structure and graphics as one conversation. In my experience, the best packaging design premium quality happens when the brand and the factory review the same physical sample together, not when everyone stares at separate PDFs and guesses. Bring the product, the insert, and the closure hardware to the table. Otherwise you are debating cardboard in the abstract, which is how people end up paying for revisions.
Key Factors That Drive Packaging Design Premium Quality
There are five big drivers behind packaging design premium quality: substrate, print accuracy, finishing, structural design, and consistency across the run. Ignore one, and the whole package slides downhill. Fast. On a 10,000-piece order, even a 0.5 mm crease drift can turn a clean box into a return-rate problem.
Substrate choice is the first decision that affects feel. SBS board is common for product packaging because it prints cleanly and handles detailed graphics well. Kraft stock gives a more natural, earthy look, which works for some wellness and food brands. Rigid board feels heavier and more gift-like. Corrugated makes sense for shipping strength. Recycled stock can support an eco story, though surface texture and color consistency need attention. The “best” choice depends on whether the package is for retail display, direct shipping, or a presentation-style unboxing moment. In practical terms, a 350gsm SBS carton in Shenzhen might print for $0.20 per unit at 5,000 pieces, while the same design on recycled kraft in Hangzhou could run a little higher because of more variable print absorption.
Print quality matters more than people think. Color accuracy is not about making the PDF “look close enough.” It is about matching brand color under actual production conditions. Registration has to hold, especially on multi-color artwork. Ink coverage must be even, not streaky or muddy. If the artwork relies on fine type, small icons, or tight line work, resolution becomes a serious issue. Premium packaging with fuzzy text is just expensive disappointment in a box. I’ve rejected samples where the black text looked slightly gray because the ink density was off by a fraction. That fraction is how brands lose credibility.
Finishing is where many brands overdo it. Foil stamping, embossing, debossing, soft-touch lamination, spot UV, matte varnish, aqueous coating, and textured paper all have a role. Not all of them belong on the same box. I’ve seen packaging design premium quality destroyed by trying to cram in every finish because someone in marketing thought “more premium” meant “more effects.” It usually means clutter. One hero finish often does more than four noisy ones. A gold foil logo on a 400gsm carton plus one matte varnish layer often looks more expensive than foil, UV, embossing, and spot gloss all fighting each other.
Where the money actually goes
Let’s talk cost like adults. A plain 250gsm folding carton with single-color print might land around $0.18 to $0.32 per unit at 5,000 pieces, depending on size and location. Add foil and embossing, and you may jump to $0.42 to $0.78 per unit. A rigid box with paper wrap, custom insert, and soft-touch lamination can move into $1.10 to $2.80 per unit very quickly. That is not because factories enjoy making numbers annoying. It is because every extra process adds labor, tooling, and waste allowance. A factory in Dongguan, for example, may quote a 2,000-piece rigid set at $2.35 per unit while a 10,000-piece run drops closer to $1.48 per unit because the setup cost gets spread out.
The best perceived value usually comes from a few smart upgrades:
- Heavier stock or better board stiffness for the outer carton, such as 350gsm C1S artboard or 1200gsm greyboard.
- One tactile finish, like soft-touch or matte varnish.
- Accurate print colors with proofing against Pantone references.
- A clean insert that protects the product without looking like it was cut with kitchen scissors.
Box structure also contributes to packaging design premium quality in a very practical way. A lid that closes with a clean click, a drawer that slides with controlled friction, or a tuck flap that fits without bulging all create a sense of precision. Add a well-designed insert and the unboxing flow becomes part of the brand story. That matters for package branding because customers remember how the reveal felt. A drawer box with a 1.2 mm tolerance on the sleeve feels very different from one that rattles around like it was assembled on a Friday afternoon.
I’ve had clients ask if they should add a magnetic closure to make a carton feel fancy. Sometimes yes. Sometimes no. If the product price is $24 and the packaging adds $3.50 in cost, the economics may be terrible. If the product is a $160 gift set, that same closure may be perfect. Context matters. Packaging design premium quality is not one-size-fits-all, no matter how loudly someone says “luxury.”
For sustainability-minded teams, certifications matter too. If you want FSC-based sourcing, check the documentation at fsc.org. For shipping performance and transit testing, the ISTA standards are worth knowing. I’ve seen too many beautiful boxes fail because nobody tested crushing, vibration, or drop impact before launch. Pretty boxes do not get a pass from gravity. A 76 cm drop test from a warehouse conveyor is very convincing, and not in a good way.
The EPA also has useful guidance on packaging and waste reduction if your brand wants to balance appearance with environmental responsibility. You can review resources at epa.gov. Good design and responsible material selection are not enemies. Lazy design and waste are the enemies. If you can reduce a carton from 420gsm to 350gsm without losing stiffness, that may save $0.06 to $0.11 per unit and still preserve the premium feel.
Packaging Design Premium Quality: Step-by-Step Process
If you want packaging design premium quality without wasting time, follow a process. Not vibes. Process. The best launches I’ve seen in Guangzhou and Shenzhen all used the same rhythm: brief, sample, revise, approve, then production.
-
Define the brand goal. Are you selling a luxury gift, a functional everyday product, or a shelf-stable retail item? The answer changes everything, from board grade to opening style. I’ve seen brands chase a premium look for a product that needed rugged shipping strength more than velvet-like aesthetics. Wrong problem, wrong fix. If the product is going through Amazon FBA in the U.S., for example, you may need stronger crush resistance than you would for a boutique shelf in Milan.
-
Build a packaging brief. Include exact dimensions, product weight, shipping method, retail shelf requirements, and budget range. Add target quantity too. A quote for 1,000 units is not comparable to 10,000 units. That sounds obvious, but apparently it is not obvious enough. Be specific: 5,000 pieces, 350gsm C1S artboard, matte aqueous coating, one-color black print, and a black paperboard insert. Then the quote means something.
-
Create or refine the dieline. Confirm structure with a physical mockup. Cardboard models are cheap insurance. A $15 mockup can save a $3,000 reprint. I’ve paid for enough mistakes in my career to respect the humble mockup. In one case, a 2 mm tray adjustment in Dongguan saved a whole production week because the bottle cap was scraping the inner wall.
-
Select finishes and request a printed sample. Do not approve only a digital proof. Digital proofs lie by omission. They cannot tell you how a matte surface reflects light or whether foil registers cleanly on the corner. Ask for a printed prototype on the actual substrate, not a substitute paper from some “close enough” drawer.
-
Approve color, timeline, and QC checkpoints. Ask for production samples, line inspection points, and final carton count checks. Packaging design premium quality depends on consistency, not just one beautiful sample on a table under perfect lighting. If you are shipping from Shenzhen to Los Angeles, build in 7-12 days for ocean or air freight coordination on top of manufacturing time.
One of my favorite factory-floor memories involved a client who insisted on approving artwork first and structure later. We built the box, and the inner tray was 2 mm too tight for the bottle shoulders. That tiny issue forced a rework of the insert geometry and delayed production by four business days. The design looked excellent. The box performed like a stubborn mule. That is why structure has to be validated early. The fix was simple on paper and annoying in reality: widen the tray cavity, adjust the glue flap by 1.5 mm, and re-cut the insert board.
Another thing: keep your supplier communication clean. Share one spec sheet, one dieline file, one master color reference. If different departments are sending different versions of the same file, your factory will produce the last file they saw. Not the one you hoped for. Packaging design premium quality cannot survive file chaos. I always ask clients to name one owner for the project, because “three people editing the same PDF” is how good boxes become expensive rumors.
For teams already exploring materials and box types, Custom Packaging Products can help narrow the options before you lock down production specs. That’s usually cheaper than asking three factories to interpret a vague idea and then paying for three different surprises. A sample set shipped from Dongguan to California might cost $35 to $60 via DHL, which is still less painful than a full reprint.
My rule is simple: sample, inspect, revise, then approve. If a vendor wants you to skip the revision step, they are asking you to subsidize their optimism. I like optimism. I also like boxes that close properly.
Common Mistakes That Ruin Premium Packaging
Most packaging design premium quality failures are preventable. That part annoys me because the mistakes are so familiar. Same problems. Different logo. I’ve seen the same three errors show up in factories from Shenzhen to Ningbo, usually on projects that were rushed to meet a product launch date that should have been moved by two weeks.
Over-designing is the first one. Too many finishes. Too many fonts. Too many decorative elements fighting for attention. Premium packaging is usually calmer than people expect. Clean typography, enough white space, and one or two strong material cues go much farther than a design that tries to “show value” everywhere at once. If the front panel looks like a trade show brochure, you’ve probably gone too far. A minimalist rigid box with one foil logo and a 1-color interior print often outperforms a crowded sleeve covered in six effects.
Cheap materials are the second mistake. Even great artwork looks flat on flimsy stock. A weak board can warp, dent, and make the box feel unfinished. I’ve seen beautifully branded packaging collapse emotionally the moment someone pressed a thumb into the panel and it flexed like a cereal box. That is not premium. That is a budget problem wearing a fake mustache. If your carton uses 250gsm board for a heavy product, you are asking for corners to crush during transit from Shenzhen to Chicago.
Color mismatches happen when teams skip Pantone references or approve from a laptop screen alone. Screens are not production. They are light-emitting guesses. Print has ink, pressure, coating, and substrate variables. If your brand color matters, proof against real standards and review under neutral lighting. I’ve had a brand green shift by enough to look “off” under warehouse LEDs in Los Angeles, which was all it took for the client to reject 3,000 sleeves.
Ignoring shipping stress is another classic. Retail packaging and shipping packaging do not always face the same abuse, but both need a real stress check. Compression, scuffing, and corner damage can ruin the first impression before the customer even opens the parcel. If the product is heading through distribution, ask about transit testing aligned with ISTA methods. Looks are great. Arrival condition is better. A box can look perfect in a showroom in Guangzhou and still arrive with a crushed edge after one bad pallet stack.
Choosing the lowest quote is the final trap. Lowest quote usually means lower board, weaker coating, looser tolerances, or a factory that cuts corners during the night shift. Not always, but often enough to be suspicious. Reprints cost more than Choosing the Right supplier in the first place. A $1,200 savings can turn into a $6,500 mistake after delays, freight, and rework. I’ve watched it happen. The “cheap” option gets expensive very quickly. One bad coating batch in Dongguan can wipe out the whole savings line item and then some.
One client told me, “We saved $0.09 per box.” Two weeks later they were reprinting 8,000 units because the finish chipped in shipping. That is how false savings work. They don’t save money. They move the invoice.
If you want packaging design premium quality, respect the boring stuff: tolerances, glue lines, fold memory, and coating durability. Those details are not glamorous, but they decide whether your box feels like a premium package or a nice idea that failed under pressure. I would rather approve a simple 350gsm carton with clean creases than a fancy mess that looks expensive for one day and broken for the next six months.
Expert Tips to Improve Premium Quality Without Overspending
You do not need to bankrupt the project to get packaging design premium quality. You need focus. A sharp box beats a noisy one almost every time. I’ve seen brands spend an extra $0.90 per unit on effects nobody noticed, while the actual opening experience still felt cheap. That is not strategy. That is performance art for accountants.
Choose one hero finish. If the brand has a strong logo mark, use foil or embossing there and keep the rest clean. A single premium cue can raise perception more effectively than stacking foil, spot UV, textured varnish, and lamination all on one face. I’ve seen one soft-touch surface do more work than four decorative tricks combined. On a 5,000-piece rigid box run in Shenzhen, a single gold foil logo might add only $0.12 to $0.18 per unit, while four finishes can multiply setup complexity and delay production by several days.
Spend where hands touch. Customers touch the lid, the opening edge, the insert, and the product tray. That is where tactile quality matters most. If the outer sleeve is simple but the opening action feels refined, the box still reads premium. Save money on hidden interior panels if needed. Spend on the touchpoints. A drawer box with a smooth pull ribbon and a snug 1.0 mm friction fit can feel far more expensive than a crowded lid with multiple coatings.
Use clean typography and white space. Luxury rarely shouts. It breathes. Large margins, disciplined font pairing, and strong visual hierarchy are cheap to implement and expensive-looking when done well. This is one of the easiest ways to improve packaging design without increasing the unit cost much. In practice, I’ve seen a cleaner layout improve perceived value more than a costly silver foil, especially on skincare boxes sold in Seoul and London.
Ask factories what gives the biggest lift per dollar. This is my favorite negotiation move. On supplier calls, I ask, “If I add only one change, which one makes the box look substantially better without wrecking the quote?” Good factories will tell you. Maybe it is moving from 157gsm wrap paper to 182gsm. Maybe it is upgrading the coating. Maybe it is changing the insert color from bright white to black for contrast. Real suppliers know where the value lives. A solid converter in Dongguan will tell you straight up whether a matte aqueous finish or a soft-touch laminate gives more perceived value for $0.06 per unit extra.
Run a small pilot. A 200-unit or 500-unit pilot run can reveal fold issues, color shifts, or scuff problems before you commit to a larger order. It is far cheaper to adjust early than to discover an issue on a full pallet. I know brands that saved thousands because they caught a tiny die-cut mismatch on the pilot. That’s not luck. That’s discipline. A pilot from a factory in Guangzhou can usually be turned around in 5-7 business days if the dieline is final and the paper is already in stock.
Keep the structure simple if the finish is complex. If the box includes embossed details and foil, don’t also force an awkward multi-part lock that adds assembly time. Complexity can chew up budget in hidden labor, and hidden labor is where people get surprised. Packaging design premium quality is often about subtraction, not addition. A clean two-piece rigid box in 1200gsm greyboard plus 157gsm art paper wrap often looks more polished than a heavily engineered shape that takes three people to assemble.
Here’s a quick comparison I use with clients:
| Upgrade Choice | Typical Added Cost | Visual Impact | Best Use Case |
|---|---|---|---|
| Soft-touch lamination | $0.08-$0.22/unit | High tactile value | Skincare, gifts, premium retail packaging |
| Foil stamping | $0.10-$0.35/unit | Strong brand highlight | Logos, seals, special edition accents |
| Embossing/debossing | $0.07-$0.20/unit | Subtle but refined | Minimal branding, luxury presentations |
| Custom insert | $0.15-$0.60/unit | Functional and premium | Fragile products, unboxing flow |
If you can only afford one upgrade, I usually recommend soft-touch or a well-designed insert, depending on the product. They affect the customer’s direct experience fast. That’s where packaging design premium quality becomes obvious instead of theoretical. For a serum box at 5,000 pieces, a black cardboard insert at $0.18 per unit can do more for perceived value than a full-panel foil treatment.
For practical reference, many brands compare structure options through Custom Packaging Products before ordering samples. Smart move. Saves time. Reduces arguments. Keeps everyone focused on the same spec sheet instead of their personal interpretation of “premium.”
Next Steps to Create Packaging Design Premium Quality
If you want packaging design premium quality that actually holds up in production, start with the basics: dimensions, budget, audience, shipping method, and reference samples. Gather two or three boxes you already like. Not because you want to copy them, but because you need a concrete benchmark for feel, structure, and finish. I tell clients to bring actual samples from brands sold in Shanghai, Tokyo, or Berlin if those are the standards they want to match.
Then request a printed prototype, not just a PDF. I cannot stress that enough. A digital file can only prove you know how to arrange art on a screen. A printed sample proves the box works under real light, real handling, and real assembly conditions. Ask the supplier to show you color, finish, fold precision, and insert fit in the same sample review. One checklist. One meeting. Less chaos. If possible, review the sample under D50 lighting and confirm the board spec, such as 350gsm C1S artboard or 1200gsm greyboard, before you sign.
Compare 2-3 supplier quotes using the exact same specs. Same size. Same stock. Same coating. Same finish. Same quantity. Otherwise you are not comparing pricing. You are comparing guessing styles. And guessing styles are expensive. A quote from a factory in Dongguan for 5,000 units should be directly comparable to a quote from Guangzhou only if the die-cut, board, and finish are identical.
Use this simple review checklist for every sample:
- Feel: Does the board feel stiff, smooth, or cheap in the hand?
- Color: Does the print match the Pantone or approved reference?
- Fit: Does the product sit securely without forcing the insert?
- Durability: Do corners, edges, and coatings hold up to light handling?
- Presentation: Does the box support the brand story without clutter?
I’ve watched brands rush from design to production because they were excited about launch photos. That excitement is understandable. But packaging design premium quality rewards patience. A better sample means fewer complaints, fewer returns, and fewer emergency calls at 8:40 p.m. from someone asking why the foil is lifting on the first batch. And yes, that call always happens on a Friday.
My final advice is simple: treat packaging as part of the product, not as a wrapper around it. The box is often the first thing the customer touches and sometimes the only thing they remember before posting it online. If you get the structure, stock, finishing, and quality control right, packaging design premium quality becomes a brand asset instead of an expense line that causes headaches. A well-made rigid box from Shenzhen, for example, can make a $40 product feel like a $60 one before the customer has even opened it.
If you are ready to move from idea to sample stage, start with a clear brief, a realistic budget, and one strong material choice. That is how packaging design premium quality gets done without drama. And honestly, drama is the one premium feature nobody asked for. If your target price is tight, ask for a sample quote first; a typical custom sample might run $25 to $80 depending on structure, and that is still cheaper than correcting 10,000 bad boxes later.
FAQs
How do I know if my packaging design premium quality is actually premium?
Check the feel of the material, print sharpness, finish consistency, and how well the box protects the product. If it looks good but dents, scratches, or prints unevenly, it is not premium enough. Real packaging design premium quality shows up in the hand, not just on a render. A sample made with 350gsm C1S artboard and a clean matte finish should feel sturdy and controlled, not floppy.
What materials work best for packaging design premium quality?
Rigid board, SBS, and well-selected kraft stocks are common choices depending on product weight and brand style. The best material depends on whether the package is for retail display, shipping, or unboxing presentation. There is no universal winner, which is irritating but true. For lighter products, 350gsm SBS or C1S artboard is often enough; for gift sets, 1200gsm greyboard wrapped with printed art paper usually feels more premium.
How much does packaging design premium quality usually cost?
Pricing depends on board grade, size, print complexity, finishing, and order quantity. A small upgrade in stock or one premium finish can change the price more than a simple artwork tweak. For packaging design premium quality, the biggest cost jumps usually come from structure and finishing, not from the logo placement. As a reference, a 5,000-piece folding carton might cost $0.18 to $0.32 per unit, while a rigid box with foil and insert can land between $1.10 and $2.80 per unit.
How long does it take to produce premium custom packaging?
Timeline usually includes design, sampling, approval, and production, so it is rarely instant. Simple projects move faster; complex structures with custom finishes take longer because samples and corrections are normal. If someone promises premium packaging in a few days, ask what step they skipped. A standard folding carton is often 12-15 business days from proof approval for production, while a rigid box can take 15-25 business days.
What is the fastest way to improve packaging design premium quality on a budget?
Use a cleaner layout, better material, and one strong tactile finish instead of adding many expensive extras. Focus on the parts customers touch first: lid, opening edge, insert, and print contrast. That is the quickest path to stronger packaging design premium quality without blowing the budget. A single soft-touch layer or a cleaner black insert can lift perception fast without turning the quote into a horror story.