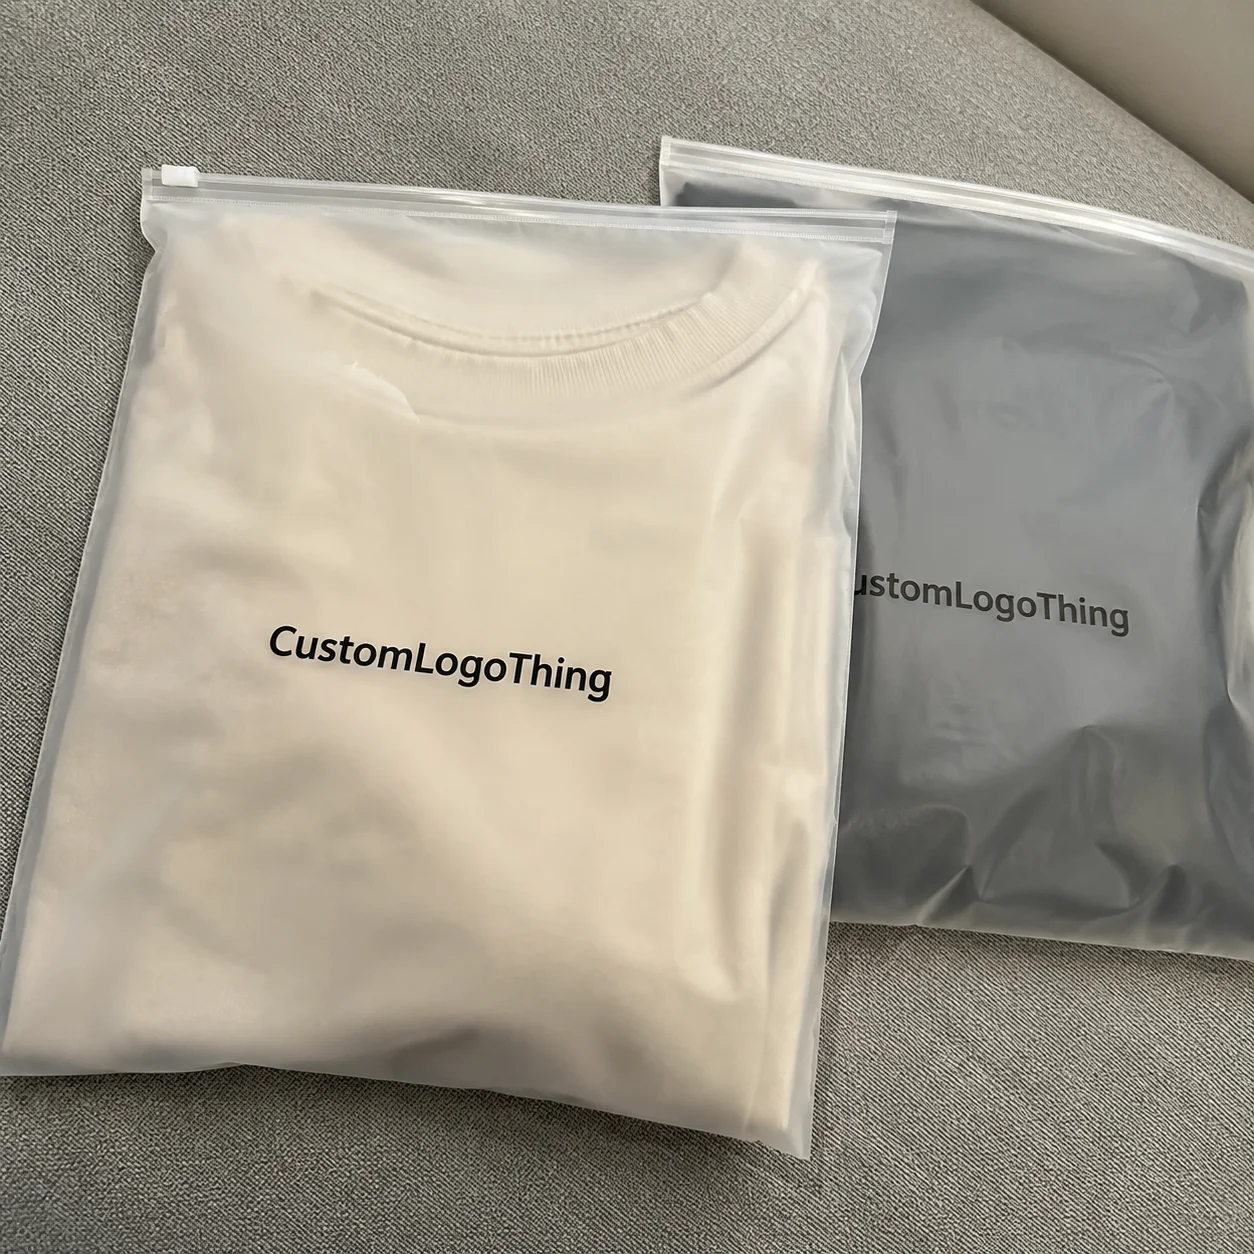
Buyer Fit Snapshot
| Best fit | Product Packaging Selection Option projects where brand print, material claims, artwork control, MOQ, and repeat-order consistency need to be specified before quoting. |
|---|---|
| Quote inputs | Share finished size, material target, print colors, finish, packing count, annual reorder estimate, ship-to region, and any compliance wording. |
| Proofing check | Approve dieline scale, logo placement, barcode or warning zones, color tolerance, closure strength, and carton packing before bulk production. |
| Main risk | Vague material claims, crowded artwork, missing packing details, or unclear freight terms can make a low unit price expensive after revisions. |
Fast answer: Product Packaging Selection Option: Material, Print, Proofing, and Reorder Risk should be specified like a repeatable production item. The safest quote records material, print method, finish, artwork proof, packing count, and reorder notes in one written spec.
Production checks before approval
Compare the actual filled-product size with the drawing, then confirm tolerance on folds, seals, hang holes, label areas, and retail display edges. Reserve space for logos, QR codes, warning copy, and material claims before decorative graphics fill the panel.
Quote comparison points
Review material grade, print process, finish, sampling route, tooling charges, carton quantity, and freight assumptions side by side. A quote is only useful when the supplier can repeat the same color, closure quality, and packing count on the next order.
I still remember a shipment of ceramic candle jars that looked perfect on paper and completely ridiculous in a real carton. The brand owner had saved $0.08 per unit on box size, then paid an extra $4.20 per shipment because the carrier charged dimensional weight like it was a personal insult. The cartons were built in Dongguan, Guangdong with 350gsm C1S artboard, but the fit was off by 9 mm on the inside width, so the jars shifted just enough to chip the rims. That’s why product Packaging How to Choose is not a cute design question. It’s a money question, a damage question, and a brand question tangled together in one messy little decision.
If you get product packaging how to choose wrong, you don’t just end up with ugly boxes. You get crushed corners, wasted freight, angry customers, and a warehouse team that hates your SKU. I’ve seen a $2.40 product turn into a $6.00 shipping mistake because someone picked packaging that was one inch too large in every direction, then added bubble wrap that pushed the carton into the next dimensional bracket. One inch. That tiny, smug little inch.
What Product Packaging Really Does
Product packaging does three jobs at once: it protects the product, presents the product, and helps the product sell. Most people start with the pretty part and forget the other two. That’s how you end up with branded packaging that looks nice in a mockup and fails the first time a box gets tossed onto a conveyor belt in a warehouse outside Shenzhen or a 3PL in Chicago.
In a Shenzhen factory I visited, we spent two hours testing a new folding carton for a skincare brand. The design team wanted a soft-touch finish and a high-gloss foil logo. Fine. But the first drop test from 36 inches split the corner because the paperboard was only 300gsm. The fix was boring, not glamorous: 350gsm C1S artboard, a slightly tighter dieline, and a simple paper insert made from 1.5 mm E-flute board. That change cost $0.11 more per unit on a 5,000-piece run and saved the client thousands in returns. That’s product packaging how to choose in real life. Not mood boards. Not fairy dust.
Here’s the plain-English breakdown:
- Primary packaging is what touches the product first. Think serum bottle, pouch, jar, tube, blister pack, or a 50 ml dropper bottle.
- Secondary packaging holds the primary package together or makes it retail-ready. Think folding carton, sleeve, gift box, insert tray, or counter display box.
- Shipping packaging is the outer protection layer. Think corrugated mailer, master carton, void fill, tape, and corner protection.
People mix these up constantly. A cosmetics brand may need a glass bottle, a folding carton, and a shipper. An apparel brand may only need a poly mailer and a hang tag. A supplement company may need child-resistant packaging because regulations don’t care how elegant your font is, and the packaging line in Suzhou still has to pass compliance checks before the product can ship to California or the UK. That’s why product packaging how to choose starts with the job each layer has to do.
Packaging also affects shelf appeal, unboxing, damage rates, and return rates. I’ve sat in client meetings where a retail buyer said, “This box looks premium, but it feels fragile.” That sentence has cost brands more money than bad ads ever did. If your retail packaging whispers “cheap” or “flimsy,” customers notice in three seconds. If your ecommerce packaging rattles, dents, or opens in transit, they notice at 11 p.m. while posting a one-star review from a phone that has probably already ordered a replacement from someone else.
One packaging director told me: “I thought we were buying a box. Turns out we were buying insurance, merchandising, and a customer experience.” She was right. Just took her $18,000 in damaged returns to admit it, and the replacement run out of Ningbo came with a stronger glue line and a 2 mm narrower insert cavity.
So the core question behind product packaging how to choose is simple: what problem is the package solving first? If protection comes first, design follows. If shelf impact comes first, structure follows. If shipping cost comes first, size and weight rule everything. That order matters. Ignore it, and your packaging budget will start acting like a drunk uncle at a wedding.
How Product Packaging How to Choose Actually Works
Product packaging how to choose is really a filtering process. You start broad, then eliminate weak options fast. I do this with clients by asking four questions before we even touch a dieline: what is the product, how is it sold, how fragile is it, and how many units are we making? Those four answers narrow the field faster than any fancy packaging design presentation, especially on a 2,000-piece launch where the difference between a $0.31 carton and a $0.58 carton can decide the whole structure.
First, measure the product. Actual measurements. Not “roughly the size of my hand.” I’ve had clients send me that exact phrase, and yes, I did make the same face you’re making now. You need length, width, height, weight, and any shape quirks like pumps, caps, handles, or sharp corners. A 9.5 oz candle in a straight-sided glass jar behaves differently from a 9.5 oz candle in a squat tin. Same weight. Very different packaging needs. If the jar is 82 mm tall and the lid adds another 14 mm, the carton has to account for both or the top crushes in transit.
Then look at fragility. Glass, ceramics, electronics, and anything with a pump or nozzle usually need inserts, tighter fit, or stronger corrugated board. Apparel and paper goods can often live in lighter structures. Food and supplements may need barrier properties, resealability, or regulatory labeling. Product packaging how to choose gets easier once you stop treating every product like it deserves the same box. A tube of hand cream in a 120 gsm paper sleeve does not behave like a ceramic diffuser in a two-piece rigid box with EVA foam.
Order volume changes everything. A 500-unit run behaves differently from a 5,000-unit run. At low quantities, setup costs hit hard. At higher quantities, unit cost drops, but storage and cash flow start barking at you. I’ve seen a folding carton quote move from $1.08 per unit at 500 pieces to $0.27 per unit at 5,000 pieces from the same supplier in Xiamen, because the die, plates, and press setup were spread over more units. Same artwork. Same structure. Same supplier. Welcome to economics, the part nobody wants to hear about until the invoice arrives.
Common packaging structures fit into a few buckets:
- Folding cartons for cosmetics, supplements, small consumer goods, and retail-ready product packaging, often printed on 300gsm to 400gsm C1S artboard.
- Mailer boxes for ecommerce, subscription boxes, and branded packaging that ships direct to customers, usually made from E-flute or B-flute corrugated board.
- Rigid boxes for luxury gifts, high-end electronics, and premium package branding, commonly wrapped in 157gsm art paper over 1200gsm greyboard.
- Pouches for food, supplements, lightweight goods, and refill packs that need low shipping weight, often with PET/PE or kraft/foil laminate.
- Labels and wraps for bottles and jars that already have a container, usually pressure-sensitive on 60gsm to 80gsm liner stock.
- Inserts for fit, display, and protection, such as molded pulp, EVA foam, paperboard partitions, or corrugated dividers.
The real logic path is boring, which is exactly why it works: protect the product, match the brand, fit the budget, then verify production feasibility. If you start with a foil stamp and a matte black box before you know whether the item survives a drop test, you’re doing packaging theater. Looks great. Costs money. Fails later. I’ve watched a brand spend $1,300 on foil tooling for a sleeve in Guangzhou before confirming the bottle neck finish even fit the insert hole.
Production realities matter too. Dielines decide what can physically be built. Minimum order quantities decide whether a supplier even wants your job. Print methods decide whether your colors, coatings, and finish choices are actually possible. I once had a client insist on an intricate embossed logo on a tiny mailer box, then act surprised when the tooling quote added $780 and the mold maker in Shenzhen asked for an extra 4 business days. The factory wasn’t being dramatic. Metal plates, die-cutting forms, and embossing dies cost real money.
At this stage, product packaging how to choose is part analysis, part negotiation. Ask what the supplier can do on their standard line, what needs custom tooling, and what can be simplified without ruining the experience. That’s how you get to a box that works instead of a box that photographs well and annoys the warehouse. In practice, that might mean changing a magnetic closure to a tuck flap, or swapping a full-color interior print for a one-color kraft interior to save $0.09 per unit.
Key Factors That Decide the Right Packaging
Different products need different solutions. Shocking, I know. But too many people try to force one packaging format across a whole catalog because it makes the brand deck look tidy. The package does not care about your brand deck. Product packaging how to choose should start with the product category and end with the practical reality of production, whether that production happens in Dongguan, Yiwu, or a folding carton plant in Vietnam.
Cosmetics usually need a balance of shelf appeal and protection. A serum in a glass bottle can work well in a folding carton with a paper insert and matte lamination. If you’re doing a luxury line, rigid boxes and soft-touch finishes are common, but the unit cost climbs fast. I’ve seen cosmetic brands spend $0.32 on the bottle and $1.84 on the box, especially when they specify foil stamping, spot UV, and a satin ribbon pull. No joke. The box became the product’s expensive little tuxedo.
Food and supplements need more attention to compliance, barrier performance, and storage conditions. If the item is dry goods, you may choose a stand-up pouch with a zipper. If it’s a supplement bottle, you may need tamper evidence and accurate labeling. For any claim related to recyclability or compostability, check the actual material and local rules. The EPA has solid guidance on waste and recycling basics here: EPA recycling resources. Don’t freestyle claims. Regulators and customers both hate that, and a label printer in Shenzhen won’t save you from an illegal claim printed on 50,000 units.
Electronics often need molded pulp, EVA foam, corrugated inserts, or a tight-fitting tray because movement kills. A supplier once showed me a laptop accessory box that looked sleek but had 8 mm of play inside. I shook the sample, heard the rattle, and said, “That’s a return rate with a ribbon on it.” We fixed it with a molded insert and a stronger outer shipper. The customer wanted package branding. Fine. But the package also had to keep the product alive through a 1.2-meter drop and a 24-hour humidity test.
Apparel is usually more forgiving. A branded mailer box, tissue paper, and sticker can do a lot of heavy lifting for ecommerce. For retail, folded cartons or hang tags may matter more than heavy structure. If the product is light and not fragile, don’t overbuild it. A $2.60 rigid box for socks is not a flex. It’s a CFO migraine, especially if the carton ships air instead of product.
Candles and glass goods are where damage risk matters most. Double-wall corrugate, snug inserts, and crush-resistant outer shipping packaging often make more sense than fancy decoration. I’ve tested candle boxes that passed a shelf test but failed a 3-foot drop because the jar bounced inside like a marble in a blender. Pretty doesn’t stop physics, and a 32 ECT outer shipper won’t forgive a loose-fit insert.
Materials matter just as much as product category. Paperboard works for many retail cartons. Corrugate adds strength for shipping. Kraft gives a natural look. Rigid board supports premium presentation. Plastic can offer moisture resistance or clarity, but sustainability conversations get more complicated. Glass is great for premium perception but heavy for freight. Specialty coatings help with scuff resistance, water resistance, and tactile feel. Packaging design is not just art; it’s material science with deadlines, board thickness charts, and production tolerances measured in millimeters.
Branding goals also steer the choice. A minimalist DTC skincare line may want clean white cartons with one spot color. A bold snack brand may want vivid print, strong shelf contrast, and a loud logo. An eco-focused brand may choose uncoated kraft, soy-based inks, and less finishing. That said, I’ve seen “eco-friendly” packaging that used three layers more than necessary. Sustainable branding without practical efficiency is just expensive virtue signaling in a box, especially when the design calls for a 4-color flood print on recycled stock and a plastic window on the front.
Cost and pricing factors pile up fast. You’re not only paying for the printed box. You may also pay for setup, plates, tooling, inserts, finishing, freight, palletization, and storage. For custom printed boxes, one quote might include everything while another excludes half of it. That’s why product packaging how to choose has to include quote apples-to-apples comparisons. If one supplier’s number looks too low, it probably forgot to mention three charges and a headache. A clean comparison should list unit price, tooling, freight to Los Angeles or Rotterdam, and any assembly labor separately.
Sustainability and compliance deserve real attention. If you’re making recyclable claims, the material and local infrastructure need to support them. If you’re shipping food, cosmetics, or supplements, the package may need specific labeling, tamper evidence, or child-resistant features depending on market and product type. FSC-certified paper can help with responsible sourcing when it fits your needs. For reference, FSC certification information is worth reviewing before you print a forest on the box and call it ethical. I’ve seen brands pay $0.06 more per unit for FSC paperboard from a mill in Zhejiang and gladly absorb the cost because their retail buyer asked for certified stock in the spec sheet.
| Packaging Option | Best For | Typical Unit Cost | Typical Lead Time | Main Tradeoff |
|---|---|---|---|---|
| Stock mailer | Small ecommerce items | $0.25-$0.85 | 3-7 business days | Limited branding |
| Custom folding carton | Retail packaging, cosmetics, supplements | $0.18-$0.95 | 12-18 business days | Needs dieline and print setup |
| Rigid box | Luxury gifts, premium package branding | $1.80-$6.50 | 18-30 business days | Higher cost and storage volume |
| Pouch | Food, supplements, lightweight goods | $0.14-$0.70 | 10-20 business days | Less shelf rigidity |
Product Packaging How to Choose by Budget and Timeline
Budget is where dreams meet invoice reality. A lot of clients ask for “premium packaging” before they ask what it costs to produce, ship, and store. That order of operations is backward. Product packaging how to choose by budget starts with setting your target landed cost, not your fantasy mood board. If your total packaging budget is $1.20 per unit, a $0.78 box leaves very little room for inserts, freight, and assembly.
Let’s use real numbers. A stock mailer might cost $0.38 per unit for 1,000 pieces. A custom printed carton might land around $0.44 to $0.72 depending on size, ink coverage, and finish. A rigid gift box could jump to $2.10 or more, especially if you add foam, magnetic closure, or foil. Then freight can turn a “cheap” packaging choice into the expensive one. I’ve watched ocean freight add 12% to total landed cost on a heavy box order from Ningbo to Long Beach. The box wasn’t the problem. The box plus the ocean plus the pallet count was the problem.
Quantity changes pricing dramatically. At 500 units, setup costs get spread over fewer pieces, so unit price climbs. At 5,000 units, the same setup gets diluted. That’s why a client may pay $1.12 per unit on a short run and $0.29 per unit on a larger run for the same custom printed boxes. The tooling doesn’t care how enthusiastic you are. It needs to be paid for, and the die-cutting form for a folding carton in Foshan still takes the same prep whether you order 500 or 50,000 pieces.
Here’s a practical view of pricing tiers:
- Low budget: stock mailers, plain kraft cartons, one-color printing, minimal finishing, and standard E-flute corrugate.
- Mid budget: custom size folding cartons, 1-4 color print, matte or gloss lamination, simple inserts, and spot varnish where needed.
- Higher budget: rigid boxes, foil stamping, embossing, specialty papers, custom trays, and premium closures.
Hidden costs are the traps. Sampling might be $35 to $180 depending on complexity. Plates or dies can be $120 to $600. Foil and embossing add more. Rush fees appear when somebody approved artwork after lunch and needed production by Friday. International freight can swing wildly based on carton volume, pallet density, and fuel surcharges. And yes, storage costs matter if you’re ordering six months’ worth of packaging because the unit price looked nice. A pallet of 5,000 cartons can take up 48 to 72 square feet depending on stacking height, which is enough to annoy a warehouse manager in Dallas or Sydney very quickly.
Timeline is the other half of this mess. A simple stock mailer can ship fast. A fully custom carton often needs artwork prep, dieline confirmation, a white sample, a color sample, production, and inspection. For overseas packaging, I usually tell clients to expect 12-15 business days from proof approval for straightforward folding cartons, longer if the finish is complex. Rigid boxes, specialty inserts, and large-volume orders can stretch beyond that. Add customs delays and nobody is surprised except the person who didn’t ask the right question. A client in Toronto once got a quote that was correct on production time and wrong on sea freight transit by 11 days, which changed their entire launch calendar.
When I negotiated with a supplier in Dongguan for a skincare launch, the client wanted gold foil, soft-touch lamination, and a magnetic closure at 2,000 pieces. I told them the quote would balloon unless we simplified the closure. We switched to a tuck-end carton with a premium insert and a better paper stock. The result looked clean, cost $0.41 less per unit, and arrived on time. That is how product packaging how to choose works when the deadline is real and the budget is not imaginary.
What causes delays? Artwork that isn’t print-ready, missing bleed, color corrections after proof approval, supplier backlogs, finish changes, and the classic “we changed the bottle size after the boxes were approved.” That last one is a beautiful way to burn money twice. Measure twice. Approve once. Then stop changing the spec unless you enjoy pain. A simple one-piece carton can be retooled in 2-3 business days for minor copy edits, but a major structural change may push the schedule out another week.
If you want a product source point while planning packaging, browse the full range of Custom Packaging Products so you can compare structures before you ask for quotes. That little bit of homework saves days of back-and-forth and at least one pointless revision email chain, especially when you are comparing mailer boxes, rigid presentation boxes, and sleeve packs in the same sourcing round.
Step-by-Step: How to Choose the Best Packaging for Your Product
If you want a usable process for product packaging how to choose, here’s the version I’ve used on real launches, not the polished version people pretend they followed later. This is the same sequence we used on a 7,500-unit skincare run in Shenzhen and a 1,200-unit candle launch in Los Angeles, and it kept the order from turning into a stack of expensive surprises.
Step 1: Measure the product and map protection needs
Get the exact dimensions and weight. Then list the risks: crush, breakage, moisture, leakage, abrasion, tampering, or heat. A 120 ml glass bottle with a dropper needs a very different solution than a 120 ml plastic bottle. If the item can move inside the box, it will. Gravity is loyal like that. For a bottle that measures 155 mm tall and 42 mm wide, you may need a carton with 2 to 3 mm clearance on each side plus an insert to stop lateral movement.
Step 2: Decide where the product will be sold
Ecommerce, retail shelf, wholesale, subscription box, or gifting all change the structure. Ecommerce packaging needs shipping strength. Retail packaging needs shelf appeal. Wholesale often cares about stackability and case pack efficiency. Subscription boxes care about unboxing. Package branding changes depending on where the customer sees it first, whether that first glance happens in a boutique in Austin or on a doorstep in Berlin.
Step 3: Pick 2-3 formats that fit the budget
Don’t fall in love with one format too early. Keep a few options open. For example, a skincare product may work in a folding carton, a rigid box, or a carton plus insert. Compare them on cost, protection, and presentation. This is where product packaging how to choose becomes a comparison exercise, not a taste contest. A $0.52 folding carton, a $1.90 rigid box, and a $0.63 carton with molded pulp all tell different stories on the quote sheet.
Step 4: Request dielines, samples, and print proofs
Never approve a full run from a PDF mockup alone. Ask for a dieline. Ask for a white sample if structure matters. Ask for a printed sample if color and finish matter. A proof on screen can hide problems like misaligned folds, clashing Pantone choices, or a logo that gets chopped by the glue flap. Yes, I’ve seen all three in one job. It was not a proud moment for the designer, and the sample correction in Yiwu took another 3 business days.
Step 5: Test fit, drop strength, and opening experience
Run a practical test. Put the product inside. Shake it. Drop it from a realistic height. Check how it opens, how it closes, and whether the customer can remove the product without wrestling the package like it owes them money. If you’re shipping, check compression and vibration. The International Safe Transit Association publishes useful testing standards at ISTA. I’ve used ISTA-style tests to shut down “it’ll probably be fine” arguments more times than I can count, especially on corrugated shipper specs above 32 ECT.
Step 6: Compare suppliers on more than price
The cheapest quote is often the most expensive mistake. Compare communication, sample quality, repeatability, on-time delivery, and how they handle revisions. A supplier who answers slowly before the order will not become a miracle after the deposit clears. For product packaging how to choose, reliability matters because packaging is part of your operating system, not a one-off art project. A factory in Zhongshan that hits a 12-business-day promise consistently is worth more than a supplier that drops the price by $0.03 and misses every deadline.
Here’s the short version: measure, define the channel, shortlist formats, sample, test, and compare suppliers. That’s the process. Simple on paper. Slightly annoying in execution. Still better than ordering 20,000 boxes and discovering the opening is on the wrong side.
One more thing: ask for a quote that breaks out unit price, setup, inserts, finishing, and freight. If the supplier gives you a single number and refuses detail, you’re being asked to trust a black box. I love trust. I also love line items, because line items tell the truth. A clean quote from a factory in Shanghai or Dongguan should show board grade, print method, finish, and destination port separately.
Common Mistakes When Choosing Product Packaging
The biggest mistake is choosing based on looks alone. A pretty package that fails transit is expensive decoration. I’ve seen brands spend $3.25 per box on a stunning rigid setup, then lose money because returns and replacement shipments wiped out the margin. Product packaging how to choose only makes sense if the packaging survives the trip from the factory floor to the customer’s hands, including the handoff at a fulfillment center in Phoenix or Amsterdam.
Oversizing is another classic. People choose a box that is too big because it “feels safer.” Usually it isn’t safer. It wastes carton space, increases freight, requires more filler, and makes the brand look sloppy. If your item swims in the box, customers notice. Warehouse teams notice too. They just don’t write pretty reviews about it. A box that is 12 mm too tall and 15 mm too wide can add filler, raise shipping volume, and push you into a more expensive carrier tier.
Underestimating print limitations causes trouble. Not every finish works on every material. A dark navy on uncoated kraft can look flat. Fine text can disappear on textured stock. Metallic foil can crack if the fold line is wrong. I’ve had suppliers reject a design because the white ink underbase wasn’t strong enough on a dark substrate. That’s not them being difficult. That’s them preventing your future embarrassment. A good printer in Guangdong will usually catch this before the press run, but only if you send the spec early enough.
Ignoring labor is expensive. A box that takes 45 seconds to assemble may be fine for 500 units and awful for 25,000. Add warehouse labor, and suddenly the “premium” solution is burning cash one fold at a time. Product packaging how to choose should include assembly speed, nesting efficiency, and storage footprint. If a carton flat-packs to 2.5 mm thickness, that matters. If it ships pre-glued and needs a 6-step setup, that matters even more.
Skipping sample testing is the fastest route to regret. A full order can look perfect in a photo, then arrive with a weak glue joint, warped sides, or an insert that doesn’t hold the product securely. I once watched a client approve a carton without testing the bottle fit. The bottle was 2 mm taller than the spec. The whole run had to be manually reworked. That was a fun week if you enjoy invoices and tears, and the factory in Foshan charged a rework fee of $0.07 per unit on top of the new insert run.
Finally, don’t ignore supplier communication. If they are vague on lead times, slow on sample approvals, or evasive about material specs, that’s a signal. Packaging is a repeat business. You’re not just buying one batch of boxes. You’re buying a process that you may need every month. Choose the team that can actually repeat the result, from the first proof in 5 business days to the repeat order six months later.
Expert Tips for Smarter Packaging Decisions
Here’s my best advice after years of factory visits, quote negotiations, and too many coffee-stained sample tables: ask for material options at multiple price points before you lock the design. A good supplier can often show you a 300gsm, 350gsm, and 400gsm version of the same structure. Then you can compare cost, stiffness, and print feel before committing. That is a far better move than designing your dream box and discovering the budget hates it. On a 5,000-piece run, the difference between 300gsm and 350gsm might be only $0.05 to $0.11 per unit, but the stiffness change can be dramatic.
Balance brand impact with operational efficiency. Not every product needs foil stamping, magnetic closures, and six layers of presentation. Sometimes the smartest branded packaging is the one that uses a clean structure, excellent print, and a good opening experience. A well-made folding carton can outperform a fancy but awkward box if the customer can use it easily and the margin survives. A tuck-end box with a crisp matte varnish from a factory in Shenzhen can look refined without dragging your unit cost above $0.60.
Build around damage risk and customer journey. If the product ships cross-country, prioritize strength. If it sits on a boutique shelf, prioritize visual impact. If it’s a subscription item, prioritize repeat unboxing delight without inflating freight. That’s the real heart of product packaging how to choose: fit the packaging to the journey, not just the product. A mailer that survives a 1.5-meter drop and still opens cleanly is doing more work than a showpiece that falls apart in transit.
Another tip: lock the specs before you shop price. I’ve watched clients ask five suppliers for quotes while changing the dimensions, finish, and insert shape on every email. The quotes became useless noise. Suppliers can price a spec. They cannot price a cloud of vague enthusiasm. Finalize the structure, board grade, print method, and finish, then compare apples to apples. That includes exact measurements, such as 86 mm x 86 mm x 112 mm for a candle carton or 145 mm x 75 mm x 28 mm for a cosmetic sleeve.
Ask for proof of past work. Photos are fine, but video of a close-up structure, a factory shot, or a similar packaging format tells you much more. If you’re buying from overseas, request sample photos under good lighting and ask whether the quoted price includes inserts, assembly, and packaging for shipment. I’ve saved clients from surprise charges more times than I can count by asking one annoying but necessary question: “Is that the full landed packaging cost, or just the box?” A supplier in Ningbo might quote $0.24 per unit for the box alone, but the assembled, inserted, and packed version can land closer to $0.39.
My last practical note: always think in terms of total cost per order, not just unit cost. A $0.07 cheaper box that adds $0.12 in labor and $0.09 in freight is not a win. That’s math wearing a fake mustache. The smartest product packaging how to choose decisions are the ones that look boring on a spreadsheet and beautiful in the customer’s hands. If the package is built from 350gsm C1S artboard, ships in 12-15 business days from proof approval, and keeps returns under 1.5%, that is a very good day at the office.
If you’re still sorting through custom printed boxes, mailers, inserts, and finish options, start with a short list, sample them, and test them under real conditions. Measure the product. Compare the quotes. Check the packaging design against the shipping reality. Then place the order once, not three times. That’s how product packaging how to choose stops being a guessing game and starts becoming a controlled decision.
FAQ
Product packaging how to choose for a small business with a tight budget?
Start with the cheapest structure that still protects the product, usually stock mailers or simple folding cartons. Use one-color printing or kraft finishes to control costs. Order a realistic quantity so your unit price drops without overstocking cash in the warehouse, and aim for a target landed cost under $1.00 if your product margin is narrow.
How do I choose product packaging that reduces shipping damage?
Match the packaging size to the product and add inserts or cushioning where needed. Test drop and vibration resistance before committing to production. Use corrugated or reinforced Packaging for Fragile or heavy items, such as a 32 ECT mailer or a double-wall shipper for glass.
What should I ask a supplier when comparing packaging options?
Ask for material specs, MOQ, lead time, sample cost, setup fees, and print method details. Request photos or videos of past work with similar products. Confirm whether pricing includes inserts, finishing, freight, and any assembly labor, especially if the factory is quoting from Shenzhen, Dongguan, or Ningbo.
How long does custom packaging usually take?
Sampling can take a few days to a couple of weeks depending on complexity. Production time varies by material and decoration method, with custom finishes taking longer. Shipping and customs can add extra time, especially for overseas orders, and a straightforward folding carton often takes 12-15 business days from proof approval before it leaves the factory.
What is the biggest mistake in product packaging how to choose decisions?
The biggest mistake is choosing packaging that looks good online but fails in real shipping and retail conditions. Always test fit, durability, and cost before approving the full order. A pretty box that arrives smashed is just an expensive disappointment, even if it was made with premium board and a beautiful foil stamp.
So if you’re narrowing down product packaging how to choose for your next launch, keep the order straight: measure the product, define the selling channel, test the structure, and only then worry about finishes. That sequence saves money, avoids rework, and gives you Packaging That Actually earns its keep instead of just looking good in a render.