Buyers usually start with artwork and end up learning that structure does the real work. That is especially true with standing pouch printing ziplock projects, where the closure, laminate stack, and print method all affect cost, shelf appeal, and how the pouch behaves on a filling line.
From a packaging buyer’s perspective, the pouch has to do three jobs at once: protect the product, carry the brand, and stay easy for the end user. Miss one, and the package feels cheap even if the graphics are polished. Get the balance right, and a stand-up pouch can beat rigid packaging on freight, shelf efficiency, and convenience.
That is why good procurement teams ask practical questions early. What barrier does the product need? Will the pouch be hand-filled or run on automated equipment? Does the zipper need to be standard, child-resistant, or slider-style? Those details shape the spec far more than most first quotes suggest.
This guide breaks down the buying logic behind standing pouch printing ziplock orders, with a focus on structure, printing choices, functional features, pricing, and supplier selection. The gap between suppliers is often less about the sticker price and more about what is actually included.
Overview
A stand-up pouch with a ziplock is one of the most common flexible packaging formats for dry foods, powders, snacks, supplements, pet treats, cosmetics, and non-food products. The appeal is straightforward: it stands upright, looks neat on shelf, and gives consumers a recloseable package without moving into rigid packaging. For many brands, that is the sweet spot between practicality and presentation.
Commercially, the format works because it uses less material than glass or rigid plastic while still offering enough face area for branding. Freight math also favors pouches. A pallet of flat pouches weighs far less than the same number of jars or bottles, and that matters when shipping costs keep climbing.
The hard part is that the same pouch format can be built in many ways. A snack brand may need a 3-side seal structure with a tear notch and matte finish. A protein powder buyer may need a heavier barrier film, a larger zipper, and a euro slot. A premium coffee customer may want a degassing valve, a kraft look, and high ink density so the bag feels intentional rather than mass-produced.
That is why standing pouch printing ziplock buying is really a specification exercise. The printer is not just making graphics. They are building a packaging system. According to the Flexible Packaging Association, flexible packaging remains attractive because it balances protection, convenience, and material efficiency. Buyers see that trade-off every time they compare a pouch quote against a jar or carton.
"The cheapest quote is often the most expensive decision once you add waste, rework, and rejected deliveries."
That line comes up in procurement meetings for a reason. A pouch that prints beautifully but seals inconsistently creates line stoppages and complaints. A pouch with a strong zipper but poor ink adhesion can scuff in transit. A good buying decision starts with the end-use scenario, not just the artwork file.
Pouch Structures and Materials
The pouch structure controls barrier, feel, durability, and machinability. Most printed stand-up pouches use laminated films instead of a single layer. Common combinations include PET/PE, BOPP/CPP, PET/VMPET/PE, and kraft-paper look constructions with an inner barrier liner. Each stack gives a different balance of stiffness, moisture resistance, oxygen barrier, and cost.
For dry snacks and non-oxygen-sensitive products, PET/PE or BOPP/PE often works well. These are economical, seal reliably, and give solid print clarity. For more demanding products such as coffee, aroma-sensitive powders, or shelf-stable nutritional products, buyers often move toward a metallized layer or aluminum foil structure to improve barrier performance.
Material choice affects print performance too. Gloss films make colors pop. Matte or soft-touch finishes reduce glare but can mute contrast slightly. If the brand wants a premium cue, a matte exterior with spot color accents often feels more refined than a fully glossy pouch. The catch is that finish choices can change cost and sometimes the amount of ink needed to hold visual impact.
Suppliers usually talk in terms of gauge, barrier layer, and sealant layer. A 100-micron pouch may be fine for lightweight snacks, while a 120-micron or heavier construction is more common for denser fills or better puncture resistance. The right structure depends on product weight, drop risk, storage conditions, and how the consumer opens the pouch.
For sustainability-minded buyers, the discussion has gotten more specific. Mono-material PE pouches are increasingly requested because they can support recyclability streams in some regions, though local infrastructure varies a lot. The U.S. EPA’s recycling guidance is a useful reference for broader material thinking: EPA recycling resources. That does not solve every packaging decision, but it does keep end-of-life claims grounded.
Buyers should also ask whether the pouch needs extra features like a laser score, hang hole, clear window, tin tie, or easy-tear notch. Every add-on affects die-cutting, assembly, and sometimes seal reliability. A “simple pouch” has a habit of becoming a detailed spec once branding, compliance, and operations all weigh in.
- PET/PE — good printability, broad use, moderate barrier
- BOPP/PE — cost-efficient, bright graphics, common for snacks
- PET/VMPET/PE — stronger barrier, metallic look, popular for premium products
- Kraft laminate — natural appearance, usually paired with an inner barrier film
- Mono-material PE — growing interest for recyclability discussions
Printing Options
Print method is one of the biggest cost and quality drivers in standing pouch printing ziplock projects. The three most common routes are digital printing, flexographic printing, and offset-supported workflows for secondary components. Most pouch buyers end up choosing between digital and flexo because those are the most practical options for packaging film.
Digital printing works well for low to mid quantities, frequent artwork changes, and short launch cycles. Setup costs are lower, which helps if you are testing a new SKU or running multiple seasonal variants. The trade-off is unit cost. Digital becomes less attractive as quantities rise, especially when the design is simple and repeat orders are likely.
Flexographic printing is still the workhorse for higher volumes. Once plates are made, unit pricing can be competitive, especially at 10,000 pieces and up, depending on size and coverage. Flexo also handles repeat programs efficiently, which matters if the pouch family will be reordered with stable artwork.
CMYK four-color printing is common for photographic graphics and gradients. If brand colors are strict, spot color matching may be needed for one or more elements. In practice, many buyers use CMYK for images and add one or two spot colors for logos, bars, or type that must stay consistent across production lots.
Offset printing is less common directly on pouch film, but it still matters in the broader supply chain when printed labels, cartons, or inserts are part of the package system. A good packaging buyer looks at the whole kit, because the pouch may carry the branding while the outer carton supports compliance and merchandising.
Finish changes perception fast. Gloss lamination sharpens contrast and intensifies color. Matte creates a softer, more premium feel. Soft-touch adds tactility, though it is not right for every product because scuff resistance and cost need to be weighed carefully. If the pouch will move through rough distribution, durability matters just as much as appearance.
For higher-end brand work, ask how the supplier controls color. A serious process should reference proofing method, print tolerance, and whether color is checked against a physical proof or a reliable digital reference. On a real order, a Delta E target, press calibration standards, and repeatability between lots are more useful than vague promises about “bright print quality.”
Do not assume the sample proves the final run. It usually does not. A hand-printed mockup, a digital proof, and a production run can all look different because film behavior, ink laydown, and laminate finish interact in ways a monitor never shows.
| Printing option | Best for | Typical strengths | Typical trade-offs |
|---|---|---|---|
| Digital printing | Short runs, test launches, multiple SKUs | Lower setup cost, fast artwork changes | Higher unit cost at scale |
| Flexographic printing | Repeat orders, larger volumes | Lower unit cost on volume, efficient production | Plate cost and longer setup |
| Offset-supported workflow | Secondary printed components | Strong image detail for cartons or labels | Not the main film print method |
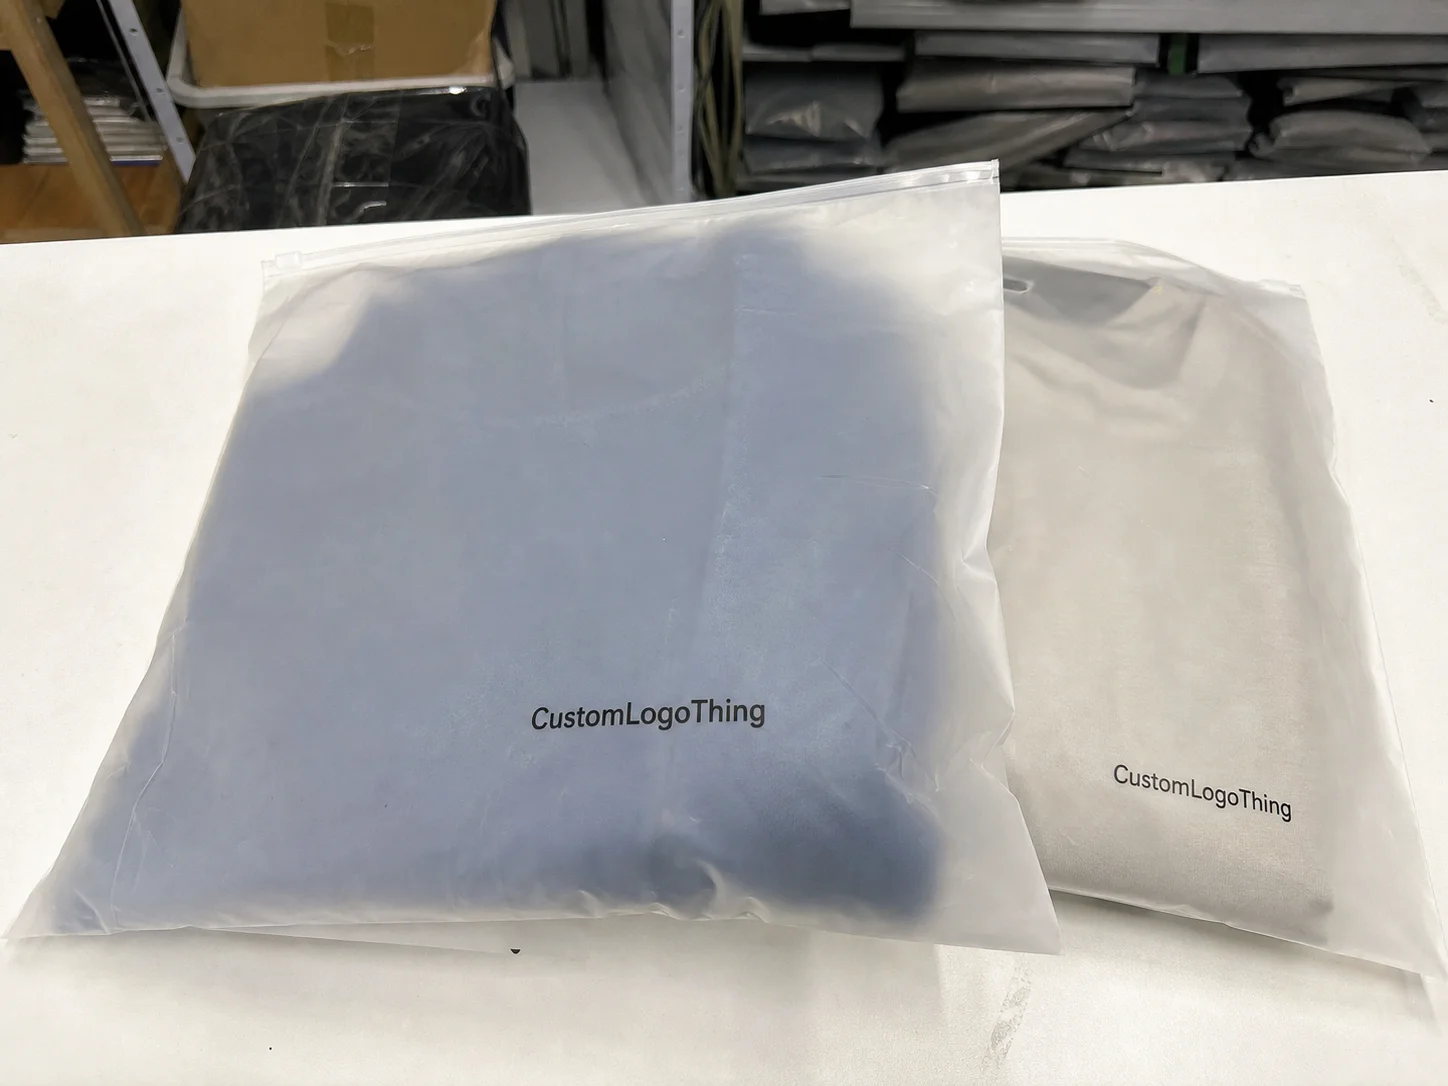
Ziplock and Functional Features
The zipper looks small. It is not small in effect. In standing pouch printing ziplock orders, the closure often determines whether the package feels premium, practical, or annoying. A weak zipper can turn a good-looking pouch into a complaint machine because the opening and reclosing experience is part of the product.
Standard press-to-close zippers are common for food, supplements, and pet treats. They are inexpensive relative to specialty closures and easy for consumers to use. If the package will be opened and closed many times, buyers should still evaluate closure consistency, zipper track alignment, and seal strength around the closure line.
Not all zippers are equal. A wider zipper can feel more substantial and easier to use, but it may raise cost and slightly change the top seal area. Child-resistant zippers, slider zippers, and double-lock styles add more complexity and are best reserved for products that truly need them. The wrong closure spec can add cost without adding value.
Functional features work as a package system. A tear notch helps with first opening. A euro slot helps with retail display. A one-way degassing valve is useful for coffee and some specialty dry goods. A clear window can help shoppers see the product, but it also reduces printable area and can create barrier concerns if it is too large.
For transit testing, buyer teams should think about ISTA standards. The ISTA site is a useful reference for distribution testing logic, especially if the pouch will ship in cases that experience vibration, compression, or drops. A pouch that survives a shelf test but fails in transit is not a win. It is a delayed failure.
For brands that want retail flexibility, the simplest closure that still supports the consumer use case is often the smartest choice. That means skipping unnecessary extras. Special features can be useful, but they also add specification points, lead time, and opportunities for mistakes during conversion.
- Press-to-close zipper — most common, moderate cost, easy consumer use
- Slider zipper — more premium, easier for some users, higher cost
- Child-resistant zipper — specialized applications, compliance-driven
- Degassing valve — coffee and aroma-sensitive products
- Tear notch — cleaner first opening, usually low cost
Pricing and Cost Factors
Pricing for pouches is rarely simple because many variables sit inside the final number. For a Custom Printed Stand-up pouch with ziplock, small-batch pricing can be much higher per unit than buyers expect, while larger runs bring the cost down quickly. The main drivers are material structure, print coverage, zipper type, pouch size, and order quantity.
As a rough reference, small quantities of custom printed pouches may sit around $0.35 to $0.90 per unit or more, depending on complexity and print method. At higher volumes, buyers may see pricing closer to $0.12 to $0.28 per unit for simpler structures, though premium laminates and specialty closures can push that higher. These are broad ranges, not promises. Every spec changes the math.
MOQ matters a lot. Digital printing can support lower minimums, sometimes a few hundred to a few thousand pieces depending on the supplier. Flexo usually needs higher quantities because plate setup has to be spread over more units. A buyer comparing quotes should always ask whether the MOQ is by SKU, by artwork, or by total order. That detail changes the real cost picture fast.
Here are the main cost factors buyers should expect:
- Film structure — multi-layer barrier laminates cost more than standard PE structures.
- Print coverage — full-bleed graphics and heavy ink areas increase complexity.
- Zipper style — standard zipper, slider, or child-resistant options change unit price.
- Special finishes — matte, soft-touch, foil effects, or spot varnish add cost.
- Size and pouch dimensions — larger pouches consume more material and shipping space.
- Compliance testing — food-grade declarations, migration testing, or documentation can add time and expense.
Hidden costs deserve attention too. Freight from overseas can erase a good unit price if the quote is ex-works and does not clearly include palletization, carton quality, or export documents. If the project requires FSC-certified paper components, verify documentation early. FSC does not apply to every laminate, but it matters wherever paper-based elements are part of the pack. Reference the program at FSC if sustainability claims are part of the brief.
The cleanest way to compare suppliers is to ask for a breakdown: material, print, closure, finishing, tooling, and freight. If one quote is much lower than the rest, the reason is usually one of three things: thinner material, fewer included features, or a hidden assumption about quantity.
| Cost driver | Effect on price | Buyer question to ask |
|---|---|---|
| Higher barrier laminate | Raises material cost | Does the product truly need oxygen or moisture protection? |
| Slider zipper | Raises closure cost | Is the slider function essential or optional? |
| Full coverage graphics | Raises print complexity | Can any areas be left unprinted? |
| Lower MOQ | Raises unit cost | Can the launch quantity be consolidated? |
Lead Time and Production Workflow
Production timing depends on whether the job is digital or flexographic, how many revisions are needed, and whether materials are already in stock. For many custom pouches, a realistic schedule is 12 to 20 business days after final proof approval, with longer timelines if the order needs specialty materials or imported components. Simple digital jobs can move faster. Complex flexo jobs can take longer.
The workflow usually follows a predictable path. First comes the specification stage, then artwork review, then proofing, then plate or cylinder preparation if needed, followed by printing, lamination, slitting, pouch making, quality checks, and packing. Each step can add time if approvals stall. The biggest delay is often not the machine. It is the back-and-forth over artwork or sizing.
For standing pouch printing ziplock projects, suppliers typically need several pieces of information before they can quote properly: pouch dimensions, material preference, closure type, print colors, quantity, and whether the artwork is print-ready. If you can provide a dieline, even better. If not, the supplier should still offer a standard dieline and explain how fill volume relates to width, gusset, and height.
Proofing deserves more attention than many teams give it. A print proof should check layout, barcode readability, legal copy, panel orientation, and color reference. If the pouch includes nutrition facts, ingredient statements, or compliance language, the buyer should verify that the supplier is not treating regulatory text like decorative filler. Mistakes here can cost far more than the pouch itself.
Packaging teams should also ask about in-line quality controls. Good suppliers inspect seal integrity, zipper alignment, print registration, and bag dimensions. For food packaging, ask what standards they follow for material declarations and whether the films are suitable for the intended contact application. “Food grade” should mean something specific, not vague reassurance.
The most efficient projects are the ones where operations, design, and procurement agree early. That may sound basic, but it saves days. A team that settles pouch size, zipper type, and artwork zones before the quote stage usually gets cleaner production than a team that keeps changing direction midstream.
Choosing a Supplier
Supplier selection should be based on evidence, not friendliness. Anyone can say they make good pouches. A credible supplier can show material options, clear MOQ terms, repeatable color control, and a realistic schedule. For standing pouch printing ziplock orders, the best partner understands branding and filling-line realities.
Start with capability fit. Does the supplier actually produce the pouch construction you need, or are they brokering it? Can they handle the closure style, finish, and print method you want? Do they support Manufacturing Capabilities that match your volume and finish requirements? The answers matter more than a polished quotation PDF.
Then check quality signals. Ask for material specs, print tolerance, and examples of comparable work. If the product is food-related, ask for migration or compliance documentation where relevant. If it will ship through rough distribution, ask how they test seal strength and carton performance. If sustainability claims are part of the brief, request FSC evidence where paper components are involved and confirm how recyclable-material claims are handled.
One useful test is how the supplier responds to constraints. Good vendors do not just say yes; they ask the right follow-up questions. What fill weight? What storage conditions? What shelf life? Will the pouch be hot-filled, frozen, or packed at ambient temperature? Those answers change everything from sealant selection to zipper performance.
Also compare how they communicate on revisions. A supplier that sends a clean dieline, precise artwork notes, and a clear approval checkpoint is usually easier to work with than one that answers vaguely. In packaging, communication quality is often a proxy for production discipline.
If you are sourcing multiple SKUs, ask about version control. Keeping one pouch family consistent across sizes reduces artwork errors and simplifies reordering. The best buyers think in systems, not single orders. That approach trims rework and helps the brand look coherent across shelf sets.
Custom Logo Things is positioned for buyers who need branded packaging that feels intentional rather than generic. If the goal is a package that protects product, supports retail presentation, and stays practical on the line, the specification process matters as much as the artwork. That is the real lesson behind standing pouch printing ziplock: the smartest quotes are built on clear requirements, not hopeful assumptions.
What is standing pouch printing with ziplock used for?
It is used for products that need shelf presentation, recloseability, and protection in one package. Common uses include snacks, coffee, powders, pet treats, supplements, and personal care items. The ziplock lets consumers open and close the pouch repeatedly, while the printed exterior carries branding and product information.
Which printing method is best for standing pouches?
That depends on quantity and artwork needs. Digital printing is often better for short runs, multiple SKUs, and fast changes. Flexographic printing is usually better for larger runs because unit cost drops as volume rises. If the design relies on exact brand colors, ask how the supplier handles CMYK and spot color matching.
How does the ziplock affect pouch pricing?
The zipper adds material and assembly cost, and specialty styles add more. A standard press-to-close zipper is usually the most economical option. Slider zippers, child-resistant closures, and wider premium tracks increase the unit price. The closure can also affect lead time because it adds another component to source and convert.
What information do suppliers need for a quote?
Suppliers usually need pouch dimensions, fill weight, material preference, closure type, quantity, print colors, finish, and whether the artwork is ready. A dieline helps a lot. If the product has compliance text, barcodes, or a specific shelf-life requirement, include that too. The clearer the brief, the more accurate the quote.
How long does production usually take?
Many orders take about 12 to 20 business days after proof approval, though it can be faster for simple digital jobs and longer for complex flexo projects or specialty materials. Revisions, imported components, and approval delays are the most common reasons schedules stretch.
Can I order custom printed standing pouches in low MOQ quantities?
Yes. Digital printing often supports lower MOQs, making it useful for launch tests and seasonal runs. Flexographic printing usually needs higher quantities to make setup costs worthwhile. The exact minimum depends on the supplier, pouch size, and print complexity, so it is best to ask for a quote based on your real launch plan.


