Buyer Fit Snapshot
| Best fit | Unboxing Experience Supplier projects where brand print, material claims, artwork control, MOQ, and repeat-order consistency need to be specified before quoting. |
|---|---|
| Quote inputs | Share finished size, material target, print colors, finish, packing count, annual reorder estimate, ship-to region, and any compliance wording. |
| Proofing check | Approve dieline scale, logo placement, barcode or warning zones, color tolerance, closure strength, and carton packing before bulk production. |
| Main risk | Vague material claims, crowded artwork, missing packing details, or unclear freight terms can make a low unit price expensive after revisions. |
Fast answer: Unboxing Experience Supplier: Board, Finish, Dieline, and Unit Cost should be specified like a repeatable production item. The safest quote records material, print method, finish, artwork proof, packing count, and reorder notes in one written spec.
Production checks before approval
Compare the actual filled-product size with the drawing, then confirm tolerance on folds, seals, hang holes, label areas, and retail display edges. Reserve space for logos, QR codes, warning copy, and material claims before decorative graphics fill the panel.
Quote comparison points
Review material grade, print process, finish, sampling route, tooling charges, carton quantity, and freight assumptions side by side. A quote is only useful when the supplier can repeat the same color, closure quality, and packing count on the next order.
Brands often think they’re buying a box. They’re really buying a controlled first impression, and a strong Unboxing Experience Supplier guide shows how those first 10 seconds can shift customer perception, brand recognition, and repeat purchase behavior. I still remember walking through a corrugated plant in Dongguan and watching a $0.18 insert make a $60 skincare product feel like a luxury purchase. Same product. Same formula. Different box story. Honestly, I was a little irritated by how powerful it was, especially after seeing the same idea repeated in a plant outside Shenzhen with a 350gsm C1S board and a simple black foil logo.
Packaging has a way of exposing what a brand values. I’ve sat in factory meetings in Guangzhou where a buyer argued over a 1.5 mm board change like it was a moral issue, and that tiny change mattered because it stopped a lid from bowing in transit. If you’re using an unboxing experience supplier guide to choose a vendor, you’re not just buying print. You’re buying materials, assembly, timing, and the brand identity your customer holds in their hands. And yes, occasionally you’re also buying a headache if someone decides the logo should move “just a hair” after approval, which in production terms can mean a full 2 mm and a reproof fee.
What an unboxing experience supplier actually does
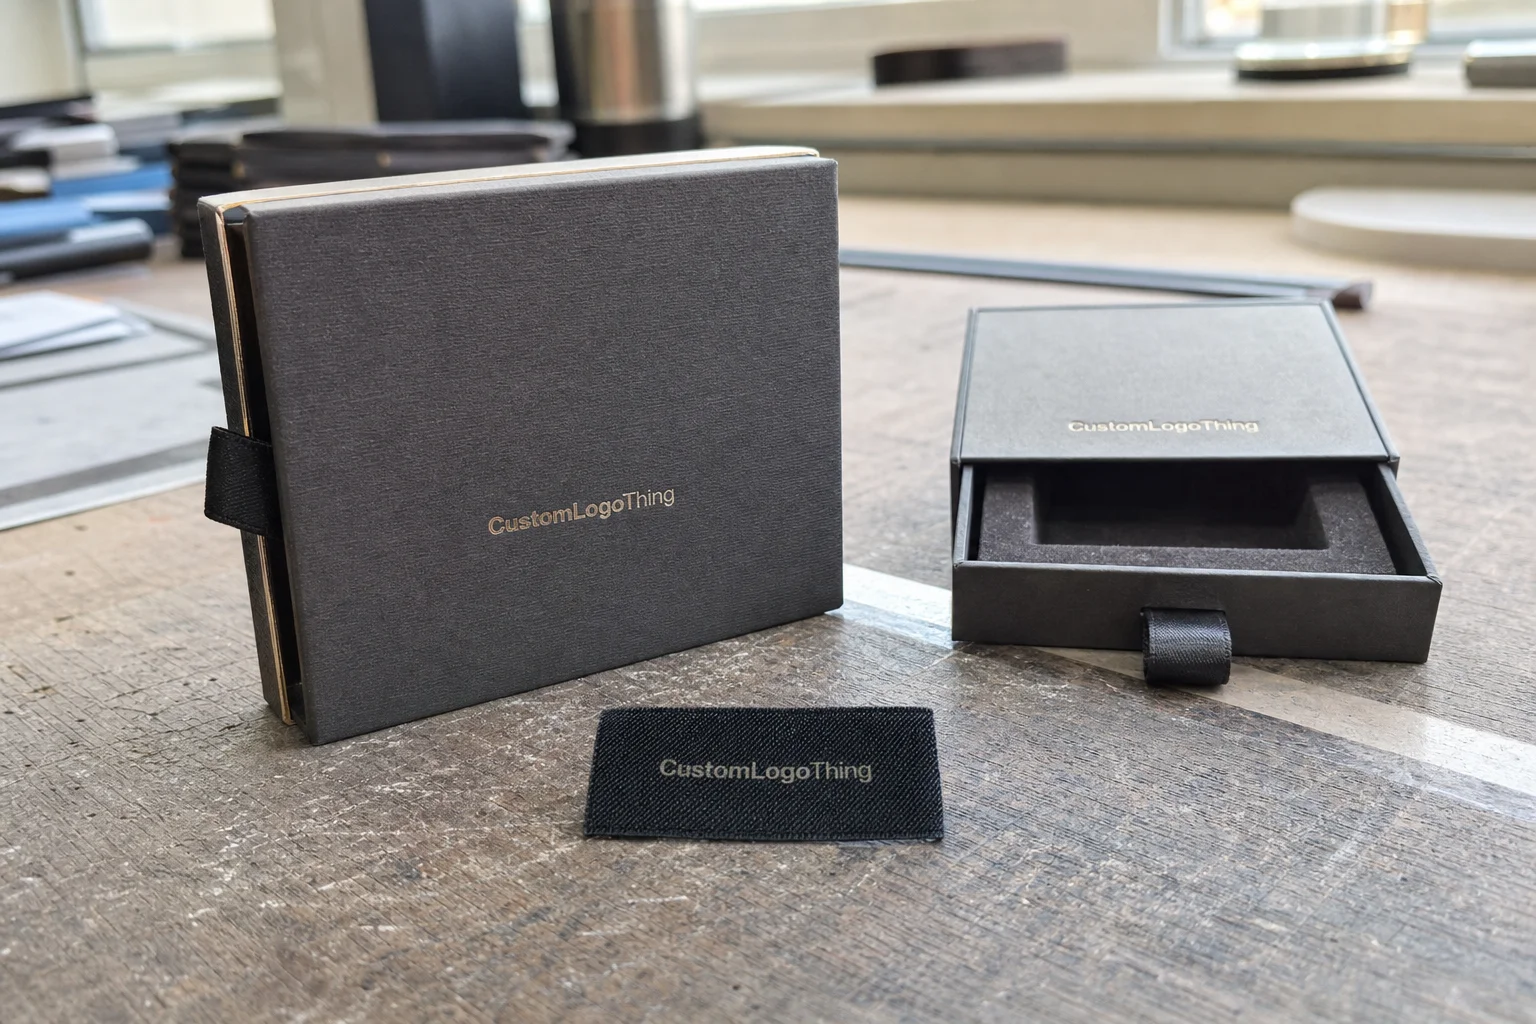
An unboxing experience supplier guide should start with the simplest truth: the supplier is not just a printer. A real unboxing experience supplier helps design, source, and produce the packaging elements that shape the customer’s first tactile, visual, and emotional interaction with your brand. That can include a mailer box, a rigid box, inserts, tissue paper, stickers, sleeves, tissue wraps, thank-you cards, protective dunnage, and kitting. If you’ve ever opened a box and thought, “Wow, they nailed the feel,” there were probably six decisions behind that moment, maybe more, including board grade, coating, fold direction, and how the insert locked the product in place during a 1.2 meter drop test.
In my experience, the brands that get this right treat packaging as both branding and logistics. Pretty without structure is a joke. Structure without brand consistency is boring. A supplier who understands the full picture can recommend a 350gsm C1S mailer for a DTC apparel drop, then switch you to a 2-piece rigid setup with EVA foam insert for a premium electronics launch. Same goal. Different engineering. Different budget fight, too. A 2-piece rigid box wrapped in 157gsm art paper may look simple on a screen, but it usually costs more in both materials and hand assembly than a flat-pack mailer.
There’s a useful distinction people miss. A printer may handle the artwork and press work. A converter turns raw board into boxes, sleeves, or inserts. A full-service supplier can manage design support, material sourcing, production, assembly, QC, and delivery. If you only need a one-color corrugated mailer, a printer might be enough. If you need a kitted experience with tissue, cards, and nested inserts, you want a supplier who can coordinate the whole chain without acting shocked when the product has to survive a 40-pound compression stack in a warehouse outside Suzhou.
I’ve seen brands hire the cheapest vendor and then discover nobody was responsible for the assembly sequence. That’s how you end up with tissue folded backward, inserts upside down, and a thank-you card hiding under the product like a prank. I actually laughed once because the misfold was so aggressive it looked intentional. A proper unboxing experience supplier guide should make one thing clear: the supplier is part creative partner, part operations manager, and part damage-control specialist, especially when the order is 5,000 units and the packing line is running two shifts in Dongguan.
“The box is the beginning of the customer relationship. If the opening feels cheap, the brand feels cheap. Customers may not say it out loud, but they absolutely notice.”
For brands in cosmetics, food, or wellness, the supplier also has to understand compliance. I’m not talking about fancy language on a sales call. I’m talking about materials that won’t contaminate product, inks that won’t smudge, and structures that hold up under shipping stress. If a supplier can’t explain the difference between decorative packaging and protective packaging, keep moving. I remember one rep pitching a beautiful sleeve that would have collapsed if you looked at it too hard. Gorgeous. Useless. A museum piece, basically, with a 14pt cover that would have been fine for a shelf but not for a parcel moving from Shenzhen to Chicago.
How an unboxing experience supplier works from concept to delivery
A solid unboxing experience supplier guide needs a real process map, because packaging doesn’t magically happen after you send a logo file. The work usually starts with a discovery call. The supplier asks for product dimensions, weight, shipping method, budget range, brand guidelines, and fulfillment needs. Skip those details, and the quote you get is basically a guess with a logo attached. And not even a stylish guess. A supplier in Ningbo or Dongguan will usually want exact measurements in millimeters, product weight in grams, and target ship date before they’ll quote anything useful.
After that comes dieline review. The dieline is the flat template that defines folds, cuts, glue areas, and panel placement. If you’ve never watched a designer and a production manager argue over a 2 mm flap allowance, count yourself lucky. I once had a client insist on a box that looked perfect in mockup but couldn’t close properly once the product was inside. That was a fun $1,200 reprint nobody needed. Fun for nobody, actually. The fix was only 3 mm on the side panel, but it delayed the run by four business days because the revised dieline had to be rechecked.
Material selection comes next. This is where a strong unboxing experience supplier guide starts paying for itself. Your supplier may suggest 16pt C2S for a small retail carton, E-flute corrugated for shipping strength, or 1200gsm rigid board wrapped in printed paper for a premium presentation. If the supplier is good, they’ll also explain finishing choices like matte aqueous, soft-touch lamination, foil stamping, embossing, and spot UV without trying to drown you in jargon. If they do drown you in jargon, politely hand them a towel. For example, a soft-touch lamination on a 157gsm art paper wrap can add about $0.08 to $0.18 per unit on a 3,000-piece run, depending on the factory and region.
Sampling matters more than most brands admit. A $75 sample kit can save thousands in reprints or damaged shipments. I’ve seen one sample reveal an insert that was 3 mm too tight. On paper, no issue. In production, that tiny mismatch meant 400 units had to be hand-adjusted. That’s the sort of thing a unboxing experience supplier guide should warn you about early. The sample is not a formality. It’s the part where reality shows up, usually after two rounds of proofing and before anyone has booked freight from Shenzhen to Los Angeles.
Once samples are approved, the supplier moves into production and kitting. Some vendors handle this in-house. Others split it across multiple facilities. Overseas production can make sense for large runs, but it usually means longer lead times, freight planning, and tighter approval control. Domestic production can shorten transit and make revisions easier, but the per-unit cost may be higher. There’s no magical best option. There’s only the option that fits your launch timing and margin math. A run produced in Vietnam or South China may cost less on tooling, while a facility in Ohio or Texas can cut the transit window by 10-20 days if you’re not waiting on ocean freight.
Here’s a practical timeline framework I use when advising brands:
- Discovery and brief: 2-4 business days
- Dieline and concept review: 3-7 business days
- Sampling and revisions: 7-15 business days
- Production approval: 1-3 business days
- Production and assembly: 10-25 business days depending on complexity
- Freight and receiving: 5-35 business days depending on origin and mode
That’s the skeleton. Your actual schedule may be shorter or longer depending on shipping method, customization level, and whether your team can approve artwork without creating twelve last-minute “small” changes. Spoiler: they usually cannot. I’ve seen “small” become a three-email chain and a redesign request by lunch, especially on launches where the customer promised social content by a specific Friday in London or Toronto.
Key factors to compare in an unboxing experience supplier guide
Every unboxing experience supplier guide should tell you to compare more than just the quoted unit cost. A $0.42 box that survives shipping is cheaper than a $0.31 box that creates 6% damage claims. I’ve watched brands chase low quotes and then spend their margin replacing crushed product, issuing refunds, and apologizing to angry customers who posted photos online. Expensive lesson. Very common. I still get a little tense thinking about one launch where the box collapsed like a folding chair at a backyard concert after a 9,000-kilometer sea journey.
The first thing I look at is material quality. Ask about board grade, flute type, print finish, and coating. A 32ECT corrugated mailer is not the same as a 44ECT mailer. A 1200gsm rigid board wrapped in coated art paper feels much more substantial than a thin folded carton. If the supplier can’t tell you why, that’s a red flag wrapped in gloss coating. In practical terms, a 32ECT box may work for a lightweight sweater, while a 44ECT or even 48ECT board is a safer call for heavier glassware or multiple products.
Brand consistency is next. Your color match, logo placement, typography, and visual branding all have to line up with your website, inserts, and email packaging cues. If your navy box prints purple and your logo shifts three times across a run, customer perception slips. People might not know why it feels off, but they’ll feel it. That’s why a careful unboxing experience supplier guide should ask about Pantone matching, proof standards, and acceptable color tolerances, usually within Delta E 2 to 3 for premium consumer packaging.
Minimum order quantities matter too. A supplier with a 5,000-unit MOQ is a very different animal from one who will do 500 or 1,000 units. Lower MOQ usually means higher per-unit pricing, but it can also reduce inventory risk for small brands. I’ve helped clients launch with 1,500 units because they didn’t want to sit on six months of packaging stock. Smart move. Not glamorous, but smart. A start-up in Austin may prefer 1,000 units for cash flow reasons, while a brand shipping through a 3PL in New Jersey may be comfortable with 10,000 units if the launch is already sold through wholesale.
Communication quality is underrated. Good suppliers answer clearly, quote lead times honestly, and explain tradeoffs without hiding behind phrases like “industry standard” when they really mean “we didn’t bother checking.” In my experience, the best teams send photos of material options, flag potential assembly issues early, and make proofing feel structured instead of chaotic. The worst ones send a one-line reply and vanish for two days. That’s a special kind of frustration, and it gets worse when the factory is in Foshan and your merch team in Berlin needs an answer before 5 p.m.
Certifications and compliance also matter when relevant. If you need FSC-certified paper, ask for proof. If your packaging supports sustainability claims, make sure the supplier can back them up. For shipping validation, standards from groups like ISTA and guidance from EPA can be useful starting points, especially if you’re trying to balance protection and material reduction. A supplier that knows the difference between decorative sleeve stock and mailer performance board can save you from a costly 12% breakage rate.
Reliability is the last major filter. Ask about on-time delivery rate, QC process, defect handling, and replacement policy. A great-looking sample means nothing if the production run arrives eight days late and 9% of units have warped inserts. A proper unboxing experience supplier guide should treat reliability as a core feature, not an afterthought. If the supplier offers a written QC checklist, pre-shipment photos, and AQL inspection standards like AQL 2.5 for major defects, that’s a very good sign.
| Supplier Type | Best For | Typical MOQ | What You Get | Watch Outs |
|---|---|---|---|---|
| Printer only | Simple cartons or sleeves | 1,000-5,000 units | Print, cut, basic finishing | Limited help with kitting or logistics |
| Converter | Boxes, inserts, structural packaging | 2,000-10,000 units | Production and material conversion | Design support may be limited |
| Full-service supplier | Multi-part unboxing sets | 500-10,000 units | Design, sourcing, assembly, QC, freight support | May cost more upfront, but often fewer headaches |
What is an unboxing experience supplier guide?
An unboxing experience supplier guide is a practical framework for evaluating packaging vendors that create the first physical moment between your brand and your customer. It helps you compare suppliers on design support, materials, cost, lead time, assembly, quality control, and shipping reliability. That matters because the package is doing several jobs at once: protecting the product, signaling brand quality, and shaping the emotional response before the item is even used.
Think of it as a decision tool, not a trend piece. A useful guide should help you separate a basic printer from a converter and from a full-service packaging partner. It should also help you ask better questions about MOQ, sampling, finishes, and freight so you don’t discover the real cost after the purchase order is already out the door. In other words, the guide is about reducing surprises. Packaging has enough surprises already, usually in the form of dented corners, color drift, or an insert that was measured in centimeters when the factory needed millimeters.
Cost, pricing, and budgeting with an unboxing experience supplier
Let’s talk money, because a lot of brands get dreamy about packaging and then faint when the quote lands. A good unboxing experience supplier guide should break pricing into visible buckets: tooling, unit cost, sampling, storage, kitting, and freight. If you only look at one line item, you’re setting yourself up for a painful surprise. I’ve done that math the hard way with clients who thought the quote total was the whole story. It never is, especially when a port delay in Long Beach adds seven extra days and a storage bill from the 3PL in Nevada.
The main cost drivers are pretty consistent. Box style matters. A folding mailer is usually cheaper than a rigid box. Print coverage matters. Full-wrap artwork with inside printing costs more than a single-color exterior. Material thickness matters. Insert type matters. Finishing matters. Assembly labor matters. Freight matters. Packaging is a chain, and every link adds cost. A one-color corrugated mailer might start at $0.15 per unit for 5,000 pieces in South China, while a fully printed rigid box with foil and insert can move well above $2.00 per unit depending on the build.
Here’s a useful pricing snapshot I’ve seen on real quotes, though your numbers will change depending on region, volume, and finish complexity:
- Printed mailer box: around $0.18-$0.45/unit at 5,000 pieces
- Rigid gift box: around $1.40-$4.80/unit at 3,000 pieces
- Die-cut insert: around $0.08-$0.60/unit depending on foam, paperboard, or molded pulp
- Thank-you card or insert card: around $0.03-$0.12/unit
- Tissue or wrap: around $0.05-$0.20/unit
- Kitting labor: often $0.12-$0.75/unit depending on number of parts
A simple printed mailer can be far cheaper than a foil-stamped rigid box, and inserts often add more to labor than to raw material cost. That sounds backward until you watch a team assemble 3,000 kits by hand. I’ve stood in a warehouse in Shenzhen while workers inserted cards, tissue, product, ribbon, and a small branded card one at a time. The material cost was modest. The labor clock was not. I had a strong coffee and a very strong opinion about it. On a 4-part kit, labor alone can jump to $0.35-$0.60 per unit if the team needs to align each component by hand.
Setup and tooling costs are where newer brands get blindsided. If your box requires a custom dieline, steel rule die, or specialty insert tooling, you may see a one-time charge from $75 to $500 or more, depending on complexity. Sampling might cost $25 to $150 per version. Storage fees can show up if you ask the supplier to hold inventory before release. Rush fees often add 10% to 25% when you compress the schedule. Freight surcharges? Oh, they’re alive and well, and they enjoy showing up late in the process, especially on air cargo out of Hong Kong or ocean shipments routed through Yantian.
This is where a strong unboxing experience supplier guide helps you budget like an adult. Don’t set a single target number and hope reality cooperates. Build a range. If a premium launch box could land anywhere from $1.85 to $2.40 per unit based on finish choices, budget for the upper half if the experience needs to feel expensive. Otherwise, you’ll spend weeks “optimizing” your way into something that looks cheap on arrival. A 157gsm art paper wrap with matte lamination and a gold foil logo may add only $0.22 to $0.38 per box, but it can make the difference between “nice” and “giftable.”
There’s also a better way to judge cost: tie it to customer value. If the packaging reduces breakage by 3% on a $48 order, that matters. If the package drives repeat purchases, gift-worthiness, or social sharing, it matters even more. I’ve had clients tell me their unboxing experience increased referral photos and lowered customer complaints. That doesn’t mean packaging always pays for itself directly, but it often supports margin in ways people miss when they stare only at unit price. A $0.15 insert that cuts refunds by even 1% can out-earn a cheaper version fast.
One more thing: ask for pricing comparisons at different build levels. A supplier should be able to show you a basic option, a mid-tier option, and a premium option. If they can’t, they’re probably selling a single path instead of helping you make a decision. A useful unboxing experience supplier guide gives you tradeoffs, not just a quote. For example, a basic mailer might be $0.22 at 5,000 units, a mid-tier mailer with inside print might be $0.34, and a premium rigid kit could be $1.95 or more depending on assembly in Vietnam, Shenzhen, or Dongguan.
Timeline and production steps in an unboxing experience supplier guide
Timing is where good packaging plans go to die if nobody is paying attention. A practical unboxing experience supplier guide should lay out each step, because the timeline is usually longer than people expect and shorter than they want. If you’re launching for a seasonal promotion, a product drop, or a trade show, start earlier than your marketing team thinks is necessary. Then start a little earlier than that. I say that with love, and a little scar tissue, after watching a holiday launch in New York slip because approvals landed two days late and freight from Shenzhen had already been booked.
The process usually begins with concept approval. Your supplier should review dimensions, product count, opening style, and the role of each component in the unboxing experience. Then the dieline gets built or adjusted. After that comes sample production. This stage is where you verify fit, color, finish, and structure. If the product rattles, if the card stock curls, or if the flap buckles, better to find out on sample day than after 2,000 units are printed. A typical sample turn in Guangdong is 3-5 business days once the brief is complete, though complex rigid boxes can take 7-10 business days.
Revisions happen next. And yes, they happen. Anyone who tells you otherwise is selling fantasy. Sometimes the logo needs to move 4 mm. Sometimes the insert opening needs to widen by 2 mm. Sometimes the matte finish is too matte and the customer loses the premium visual branding moment you were aiming for. Each change can affect tooling, printing, and lead time. A seemingly small change to a 350gsm C1S sleeve can force a fresh proof and add 2-3 business days if the supplier needs to remake the cutting form.
Production only starts once approvals are locked. That means colors, dimensions, insert fit, packaging copy, and shipping method all need sign-off. If you’re sending the supplier a new barcode the day production begins, don’t be surprised when they raise an eyebrow. I’ve seen brands lose a week because someone on the sales team changed the promo copy after approval. The factory does not care that your campaign “needed a tiny update.” In fact, they care very much, and usually not kindly. In one case, a barcode change in Dongguan delayed 12,000 units because the cartons had already been printed and stacked for coating.
Assembly and kitting can add days or weeks depending on complexity. A simple mailer with one insert card is one thing. A multi-part product experience with tissue, a product pouch, a ribbon pull, a care card, and a branded seal is another thing entirely. A reliable unboxing experience supplier guide should always tell you to account for labor, not just print time. A two-person kitting line in Suzhou can do roughly 800 to 1,200 simple kits per day, while a more complex premium set may drop below 400 units per day.
Freight is another variable that deserves respect. Air freight saves time but not money. Ocean freight saves money but not time. Domestic freight may be ideal for reorders, but not always for launch quantities. If your supplier can quote FOB, EXW, or DDP options clearly, that’s a sign they understand the real mechanics. If they just say “shipping included,” ask for the line-by-line breakdown. You deserve specifics, not mystery meat. An EXW quote from Shenzhen can look low until you add export handling, trucking to Yantian, and last-mile delivery in California.
My rule is simple: the more custom the experience, the more buffer time you need. A packaging set with one printed carton and one insert might need 3-5 weeks. A premium kitted launch with custom inserts and specialty finishes may need 6-10 weeks or more. A unboxing experience supplier guide that doesn’t include buffer time is just a wish list with measurements. I wish that weren’t true. It is, especially when a foil plate in Guangzhou needs to be remade or a tissue print order misses the cut-off by one day.
Common mistakes when choosing an unboxing experience supplier
The first mistake is choosing on price alone. Cheap can work if the spec is simple and the supplier is disciplined, but I’ve seen brands save $0.07 per unit and then lose $2.40 per order in damages, replacements, and support time. That math is not clever. It’s expensive in a quiet way. A real unboxing experience supplier guide should push you to compare total cost, not the sticker price, especially if the supplier is quoting from a lower-cost region like Hebei or inland China where freight adds back some of the savings.
The second mistake is skipping prototypes. If you haven’t tested the box, insert, and product fit, you’re basically gambling with a production run. I’ve watched a rigid box pass digital mockup review and then fail because the product had a slightly different closure height than the drawing suggested. The result? A stack of boxes that looked gorgeous in render and useless in real life. Beautiful failure. Still failure. One client learned this after a 600-unit sample in Shanghai revealed the lid sat 1.8 mm high and wouldn’t sit flush on shelves.
The third mistake is ignoring shipping stress. Your packaging may look perfect on a table in a showroom, then arrive crushed after a rough carrier route or stacked pallet. If your design can’t survive compression, vibration, and corner drops, then it isn’t ready for shipping. That’s why a serious supplier should know at least the basics of performance testing and refer to standards such as ISTA when appropriate. A box that passes a 30-minute static load test is very different from one that fails after a 1.0-meter corner drop and a 24-hour humidity cycle in coastal logistics.
The fourth mistake is over-designing the package. More finishes do not automatically mean more value. Foil, emboss, spot UV, magnetic closure, ribbon, and multiple inserts can look impressive in mockups. They can also destroy your margin and slow assembly. I’ve had clients strip a package down from five effects to two and get a better result because the customer could actually see the product instead of being distracted by packaging theater. That was a relief, frankly, and it cut production time in Ningbo by six business days.
The fifth mistake is not clarifying ownership. Who owns the artwork files? Who owns the die line? Who pays if a revision is needed after approval? Who handles replacements if 3% of units print off-color? A good unboxing experience supplier guide should remind you to settle this before the PO is issued, not after the problem shows up. If the supplier is in Shenzhen and your design team is in Toronto, clarify time zone response windows too, or you may lose a full day waiting on feedback.
The sixth mistake is forgetting the actual customer experience. Open the outer mailer. Remove the tissue. Pick up the product. Read the card. Put the item back. Then try it on with one hand if that matters. If the process feels awkward for you, it will feel awkward for the customer. The packaging has to perform in the hand, not just on the screen. I’ve seen a beautiful package become annoying because the ribbon pull was too tight and the customer needed scissors just to get to the product.
Expert tips for working with an unboxing experience supplier
My best advice? Start with the customer journey, not the artwork. Ask what the package should make the buyer feel in the first 10 seconds. Confident? Surprised? Calm? Premium? Useful? A strong unboxing experience supplier guide is really a customer psychology document dressed up as a packaging brief. That sounds a bit dramatic, but packaging is emotional whether we admit it or not, especially when the package lands on a doorstep in London at 8:15 a.m. and the first impression happens before coffee.
Use one premium moment instead of five competing effects. If the reveal is strong, you do not need every finish known to humankind. I once helped a cosmetics client drop the magnetic closure and keep a soft-touch rigid box with one foil logo and one insert card. The result looked more expensive than the earlier version with too many bells and whistles. Less noise. More impact. Fewer things to go wrong, which I loved. The final build came in at $1.68 per unit at 3,000 pieces from a factory in Dongguan, versus $2.31 for the original five-effect version.
Ask for alternatives at different price points. A serious supplier should be able to quote a base version, a mid-level version, and a premium version. That lets you compare impact versus cost. Maybe a molded pulp insert gives you the sustainability story you want. Maybe paperboard is enough and saves $0.11 per unit. You can’t make that call well if you only see one quote. On a 10,000-piece run, that $0.11 becomes $1,100, which is enough to matter whether you’re a startup in Austin or an established brand in Los Angeles.
Request sample photos, factory references, and material swatches before committing to a large run. I’m old school on this. I want to touch the board, see the ink density, and check whether the coating fingerprints too easily. Brands that skip samples usually find out the hard way that “matte” can mean five different things depending on the vendor. And some of those meanings are rude. A real sample from a facility in Foshan or Suzhou will tell you more than a polished email ever can.
Keep packaging easy to store, assemble, and ship at scale. I love a beautiful package. I also love a package that can be folded flat, packed in a manageable carton count, and assembled by a warehouse team without a 12-step instruction sheet. If your fulfillment partner hates the packaging, your costs will drift upward fast. A smart unboxing experience supplier guide should always account for labor and storage, not just aesthetics. A design that fits 50 units per master carton in Chicago may be a disaster if it only fits 24 after the factory shrinks the shipping carton size by 15 mm.
And here’s the one thing I tell every brand: treat your supplier like a strategic partner, not a vending machine for boxes. If you’re transparent about budget, launch date, and product sensitivity, they can usually help you make better tradeoffs. I’ve negotiated enough factory orders to know that good suppliers do their best work when they’re invited into the problem early, not after the deadline is already screaming. A supplier in Dongguan who knows your target margin and your launch date can usually suggest one cleaner structure, one cheaper insert, and one faster packing method without wrecking the customer experience.
For sustainability-minded brands, don’t just slap green language on a package and call it done. Ask whether the material is recyclable in your target market, whether the inks are appropriate, and whether the design actually reduces waste. FSC-certified paper can support responsible sourcing claims, but only if the supply chain documentation is in order. For reference, FSC is a good starting point if you’re checking paper certification standards, and many factories in China, Vietnam, and Mexico can provide chain-of-custody paperwork if you ask before quoting.
Next steps for choosing the right unboxing experience supplier
If you want a practical path forward, start with a short supplier brief. Include your product dimensions, order quantity, budget range, brand rules, target delivery date, and whether you need kitting, fulfillment, or just packaging production. That one document can save hours of back-and-forth. A smart unboxing experience supplier guide should always begin with clarity. I usually tell teams to include unit weight in grams, desired board grade, shipping destination, and whether they need an outer shipper or only a retail-ready box.
Then request comparable quotes from at least three suppliers using the same specs. Same box style. Same insert type. Same finishing. Same quantity. Otherwise you’re comparing apples to oranges and pretending the spreadsheet is helpful. I’ve seen buyers get tricked by a lower quote that quietly excluded assembly or freight. Surprise costs are not strategy. If one quote is from Shenzhen, one from Ningbo, and one from a domestic facility in Dallas, ask for an apples-to-apples landed cost, not just ex-factory pricing.
Ask for a physical sample or sample kit before approving production, especially if inserts or coatings matter. A sample tells you more than ten render files ever will. It reveals fit, print behavior, finish feel, and structural integrity. If a supplier resists sampling, that tells you something useful too. A standard sample kit may cost $25 to $150 and usually arrives in 5-8 business days by courier from South China if the dieline is already approved.
Review the timeline, QC process, and contingency plan for damaged or delayed goods. Ask what happens if a carton crushes in transit, if color drifts beyond tolerance, or if 200 inserts are cut short. A good supplier will answer directly. If they dodge, that’s your answer. A decent reply should include who pays for rework, whether replacement units ship from the same factory in Dongguan or a backup site in Vietnam, and whether the supplier carries any transit insurance on FOB or DDP shipments.
After you select a supplier, lock your artwork, approvals, and shipping plan before the production clock starts. Don’t keep editing the package while the factory is already cutting board. That’s how budgets get wrecked and launch dates turn into suggestions. A disciplined unboxing experience supplier guide isn’t about making packaging complicated. It’s about making it predictable. Predictable is how a 12,000-unit run leaves the factory in Foshan on schedule instead of sitting idle because someone changed the legal line in the footer.
Here’s the real payoff: the best supplier helps you balance brand impact, cost, and timing without guessing. That means your package feels premium, supports brand consistency, and survives the trip from factory to customer door. That’s the job. Everything else is decoration. If a 350gsm C1S carton, a 157gsm insert card, and a 0.12 mm coating choice are enough to create the right first impression, that’s usually better than overcomplicating the structure and adding three weeks to the timeline.
If you’re building your shortlist for Custom Logo Things, use this unboxing experience supplier guide to compare vendors the right way. Don’t buy the loudest sales pitch. Buy the supplier who understands the product, the shipping path, the budget, and the first impression your customer will remember. A supplier in Dongguan, Shenzhen, or Ningbo who can show you a sample, a clear lead time, and a landed-cost breakdown is usually worth more than the one with the flashiest deck.
FAQ
What should I ask an unboxing experience supplier before ordering?
Ask about MOQ, sample costs, lead times, and what happens if artwork needs revisions. Request material options, finishing choices, and examples of similar projects. Also confirm whether they handle kitting, fulfillment, and freight or only box production. Those details matter a lot more than a polished sales deck, especially if your target run is 3,000 to 5,000 units and the factory is in South China.
How much does an unboxing experience supplier usually charge?
Pricing depends on box style, print coverage, inserts, finishing, and order volume. A simple printed mailer can be quite affordable, while rigid boxes with specialty finishes cost much more. Always ask for setup fees, sampling costs, assembly charges, and freight separately so you can see the real total. For reference, a printed mailer might run $0.18 to $0.45 at 5,000 units, while a Rigid Gift Box can run $1.40 to $4.80 at 3,000 units.
How long does it take to work with an unboxing experience supplier?
Most projects include design review, sampling, production, and shipping time. Simple runs may finish in a few weeks, while complex packaging or custom inserts can add several more. Rush jobs usually cost more and may limit material or finish options, which is why planning early saves money. A straightforward job might take 12-15 business days from proof approval to production completion, while ocean freight from Shenzhen to the U.S. West Coast can add another 18-28 days.
What makes one unboxing experience supplier better than another?
Look for strong communication, consistent quality, realistic timelines, and clear pricing. A better supplier will flag problems early instead of waiting until production. They should understand both branding and manufacturing, not just one side of the equation. If they can explain board grades like 350gsm C1S versus 44ECT corrugated and back it up with samples from a facility in Dongguan or Ningbo, that’s a strong sign.
Can a small brand work with an unboxing experience supplier?
Yes, absolutely. Small brands should pay attention to MOQ, budget flexibility, and assembly complexity. Start with a simple package structure and one or two brand moments rather than a fully custom setup. A good supplier can scale the experience as your order volume grows. Many factories will take 500 to 1,500 units for a starter run, though the per-unit price is usually higher than on 5,000-piece orders.