Brand woven labels do more than carry a logo. They change how a garment feels the moment it is handled, which is why a hoodie, cap, or tote can read as more finished as soon as the label is sewn in. A small piece of threadwork can improve brand identity, strengthen brand recognition, and shape customer perception before a buyer notices anything else about the product.
The catch is that woven labels are not interchangeable. Some are designed for crisp detail and a premium retail presentation. Others are better suited to size tabs, internal marks, or quick-turn production. If you are sourcing brand woven labels for apparel, the weave, fold, finish, and minimum order quantity matter as much as the artwork. Those choices affect how the label looks, how it feels, and how much time the order will take from proof to delivery.
What Brand Woven Labels Are And Why They Stand Out
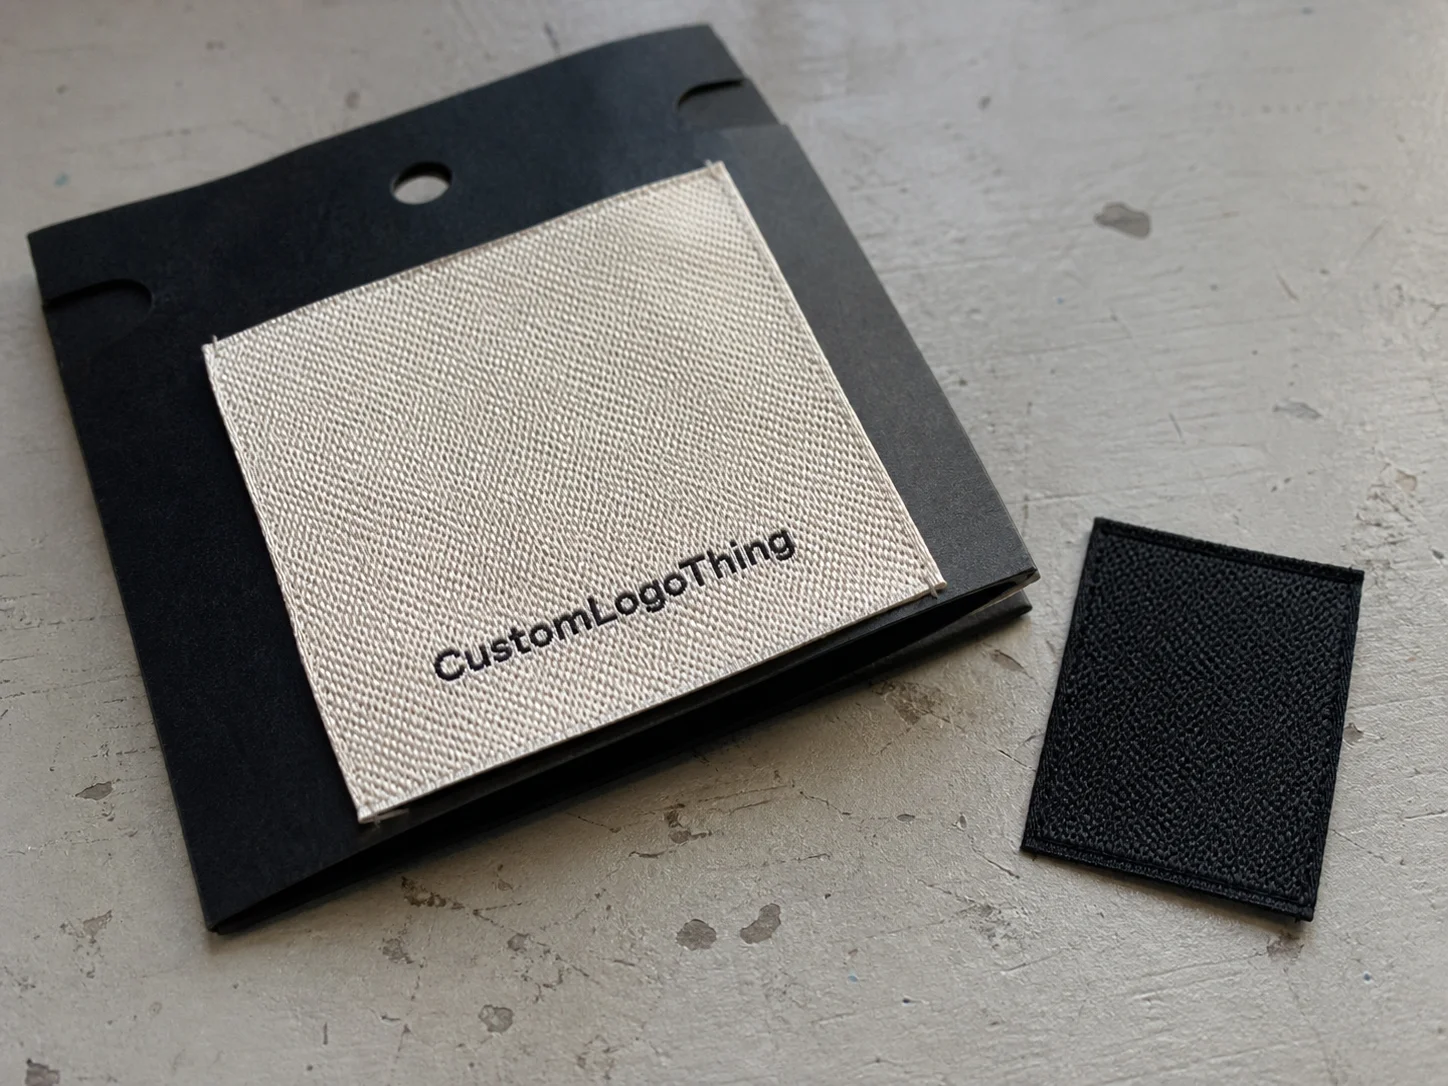
A woven label is made by turning artwork into threads rather than printing ink onto a base fabric. That distinction matters. Because the design is built into the material structure, the label tends to feel more durable, more refined, and better suited to repeated wear and washing than a printed tag. In apparel, that usually means a cleaner neck label, a better side-seam mark, or a more polished hem tag.
Brand woven labels show up anywhere a brand wants a permanent, tactile signature: neck labels, side-seam labels, size tabs, hem labels, hanging loops, and small branding patches. They are especially useful on garments that need a more expensive feel without adding much to the bill of materials. That is one reason buyers return to them. The label is small, but it has an outsized effect on the unboxing experience and the way customers remember the piece after the first wear.
Readability is the real test. A label can only hold so much detail at a given size, so tiny text, thin linework, and complex icons need to be handled carefully. A tighter weave holds sharper edges, but there is still a limit. If the artwork is too busy for a 30 mm by 50 mm label, the finished piece looks crowded and the message gets weaker instead of stronger. That is true whether the label sits inside a collar or on the outside of a garment.
Good label specs start with placement and function, not artwork alone. If the label sits inside the neck, it needs to feel soft. If it sits in the side seam, it can carry slightly more structure. If it is acting like a small branding patch, edge treatment and stitch tolerance matter more. The best brand woven labels support the garment. Poor ones fight it, snag on the wrong surface, or become unreadable once stitched in.
There is also a practical retail angle. Buyers and merchandisers tend to notice the label before they notice the stitch count. That can be useful or dangerous. A clean woven label signals control and consistency; a crowded or fuzzy one signals haste. In a category where many products are visually similar, that tiny difference can influence how the item is judged on the rack.
For examples of how label choices affect the final garment presentation, review our Case Studies and compare them with the options shown in Custom Labels & Tags.
How Woven Labels Are Built, Loomed, and Finished
The production path starts with artwork translation. A supplier converts your logo, type, and symbols into a thread map that the loom can follow. That map determines color placement, edge detail, density, and how much definition survives at final size. Once the design is approved, the loom weaves the label from warp and weft threads, building the image directly into the material.
Most buyers will hear three construction terms: damask, satin, and taffeta. Damask is the one most brands want for apparel because it gives the best balance of softness and detail. Satin can have a smoother, more reflective face that works well when the label is visible, while taffeta is often a more economical choice for simpler branding or size information. For tiny text or fine artwork, damask usually performs best.
Thread selection matters too. Finer threads generally allow more detail and a softer hand, while thicker threads can create a slightly bolder look with less precision. That tradeoff shows up quickly on small labels. A dense logo that looks sharp on a screen may need simplification once it is translated into weave structure. Buyers who understand that constraint usually get better proofs and fewer surprises.
Finishing changes both look and application. Straight cut labels are trimmed flat and often need sewing on all sides. End fold labels are folded at both ends so they can be stitched into a seam. Center fold labels are common for neck labels because they sit cleanly over a seam. Loop fold and Manhattan fold options are useful when the label needs to hang, stand off the garment, or show information on both sides. Heat-cut edges are used when a sealed edge is preferred, but they are not always the softest choice against skin.
There is a clear tradeoff here. Tighter weaves and more complex folds improve presentation, but they can also increase setup time, sampling time, and unit price. That does not make them bad options. It means the label should match the product. A premium fleece hoodie can justify a denser damask label. A basic promotional tee may not need that level of detail.
Quality control starts before the loom runs. The proof should be checked for spelling, fold orientation, thread color balance, and final dimensions against the garment it will actually sit on. If the label is going into a neck opening, stitch allowance matters. If it is a side-seam label, the fold has to sit flat rather than twist. Those are small checks, but they prevent expensive rework later.
| Label Type | Best For | Detail Level | Typical Cost Impact | Buyer Notes |
|---|---|---|---|---|
| Damask | Premium apparel branding, fine type, small logos | High | Moderate to higher | Best choice when clarity and hand feel both matter |
| Satin | Visible brand labels with a smoother finish | Medium to high | Moderate | Can look polished, but detail depends on size and thread count |
| Taffeta | Simple brand marks, size tabs, internal labeling | Lower to medium | Lower | Useful when the design is straightforward and price matters more |
If your program includes retail packaging, cartonized set packs, or shelf-ready delivery, it is worth thinking beyond the label itself. Carton durability, transit handling, and outer-pack presentation still matter. For transport testing methods, the industry uses resources such as ISTA. If the packaging around the label uses fiber-based components, FSC can matter for the paper side of the program.
Specs That Drive Cost, Minimums, and Unit Pricing
Pricing for brand woven labels is driven by a handful of variables, and almost all of them are measurable. Size is one of the biggest. A 20 mm by 40 mm label uses less material than a 30 mm by 60 mm label, and that usually shows up in the quote. Color count matters too, because every thread color adds complexity to the weave. Fold style, backing, and total quantity all affect the final number.
For many buyers, the cleanest way to think about unit price is by quantity bands. A small run of 500 pieces may land around $0.25 to $0.60 per label depending on size and detail. At 5,000 pieces, the same design might fall closer to $0.10 to $0.28 per label. These are working ranges, not promises, because thread count, fold style, and finish all change the math. Still, they are realistic enough to help with budgeting.
Artwork complexity is another hidden cost driver. Fine type, tiny icons, gradients, and highly detailed logos can require design cleanup before production. A supplier may need to simplify line work or adjust spacing so the weave can reproduce the art. That is not a sign of poor service. It is a normal part of translating branding into thread. Buyers who skip that step often pay for extra rounds of proofing.
Ask what is included in the quote. A useful quote should separate setup, production, finishing, proofing, and shipping. If the supplier includes folding, cutting, or backing in the unit price, that should be clear. If there is a sample or strike-off fee, get it in writing. Also ask whether the minimum order quantity is a true production minimum or just the supplier's preferred order size. Those are not always the same thing.
For a startup, 800 labels may be enough for a first capsule drop. A growing brand may prefer 3,000 to 5,000 pieces to cover the first release and the first reorder. There is no universal minimum that fits every line. The right order quantity depends on the garment type, sales velocity, and how often the design changes. For brand woven labels, overbuying a style that may be revised next season can be more expensive than paying a slightly higher unit price on a smaller run.
Backing also affects price and application speed. Iron-on backing can save labor on certain products, but it is not ideal for every fabric. Adhesive backing can help with temporary placement or packaging, though it is rarely the final answer for garments that will be washed often. Sew-in labels are still the safest option for longevity, especially on pieces that will see repeated laundering.
- Setup costs are easier to absorb on larger runs.
- Fewer colors usually reduce weaving complexity.
- Standard folds are often cheaper than specialty folds.
- Backings such as iron-on or adhesive can change both price and application speed.
Order Timeline: From Artwork to Production and Delivery
A normal order moves through a predictable sequence: artwork review, digital proof, sample or strike-off approval, weaving, finishing, quality check, packing, and shipment. That sounds linear, but the timeline often stretches at the proof stage. If the art is unclear or the dimensions are vague, the supplier has to pause and ask questions. Every missing answer adds time.
Simple runs with standard dimensions and two to four thread colors can often move through proofing and production in about 10 to 15 business days after approval. More complex labels, especially those with tight detail, special folds, or multiple revisions, can take longer. If you need a strike-off, add a few extra days before full production starts. That buffer matters. A launch date is not the place to discover that the label proof still needs work.
Lead time is usually delayed by the same few issues: incomplete artwork, missing size data, late color approvals, and changes after the order has already been scheduled. The last one is the most expensive. Once a run is queued, revisions can affect the loom setup and push the job behind other orders. If the brand is also waiting on apparel production, packaging, or photography, one delay can ripple through the whole calendar.
Plan around the real delivery window, not the fastest possible one. A buyer should build in time for proof approval, production, transit, and a second order if the launch performs well. That is especially true for brand woven labels tied to a seasonal drop or wholesale delivery. If you wait until inventory is nearly gone, you lose the option to compare suppliers calmly and you usually pay more for freight.
For transit-sensitive retail programs, review carrier pack-out and carton performance as part of the schedule, not as an afterthought. A label program can be perfect on paper and still miss the window if the shipped cartons are not protected well enough for the route they are taking. Small components are easy to overlook until a box arrives bent, damp, or crushed.
One more practical point: if a supplier promises an unusually fast turnaround, ask how they handle proof approval and rework. Speed is useful only if the proof is accurate. In label production, a fast wrong order is still a wrong order.
A Practical Step-by-Step Ordering Checklist
The best label orders begin with placement. Decide whether the label goes in the neck, side seam, hem, sleeve, or on a visible patch before asking for pricing. Placement determines the right size, fold style, and backing. A 15 mm by 45 mm label that works well in a side seam may feel awkward in a neck opening, and vice versa.
Then gather the spec sheet basics. You need final size, color count, quantity, preferred fold, backing type, and intended application method. If the label must feel soft against skin, say so. If the garment will be washed often, say that too. Buyers sometimes assume the factory will infer these things from the artwork, but production teams work better when the brief is explicit.
Artwork should be clean and vector-friendly whenever possible. That means outlines, not pixel blur. If you only have a raster file, the supplier may still quote it, but tiny letters or thin strokes can become the weak point. Mark anything that absolutely has to stay legible, including size numbers, care symbols, or multilingual text. A proof is only useful if the buyer knows what to inspect.
Color references should be practical, not vague. If the brand has a defined palette, send the closest thread reference or Pantone equivalent and ask the supplier to confirm the available thread match before production begins. Small dye lots and thread variations can shift the appearance slightly. On a dark ground, even a clean white can read warmer or cooler than expected.
"A good woven label order is really a small production brief. If the brief is precise, the proof is faster, the finish is cleaner, and the brand spends less time fixing avoidable errors."
Review the proof like a production manager. Check spelling, spacing, fold orientation, thread color balance, and the final dimensions against the garment it will actually sit on. If the label has a center fold, make sure the fold line does not cover important artwork. If it has an end fold, confirm the sew-in allowance. Small errors here are annoying later because they show up after the labels are already on the goods.
Finally, think about application. Sew-in is the most common method, but iron-on or adhesive backing can make sense for certain programs. The right choice depends on fabric type, heat tolerance, and how fast the line needs to move. A high-speed garment operation may value application speed more than a luxury feel, while a premium line may prefer stitch-in placement for longevity.
That same logic applies to finishing. If the label is going directly against skin, ask whether the cut edge will feel smooth after wash and wear. If it sits on the outside of the garment, visual sharpness may matter more than softness. The label is not a standalone product. It has to behave properly once it is attached to a real garment under real conditions.
If you want a faster quote cycle, compare your plan against the options in Custom Labels & Tags and keep the same specification format every time. Consistency in how you request labels usually improves consistency in how they are produced.
Common Mistakes That Slow Down Label Orders
The most common mistake is asking too much of a small label. Buyers want a logo, website, size, care note, country of origin, and a decorative border, all inside a tiny woven panel. That can work only up to a point. Once the design gets crowded, the weave loses clarity, and the garment starts to look busy instead of considered. For brand woven labels, clarity usually beats decoration.
Skipping proof review is another avoidable problem. A label proof is not just a preview. It is the last chance to catch wrong spelling, reversed fold orientation, awkward spacing, or a size callout that no longer matches the garment spec. If the order includes multiple language lines or size marks, careful review matters even more.
Many buyers also underestimate how the label will actually be sewn in. They approve a label that looks good flat on a screen, then discover it folds awkwardly at the seam or pulls the fabric too much during application. The label has to work in motion, not just as a digital mockup. That is where a little production thinking pays off.
Color matching can cause trouble too. If the brand does not define thread colors with a usable reference, repeat orders can drift. Over time, that creates inconsistency across product drops, and customers notice more than brands think they do. A simple reference note, even if it is not a full Pantone match, helps preserve visual branding across seasons.
Under-ordering is the last common trap. It feels conservative, but a short run can cost more once repeat setup, shipping, and time pressure are added back in. If the design is stable and the label is likely to be reused, a slightly larger first order can be the cheaper route. That is not always the answer, but it is worth modeling before approval.
One more failure point shows up after production: inconsistent inspection. If the first carton gets checked and the rest are only assumed to be fine, defects can slip through. A simple incoming inspection plan helps. Count pieces, check one label from the top, middle, and bottom of a carton, confirm the fold, and compare the color against the approved sample. That takes little time and catches the errors that matter.
Next Steps: Build a Quote-Ready Label Spec Sheet
The easiest way to get a cleaner quote is to make the buyer brief do more work. Put the label size, fold style, thread color count, quantity, placement, backing preference, and target ship date into one document. If possible, include a garment photo or flat sketch so the supplier can see where the label will live. That one extra step removes a lot of guesswork.
Ask for a digital proof first, then request a sample or strike-off if the garment is premium, highly visible, or time-sensitive. That is especially useful for brand woven labels that sit on outerwear, elevated basics, or retail goods where the label is part of the perceived value. A small sample cost is often easier to absorb than a full rework after production.
Set a reorder threshold now. Do not wait until inventory is nearly gone. If the product is selling well, rush freight and re-setup charges can erase the savings from a smaller initial run. A planned reorder point gives you more flexibility, better pricing leverage, and less stress when a launch outperforms expectations.
When comparing suppliers, look beyond the line item price. Compare clarity, finish quality, minimums, proofing process, and timeline. If two quotes are close, the better operational fit usually wins. That is the practical side of buying. The label should support the garment, the schedule, and the brand promise without becoming a bottleneck.
Useful spec sheets also reduce repeated clarification emails. A supplier can only price accurately when the brief answers the questions they would otherwise have to ask: how many colors, which fold, where it will be sewn, and whether the label needs to feel soft or simply look sharp. The better the input, the fewer revisions later.
That is the main takeaway: brand woven labels work best when they are specified like a production component, not treated as an afterthought. If you build the order around the actual garment, the weave, the fold, and the timeline, the result is usually cleaner and far less fragile operationally.
FAQ
What is the difference between woven brand labels and printed labels?
Woven labels are made by weaving threads into the design, so the artwork becomes part of the material structure. Printed labels use ink on a base substrate instead. Woven labels usually feel more premium and hold up better in wash-heavy apparel, while printed labels can be useful for very fine detail or smaller runs.
How much do custom woven labels usually cost?
Cost depends on size, color count, weave density, fold style, backing, and order quantity. As a rough working range, small runs can land around $0.25 to $0.60 per unit, while larger runs often fall closer to $0.10 to $0.28 per unit. The cleanest quote separates setup, production, finishing, and shipping so comparisons stay honest.
What lead time should I expect for brand woven labels?
Simple orders often take about 10 to 15 business days after proof approval, while more detailed jobs or orders needing a strike-off can take longer. The biggest delays usually come from slow approvals, unclear artwork, or changes after production has been scheduled. Build buffer time into the plan if the labels must arrive before a launch or wholesale shipment.
Which fold style is best for clothing brand labels?
Center folds and end folds are common for neck and side-seam placement because they sew cleanly into the garment. Loop folds and Manhattan folds are useful when the label needs to stand off the fabric or show branding on both sides. The right choice depends on placement, garment thickness, and whether the label should be soft, visible, or hidden.
What artwork file do I need to order woven labels?
A vector file is the best starting point because it preserves clean edges and scales properly for weaving. If you only have a raster logo, a supplier may still quote it, but thin lines and tiny text may need to be simplified. Include size notes, color references, and any non-negotiable text so the proof stage is faster and more accurate.