Branded mailer boxes do more than carry a product from the warehouse to the doorstep. They shape the first physical impression a customer gets, and that first impression can feel either carefully considered or casually assembled. In ecommerce, subscription programs, and repeat purchase categories, the shipping carton often does part of the brand work before the product is even seen.
That is why structure, board choice, print coverage, and closure style deserve as much attention as the artwork itself. A mailer box has to protect the item, pack consistently on the line, arrive looking presentable, and still make sense from a cost and freight standpoint. When those pieces line up, the box becomes a useful part of the fulfillment system rather than just a decorated container.
If you want to compare how different packaging formats translate into finished work, our Case Studies page is a practical reference for print effects, structure choices, and pack-out approaches across different product types.
What Branded Mailer Boxes Really Change in Fulfillment
A plain corrugated shipper can move product safely, but a branded version changes the customer experience before the tape is cut. The package becomes visible brand surface, and for many buyers it is the first tangible sign that the order was handled with care. That matters more in categories where the product is familiar and the packaging carries a bigger share of the perceived value.
Inside fulfillment, the box also has to behave like a working piece of equipment. It needs to stack cleanly, close without fuss, hold its shape during handling, and survive the trip without opening at the seam or scuffing badly. If a closure tab is weak, the board is too light, or the print sits awkwardly across a fold, the box may look polished in a mockup and ordinary in a real pack-out.
There are three jobs happening at once. The box protects the contents from crush and abrasion. It presents the brand in a way that feels deliberate. It also sets the tone for the unboxing moment, which can influence reviews, retention, and whether customers keep the carton for storage or toss it immediately.
That is why branded mailer boxes are often a better fit for subscription shipments, giftable products, and repeat purchase programs than for one-off commodity shipments. People already know the product. The packaging becomes part of the memory. From a packaging buyer’s point of view, the box should be designed around the product, the shipping method, and the likely handling route, not just the visual brief.
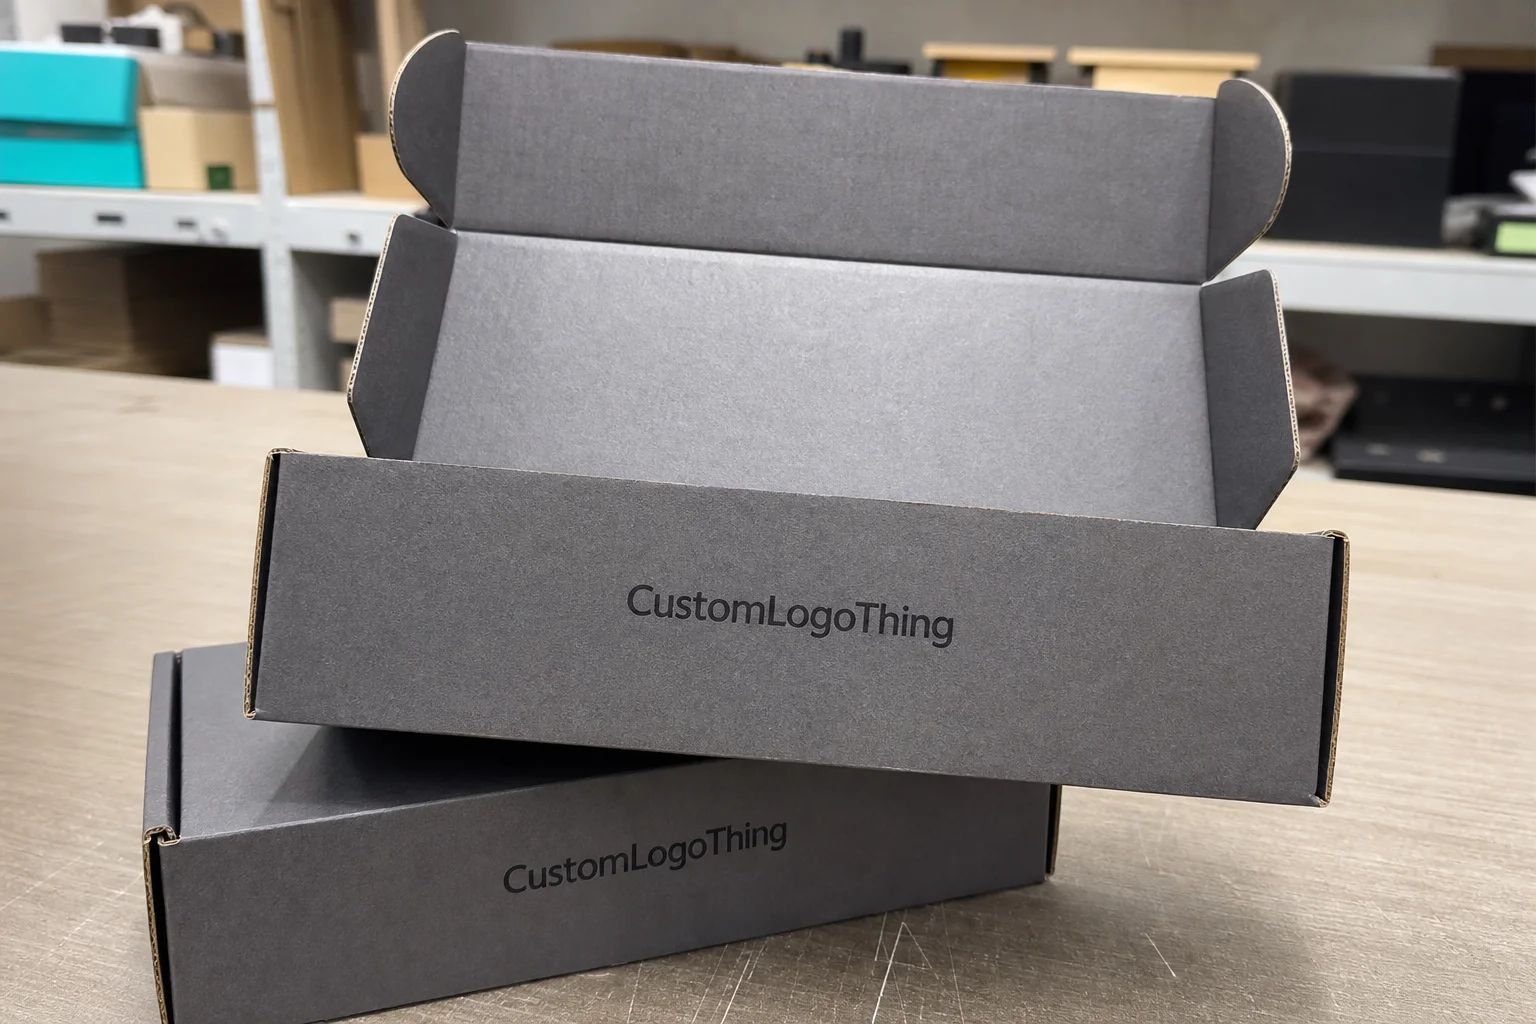
A good mailer box does not need to be crowded with effects. It needs to fit the item, print cleanly, and survive the trip with enough visual quality left to make the opening feel intentional.
That also means one box style is rarely the right answer for every SKU. A carton that works well for a folded garment kit may be too loose for a cosmetic set and too light for a heavier accessory bundle. Comparing formats across our Custom Packaging Products lineup usually gives a clearer picture than forcing every item into one structure.
Board, Finish, and Print Choices That Affect Performance
The material choice is where much of the real performance comes from. Corrugated mailers remain the standard for a reason: they offer crush resistance, stack strength, and decent printability without making the box feel overbuilt. Lighter paperboard mailers can work for sample kits or very light goods, but they do not provide the same structural margin during transport.
Flute selection matters more than many buyers expect. E-flute gives a smoother surface and a cleaner print result, which is useful when the box needs to feel refined. B-flute, or mixed-wall constructions, can add stiffness and improve compression resistance. Board grade and caliper also affect postage weight, and that becomes a real issue in high-volume ecommerce programs where even small changes in weight affect shipping spend.
Finish should be treated as part of performance, not only as decoration. Matte coatings hide handling marks better and can make typography feel more restrained. Gloss gives stronger color pop, but it tends to show scuffs more quickly. Aqueous coating is often the practical middle ground for boxes that are packed, stacked, and shipped in volume. It protects the print without making the surface feel overly coated.
Print method changes what kind of artwork is realistic. Digital printing is usually the better option for shorter runs because it avoids heavy setup and keeps turnaround manageable. Flexographic printing makes more sense at larger quantities where efficiency matters more than run flexibility. Litho-lam can deliver a more premium surface with tighter color control when the artwork depends on subtle tones or highly refined graphics, although it usually brings more coordination and a longer setup path.
Exterior-only print is common, and for many jobs it is enough. Interior print creates a stronger reveal, but it also adds cost, design complexity, and another point where folds and glue areas need to be respected. If the inside of the box is part of the experience, it should be planned as a real design layer rather than added late as a decorative extra.
Small structural details often separate a box that ships reliably from one that creates trouble at the line. Tuck style, locking tabs, insert fit, and closure strength can matter more than a premium visual effect. A box that closes with a crisp hand-feel and packs consistently usually outperforms a prettier design that slows the team down.
For transit testing and distribution planning, standards from organizations such as ISTA can help frame the conversation more realistically. Not every program needs a full test suite, but the package should be judged against the actual handling route, not just against a sample on a desk.
| Mailer option | Typical use | Strength | Typical price range | Notes |
|---|---|---|---|---|
| E-flute corrugated mailer | Ecommerce, subscription boxes, light retail kits | Moderate | $0.65-$1.30 per unit at 1,000-3,000 pcs | Good print surface, balanced weight, practical for most branded mailer boxes |
| B-flute or stronger corrugated mailer | Heavier items, better crush resistance, multi-item packs | High | $0.85-$1.70 per unit at 1,000-3,000 pcs | More board, more freight weight, better when protection matters most |
| Paperboard mailer | Lightweight goods, sample kits, lower-compression needs | Low to moderate | $0.40-$0.95 per unit at 2,500-5,000 pcs | Cleaner shelf look, but less forgiving in shipping |
Cost, Pricing, MOQ, and What Shapes Your Quote
The main price drivers are size, board strength, print coverage, number of colors, finish selection, and quantity. Larger runs usually reduce unit cost because setup expenses are spread across more boxes. Smaller runs can still be the right choice, but the per-piece price will reflect the fixed work required to get the job into production.
MOQ, or minimum order quantity, usually appears because the production process carries real setup costs. Die cutting, plates, prepress, tooling, and color calibration all take time. If the box needs a custom insert or a special structural element, the minimum can rise even when the artwork looks simple.
Comparing quotes without a spec sheet is where buyers get misled. One vendor may quote a different size, lighter board, one-sided print, or a simpler finish and still present it as comparable. It is not comparable if the fit, material, or print method changes. The quote is answering a different question.
Before approving pricing, check whether the estimate includes inserts, coatings, proof charges, freight, and sample units. Those details often determine whether the landed cost is realistic. A low unit price can look attractive until freight, rework, or a second proof cycle gets added on top.
The cheapest quote is not always the lowest total cost. A box that crushes in transit, prints off-color, or delays a launch can cost more than a slightly higher spec that runs cleanly the first time. Packaging buyers usually learn this the hard way when they compare the quoted number to the actual cost of a delay.
Some teams compare mailer structures against poly bags or similar lightweight formats for soft goods. If that is part of your decision tree, our Custom Poly Mailers page is a useful reference point for categories that sit closer to apparel and flexible goods than rigid packaging.
Process and Timeline From Dieline to Delivery
The cleanest ordering process starts with dimensions. Measure the packed product, not just the item itself, because tissue, inserts, sleeves, and hand-packing tolerance all affect the final fit. Once the size is fixed, the box style can be selected, a dieline requested, and artwork placed with the actual folds in mind.
After that comes proofing. Prepress checks file setup, bleeds, panel placement, and fold behavior. Then the vendor sends a digital proof or a sample, depending on the job. If color accuracy matters, a physical proof is the safer option. Screen previews can hide shifts in dark solids, gray neutrals, and subtle brand tones that become obvious once the job is printed.
Production timing depends on more than the print run alone. Material sourcing, printing, finishing, die cutting, gluing, packing, and freight all carry their own schedules. For a straightforward job, a typical cycle often lands around 12-15 business days after proof approval. Custom structures, specialty coatings, and seasonal congestion can extend that window.
The most common delays are predictable. Late artwork files, missing image links, unapproved color changes, structural revisions after proof, and unclear shipping instructions are the usual offenders. None of those issues are unusual, but each one can add days when a project is already moving through production.
To keep a launch on schedule, lock the spec early, approve proofs quickly, and leave a buffer before any event tied to a campaign or trade show. The box may be simple, but the production chain is still a real manufacturing schedule, and that schedule has little patience for last-minute changes.
For programs that need certified materials, ask for FSC-sourced board where relevant and verify the documentation before the order is placed. If sustainability claims are part of the packaging brief, the chain of custody should be confirmed rather than assumed. The FSC site is a useful starting point for understanding the language before it appears on packaging copy.
How to Spec Artwork and Dimensions Without Rework
The first measurement should be the packed product, not the product by itself. If the pack includes inserts, tissue, a card, or a sleeve, those elements change the usable cavity. That is where many sizing mistakes start: the item looks easy on paper, but the full pack-out needs extra clearance in one place and a tighter hold in another.
Hand-packing tolerance matters too. A tight CAD drawing can become frustrating on the line if the item includes accessories, a charger, a folded component set, or a fragile part that must be oriented a certain way. Give the packer enough room to work without forcing the product into the box or leaving it loose enough to shift in transit.
Panel design should follow the fold pattern rather than fight it. Logos, callouts, and key graphics belong on the most visible faces, with safe zones kept clear of seams, closure flaps, and glue areas. If a headline runs straight across a crease, it may still look fine on a screen and read badly on the actual carton.
Good print files save time. Include bleed. Keep text inside safe zones. Put the dieline on its own layer. Convert fonts or outline them before sending the artwork. If the file includes multiple languages, check that the layout still works when one line gets longer than the others. These are small habits, but they prevent the kind of rework that can push a project back a week.
Color-critical jobs deserve a physical check. A monitor is not a press. Dark blues, soft grays, metallic-looking neutrals, and deep brand reds can all drift in print if the ink build or substrate changes. If the packaging has to match an existing identity system, ask for a sample or a controlled proof instead of trusting a screen match.
One practical rule helps the whole file stay clean: design for the fold, not just the flat sheet. The more the artwork respects the box structure, the less likely you are to see awkward type placement, broken lines, or logos landing at the closure in a way that makes the carton feel improvised.
Common Mistakes That Raise Unit Cost and Delay Orders
Oversizing is one of the easiest ways to waste money. Even a small increase in dimensions can raise board usage, freight weight, pallet efficiency, and pack-out time. A box that is too large also lets the product move around, which can create scuffing or force the team to add extra void fill.
Another common mistake is adding premium effects before the structure is right. Heavy coverage, specialty coatings, foil, and textured finishes can look attractive, but they should support the brand story rather than inflate the quote by default. If the box is for a high-touch launch, premium may be justified. If not, a cleaner print specification often gives better value.
Approving artwork from a screen alone is risky. The design may look balanced on a laptop and still fail once it wraps around a dieline. Small type can land too close to a fold. Dark backgrounds can show scuffs. Panel alignment may shift after the first proof if the structure was not reviewed carefully.
Last-minute structural changes create the worst delays because they usually trigger a new dieline, a new proof cycle, and sometimes a new production slot. That is not just an art issue. It is a production issue, and production calendars do not care that the launch date is close.
Storage and shipment details matter more than many buyers expect. Flat-packed mailers still need to be palletized, stored, and handled in a way that fits the warehouse. If the cartons arrive in a format that is awkward for the pick-and-pack team, the packaging can become a bottleneck instead of a help.
The best way to avoid those problems is to decide early what the box must do. If the goal is low-cost transit protection, keep the spec direct. If the goal is a premium reveal, allocate budget for print clarity and finish. Blending those two objectives without a clear plan usually produces a box that does neither job especially well.
Next Steps for a Cleaner Reorder and Faster Launch
Before requesting a quote, gather five things: product dimensions, target quantity, brand artwork, shipping window, and any insert or finish requirements. That simple packet gives a packaging supplier enough detail to answer the right question instead of guessing across several possible specs.
Ask for a sample or proof and compare it against both fit and presentation. Color on a monitor is only one part of the decision. The real check is whether the box closes properly, holds the product in place, and opens in a way that matches the customer experience the brand wants to create.
Keep one backup spec ready if the budget tightens. A simpler finish, a slightly different board grade, or a modest size revision can preserve the packaging concept while lowering cost. That kind of fallback is much better than forcing a redesign after the order is already moving.
Be clear about who approves artwork, how revisions are tracked, and when final sign-off happens. Orders stall when three people think someone else has the last word. A short approval chain prevents that kind of drift and keeps the production calendar honest.
For branded mailer boxes, the right result is usually the one that fits the product, fits the budget, and fits the delivery date without creating avoidable rework. That standard is more useful than chasing the lowest quote or the flashiest effect. A good mailer is part of the fulfillment process, and it should be specified with the same discipline as any other production component.
How are branded mailer boxes different from plain shipping boxes?
Branded mailer boxes are designed to protect the product and present the brand at the same time, while plain shippers usually focus only on transit protection. They can include printed exteriors, interior graphics, custom sizing, and inserts that make the unboxing experience feel more deliberate. The right choice depends on product weight, shipping method, and how important presentation is to the buyer experience.
What affects the price of branded mailer boxes the most?
Size, board grade, print coverage, finish, quantity, and whether inserts or special structures are included usually have the biggest effect on pricing. Setup costs matter more on smaller runs, while larger quantities usually lower unit cost by spreading those costs across more boxes. Shipping and proofing should be included in the comparison so the quote reflects the true landed cost.
How long does production usually take for branded mailer boxes?
Timing depends on the style, artwork readiness, proof approvals, and whether the box needs special finishes or custom tooling. Simple projects can move faster, while custom printed runs with multiple revisions need more lead time. The safest approach is to lock the spec early and leave buffer time before a launch or campaign date.
What files do I need to order branded mailer boxes?
You usually need print-ready artwork, the dieline, logo files, and any brand color references that should be matched in production. Files should include bleed, safe zones, and properly placed layers so folds and cut lines do not damage the design. If color matters, ask for a proof or sample before full production.
Are inserts worth adding to branded mailer boxes?
Yes, when the product can shift, break, or look disorganized without support inside the box. Inserts help with presentation, product protection, and repeat packing consistency, especially for multi-item kits or fragile goods. They do add cost, so the decision should be based on product fit and customer experience, not decoration alone.


