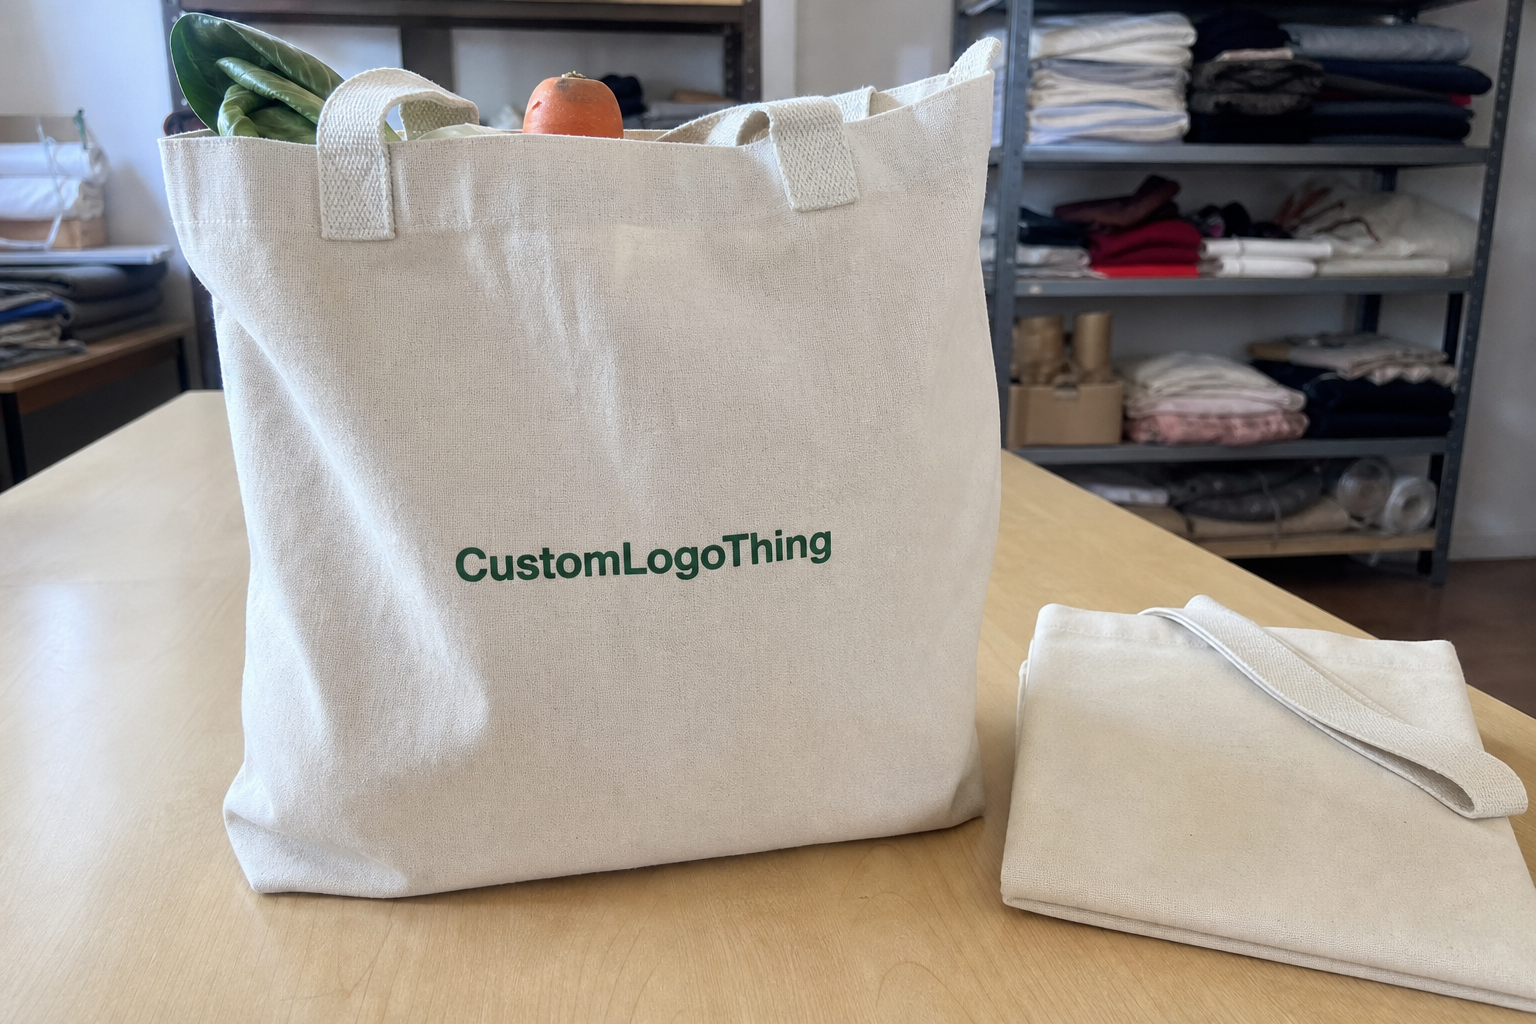
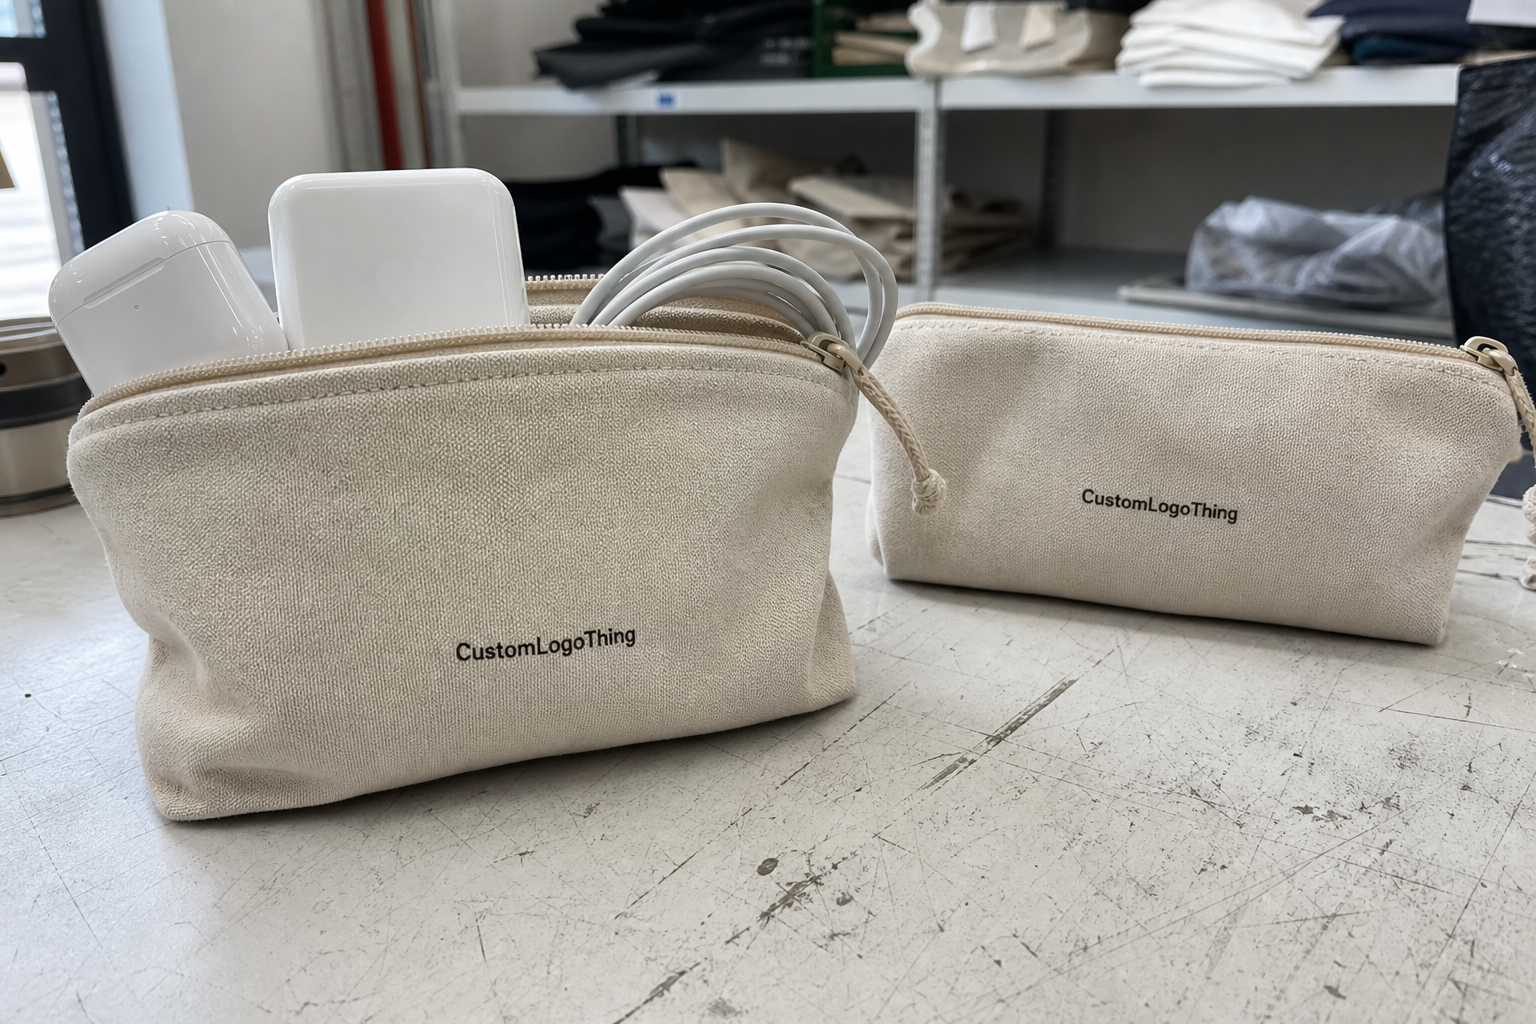
A custom canvas zipper pouch is useful when the package needs to protect the contents, carry a brand mark, and still stay practical after delivery. It gives a clean surface for decoration without forcing the product into a rigid box format that may be more package than the item needs.
For merch kits, cosmetics, stationery, travel accessories, sample sets, and event giveaways, a canvas pouch sits in a workable middle ground. It is sturdier than a thin poly bag, generally simpler to ship than a carton with inserts, and often kept by the recipient for later use, which extends brand exposure beyond the first opening.
The main decision points are straightforward: material weight, zipper quality, lining, print placement, size tolerance, and inspection standard. Buyers who define those early usually avoid the most common production problems.
Why Small Pouches Solve Oversized Packing Problems
Small pouches solve a different problem than boxes. A box is best when a product needs rigid protection, retail stacking, or a built structure with inserts. A pouch is better when the item is soft, irregular, bundled with accessories, or likely to vary slightly across SKUs. In those cases, it gives a finished presentation without overengineering the package.
That is why pouches show up often in promotional kits and retail packaging programs. They hold a narrow range of contents without looking improvised, and the zipper keeps everything together without folding, taping, or seal labels. If the product mix changes a little, the same pouch often still works.
There is also a freight benefit. Compared with a rigid carton, a pouch usually needs less void fill and less protective outer packaging. For lightweight programs, that can reduce shipping volume and simplify packing. The pouch may also stay in use longer on the customer side, which matters when the goal is repeated brand exposure instead of a one-time reveal.
“A good pouch should feel like part of the product, not an afterthought wrapped around it.”
That is the right standard. If it improves the presentation, travels well, and stays useful, it has done its job.
How the Pouch Is Built: Fabric, Lining, Zipper, and Print Area
Build details separate a polished pouch from a forgettable one. Canvas is a strong starting point because it has body, a natural texture, and a casual-premium feel that works across many brands. Buyers usually compare fabric weight first. An 8 oz canvas is often softer and less expensive, while 10 oz to 12 oz canvas usually holds shape better and feels more substantial.
Weave density matters as well. A tighter weave usually gives a cleaner print surface and less distortion, especially for small text or fine lines. A more open weave can suit a rustic look, but it may show ink variation more clearly and feel less refined in close inspection.
Lining is a practical decision, not just a cosmetic one. An unlined pouch is simpler and cheaper. A cotton or polyester lining can improve the interior finish, reduce snagging, and help the pouch slide more easily when the contents fit tightly. For pens, cables, makeup tools, or samples with sharper edges, lining can also reduce wear inside the pouch.
Zippers deserve close attention. A metal zipper usually feels heavier and more durable, while a plastic zipper can reduce weight and cost. Pull style also matters. A larger pull is easier to grab in a bag or on a trade show table, and a reinforced zipper end helps the pouch open and close without pulling stress into the seam.
Artwork placement has to work with the construction. The print area shown on a flat spec sheet can look larger than what is actually usable once seams, curves, and zipper tape are included. A centered logo usually gives the cleanest result. A design pushed too close to the edges may run into stitching or lose balance once the pouch is sewn and filled.
For decoration method comparisons, the simplest view is this:
| Option | Best For | Typical Strength | Tradeoff |
|---|---|---|---|
| Screen print | Bold logos, solid spot colors | Strong opacity and clean branding | Less suitable for highly detailed artwork |
| Heat transfer | Short runs, detailed graphics | Better detail reproduction | Can feel more applied if overused |
| Woven label or patch | Premium feel, subtle branding | Textural, durable brand mark | Usually not the cheapest option |
For buyers comparing pouch styles with other packaging formats, Custom Packaging Products is a useful reference point when you are weighing canvas pouches against cartons, sleeves, or other branded packaging options.
Cost, Pricing, MOQ, and What Drives Unit Cost
Pricing usually comes down to size, fabric weight, zipper type, lining, print method, print color count, and sewing complexity. A simple pouch with one-sided decoration and limited color often stays more controlled. Heavier canvas, double-sided decoration, lining, or specialty hardware increase cost because material and labor both rise.
For rough planning, a straightforward run at around 5,000 pieces might fall near $0.60 to $1.40 per unit. More elaborate constructions can go higher, especially when the order is small or requires extra handling. Those figures are not quotes, but they are consistent with how production pricing usually behaves.
MOQ matters because setup costs have to be absorbed somewhere. Pattern confirmation, cutting setup, printing setup, and sewing adjustments all take time before the first finished unit is packed. When that work is spread across fewer pieces, unit cost rises. That is also why samples often look expensive compared with bulk production: the sample is proving fit, construction, and decoration before the run starts.
When comparing quotes, ask what is included. Is the zipper a standard component or a better-grade option? Is the print on one side or both? Is individual polybagging included, or bulk packing only? Does the sample fee get credited to production? A quote can look attractive until those details are added back in.
What to compare before approving a quote
- Finished dimensions, not a vague size description.
- Fabric weight, such as 8 oz, 10 oz, or 12 oz canvas.
- Decoration method and number of print colors.
- Zipper quality and pull style.
- Packaging method for the finished units.
- Sample policy and whether setup is refundable or credited.
Without that level of detail, quote comparisons get messy fast. Two pouches can look similar on paper and still vary widely in real cost because one is built for retail use and the other is closer to a plain sewn bag with a logo applied.
Production Process and Lead Time: From Artwork to Shipment
The production sequence is simple, but each step depends on the one before it. It starts with dimensions and artwork files, then moves into sampling or proofing, material confirmation, cutting, sewing, decoration, finishing, inspection, and packing. If one of those inputs is unclear at the beginning, the schedule can slip later in the run.
Artwork approval is a common delay point. A logo may look fine on screen and still need adjustment once it is reduced to pouch size, especially if it includes thin lines, gradients, or small text. Color matching can also take a round or two because canvas absorbs ink differently than coated paper or board.
Zipper sourcing can become a bottleneck as well. The right length, tooth style, pull shape, and color may not always be in standard stock. That is one reason experienced buyers lock the zipper specification early instead of treating it as a last-minute detail.
For planning, a sample often takes about 7 to 12 business days, depending on complexity and proof approval speed. Bulk production commonly runs 12 to 20 business days after sample approval, although special materials or extra finishing can extend that range. If the order is tied to a launch, retail drop, or trade show, leave schedule cushion instead of assuming every step will land at the earliest possible date.
Good packaging programs also account for transit and handling. General testing references such as ISTA are useful if you need a framework for vibration, compression, and parcel movement. If sustainability claims are part of the program, broader environmental guidance from the EPA can help keep terminology and expectations grounded.
Step-by-Step Guide to Choosing the Right Specs
The most reliable way to spec a pouch is to start with the item that must fit inside it. Measure the product in its actual packed form, then add allowance for seams, zipper clearance, and easy insertion. If the contents are rigid, boxed, or oddly shaped, do not guess. A pouch that looks roomy on paper can still feel tight once production tolerances are added.
- Measure the product in the form it will actually ship or be used in.
- Add allowance for seam depth, zipper space, and easy insertion.
- Choose the fabric based on hand feel and expected reuse.
- Select the zipper for durability, appearance, and opening comfort.
- Pick the decoration method that suits the artwork and the budget.
- Confirm the interior if lining or extra compartments are needed.
- Test a sample with the real contents before approving bulk production.
That order matters because it keeps functional size ahead of aesthetic preference. A soft-touch canvas pouch for a cosmetics set may need a lining and a smoother zipper so the contents do not snag. A stationery pouch carrying pens or a ruler may need heavier fabric and a wider opening. A travel accessory pouch may need stronger stitching at stress points because the contents move more during use.
Keep the brand purpose in view as well. If the pouch supports premium retail packaging, the fabric, zipper, and print treatment should feel deliberate. If it is for an event handout or promotional bundle, cost and speed may matter more than a refined interior finish. The best spec is the one that matches the job instead of chasing features that do not affect the user experience.
For buyers who want to keep material choices more responsible, ask whether the pouch materials, lining, or outer packaging can be selected with recyclability or sourcing standards in mind. If the rest of the packaging system already uses FSC-certified paper, keeping the same discipline across other components helps the program feel coherent. More on FSC standards is available at fsc.org.
Common Mistakes That Cause Rework or Weak Results
Undersizing is the most common mistake. Buyers measure the product alone, forget about seam allowance and zipper movement, and then wonder why the pouch feels strained. A pouch that is too tight may still close, but it often looks stressed at the corners and wears out faster.
Artwork causes trouble too. Designs that run across seams, sit too close to the zipper line, or rely on tiny detail can look good in a file and disappointing on the finished pouch. Canvas has texture, stitching is visible, and the pouch is not a flat poster. Good design work respects those limits instead of pretending they do not exist.
Another frequent mistake is treating the sample like a miniature display piece rather than a functional test. It should be loaded with the actual contents, zipped repeatedly, checked for stitch strain, and inspected under normal handling. A pouch that looks good in a photo but fails after a few uses is not ready for bulk production.
The issues below account for a lot of avoidable rework:
- Insufficient clearance for seams and zipper movement.
- Too much detail in artwork for a textured surface.
- Ignoring the zipper path when placing logos or borders.
- Skipping sample testing with the real product inside.
- Comparing quotes without matching the same spec.
If those five issues are avoided, the order is usually in much better shape. That is not a dramatic claim; it is what tends to happen when a pouch is treated like a manufacturing product instead of just a design file.
Expert Tips and Next Steps for a Better Order
Before asking for pricing, build a simple reference pack. Include finished dimensions, target fabric feel, zipper preference, decoration method, artwork file, approximate quantity, and any must-have notes about lining, pull tabs, or internal pockets. That small amount of preparation usually removes several rounds of clarification later.
Order a sample and test it with the actual product, not just with your hands. Open it, close it, pack it, unpack it, and see whether the zipper action feels smooth and whether the stitching stays stable when the pouch is full. That kind of testing says more than a polished render or a flat lay.
If the order is tied to a launch, retail drop, or large event, build the timeline around the slowest likely step rather than the fastest one. Artwork corrections, zipper changes, and sample approval can each add time, and rushed approvals usually cost more than a little patience at the start.
A practical order sequence usually looks like this:
- Confirm quantity and target budget.
- Lock the size based on the real contents.
- Approve the material and zipper spec.
- Review the sample under actual use conditions.
- Release production only after everything matches the brief.
That approach keeps the project moving without unnecessary friction. More than that, it gives you a pouch that looks right, feels right, ships well, and supports the brand without calling attention to avoidable flaws.
What size should a custom canvas zipper pouch be for my product?
Measure the product first, then add space for seams, zipper clearance, and easy insertion. If the item is rigid or awkwardly shaped, test a sample before approving bulk sizing. A little extra room is usually better than a pouch that feels tight or difficult to close.
How durable is a canvas zipper pouch for everyday use?
Durability depends on fabric weight, stitch quality, zipper grade, and how much strain the pouch carries. A reinforced seam and a reliable zipper matter more than decoration when the pouch will be opened often. Ask for a sample loaded with the actual contents to confirm real-world performance.
What affects the price of a custom canvas zipper pouch order?
Size, fabric weight, zipper type, print complexity, and labor are the biggest cost drivers. Lower quantities often raise unit cost because setup and sampling are spread across fewer pieces. Clear specs reduce quote surprises and make comparisons more accurate.
What is the usual lead time for sample and bulk production?
Sampling usually takes longer than expected because the first piece is built to confirm the spec, not just to run the line. Bulk lead time depends on material availability, approval speed, and whether any finish needs extra handling. Orders move faster when artwork is final and the specification is already locked.
Can I print both sides of a canvas zipper pouch?
Yes, but the final price and production complexity usually increase when both sides need decoration. Double-sided printing works best when the artwork is planned around seams, zipper placement, and stitch lines. If the pouch will be reused often, make sure the decoration method can hold up to handling and abrasion.