Custom design woven labels are small, but they carry an outsized amount of brand work. A customer may barely glance at a hangtag. They will touch a neck label, read it when they notice the fabric, and judge the garment partly by that first tactile contact. A good woven label makes the product feel considered. A poor one makes even a decent garment look rushed.
For apparel brands, woven labels are one of the most efficient forms of package branding and product identification, even though they live on the product rather than inside the box. They hold up well through wash cycles, they can carry crisp brand marks, and they tend to read as more premium than a basic printed tag. If you are pairing them with Custom Labels & Tags or broader Custom Packaging Products, the label should match the same visual system. Otherwise the product feels assembled from separate decisions.
Custom Design Woven Labels: What They Are and Why They Matter
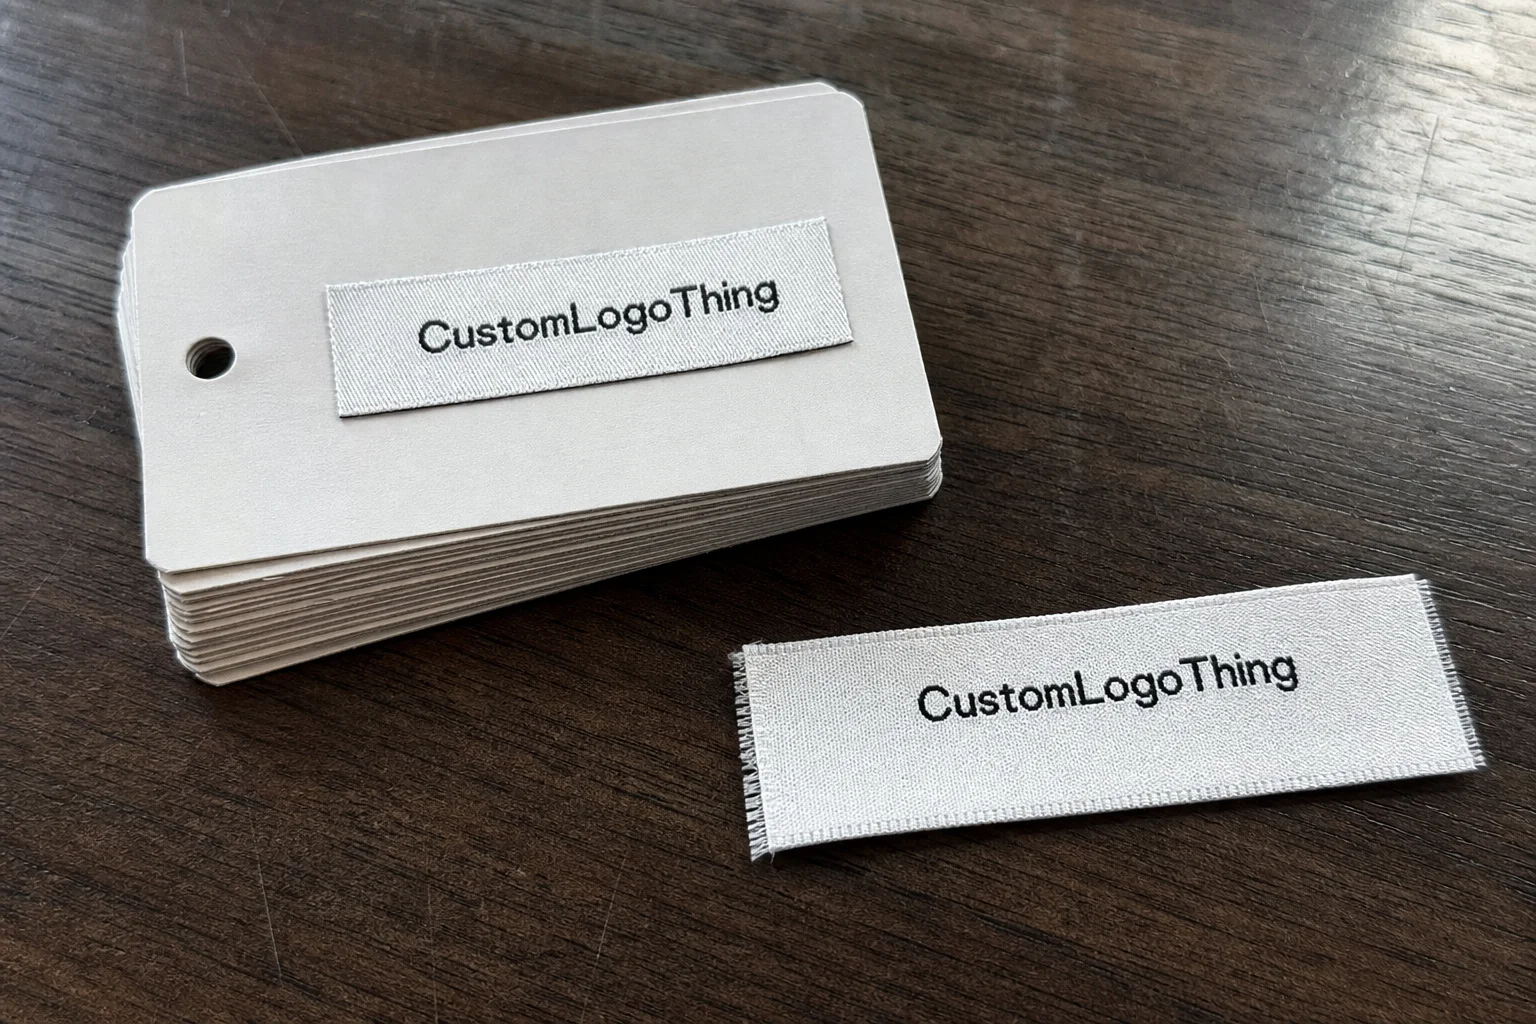
Woven labels are made by weaving thread into the design itself rather than printing ink on top of a finished surface. That sounds like a minor technical difference, but it changes how the label wears, how it looks in close-up, and how much detail survives production. Printed labels can work for care content or short-term applications. Woven labels usually feel more substantial because the texture is built into the material.
You will see them used as neck labels, side seam tags, hem labels, patches, brand markers on hats and bags, and limited-edition identifiers for small drops. They are especially useful for brands that care about retail packaging presentation, even if the label is inside the garment. Buyers may not say “the label sold me,” but they notice when it looks sharp, sits flat, and feels soft enough to wear.
The choice between woven, printed, and heat-transfer labels usually comes down to use case. Woven labels are the better option when detail, wash durability, and perceived quality matter. Printed labels can be cheaper for short runs and variable data. Heat transfers are often better for athletic wear or skin-sensitive garments because they eliminate a sewn-in seam. If the brand wants a more established look, woven still tends to be the safest bet.
“The label is small, but the decision is not. It affects comfort, shelf presentation, and how customers judge the whole garment.”
There is also a practical reason woven labels stay popular: they are forgiving across product categories. A soft tee, a heavyweight hoodie, a tote bag, and a structured jacket all need different attachment methods, but the underlying label construction can be adapted. That flexibility is useful for brands that are not selling only one product type.
How Woven Labels Are Made From Art File to Finished Roll
The process starts with artwork review. A supplier checks the logo, text, dimensions, weave type, fold style, and color references, then converts the design into a weaving file. That digitizing step is where quality is often won or lost. Strong source art gives the loom clear instructions. Weak source art forces someone to guess at line weight, spacing, or how much detail can survive in thread.
That matters more than most first-time buyers expect. A design that looks clean on screen can fall apart once it is reduced to a one-inch label. Thin serif fonts, gradients, tiny icons, and crowded text usually do not translate well. The issue is not always the machine. More often, the artwork is asking thread to do the work of a printer. It cannot.
Once the artwork is digitized, the loom is set up and labels are woven in batches. After that, the labels are cut, folded, checked, and packed. Common finishing options include hot cut, ultrasonic cut, center fold, end fold, mitre fold, and straight cut. The finish changes the amount of usable space, the feel against the skin, and the way the label sits on the garment. That means fold style should be decided before final artwork approval, not after.
Proofing deserves more attention than it usually gets. A digital mockup shows layout and proportions, but it is not the same as a woven sample. Thread color, weave density, and edge finishing can shift the final look. If the supplier offers a sample or strike-off, review it before full production. Check spelling, fiber content, country of origin, size marks, and whether the fold direction matches the intended seam. Those details are tedious, which is precisely why they get missed.
Most avoidable production problems come from the same handful of issues: missing Pantone references, incorrect finished dimensions, vague fold instructions, or artwork exported from a screenshot instead of a vector file. If the supplier has to interpret the file, the odds of extra revisions rise. That costs time, and on a label order, time is usually more expensive than the material itself.
There are also material choices that affect how the label behaves. Damask is common because it allows finer detail and a smoother surface. Taffeta is lighter and often cheaper, but it can look flatter. Satin has a softer hand feel and a more polished sheen, though it is not always the best fit for rough-wear garments. The right material depends on where the label will sit and how much abrasion it will face.
Production Steps and Timeline: From Proof to Delivery
Most orders move through the same sequence: quote approval, artwork prep, proof approval, production, finishing, and shipment. If everything is clean, a standard woven label order often lands in the 10 to 18 business day range after proof approval. Shipping is separate. That sounds obvious until a buyer assumes “two weeks” includes freight, customs, and the time spent waiting for someone to release the parcel.
Rush orders are possible, but they come with tradeoffs. Shorter timelines usually reduce the room for revisions, increase freight costs, and limit finishing flexibility. Dense artwork and tiny text can also slow things down because they require more digitizing checks. If the labels are tied to a seasonal drop or retail launch, give yourself a buffer of at least a week. More if the label has to coordinate with garment production and packaging timing.
Standard lead time and rush lead time are not the same thing, even if suppliers use similar wording. Standard usually means the order is moving through the normal queue. Rush means the order jumps ahead, which often adds cost and can limit fold choices, custom colors, or sample steps. For planning, assume the slowest likely step will define delivery, not the best-case estimate.
A simple planning framework helps keep the order realistic:
- Finalize the size, fold, and placement before artwork approval.
- Allow time for one proof correction cycle.
- Add manufacturing lead time.
- Separate shipping from production in the calendar.
If you are coordinating labels with custom printed boxes, hangtags, inserts, or full packaging design, lock the schedule early. Labels that arrive after the launch date do not improve the product. They only create inventory that is technically correct and operationally late.
International shipments deserve special caution. Transit time can vary by carrier, customs review, and service level. A short factory timeline does not guarantee a short delivery timeline. That is one of the easiest mistakes to make when comparing quotes, because one supplier may quote production only while another includes freight estimates. The numbers look similar until they are not.
Cost, Pricing, MOQ, and Quote Variables to Watch
Pricing for custom design woven labels depends on size, stitch density, color count, fold style, quantity, and weave type. Damask labels often cost more than basic taffeta because they support finer detail and a smoother finish. Satin may also carry a different price because of the face material and the look it creates. The cheapest spec is not always the most economical if it leads to rework or a label that weakens the product.
For budgeting, many low-to-mid volume orders fall somewhere around $0.12 to $0.45 per label, depending on the run size and complexity. A 5,000-piece order often prices better than a 300-piece run because setup costs are spread over more units. MOQ matters because digitizing, loom setup, and finishing are fixed costs. They do not disappear just because the order is small.
Here is a practical comparison:
| Option | Typical Unit Cost | Best For | Tradeoff |
|---|---|---|---|
| Low MOQ woven labels | $0.25-$0.45 | New brands, test runs, limited drops | Higher unit cost, fewer custom extras |
| Mid-volume woven labels | $0.12-$0.25 | Core apparel lines, repeat seasonal styles | Cleaner artwork and firmer scheduling usually required |
| Higher-volume production | $0.08-$0.18 | Established brands, uniform programs | More cash tied up, stronger forecast needed |
Ask for quotes that clearly list finished size, fold style, thread count or weave density, sample policy, lead time, and shipping terms. If a price looks unusually low, check what is missing. Setup, freight, proof corrections, and re-dos are frequent omissions. The quote is not the full cost until those pieces are visible.
Hidden cost traps include reproof fees, rushed production, artwork revisions after approval, and freight charges that appear after the order is already committed. If you are comparing branded packaging across multiple components, compare like with like. Otherwise the cheapest quote may simply be the one that excluded the details everyone else included.
For sourcing context and quality expectations, it helps to understand broader packaging standards and sustainability language. The Packaging School and packaging education resources are useful for terminology, while ISTA shipping standards matter when labels are part of a larger shipment that has to survive transit without damage or delay.
Step-by-Step Guide to Choosing the Right Specs
Start with the garment itself. Heavy outerwear, soft tees, children’s clothing, and premium basics do not need the same label construction. A thick jacket can handle a larger woven patch or exterior branding. A lightweight tee may need a softer neck label or a flat label sewn into the seam to reduce irritation. The garment should decide the spec, not the mood board.
Then choose the fold. A center fold works well for neck seams because it can be sewn in cleanly. An end fold is useful for side seams and edge placement. A mitre fold gives a more tailored appearance for certain branded applications. A flat cut label is helpful for exterior branding, patch-style placement, or applications where the label is sewn down on multiple sides. Pick the fold for comfort, visibility, and attachment method.
Next, think about contrast and thread choice. Light text on a dark background is usually easier to read. Low contrast can look refined, but only if the design is large enough. Matte finishes tend to feel understated. More sheen can look polished on some garments, especially if the rest of the retail packaging system is also crisp and controlled. Vintage-inspired labels often use muted colors and a tight palette. Streetwear labels tend to tolerate stronger contrast and bolder typography.
Material weight should also be matched to the garment. A thin label on a thick coat can look underbuilt. A heavy label on a soft tee can feel stiff. That mismatch is one of the quickest ways to make a garment feel off, even when the artwork itself is good. Buyers often focus on logo design and forget that the physical hand feel is part of the brand experience.
Proof checklist before approval
- Brand name spelled correctly
- Finished size matches the garment placement
- Fold direction is correct
- Thread or color references are clear
- Country of origin and fiber content are accurate if required
- Trim line, border, and edge finish are shown correctly
If the label is part of a wider packaging system, make sure it does not clash with hangtags, mailers, carton graphics, or insert cards. Consistency across touchpoints matters more than trend-driven decoration. A brand feels intentional when the box, tag, and woven label speak the same visual language.
Common Mistakes That Make Labels Look Cheap
The biggest mistake is trying to cram too much detail into a tiny label. Fine text, thin outlines, and complicated logos can blur once woven. If the label is only one inch wide, it is not the place for a paragraph of information and a logo with a dozen hairline elements. Thread has limits. Good design respects them.
Wrong size is another frequent problem. A label that is too large for a slim tee can feel awkward or scratchy. A label that is too small may vanish into the seam or look like an afterthought. A good supplier should flag obvious sizing problems, but they cannot rescue a bad specification after the fact. The buyer still has to bring a real garment context to the order.
Skipping proof review is risky because woven labels often carry required information. Brand name, care info, size, fiber content, and country of origin are not fields for guesswork. If the information is wrong, the result can be rework or compliance issues. For apparel sellers, that can turn into trouble during retail onboarding or fulfillment audits.
Most cheap-looking labels are not the fault of the factory. They start with a weak spec. Poor artwork, weak contrast, unrealistic quantities, and last-minute changes do the damage. The loom usually reproduces the mistake with impressive efficiency.
“If the label looks expensive on screen but weak in hand, the problem is usually the spec, not the loom.”
Another subtle issue is overusing effects that do not survive woven production. Gradients, tiny shadows, and ultra-fine lines may look polished in a digital file, then collapse into muddled thread. The fix is usually simplification, not more color. In woven work, clarity beats ornament more often than buyers expect.
There is also a sustainability angle. If your brand cares about branded packaging and material sourcing, you may want FSC-certified paper elements for tags and cartons alongside the labels. The FSC site is a useful reference for certification basics and responsible sourcing language. That does not make a woven label sustainable by itself, but it keeps the wider packaging conversation grounded in actual standards rather than vague claims.
What to Prepare Before You Request Quotes
To get accurate pricing on custom design woven labels, send the supplier the actual logo file, finished size, fold style, quantity, color count, placement, and target delivery date. A vector file is best: AI, EPS, or PDF with editable shapes and clean text. If all you have is a JPG or PNG, expect extra setup time because the design may need digitizing or simplification before weaving begins.
Photos help too. If the label is going into a tee, jacket, hat, or bag, send a picture of the garment or a close-up of the seam area. That gives the supplier a real reference for sizing and placement. A two-inch label may be perfect for a jacket and absurd on a children’s top. That kind of mismatch is easy to avoid if the fabric context is visible early.
For first orders, ask for a digital proof or a sample before committing to the full run. That small step can prevent a full order with the wrong fold orientation, a logo that reads too small, or a border that does not match the garment. If it is a rebrand, compare the old and new labels side by side before approval. Tiny changes can alter the whole visual impression.
Here is the simplest buying process to keep the order under control:
- Gather your artwork and garment reference photos.
- Request two or three quotes with the same spec.
- Check lead time, sample policy, and shipping terms.
- Lock the spec sheet.
- Approve the proof only after checking every line.
If your line also needs mailers, inserts, cartons, or other Custom Packaging Products, align all production dates before placing the order. Otherwise you can end up with labels ready on time and packaging arriving later than the launch, which creates a finished product that still looks unfinished.
One more practical point: ask whether the quote includes color matching support. Some suppliers are strict about Pantone references, while others work more loosely from visual swatches. If color consistency matters across labels, hangtags, and cartons, the matching process should be discussed early. It is much easier to settle thread colors before production than after the first strike-off reveals a mismatch.
How much do custom woven labels usually cost per piece?
Price depends mainly on quantity, size, weave density, color count, and fold style. Lower MOQs usually cost more per label because setup costs are spread across fewer pieces. For planning, many buyers see ranges around $0.12-$0.45 per label depending on order size and complexity.
What file do I need for custom design woven labels?
A vector logo file is best, usually AI, EPS, or PDF with editable shapes and clean text. If the artwork is rough, expect extra setup time because the factory may need to digitize or simplify it before weaving begins.
How long does production usually take?
Standard timing depends on proof approval, production queue, finishing, and shipping destination. A normal run often takes about 10-18 business days after approval, while rush orders are possible if you are willing to pay more and accept less room for changes.
What is a normal MOQ for woven labels?
MOQ varies by supplier and construction, but many orders start in the low hundreds rather than dozens. If you need a very small run, ask whether a stock size or simplified spec can reduce the minimum.
How do I choose the best fold style for my labels?
Use the fold that fits the garment location: center fold for neck seams, end fold for side seams, and flat cut for external branding. Match the fold to visibility and comfort, not just appearance, because placement affects wear and readability.
Smart buyers treat labels as part of the product system, not a last-minute detail. The right spec improves comfort, presentation, and brand consistency across apparel and packaging. The wrong one wastes money and makes the whole product feel slightly off. For anyone ordering custom design woven labels for the first time, the safest path is simple: keep the artwork clear, confirm the fold, inspect the proof carefully, and compare quotes on the same terms. That is how you avoid the usual production mess without paying for it twice.