A shirt can look plain on a hanger and still feel premium the moment the neck label, size tab, and care copy are handled with discipline. That is why custom fabric labels for shirts private label brands rely on matter so much. They are small, but they stay with the garment, touch the skin, and tell a buyer whether the product was made with care or assembled on autopilot.
The label also works like packaging, just inside the garment. It is not there to entertain anyone. It is there to make the shirt feel finished, keep the information clear, and support the brand story without clutter. A good label can quietly raise the perceived value of a basic tee. A weak one can make a well-cut shirt feel generic in seconds.
Why custom fabric labels for shirts private label change perceived value
Most shoppers never read every line on a sewn-in label, but they feel the difference immediately. If the trim is scratchy, the print is blurry, or the brand name sits crooked after sewing, the shirt reads as low-effort. If the label is soft, legible, and proportioned correctly, the same shirt can feel closer to a higher-end garment before the customer ever checks the fabric weight or stitching.
That effect is easy to underestimate because labels are hidden on the inside. Hidden does not mean unimportant. A shirt label is one of the few brand touchpoints customers physically contact every time they wear the item. Hangtags get removed. Inserts get thrown out. The sewn-in label stays through wear, washing, and repeat handling. For basics, fashion tees, and uniforms, that permanence carries real weight.
For private label programs, the label usually has three jobs at once: identify the brand, show size, and carry required care or fiber content. That mix matters because it affects returns, compliance, and the buyer’s first impression at once. If the shirt feels comfortable but the label is hard to read, the product still feels unfinished. If the label is polished but the information is wrong, the whole order can become a rework problem.
A private label shirt label is not decoration. It is a comfort surface, a compliance surface, and a brand signal in one piece of trim.
There is also a useful comparison with outer packaging. A shirt can ship in attractive packaging and still feel cheap if the internal trim is careless. The reverse happens too. A well-built label can lift a simple garment much faster than a glossy box can rescue weak finishing. That is why many brands treat labels, hangtags, and mailer or retail packaging as one system rather than separate purchases. Custom Packaging Products often support the launch story, but the label is the part that the customer lives with.
The practical question is straightforward: how do you specify a label that looks right, wears well, and avoids expensive revision? The answer starts with the artwork and ends with how the label sits on the shirt.
How the label-making process works from artwork to sewn-in finish
Suppliers do not need only a logo. They need a production spec. That distinction matters because the file that looks fine on a screen may not survive woven construction, small-scale text, or fold conversion. A clean vector file is useful, but it is not enough by itself. The vendor still has to turn that art into a loom file, print proof, or other production format that can actually be manufactured at garment scale.
For custom fabric labels for shirts private label buyers, the first approval step is usually the most important one: deciding what information must fit on the label. At minimum, confirm finished size, fold style, material, placement, brand name treatment, and whether the label must include fiber content, care instructions, size, or country of origin. If the shirt is sold across multiple markets, that copy can change by region. One universal layout rarely works unless it was planned that way from the beginning.
The usual process looks like this:
- Send artwork, dimensions, placement, and required copy.
- Review a proof showing layout, fold, text treatment, and color placement.
- Approve a sample or strike-off if the order is detailed or highly visible.
- Move to bulk weaving or printing, then finishing and trimming.
- Check the first lot before sewing or packing at scale.
Most schedule slips happen at the proof stage. One missing size code, a text correction, or a placement change can push the whole order back. Experienced buyers do not keep polishing the design once the proof is functionally correct. They lock the spec, verify the wording, and move on. That habit saves time and protects launch dates.
It also helps to think of the label as part of the wider trim family. If the shirt has a hangtag, a care card, or a woven side tab, those pieces should look like they belong together. The label should not feel like it came from one brief while the rest of the packaging came from another. For that reason, many buyers coordinate trim with Custom Labels & Tags as a single identity system.
Material, fold, and placement choices that affect wearability
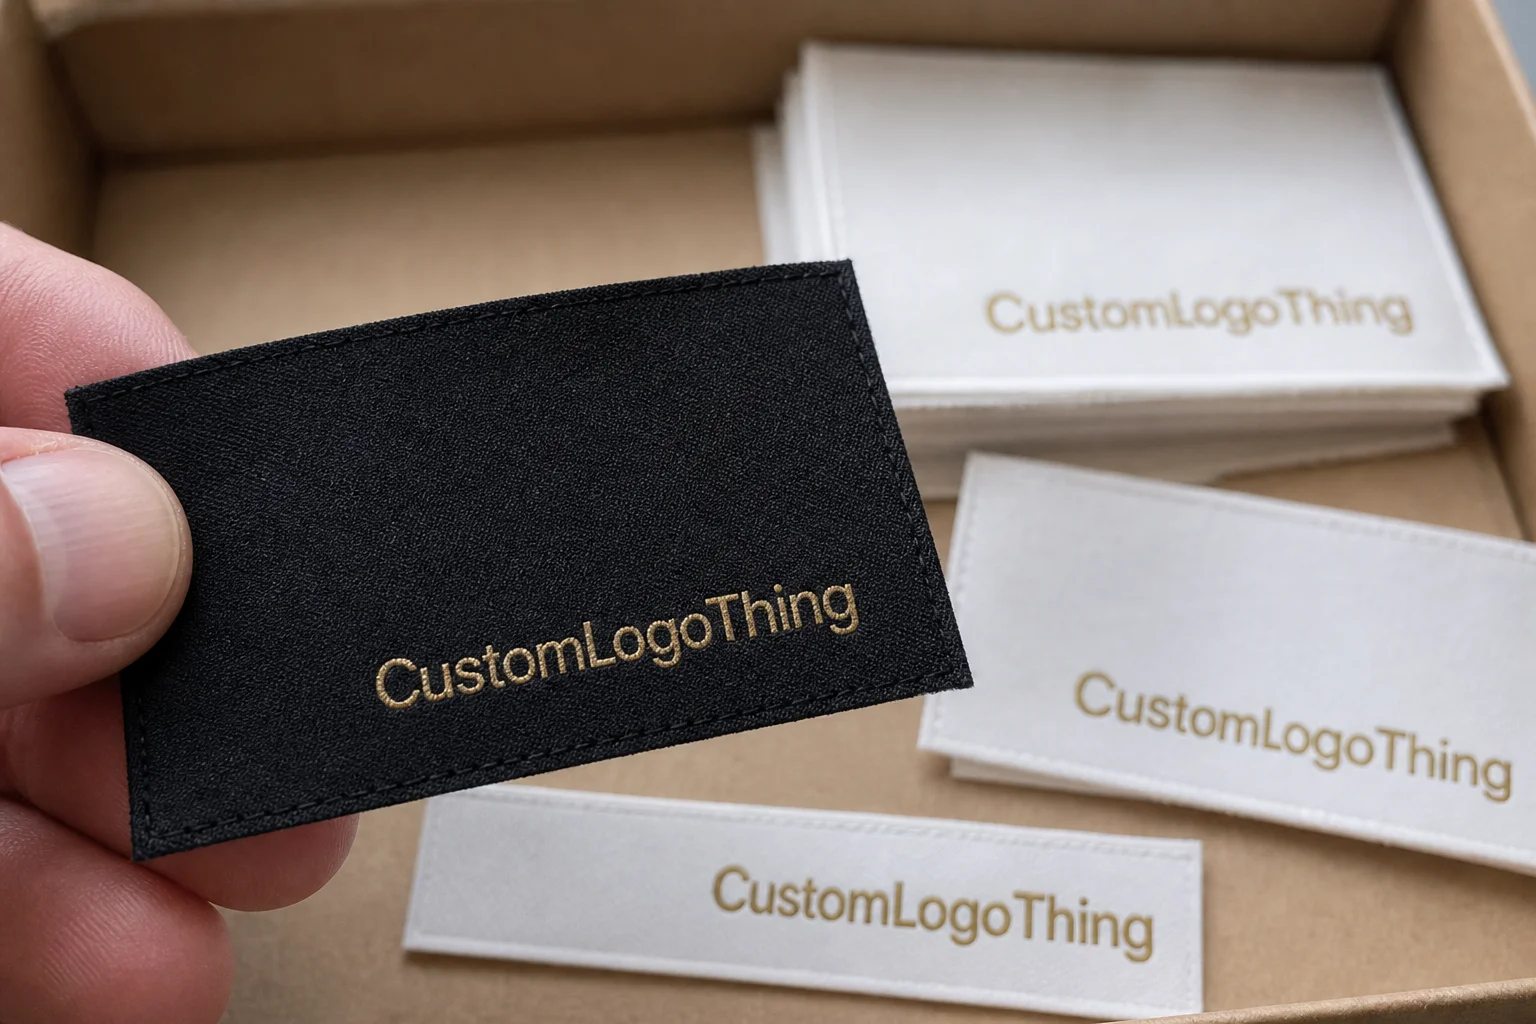
Material is not a styling preference. It is a comfort and durability decision. Woven damask is the classic choice for a clean, premium label because it can hold fine detail better than many buyers expect. Satin has a smoother hand and is often a better fit for fashion tops or softer shirts. Taffeta is usually the most economical option and works well for volume basics, though it tends to feel more utilitarian. Printed polyester is useful when the copy is dense, the text needs to stay readable, or the brand wants a low-profile, soft label.
Fold style changes both the look and the wear experience. An end fold gives a tidy finish when the label is sewn into a seam. A center fold works well for neck labels that hang naturally from the back of the shirt. A loop fold can suit size tabs or small brand markers. Straight cut labels are common when the trim is attached in a way that prevents fraying, but they are not always the best choice for skin contact.
Placement matters just as much as the build. Neck placement gives the strongest branding moment, but it is also the first place customers notice scratchiness. Side seam placement improves comfort and reduces irritation, though the label becomes less visible. Hem or external tab placement can support a more fashion-forward presentation, but then the trim has to earn its place as part of the design rather than a hidden utility item.
Color contrast is another practical issue. Small text can disappear fast in low light or after a few wash cycles. A label that looks polished on a screen can turn muddy in production if the contrast is too weak. If the label carries care symbols or fiber content, readability should win over decorative restraint. Buyers sometimes optimize for aesthetics and accidentally make the important information harder to see.
Different shirt categories usually need different specifications:
- Basics: simple woven or printed labels, low irritation, efficient folding.
- Premium tees: softer satin or fine-weave damask, tighter registration, cleaner finishing.
- Uniforms: durable construction, readable care copy, consistent reorders.
- Children’s shirts: soft hand feel, minimal scratch risk, careful placement.
There is no single best label build. The right spec depends on the garment, price point, wash frequency, and how visible the label needs to be. That is the part buyers learn the hard way: a label that is perfect for a premium tee can be unnecessary for a work shirt, while an economical label can feel too rough for a higher-end piece.
Production steps and turnaround: what happens after approval
Once the proof is approved, the order moves into production. That usually includes file prep, weaving or printing, finishing, trimming, inspection, and shipping. The cleanest jobs are the ones that arrive with precise artwork and no ambiguity about size, fold, or placement. The slowest jobs tend to look simple at first glance but hide several revisions in the details.
There are two places where timeline risk shows up most often. The first is sample approval. The second is coordination with garment production. If the labels are ready but the shirts are delayed, or if the trim arrives after the sewing window closes, the order can sit idle. Label planning should sit inside the launch calendar, not beside it.
For straightforward woven or printed labels, a standard turnaround is often about 12 to 15 business days from proof approval to completion. Specialty folds, complex copy, or multi-color construction can stretch that longer. Rush work is possible, but it usually costs more and leaves less room for correction. If the launch date matters, build a buffer rather than assuming the supplier can absorb every delay.
Quality control also matters after production. The first lot should be checked against the approved spec for width, fold accuracy, text clarity, color consistency, and stitch behavior on the garment. A label that looks fine on the roll can behave differently once it is sewn into a seam. That is especially true for narrow labels, small neck openings, and softer fabrics that shift during stitching.
If the shirt line also moves through warehousing and distribution, packaging durability matters as well. Trim should survive handling without scuffing, curling, or picking up wrinkles that change the presentation. Standards-based shipping checks can help here. ISTA guidance is useful if you want a practical framework for reducing transport damage before cartons reach the customer.
Paper components deserve the same attention. If hangtags or inserts are part of the launch, sourcing them through a certified chain can support the broader sustainability message. FSC certification does not replace good design, but it does provide a clear paper sourcing signal when that matters to the brand and its buyers.
Cost, MOQ, and quote drivers for shirt labels
Quote behavior is usually more predictable than brands expect. The price of custom fabric labels for shirts private label orders is driven by a small set of variables: size, color count, material, fold complexity, finishing, and quantity. If the supplier cannot see those details clearly, the quote comes back vague or padded with contingency.
MOQ, or minimum order quantity, varies by construction. A printed label often has a lower entry point than a woven damask label with a special fold. Some suppliers will quote smaller test runs. Others want a larger batch because setup time makes small orders inefficient. The better question is not, “What is the MOQ?” It is, “What is the MOQ by label type, and how does the unit price move across volume tiers?”
At a common buying level, the rough ranges below are useful planning numbers. They are not universal, and they usually exclude setup fees, shipping, and sample costs.
| Label type | Typical feel | Best for | Approx. unit cost at 5,000 pcs | Main tradeoff |
|---|---|---|---|---|
| Woven damask | Textured, premium, durable | Brand-heavy neck labels, fashion tees | $0.06-$0.18 | Higher setup sensitivity for fine detail |
| Printed satin | Soft, smooth, low profile | Comfort-first shirts, fine text | $0.04-$0.12 | Less texture, can look lighter in finish |
| Taffeta | Lightweight, economical | Volume basics, utility apparel | $0.03-$0.08 | More utilitarian hand feel |
| Specialty fold or finishing | Varies by spec | Premium branding, unusual placements | $0.10-$0.25+ | Higher cost and longer approval path |
Those numbers move with volume, stitch complexity, supplier location, and how much setup the order requires. They still help because they show the real tradeoff: buying more lowers the unit price, but over-ordering ties up cash in trim that may outlive the style. That is a real risk for brands still refining graphics, sizing, or compliance copy.
To get a clean quote, send the full spec set at once: artwork file, finished dimensions, fold style, placement, quantity tiers, and required compliance text. If the brand is still deciding between two constructions, ask for both. It is faster for a vendor to price two clear options than to guess what you meant and revise the order later.
Hidden costs matter too. Setup fees, sample shipping, revision time, and reprints can shift the economics of the first order. A slightly higher unit price with fewer mistakes is usually cheaper than a low bid that creates relabeling or delays the launch.
Common mistakes that make shirt labels look cheap or fail QA
The most common failure is overcrowding. Buyers try to fit the brand name, size, country of origin, care symbols, fiber content, and marketing copy into a label that can barely support three readable lines. On screen, it can look efficient. In production, it often looks cramped. Tiny type can collapse once woven or printed at scale, and the label ends up adding noise instead of clarity.
Comfort issues are just as damaging. A label can meet the technical spec and still fail in the market because it feels scratchy, stiff, or too large against the skin. That is not a cosmetic complaint. Customers usually do not say, “the label failed.” They say the shirt feels cheap, and the style gets returned or avoided the next time they shop.
Compliance is another place where private label brands get burned. If the shirt needs fiber content, care instructions, or country-of-origin information, the label must be built to carry that text consistently. Missing or inconsistent copy can force rework, especially when a line launches across more than one market. The risk grows when packaging and trim are treated as separate projects instead of one coordinated system.
Proof approval is often rushed because the garment itself gets the attention. That is a mistake. A label should be checked against the actual neck opening, seam allowance, and stitching plan. If the label is too wide or the fold is wrong, it can distort after sewing even if the proof looked acceptable on a flat screen. The final sewn-in result is what matters.
Reorder discipline matters too. Fast-selling styles can burn through trim faster than planned, and the second run may drift if the supplier changes stock fibers, dye lots, or finishing conditions. Keep a record of approved specs, not just the artwork file. That is the easiest way to keep label consistency across repeats and keep the rest of the retail packaging aligned from one production lot to the next.
Expert tips and next steps for your first order
Start with one master spec sheet. Include artwork, exact dimensions, fold, material, copy, placement, quantity targets, and required compliance text. That document becomes the anchor for quoting, approval, and reorders. It also keeps the trim system aligned with the rest of the brand’s packaging choices.
If the brand is still refining its visual language, order two versions and compare them on the actual shirt. One can be the safer baseline. The other can be the more premium option. Side-by-side evaluation is more useful than debating mockups in a spreadsheet because the eye and the hand notice different problems. A label that looks balanced on screen may still feel bulky in the seam.
Test the label on the shirt fabric before mass production. Then test it again after a wash cycle if the garment will be worn often. Check three things: legibility, softness, and retention of shape. If the label changes character after washing, that is a production issue, not a style preference. It should be corrected before the bulk run moves forward.
For buyers building out a larger line, labels should sit inside the wider product story. The trim should match the shirt, the hangtag should match the trim, and the outer pack should match both. That alignment is what makes a brand feel deliberate rather than assembled from disconnected parts. Whether the order includes Custom Labels & Tags or broader Custom Packaging Products, the standard is the same: the pieces need to speak the same design language.
The most reliable first-order path is simple: gather the logo, trim copy, size range, and placement notes, then Request a Quote and a sample run. That reduces back-and-forth and gives the supplier enough detail to produce something that is actually ready for sewing, packing, and repeat orders.
FAQ
What should I choose for custom fabric labels for shirts private label: woven or printed?
Choose woven labels if you want a textured, premium look and strong brand presence on the inside of the shirt. Choose printed labels if you need very fine text, a softer hand feel, or more copy in a small space. The right choice depends on the fabric, wash profile, and how much the label will touch skin.
How many custom shirt labels should a private label brand order first?
Base the first order on launch quantity plus a buffer for damage, relabeling, and unexpected size growth. If the MOQ is high, ask for tiered pricing so you can compare a test run against a fuller production run. Ordering only the exact minimum can create problems if the style sells faster than planned.
What is a normal turnaround for custom fabric labels for shirts?
Turnaround depends on proof approval speed, production complexity, and whether a sample or strike-off is needed first. Simple jobs move faster than custom folds, specialty materials, or multi-color designs with compliance text. A standard run is often around 12 to 15 business days from proof approval, but revisions can extend that.
How do I reduce label cost without making shirts feel low quality?
Simplify the design by reducing color count, keeping the dimensions efficient, and choosing a standard fold when possible. Protect perceived quality by keeping the text readable, the hand feel soft, and the stitching clean. Ask for multiple quote tiers so you can see where cost drops without losing the brand experience.
What details do suppliers need for a private label shirt label quote?
Send the artwork file, exact finished size, label type, fold style, placement, quantity, and required text. Include fiber content, care, or origin wording if it must appear on the label, because that affects the first proof. If one spec is still undecided, ask the supplier to price two options instead of guessing and reworking the order later.