Custom Name Tags Stickers: Order Smarter Event Labels
A name tag usually gets three or four seconds to work before the handshake, check-in line, product demo, school activity, or warehouse tour moves on. Custom Name Tags Stickers are small communication tools, not decoration. They need to stay readable, stay attached, and identify the person or group without making everyone pause to squint.
What Custom Name Tags Stickers Actually Need to Do
These labels can carry names, roles, departments, table assignments, attendee types, school groups, volunteer teams, retail staff names, or a branded blank field for handwriting. Some are worn for a two-hour visitor session. Others sit on folders, cartons, sample bags, or event kits for weeks. That difference changes the material decision more than many buyers expect.
You see adhesive name labels at conferences, open houses, retail pop-ups, staff onboarding sessions, kids’ activities, visitor desks, subscription boxes, and sampling tables. They also solve a practical packaging problem: a brand can personalize a small batch, identify a kit, or mark a limited program without changing the printed carton.
Sticker name tags sit in a different category from pin badges, magnetic badges, and reusable plastic tags. Pin badges feel more permanent, but they can damage fabric. Magnetic badges look clean, though they cost more and are not suitable for every garment or safety setting. Reusable plastic tags work for staff programs, but someone must manage inserts, holders, cleaning, collection, and replacements. Adhesive labels win on speed: low unit cost, quick distribution, easy customization, and no hardware to recover after the event.
Material choice is where many orders either succeed quietly or cause small, irritating failures. A basic uncoated paper sticker may be exactly right for a three-hour indoor registration table where people write names with a marker. A white polypropylene film, often around 2.0 to 3.0 mil face stock before adhesive and liner, makes more sense when the label faces moisture, friction, longer wear, or repeated handling on folders, cartons, or sample kits.
The pass-fail criteria are simple. Readable type. Enough blank or printed space. Adhesive matched to the surface. Strong contrast. Clean cutting. A finish that supports the job. If the name is too small, the corners lift, or the marker smears after 20 minutes, the label failed even if the mockup looked sharp.
Practical rule: the best name tag label is not the fanciest one. It is the one people can read at arm’s length, peel quickly, apply without fuss, and remove or keep in place exactly as intended.
For buyers comparing options through Custom Labels & Tags, the useful questions are operational. What surface will the label touch? How long must it stay there? Who will apply it? What happens if it falls off?
How Adhesive Name Tag Labels Are Printed and Finished
The production path is usually direct: prepare artwork, select face stock, print the design, coat or leave the surface uncoated, kiss-cut or die-cut the shape, then pack the labels on sheets, rolls, or as singles. The small choices inside that sequence determine whether the sticker behaves properly in use.
Digital printing is often the practical choice for short to medium runs, changing artwork, and variable names. It handles Personalized Name Tag stickers well because the file can pull names, departments, table numbers, or attendee categories from a clean spreadsheet. Flexographic production may be more efficient for larger repeat orders with stable artwork, especially when the same design runs across thousands or tens of thousands of pieces.
Substrate options usually start with paper and move into films. Uncoated paper accepts markers and many pens well. Gloss paper gives brighter color and higher shine, though glare can be a problem under strong event lighting. Matte paper looks quieter and more professional. White polypropylene and vinyl-style films add moisture resistance, durability, and a more polished feel. Clear film can work on glass, plastic pouches, or branded packaging where the background surface is part of the design.
Adhesive selection should stay practical, not theoretical. Removable adhesive is the safer direction for temporary clothing use. Permanent adhesive is better for packaging, folders, bins, sealed sample bags, glass jars, coated cartons, and other surfaces where lifting would be a problem. No adhesive type is universal. Cotton, fleece, kraft paper, coated SBS board, PET pouches, and glass all behave differently because texture, surface energy, coatings, and temperature change the bond.
Finishes affect both appearance and function. A matte laminate can reduce glare and protect print from scuffing. A gloss coating can make colors pop, which may fit retail packaging or branded inserts. An unlaminated write-on surface is usually better when staff or attendees will add names by hand. Slick coatings often resist ink, causing beading, slow drying, or smearing.
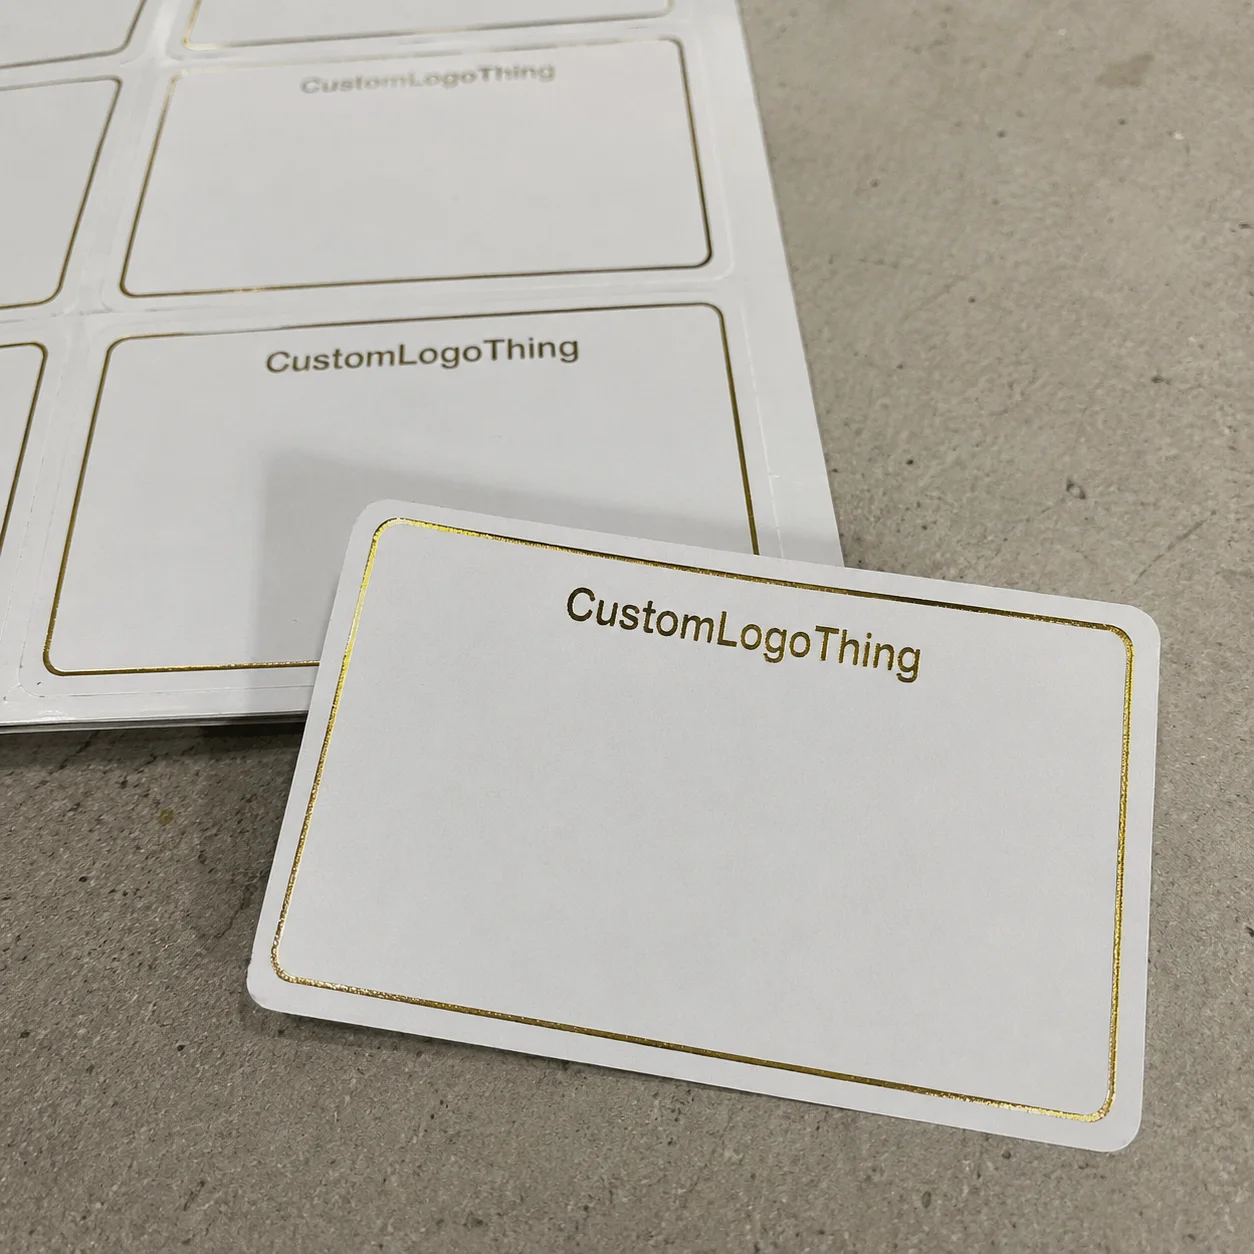
Format matters at the table. Sheets are easy for registration desks, classrooms, and alphabetized attendee lists. Rolls work well for dispensers, warehouse use, and higher-volume application. Kiss-cut stickers are cut through the face material but not the backing liner, so they peel cleanly while the sheet or roll stays intact.
Shape is not just style. Rounded corners help reduce edge lift on clothing and flexible surfaces. Rectangles and ovals preserve usable name space. Custom shapes can be memorable, but they should not steal room from the name field or make peeling slower during a check-in rush.
Key Specs That Control Readability, Adhesion, and Durability
Size should be chosen around the longest realistic name, not the average name. Common event sticker sizes often land around 3 inches by 2 inches, 3.5 inches by 2.25 inches, or 4 inches by 3 inches. The right size depends on whether the label needs a first name only, full name, pronouns, company, title, table number, attendee type, or color category.
A small sticker can look tidy in a proof and still force 9-point type that nobody can read from a normal conversational distance. If someone standing 3 to 5 feet away cannot read the name without leaning in, the label is underperforming.
Large first names, simple fonts, strong contrast, and restraint with decorative scripts all improve performance. Many layouts fail for a strange reason: the logo gets protected more carefully than the name field. A badge is not a miniature poster. Its first job is identification.
Color contrast does real work. Dark text on a light background is the safest choice for most event name labels. Reverse type, such as white letters on navy or black, can work if the type is large enough and the print process holds clean edges. Pale gray text, thin gold lines, and low-contrast pastel combinations may look refined on a monitor but fade at actual size.
Adhesive testing is not overkill when the surface is unusual or the event has no margin for failure. Fabric, coated boxes, kraft mailers, plastic pouches, glass jars, event lanyard cards, and folder covers all respond differently. A removable clothing adhesive may not grip a matte laminated box. A permanent packaging adhesive may hold beautifully on a carton but tug delicate fabric or leave residue.
For clothing, temporary labels should avoid overly aggressive adhesives, especially in conferences, clinics, schools, and hospitality settings where people may wear silk, wool, uniforms, or textured knits. No supplier can honestly guarantee every fabric. Testing on representative garments is the safer answer for higher-risk use.
Exposure changes the specification. Indoor check-in stickers do not need the same build as labels worn outdoors, handled with damp hands, used near refrigeration, or applied to chilled packaging. Cold product packaging can collect condensation, weakening adhesion. Labels handled all day may need film stock or a protective finish to resist scuffing better than basic paper.
Writable areas need the right face stock. If names are added by hand, test the actual pen or marker. Uncoated paper usually accepts ink well. Matte-coated papers vary by coating. Laminated or glossy surfaces can smear unless a specialty marker is used. Leave quiet space around the name field so logos, sponsor marks, patterns, and category colors do not compete with the information people came to read.
| Use Case | Typical Material | Adhesive Direction | Practical Note |
|---|---|---|---|
| Short indoor event | Uncoated or matte paper | Removable | Good for handwriting and quick removal from clothing |
| Conference with printed names | Matte paper or white polypropylene | Removable or general purpose | Use large type and avoid glare under hall lighting |
| Packaging insert or kit label | Gloss paper, matte paper, or film | Permanent | Match adhesive to coated board, kraft, or plastic surface |
| Outdoor sampling or damp handling | White polypropylene film | Permanent or specialty removable | Consider lamination and test against moisture exposure |
Pricing, MOQ, and Unit Cost Factors for Name Tag Stickers
Pricing for custom name tags stickers depends on quantity, size, material, adhesive, print coverage, finish, die shape, variable data, packing format, and shipping. A single flat number would be misleading. A 3-inch paper write-on label on sheets is not the same product as a matte laminated film label carrying 800 unique names.
MOQ means minimum order quantity: the smallest run a manufacturer can produce efficiently after setup, material handling, printing, cutting, inspection, packing, and administrative work are included. A digital short run may support lower quantities than a flexographic run, but even short runs carry fixed setup time.
Unit cost usually falls as quantity rises because setup gets spread across more pieces. As a broad planning range, simple paper name labels may land around $0.12 to $0.35 per piece at several thousand units, depending on size and print coverage. Smaller runs of 100 to 250 pieces can cost much more per sticker because proofing, setup, and cutting still happen. Film stocks, laminates, specialty adhesives, and variable data can push moderate-quantity work higher, sometimes into the $0.25 to $0.75 per piece range. These are planning ranges, not a quote.
The cost drivers are easy to miss. Larger labels use more material. Film face stocks cost more than basic paper. Custom shapes may add tooling or slower cutting time. Laminates add material and another finishing pass. Sheeted labels can require different packing labor than roll labels. Variable names can be efficient digitally, but only if the spreadsheet is clean and the proofing process is disciplined.
Cheaper is not always cheaper. A low-cost paper label that curls off a cotton shirt, smears when a volunteer writes on it, or falls from a sample box creates wasted labor and a weaker impression. For event teams, one hour of staff rework can cost more than the savings from choosing the wrong stock.
A useful quote request includes size, quantity, material preference, application surface, indoor or outdoor use, printed names or blank write-on fields, sheet or roll format, deadline, and shipping location. Compare quotes by specification, not just total price. A matte polypropylene label with removable adhesive is a different item from a gloss paper sticker with permanent adhesive.
Process and Timeline: From Artwork to Ready-to-Use Labels
The ordering sequence is manageable when it is spelled out: confirm the use case, choose size and material, prepare artwork or data, review the proof, approve production, print, finish, inspect, pack, and ship. The largest delays often happen before printing starts.
Missing dimensions, vague adhesive needs, low-resolution logos, incomplete attendee lists, and late proof approvals can add days. A clean vector logo is preferred, usually supplied as AI, EPS, or print-ready PDF. Fonts should be outlined or embedded. Colors should be specified clearly, especially when an event or brand depends on a tight color match.
Production files need room to breathe. Important text should stay inside safe margins, commonly at least 1/8 inch from the cut line. Artwork that runs to the edge needs bleed, often 1/16 to 1/8 inch depending on the production setup and dieline.
For variable data, send a clean spreadsheet. Use one row per label and separate columns for first name, last name, title, company, table number, department, or category. Remove extra spaces. Check capitalization. Avoid hidden formatting. If badges need to be sorted alphabetically, by table, or by group, say so early because that affects proofing and packing.
A digital proof should show layout, spelling, size, bleed, cut line, and variable fields. It confirms what will print. It does not always prove adhesive behavior or writeability. If the label must work on delicate fabric, a chilled carton, a textured kraft mailer, or a glossy retail pouch, a physical sample or material check is the more reliable test.
Lead times vary. A simple repeat order with approved artwork may move quickly. Custom materials, specialty finishes, unique die shapes, larger quantities, and hundreds of variable names require more coordination. Many buyers plan around 7 to 15 business days from proof approval for standard work, although actual schedules depend on material availability, production load, finishing, packing, and transit distance.
Shipping and receiving deserve more attention than they usually get. Build in time for transit, internal distribution, event kit assembly, badge table sorting, and last-minute attendee additions. Name tags are small, but they create outsized stress when they arrive the afternoon before packing day.
If your team is coordinating labels with broader Custom Packaging Products, align the schedule with custom printed boxes, retail packaging, inserts, and other package branding pieces. A label order that is technically ready can still cause trouble if it misses the kitting window.
Common Ordering Mistakes That Make Name Tags Hard to Use
The most common mistake is designing a label that looks polished on a screen but becomes hard to read once printed at actual size. Screens enlarge everything. A 3-inch badge viewed on a 27-inch monitor gives a false sense of space, especially when the layout includes a logo, sponsor bar, QR code, name, title, company, and color category.
Overloading the layout reduces the value of the label. Too many sponsor logos, decorative borders, color bands, QR codes, and long titles crowd the name. If a QR code is needed, give it enough white space and keep it secondary. If sponsor branding is required, place it where it does not fight the first name.
Poor adhesive matching is another frequent issue. A label intended for a cardboard welcome packet may not perform the same way on a cotton shirt, a coated gift box, or a plastic sample bag. Adhesives are engineered for surface types, not vague categories. “Sticker” is not a complete specification.
Wrong finish choices create their own headaches. Gloss can glare under trade show lighting. Slick coatings may reject handwritten names or marker corrections. Heavy lamination can make a label feel premium, but it may be unnecessary for a four-hour indoor event and can interfere with write-on needs.
Sharp corners and tiny cuts slow people down. Square corners can lift sooner on flexible surfaces. Delicate custom shapes may look clever in a mockup but peel slowly during a rush. A rounded rectangle often outperforms a complex silhouette because volunteers can peel and apply it faster.
Bleed and safe margins are not production trivia. Artwork that runs to the edge needs proper bleed so no white sliver appears after cutting. Names and logos need space away from the cut line so the finished sticker does not look cramped or uneven. For most standard labels, a 1/8-inch safe area is a sensible starting point, though the final spec should follow the printer’s dieline.
Data mistakes are easy to miss. Duplicate names, inconsistent capitalization, missing departments, and late spreadsheet changes can create production errors if nobody owns the final review. For larger events, assign one person to approve the final data file. Version control matters even for something as small as event name stickers.
The operational mistake buyers forget is format. Rolls may be wrong if volunteers need alphabetized sheets at a registration desk. Loose singles may be wrong if staff need fast dispenser application. Sheets may be awkward for a packaging line applying hundreds of labels per hour. The right format depends on how people peel, sort, distribute, and apply the label.
Next Steps Before You Request a Name Tag Sticker Quote
Before asking for a price, define the job. Who will wear or use the labels? How long do they need to stay on? What surface will they touch? Should they be removable, writable, waterproof, scuff resistant, freezer tolerant, or simply economical? A clear use case saves time and prevents mismatched quotes.
Choose size based on the longest realistic name or title. The outliers usually break the layout. If “Alex Kim” fits beautifully but “Christopher Van Der Meer, Regional Operations Director” collapses into unreadable type, the design needs adjustment. Consider a larger label, a two-line name field, or a layout that prioritizes first name over title.
Prepare two files when possible: one clean artwork file for the design and one spreadsheet for variable data. The artwork file should include the logo, colors, layout, dieline, bleed, and safe area. The spreadsheet should include names, departments, roles, tables, or attendee categories in separate columns.
Ask for material guidance instead of guessing. Describe the surface, temperature, handling conditions, event duration, and removal expectations. A supplier can recommend paper, polypropylene, removable adhesive, permanent adhesive, laminate, or uncoated write-on stock only after the job is clear.
- Quantity: total labels needed, plus extras for walk-ins, mistakes, and replacements.
- Size and shape: finished dimensions, corner style, and whether a standard shape is acceptable.
- Material and adhesive: paper or film, removable or permanent, and the actual application surface.
- Finish: uncoated write-on, matte, gloss, laminate, or specialty coating.
- Print setup: blank write-on fields, preprinted names, variable data, color requirements, and proof needs.
- Format and delivery: sheets, rolls, singles, deadline, shipping destination, and sorting instructions.
For repeat programs, test before locking the spec. If the same labels will be used every month, semester, season, or retail campaign, a small material check can prevent recurring lift, smearing, glare, or readability problems. Packaging buyers can also reference standards and sustainability expectations from groups such as the Forest Stewardship Council for paper sourcing and ISTA for broader distribution-testing context when labels are part of shipped kits.
Custom name tags stickers are easiest to order when the buyer treats them like working labels, not small printed giveaways. Get the size, surface, adhesive, finish, artwork, data, and format aligned early. The finished labels should help people connect, identify, sort, welcome, and move through the day with less friction.
FAQ
What material is best for custom name tag stickers used at events?
Uncoated or matte paper is usually best for short indoor events where names are written by hand. White film materials such as polypropylene are better when labels need more durability, moisture resistance, or a cleaner premium feel. The best choice depends on whether the sticker goes on clothing, folders, boxes, badges, or product packaging.
Can custom name tags stickers be removable from clothing?
Yes, but the order should specify a removable adhesive intended for temporary wear. Testing is wise for delicate fabrics, textured uniforms, or long event days because adhesives behave differently across materials. Avoid permanent adhesive for clothing unless clean removal is not required.
How much do personalized name tag stickers cost?
Cost depends on quantity, size, material, adhesive, finish, shape, sheet or roll format, and whether each sticker has variable printed data. Higher quantities usually reduce unit cost because setup and production time are spread across more labels. A useful quote request should include the application surface, deadline, artwork status, and whether the labels are blank write-on or preprinted with names.
How long does it take to produce custom event name stickers?
The timeline depends on proof approval, material availability, print method, order quantity, finishing, variable data setup, and shipping distance. Simple repeat orders can move faster than custom shapes, specialty materials, or attendee lists with hundreds of unique names. Buyers should allow extra time for proof review, internal distribution, and event kit packing.
Should name tag stickers be ordered on sheets or rolls?
Sheets are convenient for registration tables, classrooms, alphabetized attendee lists, and volunteer handout stations. Rolls are efficient for dispensers, packaging lines, warehouse labeling, or high-volume repetitive application. The right format depends less on the sticker itself and more on how people will peel, sort, distribute, and apply it.

