What Custom Image Stickers Are Really Used For
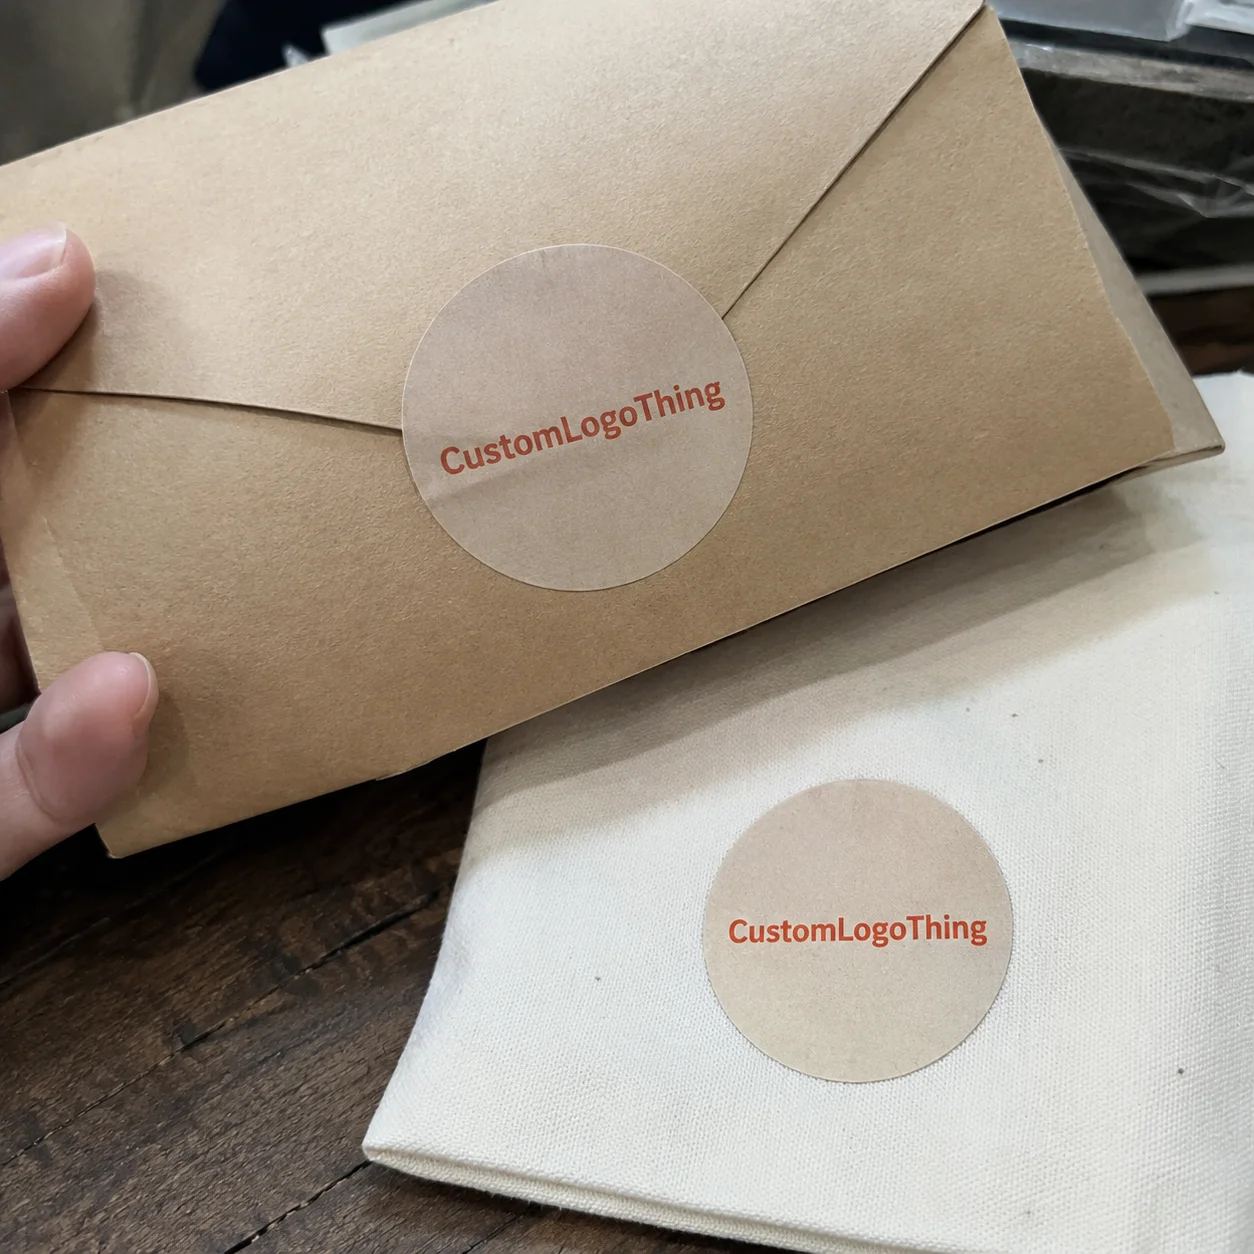
A small sticker can carry more brand memory than the box it ships on. Customers peel it, keep it, stick it to a laptop, photograph it during an unboxing, or pass it to someone else. Custom image stickers are printed pieces built from supplied artwork: a photo, logo, illustration, product image, QR graphic, campaign visual, mascot, or branded design.
Simple description. Less simple order.
Image stickers are not automatically the same as logo stickers, labels, decals, or sticker sheets. That distinction matters because each format is built for a different job. A buyer who asks for a “sticker” but really needs a compliant product label may receive a pretty piece of print that fails the shelf, the scanner, or the refrigerator test. It happens often enough that proofing departments develop a sixth sense for it.
An image sticker usually puts the visual first. A logo sticker is cleaner and identity-driven. A label sticker carries product information, barcodes, ingredients, batch codes, warnings, or regulatory copy. A decal is generally more durable, often larger, and intended for windows, vehicles, equipment, outdoor signs, or hard-use surfaces. A sticker sheet groups several designs on one backing sheet, which works well for events, creator merchandise, kids’ promotions, sample kits, and multi-character artwork.
The common uses are practical: ecommerce packaging inserts, product seals, event handouts, retail freebies, QR campaign stickers, laptop stickers, limited-drop merchandise, sample kit branding, and thank-you inserts inside Custom Packaging Products. They also pair well with custom printed boxes because they add seasonal, regional, or campaign-specific messaging without reprinting the entire carton.
The idea may be clever. The file still has to print.
A strong design printed from a tiny screenshot will still look like a tiny screenshot. Print is not a forgiveness machine. Material, adhesive, finish, size, quantity, timeline, and proofing decide whether the final sticker feels premium, average, or disposable.
How Image Sticker Printing Works From Artwork to Finish
The production flow usually follows a predictable path: artwork review, file cleanup if needed, color setup, proof creation, material selection, printing, finishing, cutting, quality check, and packing. Basic digital jobs can move quickly. Specialty films, multiple artwork versions, roll labels, Custom Die Cuts, and strict brand color requirements add more checkpoints.
Digital printing is common for short and mid-size runs because it supports lower quantities and multiple designs without heavy setup costs. Larger production runs can reduce unit cost once setup and press time are spread across more pieces, but they demand cleaner files, confirmed specs, and fewer late-stage changes. The phrase “just one small update” has delayed more sticker orders than bad weather.
Cut style changes both appearance and handling. Square and rectangle stickers are efficient for labels, inserts, and simple package branding. Circle and oval cuts work well for seals, food packaging, gift packaging, and promotional stickers. Custom Die Cut stickers follow the artwork shape, which looks more retail-ready but costs more because cutting is slower and setup is more specific. Kiss cut stickers leave the sticker on a larger backing, making them easier to peel. Sticker sheets keep several small designs together and can reduce loose-piece handling.
Finishes change the mood fast. Gloss makes color look brighter and sharper. Matte feels quieter and more premium, especially for minimalist packaging. Clear film creates a no-label appearance on glass, jars, bottles, and smooth mailers. Holographic or metallic stock adds movement and shine. Used well, it can make a launch sticker feel collectible. Used carelessly, it can turn fine typography and low-contrast art into visual noise.
Adhesive is less glamorous, but it may be the most practical decision in the order. Permanent adhesive suits packaging, retail, and shipping use. Removable adhesive fits temporary campaigns, event signage, and short-term promotions. Freezer-grade adhesive is built for cold-chain products. Stronger adhesive may be needed for textured mailers, curved bottles, powder-coated tins, kraft boxes, or surfaces exposed to abrasion.
Proofing is the buyer’s safety net. The proof confirms size, cut line, color setup, bleed, safe zone, spelling, and orientation before production. Approve it casually and the typo becomes yours. Harsh, but fair.
A proof is not just a formality. It is where the buyer checks whether the QR code has enough white space, whether the cut line clips a shadow, whether the label direction makes sense on a roll, and whether the final size feels right. A 1.5-inch sticker and a 3-inch sticker can carry the same artwork. They do not carry the same information.
Key Specs That Decide Sticker Quality
Start with resolution. Raster artwork should be supplied at 300 DPI at final print size. If the sticker will print at 3 inches wide, the image needs to be sharp at 3 inches wide, not merely sharp as a phone thumbnail. Logos, icons, line art, and clean shapes should be vector whenever possible because vector files scale without losing edge quality.
Preferred vector formats include AI, EPS, PDF, and SVG. PNG can work for transparent graphics if the file is large enough. JPEG is acceptable only when it is high-resolution and not repeatedly compressed. Screenshots, social media downloads, and website thumbnails are usually poor source files. They may look acceptable on screen because screens glow, shrink, and flatter. Presses are less charming.
Bleed and safe zone sound dull until they ruin the job. Bleed is extra artwork that extends beyond the trim or cut line, commonly around 0.0625 to 0.125 inch depending on the supplier and cutting method. It prevents white slivers at the edge after cutting. Safe zone keeps text, QR codes, borders, faces, and important details away from the cut line. For small stickers, at least 0.0625 inch of breathing room is a sensible minimum; more is better if the design allows it.
Material should match the environment, not just the mood board. White vinyl is durable and popular for giveaways, laptop stickers, outdoor-ish use, and general branded packaging. BOPP works well for product labels, jars, bottles, pouches, and retail packaging because it is thin, clean, and moisture-resistant. Paper is fine for dry indoor packaging, bakery boxes, stationery, envelope seals, or short-use promotions. Clear film works for glass and minimal product packaging. Specialty stocks, including holographic, kraft, textured paper, and metallic film, can make a campaign feel more premium if the artwork is built for that surface.
| Material | Best Use | Typical Strength | Watchout |
|---|---|---|---|
| White vinyl | Giveaways, decals, laptop stickers, durable inserts | Water-resistant, flexible, strong color hold | Costs more than paper on small runs |
| BOPP film | Bottles, jars, pouches, product labels | Good moisture and oil resistance with the right finish | Needs the correct adhesive for curved surfaces |
| Paper | Dry indoor packaging, seals, short campaigns | Cost-efficient and easy to print | Poor fit for water, oil, refrigeration, or rough handling |
| Clear film | Glass, clear boxes, minimalist package branding | No-label appearance on smooth surfaces | White ink may be needed for opacity |
| Holographic or metallic | Launches, merch, premium promos | High visual impact | Fine detail and low-contrast art can get messy |
Durability depends on water resistance, UV exposure, scratch resistance, oil exposure, refrigeration, dishwashing, and handling abrasion. A sticker going on a candle jar has different needs than one going on a shipping box or stainless bottle. Industry testing standards can help frame performance conversations; for shipping-related handling, ISTA is a useful reference point, while paper sourcing questions often connect to FSC materials.
Size controls readability. Tiny QR codes, thin script fonts, low-contrast photos, and complex gradients can fail once reduced. Before approving a large run, print the design at actual size on a basic office printer. It will not match final color or finish, but it will expose tiny text, awkward spacing, thin outlines, and QR codes that need more room.
For machine-applied roll labels, add another layer of discipline. Roll direction, gap between labels, liner type, outer diameter, core size, and unwind direction can matter. A beautiful label on the wrong roll orientation may stop a labeling machine cold. Hand-applied stickers are more forgiving, though not immune to surface issues, curl, or poor peel performance.
Pricing, MOQ, and Unit Cost Tradeoffs
Sticker pricing usually depends on size, quantity, material, finish, number of designs, cut type, adhesive, packaging method, and whether artwork help is needed. A 2-inch paper circle is not priced like a 5-inch weather-resistant die-cut decal with matte laminate. Obvious once stated. Frequently missed in quote requests.
Small custom runs cost more per piece because file handling, proofing, setup, printing, cutting, and packing still take time. For a simple 2- to 3-inch digital sticker, very small batches might land around $0.45 to $1.50 per piece, depending on specs and quantity. Mid-size runs can often drop into the $0.12 to $0.40 per piece range. Larger, efficient bulk orders may go lower, especially if the design, size, material, and finish are standardized. These are planning ranges, not a universal price sheet.
MOQ matters. Some suppliers allow low minimums for digital printing, especially for sheets or simple die cuts. Specialty materials, roll labels, metallic effects, weatherproof laminates, machine-applied formats, or custom packaging may require higher minimums. If the request is 75 holographic stickers, five designs, custom shapes, and individual bagging, the unit cost will not behave like a bulk paper label order.
Finish upgrades can improve perceived value, but each one adds cost and sometimes risk. Matte laminate can make product packaging feel more refined. Gloss laminate boosts color and gives stronger scuff protection. Soft-touch feels expensive, but fingerprints may show on dark artwork. Holographic and metallic materials cost more and need contrast planning. Weatherproof laminates are worth considering for outdoor, bottle, cooler, bath, and high-handling use.
Individual pieces, rolls, and sheets also price differently. Loose die-cut stickers may be ideal for giveaways, but they require handling. Roll labels suit production lines, jars, bottles, and fulfillment stations. Sheets can be efficient for multiple small designs or kit inserts. The cheapest format per sticker is not always the cheapest format to use if staff spend extra hours peeling, sorting, or applying them.
Request quotes with exact specs. Include size, quantity, material, finish, adhesive, cut style, number of artwork versions, delivery location, and target in-hand date. If you are also building labels, hang tags, or matching inserts, review Custom Labels & Tags so the sticker specs do not clash with the rest of the package.
Process and Timeline: What Happens After You Order
A normal order sequence is straightforward: submit artwork and specs, receive a quote, approve the estimate, review the digital proof, request changes if needed, approve the final proof, start production, then ship. The key phrase is production starts after proof approval. Not after the first email. Not after the word urgent appears in the subject line. After approval.
Proofing time depends heavily on buyer response speed. A supplier cannot print what has not been approved. If internal approval requires a founder, marketing manager, legal reviewer, retail buyer, and someone with strong opinions about teal, build that into the schedule.
Simple digital sticker jobs may move quickly after proof approval, sometimes in a few business days depending on capacity and specs. More realistic planning windows are 5 to 10 business days for straightforward runs and 10 to 18 business days for larger quantities, specialty materials, custom die cuts, multiple SKUs, roll labels, or added finishing. Timing depends on the supplier, season, artwork condition, and material availability.
Production time and shipping time are separate. Many buyers combine them mentally, then blame the printer when ground shipping behaves exactly like ground shipping. If production is seven business days and transit is four business days, that is not a seven-day project. It is an eleven-business-day project before proof delay, weather delay, address issues, receiving dock schedules, or holiday congestion.
Rush production may be possible, but tradeoffs follow. Rush orders can limit material choices, increase cost, reduce revision time, or force a simpler cut style. If color accuracy matters, rushing also leaves less room for drawdowns, printed samples, or internal review. For event handouts, influencer mailers, retail deliveries, subscription boxes, and product launches, a buffer of 5 to 7 extra business days is not paranoia. It is cheap insurance.
Common Ordering Mistakes That Make Stickers Look Cheap
The biggest mistake is uploading low-resolution images and expecting crisp print results. If the file is blurry on screen, it will not become luxury packaging on press. A 600-pixel-wide image might survive as a tiny web graphic, but it has no business becoming a 4-inch promotional sticker unless soft edges are part of the aesthetic.
Missing bleed is another classic failure. Without bleed, small cutting shifts can create uneven white edges. No safe zone causes chopped letters, cramped borders, and awkward design tension. Thin frames near the edge are especially risky because even a tiny cutting tolerance can make them look crooked.
Material mistakes are just as common. Paper can be perfectly fine for dry indoor packaging, envelope seals, bakery boxes, and short-term retail use. It is usually the wrong call for water, oil, refrigeration, outdoor handling, bathroom products, drinkware, or anything customers will touch repeatedly. Cheap material in the wrong environment is not a bargain. It is delayed waste.
Color surprises happen because screens glow and ink does not. RGB artwork can shift when converted for print, especially bright blues, greens, neons, and deep blacks. If brand color is critical, provide Pantone references or printed color standards and ask what level of matching is realistic. Digital sticker printing can be accurate, but not every fluorescent screen color can be reproduced with standard CMYK inks.
Clear stickers need special attention. Transparent material does not automatically make a design readable on every surface. White ink may be needed behind artwork so colors stay opaque on glass, dark packaging, amber bottles, or tinted plastic. Without it, the background surface becomes part of the design whether anyone planned for that or not.
Overcomplicated designs fail fast at small sizes. Fine lines, tiny disclaimers, delicate script fonts, busy photos, and detailed gradients can turn into sticker soup once reduced. Strong contrast, simpler shapes, and fewer words usually print better. A 2-inch sticker is not a brochure. It should not be asked to behave like one.
Quantity mistakes cut both ways. Ordering too few can wreck a campaign if reprints arrive late or cost more because they run separately. Ordering 10,000 before testing demand can leave a team with cartons of obsolete artwork. Splitting 12 designs into tiny runs also pushes unit cost up quickly because proofing and setup repeat. Group designs by shared size, material, and finish whenever possible.
Next Steps Before You Request a Sticker Quote
Good quoting starts with clean inputs. Before asking for price, gather the final artwork file, preferred size, quantity range, material preference, finish preference, cut style, use environment, deadline, and delivery location. If you do not know the material yet, describe the surface and conditions instead: glass jar, matte mailer, freezer pouch, candle tin, kraft box, outdoor cooler, product insert, retail display, or curved bottle.
- Artwork: vector file for logos or 300 DPI raster file for photos at final print size.
- Size: exact width and height, plus whether the shape is standard or custom die cut.
- Quantity: include a range, such as 500, 1,000, and 2,500, to compare unit cost.
- Material and finish: paper, vinyl, BOPP, clear, matte, gloss, soft-touch, metallic, or weatherproof.
- Use environment: dry indoor, refrigerated, oily, wet, outdoor, high-touch, or removable.
- Deadline: target in-hand date, not just the date production should begin.
For repeat orders, create a simple spec sheet. Include dimensions, material, adhesive, finish, color notes, roll or sheet preference, unwind direction if roll labels are machine-applied, packaging requirements, and approved artwork version. This saves time, reduces quoting errors, and keeps package branding consistent across reorders.
Test real-life conditions before scaling. Stick samples to the actual box, jar, pouch, mailer, bottle, insert card, or retail display. Check adhesion after 24 hours, then look at edge lift, readability, scuffing, color, and finish under normal handling. Curved surfaces deserve extra testing because adhesive stress builds near the edges.
Ask for samples if the material is new, the sticker will be used outdoors, the product goes into a freezer, retail placement matters, the launch is premium, the adhesive is unfamiliar, or the order volume is high. For a new design, market, or application, a small pilot run can cost more per piece, but it is cheaper than discovering 10,000 stickers do not fit the jar.
Before ordering custom image stickers, lock the specs, review the proof carefully, and match the material to how the sticker will actually be used. That is the unglamorous part. It is also the part that keeps the final print from looking cheap, peeling early, or wasting budget before the campaign reaches a customer.
FAQ
What file type is best for custom photo stickers?
Use vector files like AI, EPS, PDF, or SVG for logos, icons, and clean graphics because they scale without losing sharpness. For photo-based stickers, use a high-resolution PNG, TIFF, or JPEG at 300 DPI at the final print size. Avoid screenshots, social media downloads, and images copied from websites because they are usually compressed too heavily for clean print results.
Are custom image decals waterproof?
They can be waterproof or water-resistant if printed on the right film material, such as vinyl or BOPP, with a suitable laminate. Paper stickers are usually not the right choice for wet, oily, refrigerated, or outdoor environments. Tell the supplier where the sticker will be used so they can recommend the correct material and adhesive.
How much do personalized image stickers usually cost?
Cost depends on size, quantity, material, finish, cut shape, number of designs, and whether special adhesive or lamination is needed. Small runs usually have a higher unit cost because setup time is spread across fewer pieces. Bulk orders often reduce unit cost, but only if the specs are finalized before production starts.
How long does it take to produce custom picture stickers?
Production starts after quote approval, artwork review, and final proof approval, not when the first email is sent. Simple digital runs can be faster, while specialty finishes, large quantities, die cuts, and multiple designs add time. Build in extra days for proof revisions, shipping, event deadlines, and any sample testing.
Can I order custom image stickers in multiple designs?
Yes, but each design may affect pricing, setup, proofing time, and production planning. Sticker sheets can be efficient for multiple small designs, while separate die-cut stickers may work better for giveaways or packaging inserts. Group designs by the same size, material, and finish when possible to keep quoting cleaner and costs more controlled.

