Custom Neon Stickers: Design, Price, and Order Tips
Custom neon stickers are printed stickers designed to look bright, electric, and attention-grabbing through fluorescent inks, neon-style artwork, high-contrast color, reflective materials, holographic stock, or glow-in-the-dark effects if that option is specified. They are not tiny glowing signs.
That distinction affects cost and specs. A beverage label for a chilled bottle needs a different build than a laptop decal for an event table. A candle brand using bright seals on kraft boxes has different requirements than a cosmetics company labeling glossy jars. The right sticker has to stay readable, stick to the intended surface, survive handling, and fit the budget.
What Custom Neon Stickers Actually Are
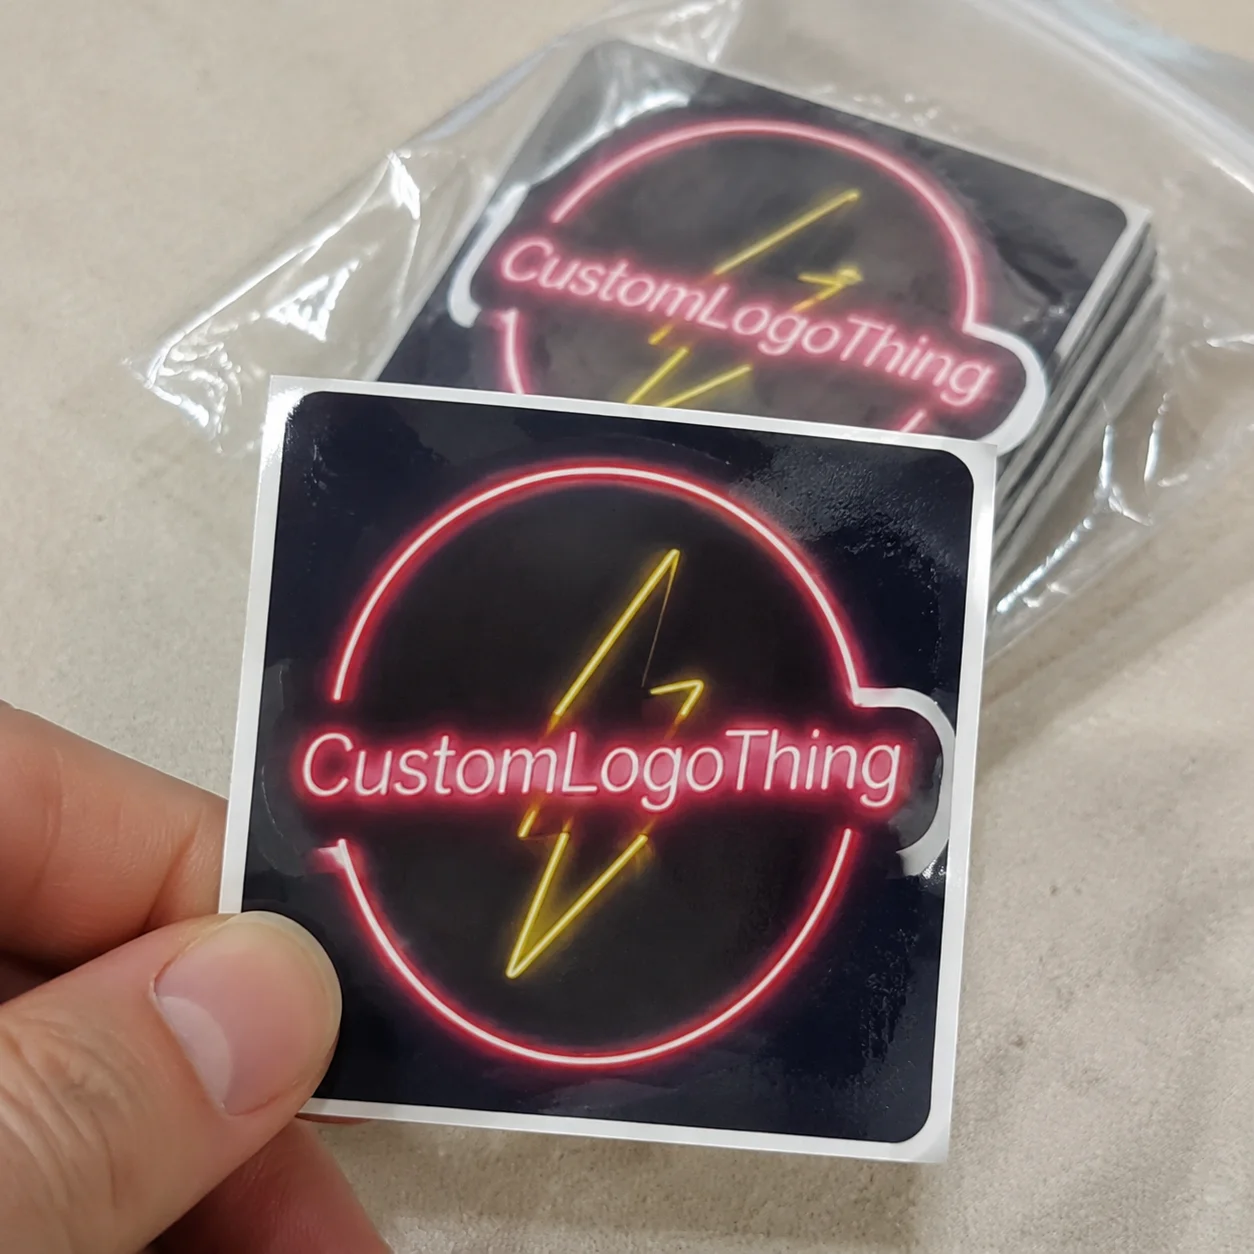
Custom neon stickers are printed labels or decals built to create a vivid visual effect. They do not usually emit light, plug in, or glow unless you choose phosphorescent glow-in-the-dark material or ink.
The neon look can come from several routes. True fluorescent ink uses pigments that reflect more visible light and can look very bright under the right lighting. Neon-inspired CMYK artwork uses standard process inks with gradients, shadows, dark backgrounds, and high contrast to suggest an illuminated look. Metallic or holographic stocks add shine and movement. Glow-in-the-dark materials absorb light and release it in low-light conditions, usually with a greenish or blue-green glow.
These options are often grouped together, which is how buyers approve a glowing screen mockup and receive a flat-looking printed sticker. RGB color on a monitor can look more intense than printed ink on vinyl. Specialty printing can narrow the gap, but it does not remove print limitations.
Common uses include logo stickers, product labels, warning labels, promotional decals, laptop stickers, event handouts, limited-edition packaging seals, and retail shelf callouts. For Custom Labels & Tags, bright sticker effects can highlight a flavor, sale message, limited run, QR code, or brand mark without redesigning the entire box, jar, pouch, or bag.
Practical rule: the goal is not just “bright.” The goal is bright, readable, durable, brand-consistent, and manufacturable at the quantity and price point that makes sense.
How Neon Effects Work in Sticker Printing
Neon appearance comes from a mix of ink, substrate, finish, contrast, and lighting. One variable rarely carries the whole job. Fluorescent pink on dull paper can look flat, while standard orange on gloss white vinyl with a black outline can look surprisingly bold.
Digital printing is common for short runs, fast artwork variation, and lower minimums. It works well for promotional stickers, sample batches, and multiple designs in one order. Flexographic printing and screen printing are better for larger runs or stronger specialty color control, especially when true fluorescent spot colors are involved. UV printing can produce crisp surface graphics with good durability on vinyl, polypropylene, and other synthetic stocks.
Fluorescent inks are strongest in colors like pink, orange, yellow, and green. They may not match a standard CMYK proof perfectly because they are often handled as spot colors. If fluorescent color is important, ask whether the supplier is printing a true spot fluorescent ink or simulating the look with process color.
Design technique matters as much as ink. Dark backgrounds, thick outlines, high-contrast borders, glow-style gradients, and simplified shapes can make a sticker feel brighter even when printed with standard inks. If the design is tiny, thin, and packed with microcopy, no ink set will save it.
Material choice changes the result quickly. White vinyl gives color a clean, opaque base. Clear vinyl creates a window-decal look but can weaken brightness unless white ink is printed behind key areas. Holographic stock adds flash but can fight readability, especially with small type. Paper is cheaper and works for indoor packaging, but it is less durable against moisture, abrasion, and heavy handling.
Finish is the final push. Gloss makes colors feel more saturated. Matte can look premium but often softens the punch. Laminate protects outdoor or high-touch stickers. Spot gloss or raised effects can highlight selected bright areas, but too many effects can make the design harder to read.
Key Specs That Decide Brightness, Durability, and Fit
Start with size and shape. Tiny neon artwork often fails because glow effects, thin type, and detailed outlines collapse when reduced. A 1-inch circle can carry a simple logo or icon. It cannot carry a full ingredient list, QR code, fake glow, tagline, website, and three social handles.
For most logo decals, 2 to 4 inches wide is practical. Product labels vary more: a 2 x 3 inch label may work for a small jar, while a 3 x 5 inch label may fit a pouch or bottle panel. Packaging seals often sit around 1.5 to 2.5 inches. The right size depends on the surface, viewing distance, and how much information must stay readable.
Artwork setup is not optional. Vector logos are preferred because they scale cleanly. Raster glow effects should usually be 300 dpi at final print size. Fonts should be outlined. Bleed is commonly 0.0625 to 0.125 inch, depending on the printer and cut method. Safe zones often need a similar margin inside the cut line so text and borders do not crowd the edge.
Pick one or two dominant bright colors, or three if the design is simple. If everything is neon, nothing stands out. Contrast does most of the work, especially on small stickers or retail labels viewed from a distance.
Adhesive should match the job. Permanent adhesive is common for packaging seals and product labels. Removable adhesive is better for event decals, short-term promotions, or surfaces where residue is a problem. Freezer-grade adhesive helps cold products, frozen food packaging, and chilled beverage labels. Stronger adhesive may be needed for textured mailers, curved containers, powder-coated surfaces, or low-energy plastics such as some polyethylene and polypropylene packaging.
Durability depends on use. Indoor retail packaging may only need coated paper or basic vinyl. Outdoor decals should use weather-resistant vinyl, UV-resistant ink, and protective laminate. Water resistance and waterproofing are not the same thing. A sticker that survives a damp cooler is not automatically built for six months on a car window.
Format matters too. Rolls are practical for labeling products by hand or machine. Sheets are good for grouped designs, retail packs, and small-batch fulfillment. Individual die-cut stickers work well for merch, giveaways, subscription boxes, and event handouts. If the stickers are for production labeling, rolls usually beat loose singles for speed.
| Sticker Format | Best Use | Typical Tradeoff |
|---|---|---|
| Roll labels | Product packaging, jars, bottles, pouches, fulfillment lines | Efficient for application, but setup may require orientation and core specs |
| Sticker sheets | Retail packs, multi-design promos, planner stickers, sample kits | Good presentation, but not ideal for fast product labeling |
| Individual die-cut stickers | Merch, event handouts, laptop decals, brand giveaways | Great perceived value, but higher handling and packing cost |
Cost, Pricing, MOQ, and Quote Factors
Sticker pricing is driven by quantity, size, material, ink setup, finish, cut style, proofing needs, and packaging format. The cheapest sticker is not the best value if it peels, fades, looks muddy, or arrives after your launch.
Small short runs often land around $0.40 to $2.00+ per sticker, depending on size, material, cut, and finish. Mid-size orders may drop into the $0.15 to $0.75 range. Larger roll orders can fall much lower per unit, especially for simple shapes and standard materials. Specialty fluorescent inks, holographic stock, custom die lines, premium laminate, and multiple SKUs push pricing up.
Minimum order quantity depends on the production method. Digital suppliers may accept 50, 100, or 250 pieces. Roll-label production may start around 500 to 1,000 pieces per design. Flexo or screen jobs often make more sense at higher volumes because setup costs are heavier. Larger quantities reduce unit price because setup, proofing, and production time get spread across more stickers.
Prepare quote inputs before asking for pricing. Send final size, shape, quantity, material preference, indoor or outdoor use, roll/sheet/individual format, number of designs, special effects, and delivery deadline. If the sticker goes on product packaging, include the application surface: glass jar, plastic bottle, kraft mailer, glossy box, freezer pouch, flexible film, or coated tin.
Hidden cost areas include rush production, specialty inks, multiple designs, custom die lines, premium laminate, split shipments, and art cleanup. Low-resolution logo files, missing fonts, or unclear cut paths can add time before production even starts.
Testing before scaling is smart. Order a smaller run or physical proof when color accuracy, adhesive performance, or retail presentation matters. If you plan to order 10,000 labels for branded packaging, proofing is cheaper than reprinting.
Production Steps and Timeline From Artwork to Delivery
The usual process is simple: submit artwork and specs, receive a quote, approve the dieline, review a digital or physical proof, move into production, complete finishing and cutting, then ship. Delays usually come from missing specs, slow proof approval, or artwork that is not production-ready.
Artwork review checks bleed, safe zones, resolution, cut lines, color setup, text size, and material compatibility. Send vector artwork when possible, include linked assets if requested, and confirm whether the file is built to final size.
Digital proofs are fast and useful. They confirm layout, size, cut path, copy placement, and basic color location. They do not always predict exact fluorescent intensity, holographic behavior, adhesive performance, or how a clear sticker looks on an amber bottle. For those variables, a physical proof is the safer choice.
Simple digital sticker orders may take about 3 to 7 business days after proof approval. Specialty materials, fluorescent inks, large quantities, or roll labels may take 7 to 15 business days or more. Add transit time, receiving time, and a buffer if your team needs to apply labels before shipping finished goods.
Lead time stretches when specs are incomplete, materials are out of stock, custom tooling is required, die cuts are complex, or multiple designs need batching. Rush shipping can help transit, but it does not replace production time for ink curing, coating, cutting, or roll finishing.
For launches, trade shows, subscription boxes, or retail deadlines, approve artwork at least two weeks before the stickers are needed. If the stickers support a larger packaging rollout, coordinate them with boxes, inserts, tissue, mailers, and other Custom Packaging Products so label color, box finish, and product presentation work together.
Common Mistakes That Make Bright Stickers Look Cheap
The first mistake is using thin white or light-colored text on a neon background. It may look fun on a backlit screen, then become unreadable when printed at two inches wide. For small labels, use heavier type, stronger outlines, or a dark text panel.
The second mistake is assuming screen color equals print color. RGB neon on a monitor can be far brighter than printed ink. Pantone references, realistic proofs, and specialty color discussions help prevent disappointment. If true fluorescent color matters, say that early and ask how it will be printed.
The third mistake is choosing clear material without considering the surface underneath. Clear stickers on amber bottles, kraft boxes, dark pouches, or colored tins can lose punch unless white ink is used behind key artwork. White ink backing adds cost, but it can be the difference between crisp and barely visible.
The fourth mistake is skipping bleed and safe zones. Bright borders and glow effects placed too close to the edge can look uneven after die cutting, even with normal manufacturing tolerance. A cut shift of 1/32 inch can be acceptable production variation, but it looks obvious when the border is too thin.
The fifth mistake is picking the wrong adhesive. A sticker that curls off a cold bottle or textured mailer has failed, even if the print looks good. If the label will face condensation, refrigeration, oils, outdoor exposure, or repeated handling, define that before quoting.
The sixth mistake is overloading the layout. Tiny details, QR codes, microcopy, fake glows, shadows, outlines, and five bright colors do not make a sticker more premium. They make it harder to read. For retail packaging, the sticker should pass a shelf test from 3 to 6 feet away: brand, flavor, offer, or action should be clear.
Next Steps Before You Order Neon-Style Stickers
Choose the use case first. Is the sticker a product label, logo decal, packaging seal, warning label, event giveaway, or shelf callout? The job determines the size, shape, material, finish, adhesive, and deadline.
Create two or three artwork versions before ordering. Build one bold logo-first version, one product-label version with required details, and one promotional version for handouts or merch. Print them at actual size on a basic office printer. It will not show color accurately, but it will reveal crowded type, weak hierarchy, and unreadable QR codes.
Request the right proof level. A digital proof is usually fine for standard vinyl stickers with simple artwork. A physical proof is worth it for specialty fluorescent inks, holographic stock, clear material, unusual adhesives, or large production runs. For paper-based stickers or packaging components, responsible sourcing may matter too; buyers can review standards from the Forest Stewardship Council if FSC-certified material is part of the brand requirement.
Test placement before committing. Apply sample stickers to the actual jar, pouch, mailer, box, bottle, or laptop surface. Curves, texture, moisture, oil, temperature, and handling change performance. For shipping-heavy product packaging, broader package testing standards from ISTA can help teams consider transit stress, vibration, compression, and handling.
Send the manufacturer final artwork, target size, order quantity, application surface, indoor or outdoor use, preferred finish, delivery location, and hard deadline. If you need machine-applied roll labels, include unwind direction, roll core size, outside diameter limits, and gap requirements.
Custom neon stickers work best when the design, material, adhesive, proofing, and timeline are planned together. Bright is easy to request. Bright, readable, durable, and on budget takes better specs.
FAQ
Are custom neon stickers actually glow-in-the-dark?
Usually no. Most neon stickers are bright fluorescent or neon-style printed stickers, not glow-in-the-dark products. Glow-in-the-dark stickers require phosphorescent material or ink and usually need light exposure before they glow. If you want both bright daytime color and nighttime glow, ask for that specifically because it changes material, pricing, and proofing.
What material is best for neon logo stickers?
White vinyl is usually the safest choice for bright, clean color and general durability. Clear vinyl works well for window-style decals but may need white ink backing to keep colors from looking weak. Holographic or metallic stock adds flash, but it can reduce readability if the artwork is already busy.
How much do custom fluorescent stickers cost?
Small runs can often cost around $0.40 to $2.00+ per sticker depending on size, cut, material, and finish. Larger orders usually reduce unit cost because setup and production time are spread across more pieces. Specialty fluorescent inks, laminates, rush orders, and multiple designs can increase the quote.
How long does it take to produce neon-style stickers?
Simple digital orders may take about 3 to 7 business days after proof approval. Specialty inks, physical proofs, Custom Die Cuts, or larger roll-label orders may take 7 to 15 business days or longer. The biggest avoidable delay is slow proof approval or incomplete artwork files.
Can custom neon decals be used outdoors?
Yes, if they are made with outdoor-rated vinyl, durable ink, and protective laminate. For sun, rain, or heavy handling, ask for UV resistance and water resistance instead of assuming every vinyl sticker can survive outside. Paper neon stickers are better for indoor packaging, short-term promotions, or low-contact use.


