A custom pvc patch maker is not printing ink onto cloth. It is building a molded emblem from liquid PVC, curing each color layer in sequence, then trimming the piece into a finished patch. That construction is the reason these patches stay readable after abrasion, rain, dirt, and repeated handling. For bags, caps, uniforms, and hard-use gear, the real question is not whether the supplier can make one. It is whether they can make it cleanly, consistently, and at a cost that still works for your program.
Buyers usually run into the same traps. The lowest quote often hides a weak proof, a vague backing choice, or a tooling setup that only works if you accept thin borders and blurry text. A better approach is to lock the spec first and let the quote follow the spec, not the other way around.
What a custom pvc patch maker is actually making
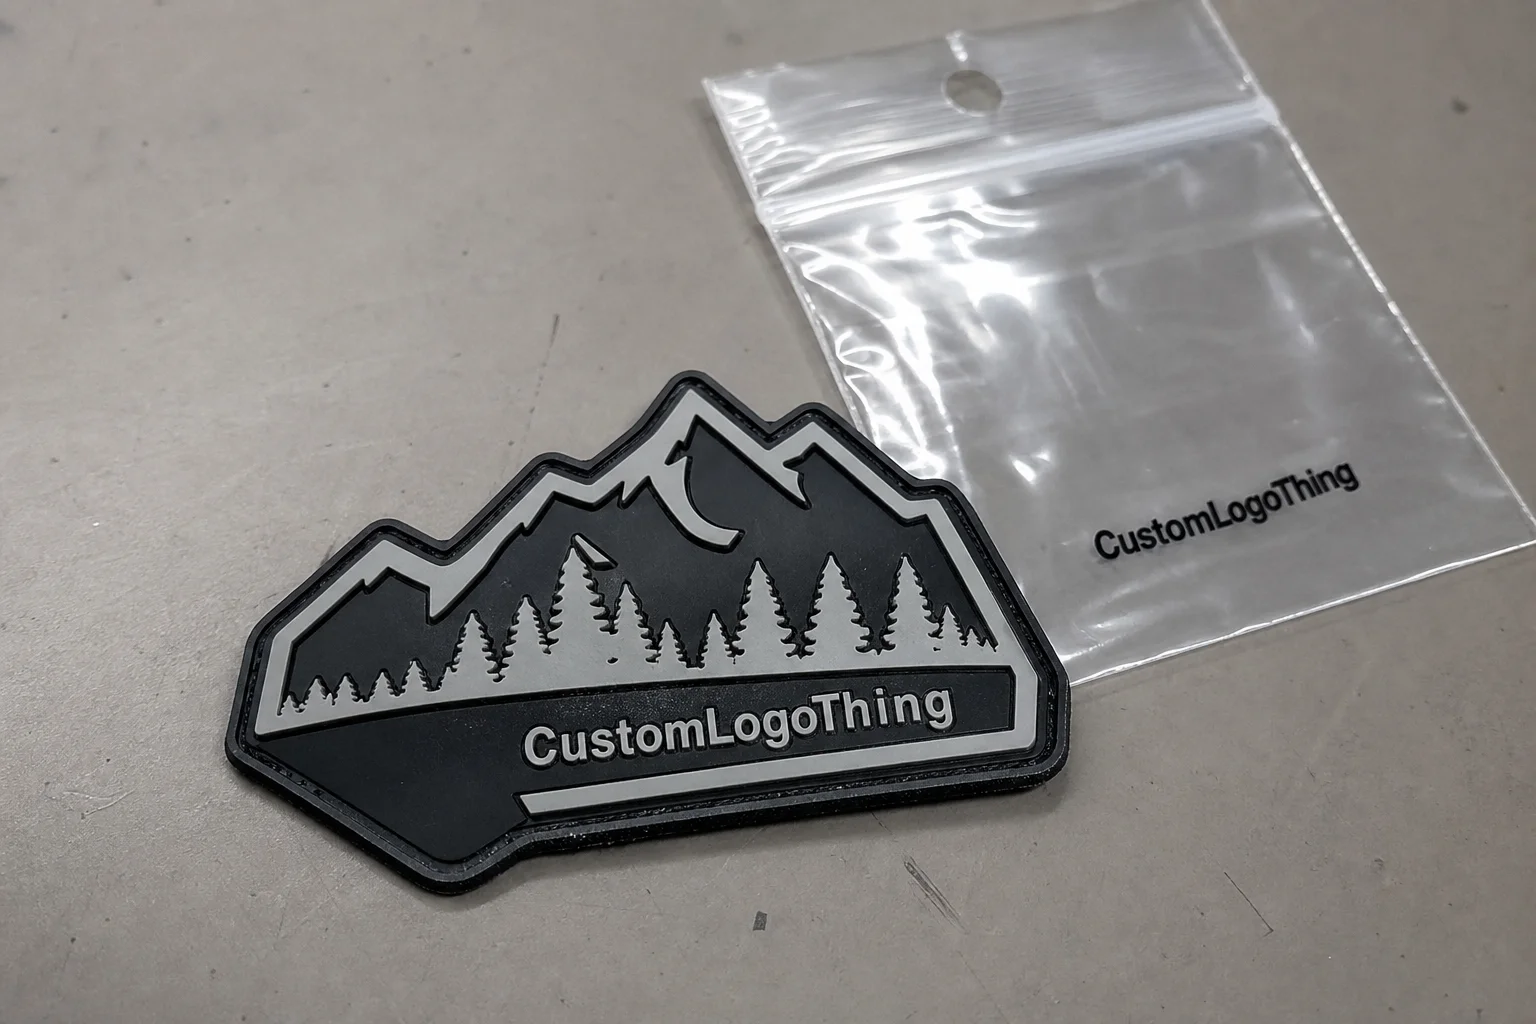
PVC patches are molded goods, not printed labels. The factory builds the patch in cavities, fills each color zone with soft PVC compound, cures the material, and trims the final shape. Raised areas, recessed lines, and border walls are all defined by the mold. That is why the finished piece can carry sharp edges and survive rough use far better than many embroidered or screen-printed options.
That matters on anything that gets scraped, washed, or exposed to weather. Backpack straps, luggage tags, laptop sleeves, tactical uniforms, workwear, and outdoor accessories all punish decoration differently. Embroidery has a stitched feel that many brands still want, but it can fray, trap dirt, and lose clarity when the art gets small. PVC gives you stronger contrast and a wipe-clean surface. For utility use, that usually wins. For heritage or fashion-led branding, embroidery may still be the better fit.
From a buyer’s perspective, the patch is only one part of the decision. Size, thickness, attachment method, color count, and artwork complexity decide whether the piece feels intentional or awkward. If the patch sits beside other branded packaging elements, it should match the tone of the box, insert card, or hang tag instead of looking like a separate project pasted on top.
Practical rule: simplify the art before you ask for a quote. If the logo depends on hairline details or tiny reversed text, the mold will not rescue it.
If the patch is part of a broader packaging system, the same discipline applies to the rest of the kit. The patch, insert, and carton should tell the same story. For that side of the job, our Custom Packaging Products page is a useful starting point when you need to compare formats without guessing.
How the production process works from artwork to mold
The workflow usually starts with artwork cleanup. A serious vendor will convert rough files into production-ready vector art, separate the colors, and mark the raised and recessed zones that the mold has to carry. The cleaner the source file, the less time gets burned on avoidable fixes. AI, EPS, and vector PDF files are ideal. A low-resolution JPG can sometimes be used, but only after redraw work, and redraw work is where delay and misunderstanding often start.
After the art is cleaned up, the maker creates the mold or tooling. This is the structural step. Each color occupies its own zone, and the depth of the artwork determines how the patch reads in real life. A flat 2D patch is usually better for logos that need crisp separation and a simple silhouette. A 3D patch adds depth, shadow, and surface variation, which can make a bold mark feel more premium. It can also become messy if the art is overcrowded. More depth is not automatically better. Readability still wins.
The proof stage matters more than many buyers think. This is the point where proportion issues, missing elements, awkward line thickness, and color errors can still be corrected. Once the order moves into production, every mistake gets multiplied by quantity. Proof approval is not paperwork. It is the control point.
One useful habit is to review the proof in the context of the actual product. A logo that looks balanced on a white proof sheet may vanish on a black pack panel. A patch that fits a hoodie chest might feel oversized on a cap. The maker needs the target surface, not just the logo file, if scale is going to be right.
Good suppliers can usually fix modest issues: closed shapes, uneven stroke widths, minor proportion corrections, and simplification of adjacent colors. What they cannot fix cleanly is artwork that depends on gradients, photo detail, feathered shadows, or tiny copy set in reverse. PVC is practical. It is not a substitute for print.
Material specs and finish details that affect quality
Most buyers focus on design and ignore the compound itself. That is a mistake. PVC patches are not all made from the same material feel or finish. Softer compounds flex better on curved surfaces like caps and sleeves. Harder compounds tend to hold edges more sharply and feel a little more structured. If a supplier will not give a formal durometer value, ask at least how the patch behaves on soft goods versus flat panels. A patch that feels right on a mockup can still sit badly on a curved seam.
Thickness is another decision that changes the result more than people expect. Thin patches are lighter and easier to place on apparel, but they can lose presence on a large bag panel. Thicker patches read more like a badge, yet they can feel bulky on hats or sleeves. For many applications, the useful range sits roughly between 2 mm and 4 mm, with deeper builds reserved for larger logo marks. That is not a rule, just a common production range that keeps the patch from becoming clumsy.
Edge treatment is worth checking too. A clean border hides trim variation and gives the patch a finished outline. Rounded corners usually wear better than sharp ones on soft goods. Heavy borders can make a piece look overbuilt, especially on small dimensions. A supplier that shows you the edge profile in the proof is usually paying attention to the details that separate a polished result from an ordinary one.
Color matching deserves the same scrutiny. PVC can be mixed to approximate Pantone references, but exact visual matching depends on the compound, lighting, and surface finish. A dark red in molded PVC may not read the same as the same color in print or embroidery. If the brand is strict about color, ask for a physical sample or production reference, not just a digital mockup. Screens lie. Material does not.
One more point that often gets skipped: texture. Some molds leave a smoother face, while others carry a slight matte or satin effect depending on the tooling and compound. That changes how light hits the patch and how visible small details remain. A matte finish can hide minor handling marks. A glossy finish can make colors pop, but it also shows scuffs sooner. There is no universal winner. The right finish depends on use, not preference alone.
Custom PVC patch pricing, MOQ, and unit cost drivers
Price depends on more than quantity. Size, number of colors, 2D versus 3D depth, backing type, border shape, mold complexity, and packaging all move the number. A simple 2-inch patch with a clean outline and hook-and-loop backing will not price the same way as a 4-inch 3D badge with multiple recessed layers, custom packaging, and individual sleeves.
Typical minimum order quantities often run from 50 to 100 pieces for standard shapes, though a custom pvc patch maker may set a higher floor when the design is complex or the tooling is expensive. Smaller orders absorb setup cost badly, which is why the per-piece price rises fast at the low end. Larger runs spread the mold cost out, but only if the design stays stable. Change the shape halfway through and the economics get ugly fast.
Buyers usually see broad pricing bands like these:
| Order profile | Typical cost pattern | Best fit | Main tradeoff |
|---|---|---|---|
| 50-100 pcs | Highest unit price, often with a separate mold fee | Samples, small launches, internal use | Good for testing, expensive per unit |
| 250-500 pcs | Better spread of setup cost, moderate unit price | Merch drops, team gear, limited retail runs | Still sensitive to color count and 3D detail |
| 1,000+ pcs | Lowest unit cost, stronger setup efficiency | Repeat programs, multi-SKU branding, resale | More cash tied up upfront |
As a rough reference, simple patches at low quantity may land around $1.50 to $3.50 per piece, plus tooling or sample fees. Mid-volume runs often move closer to $0.80 to $1.50 each. Larger repeat orders can go lower, but only if the size, color count, and finish stay under control. Add retail sleeves, custom printed cards, or branded cartons and the landed cost rises fast.
Mold fees are usually handled one of three ways: paid up front, credited into the first order, or folded into the unit price once the quantity is high enough. Sample charges may be waived, but do not assume that. Ask directly. A clean quote separates tooling, sample cost, unit price, and shipping instead of hiding everything inside one number that looks attractive until the invoice lands.
If packaging is part of the order, ask for cartons that can survive the shipping lane. ISTA testing standards are a useful benchmark for that discussion: ISTA. For paper-based cartons or inserts, FSC-certified stock can support a more credible packaging story: FSC.
Choosing size, backing, and attachment for the actual use case
Size is not just a visual choice. Smaller patches demand simpler art because there is less room for each line to breathe. If you crowd too much into a 1.5-inch shape, the copy turns into noise. A large patch with only a tiny logo can feel empty unless the layout is intentional. Scale has to match the product surface.
Backing should follow use. Hook-and-loop is the default for removable patches on uniforms, tactical gear, and modular bags. Sew-on is better for permanent attachment and usually holds up well under washing. Adhesive is fine for light-duty or temporary placement, but it is generally the weakest option under heat, friction, and repeated laundering. Pin backings fit fashion and collector pieces better than rugged gear.
Attachment compatibility matters on substrate as much as on design. A patch that performs on a backpack panel may behave badly on coated fabric, waterproof materials, or surfaces that fold constantly. If the supplier has not seen your substrate before, ask for a compatibility opinion before you approve the backing. That question is cheap. A failed batch is not.
Edge shape and placement affect how premium the final piece feels. Rounded corners tend to wear more gracefully than sharp corners on soft goods. A border can frame the art well, but too much border makes a patch look heavy. The piece should sit naturally on the product. If it fights the surface, the design is wrong even if the mockup looked fine.
Color contrast is a practical issue, not a theory exercise. Dark bags need lighter art or a stronger border. Busy surfaces need cleaner silhouettes. If your brand already uses bold packaging graphics, the patch should sit in the same visual family instead of competing for attention. That sort of consistency reads as quality even when the buyer cannot explain why.
Here is the blunt version: if the patch will be removed often, do not choose sew-on. If it will be washed frequently, do not choose weak adhesive. If it will sit on a coated bag or technical fabric, test it on the real surface before you approve the run. The same logic applies to packaging inserts and retail kits. A good-looking proof is not the same as a usable product.
Process, timeline, and lead time after you order
A realistic timeline from approval to delivery usually includes artwork cleanup, digital proof, tooling or sample production, mass production, trimming, inspection, packing, and shipping. Straightforward orders often finish in 2 to 4 weeks after proof approval, then freight adds whatever the lane requires. International shipping is usually the quiet bottleneck. It is not glamorous, just slow.
Most delays come from four places: slow art approval, too many revision loops, peak season factory load, or freight problems outside the supplier’s control. If a vendor offers rush service, ask what gets compressed. Sometimes the rush only speeds production and not proofing or shipping. Sometimes it means fewer revision rounds. That may be acceptable, but only if the art is already stable and the deadline is real.
A clean order shortens the schedule. Send final dimensions, quantity, backing choice, target use, and any Pantone references if color accuracy matters. Include a photo of the product the patch will live on. That one image helps the maker judge scale, contrast, and placement in a way a flat file never can.
If the patch is part of a branded packaging program, line up the patch proof, box proof, and insert proof together. Separate approvals create separate mistakes.
For merch kits or sales sets, the same timing logic applies to product packaging. Keep the brief, dimensions, and artwork notes in one place so the patch and packaging do not drift in different directions.
Common mistakes that make a PVC patch look cheap
The first mistake is too much text. If copy is barely readable on your screen, it will usually look worse in molded form. The second is chasing gradients or photographic detail. PVC is not a print process, so soft shadows and blended tones tend to collapse into visual clutter. Third, too many colors crowd the design and add cost without improving the result.
Trim quality matters more than buyers expect. Uneven edges, inconsistent border thickness, and poor proportions all read as low quality immediately. People may not know what is wrong, but they notice the piece feels off. Thickness can do the same thing. A patch that is too bulky for a cap crown or a thin pocket panel can look heavy instead of premium.
Substrate compatibility is another failure point. A patch that behaves fine on a backpack may fail on a coated surface or on a garment that flexes constantly. For workwear, outdoor gear, and retail samples, test the attachment in the real environment, not on a desk. That sounds obvious. It still gets skipped.
The cheapest quote can also create false confidence. If one supplier leaves out the mold fee, another leaves out shipping, and a third quotes a smaller size than everyone else, the comparison is useless. A low number means nothing if it is built on missing information. That is confusion with a price tag.
How to request quotes and compare vendors without guessing
Send every supplier the same brief. Include final dimensions, exact shape, quantity, backing type, target use, deadline, packaging needs, and artwork file format. If you want a realistic quote from a custom pvc patch maker, do not make them guess at half the job. Guessing produces mismatched numbers and a lot of unnecessary email traffic.
Ask for a digital proof, a sample photo or production reference from a similar order, and a written breakdown of mold fee, unit cost, sample charge, and shipping. If the supplier will not separate those items, the quote is hard to compare. Also ask whether the mold fee is refundable or credited against the first run. That one question often changes the real price more than the headline number does.
Compare vendors on three practical signals: how clearly they explain tradeoffs, how fast they answer, and how much they understand the actual use case. A supplier that tells you why a thinner border may fail on a dark bag is usually safer than one that agrees to everything. Polite agreement is cheap. Judgment is what you are buying.
If the order includes retail presentation, keep packaging in the same conversation. The patch, insert, and box should all sit in the same visual lane, and the vendor should know whether the patch is going into product packaging, merch packaging, or a bulk shipment. If you need a place to start on the packaging side, our Custom Packaging Products page gives you a clean reference point.
The best quote is not the lowest one. It is the one that shows a clear path from proof to production without avoidable surprises. If you shortlist three suppliers, send one clean brief, and ask the same questions every time, the right custom pvc patch maker usually becomes obvious quickly.
FAQs
How do I choose a custom PVC patch maker for bags and gear?
Look for molded samples or clear product photos, not only polished mockups. Ask how they handle small text, layered art, and backing compatibility on coated bags or outdoor gear. A good vendor will separate mold fee, sample timing, and landed cost so you can compare quotes without guesswork.
What is the usual MOQ for custom PVC patches?
Minimums often run from 50 to 100 pieces, but the exact number depends on size, mold complexity, and supplier policy. Simple shapes and repeat orders can go lower; custom shapes and multi-color 3D builds usually need a higher MOQ. Compare total run cost, not just unit price, because a low MOQ can hide a heavy setup charge.
How long does custom PVC patch production usually take?
Straightforward orders often take 2 to 4 weeks after proof approval, plus shipping time. Delays usually come from artwork revisions, peak season load, or freight disruptions. Rush orders exist, but they usually cost more and may limit revision rounds, so use them only when the deadline is real.
Are PVC patches better than embroidered patches?
PVC works better when you need waterproof, wipe-clean, high-durability branding. Embroidery is softer and more traditional; PVC is sharper for outdoor, tactical, and utility use. The better choice depends on the environment and how the patch will be handled, not only on appearance.
What files should I send to a custom PVC patch maker?
Send vector artwork if possible, plus size, quantity, backing, and any Pantone or color references. Include a photo of where the patch will live on the product so the maker can recommend scale and attachment. If the art is not final, ask for cleanup before mold approval so you do not pay to fix avoidable mistakes.
If you want the shortest path to a clean order, keep the brief tight, the art readable, and the spec sheet consistent. That is how you get a custom pvc patch maker to deliver something durable, sharp, and worth putting on your product or package.