Custom sleeve patches custom logo work can do something a front chest logo often cannot: add identity without taking over the garment. The sleeve sits in a high-movement, high-visibility zone, so even a small patch catches attention as the wearer moves. That matters for uniforms, outerwear, streetwear, team apparel, and branded merchandise, where the goal is usually recognition rather than loudness.
Used well, a sleeve patch makes a garment feel more deliberate. Used poorly, it looks like an afterthought. The difference is rarely the artwork alone. It usually comes down to patch construction, backing choice, garment fabric, placement, and how much detail the logo asks the patch to carry.
That is why buyers comparing custom sleeve patches custom logo options should look past the mockup and ask how the patch will behave after sewing, heat pressing, or repeated washing. A patch that looks clean in a digital proof may still sit awkwardly on a stretchy knit, curl at the edges on a lightweight tee, or lose clarity if the logo is too intricate for the construction method.
Why sleeve patches can change a garment’s whole readability
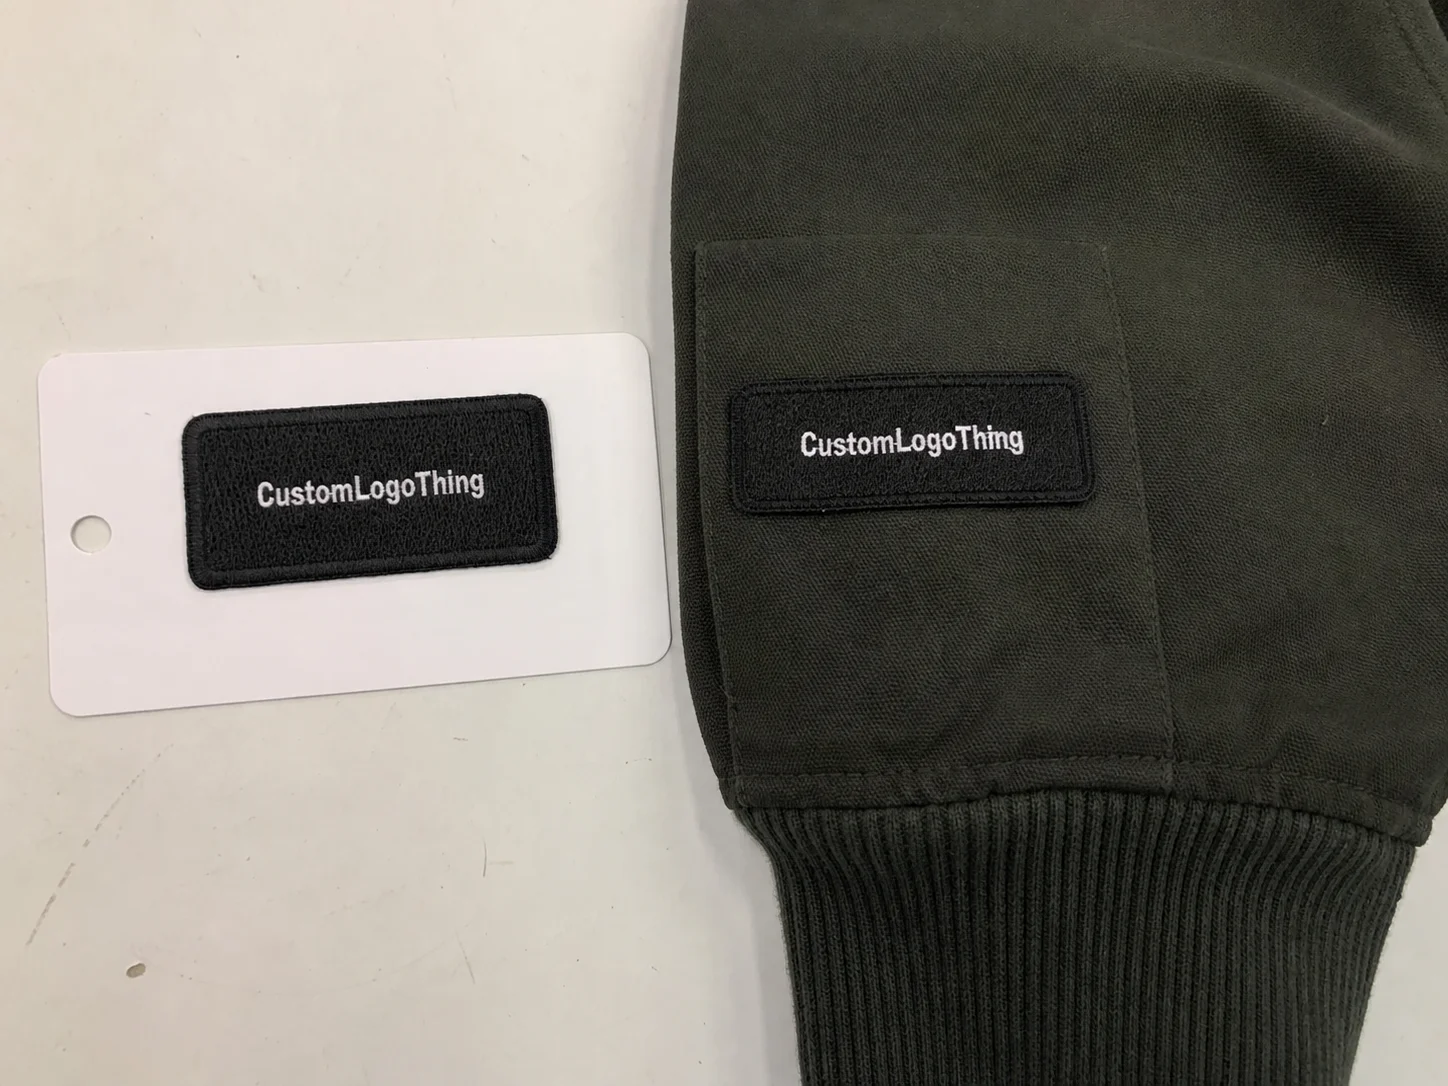
A sleeve patch is usually placed on the upper sleeve, mid-sleeve, or near the cuff, depending on the garment and the branding goal. It can be embroidered, woven, PVC, leather, or printed. In each case, the patch acts like a secondary identifier, supporting the primary logo rather than competing with it.
That supporting role is one reason sleeve branding keeps showing up in workwear and retail discussions. Buyers want the brand to be visible, but not overbuilt. They want the garment to feel finished, not crowded. A sleeve patch does that well because it creates a controlled focal point at arm level, where the eye naturally catches movement.
There is also a practical advantage. On garments with a busy chest area, a sleeve patch avoids visual congestion. It can preserve room for a main graphic, employee name, number, or product label. For brands that care about a clean hierarchy, the sleeve is often the more disciplined choice.
Different categories use sleeve patches for different reasons:
- Uniforms use them for easy identification and a more professional finish.
- Streetwear and retail apparel use them for texture, layering, and a more premium feel.
- Team apparel uses them for consistency across sizes and garments.
- Outdoor and workwear brands use them because a sleeve patch can survive hard use if the construction is right.
The placement choice matters as much as the patch style. A patch that looks balanced on a size medium can read too large on a small and too small on an XXL if the sizing was never checked against the full garment range. Sleeve width, seam placement, cuff shape, and stretch all affect how the patch sits once it is attached.
A sleeve patch should feel integrated with the garment, not pasted onto it to fill space.
That sounds simple, but it is where many orders go wrong. Buyers often start with the logo and only later ask whether the patch style can actually hold that level of detail. The better approach is to match the logo to the patch method before production begins.
How custom sleeve patch production actually works
The production process is fairly direct, but each stage affects the next one. It begins with artwork review. A supplier checks line thickness, text size, number of colors, border complexity, and shape. That review is not bureaucratic busywork; it is the step that tells you whether the design can be built cleanly at the requested size.
From there, the artwork is prepared for the chosen method. Embroidered patches need digitizing so the stitch path is mapped correctly. Woven patches require a tight thread structure to preserve detail. PVC patches usually need mold tooling. Leather patches may be debossed, laser-etched, or paired with printed detail. Printed patches rely on image quality and ink stability.
For custom sleeve patches custom logo orders, the proof stage is where problems are usually caught before they become expensive. A proper proof should show:
- Patch size and dimensions
- Shape and border style
- Thread, print, or molded color references
- Backing type
- Attachment method if the supplier is applying the patches
- Any special notes about placement or garment compatibility
If a sample is needed, it is usually because the logo is fine-detailed, the shape is unusual, or the garment fabric needs a real test. That extra step can save money later. A sleeve patch that behaves perfectly on paper may still shift, curl, or feel too stiff once it is attached to the actual garment.
Patch type determines the final behavior:
- Embroidered patches give a raised, textured look with strong visual presence.
- Woven patches use finer threads and can hold smaller lettering and sharper lines.
- PVC patches are molded, durable, and easy to read in simple shapes.
- Leather patches create a more restrained, premium finish.
- Printed patches handle gradients, fine color shifts, and artwork that would be too detailed for embroidery.
Attachment method is a separate decision, and it should be matched to the garment rather than chosen by habit. Sew-on remains the most dependable for long-term wear. Heat-applied or iron-on backings are faster, but they depend on fabric compatibility and correct press temperature. Velcro is useful for removable patches, especially in tactical or utility applications. Adhesive backings are generally temporary or used during positioning.
Fabric type changes the recommendation. Heavy canvas and denim can tolerate more structure. Fleece usually behaves differently from a lightweight jersey. Stretch fabrics need more caution because a stiff patch can make the sleeve hang oddly or restrict movement. Performance fabrics can also be sensitive to heat, so heat-activated backings need careful testing.
The cleanest workflow is simple: proof, sample if needed, correction if needed, final run, finishing, inspection, and packing. Skipping review can feel faster, but it often creates rework if the patch is the wrong size, too stiff, or not aligned with the garment’s structure.
Design, durability, and cost: the factors that matter most
If you are comparing custom sleeve patches custom logo options, the biggest pricing drivers are usually size, quantity, material, and complexity. A 3-inch woven patch is not priced the same way as a 4.5-inch PVC patch. A run of 500 pieces does not price like 5,000 pieces because setup costs are distributed differently.
Artwork complexity can change both the cost and the final clarity. Thin outlines, tiny letters, layered shapes, and gradients often push the design toward woven or printed construction. A bold logo with clean fill areas may work better in embroidery or PVC. Stitch count, border style, and line thickness all affect production time and visual sharpness.
Material choice influences how the patch feels as much as how it looks:
- Embroidered patches give texture and a classic branded feel.
- Woven patches support fine detail and smaller text.
- PVC handles moisture, abrasion, and outdoor use well.
- Leather creates a premium, understated look with less visual noise.
Durability is not only about the patch face. Edge finish, thread density, and backing all matter. A merrowed border is common on embroidered patches and usually holds up well on heavier garments. Heat-cut or laser-cut edges can create a cleaner modern profile, especially on woven or printed styles, but the edge has to be stable enough to avoid fraying or lifting.
Backing choice can be the hidden failure point. A heat seal may save labor, but if the garment is delicate or the wearer launders it aggressively, the bond can weaken. Sew-on takes longer, but for uniforms and workwear it is often the safer long-term option. Buyers sometimes focus on unit price and miss the real cost of replacement patches, damaged garments, or labor spent fixing failures later.
| Patch style | Best for | Typical strengths | Common tradeoff |
|---|---|---|---|
| Embroidered | Uniforms, outerwear, classic branding | Texture, strong presence | Less ideal for tiny text |
| Woven | Retail apparel, detailed logos | Fine detail, crisp edges | Less raised texture |
| PVC | Outdoor gear, workwear, performance use | Water resistance, bold readability | More modern, less textile-like |
| Leather | Premium apparel, hats, jackets | Upscale finish, subtle branding | Limited color and detail complexity |
There is also a direct relationship between complexity and lead time. A simple woven sleeve patch may move quickly. A custom-shaped PVC patch with special tooling, multiple approvals, and precise color matching will usually move more slowly. The more variables in the build, the more likely it is that the job needs extra review.
Pricing, MOQ, and quote basics for custom sleeve patches
Most buyers want a clear number, but patch pricing is built from several separate costs. Size, quantity, material, number of colors, border style, backing, and finishing all matter. That is why quotes should be compared line by line instead of by the lowest headline unit price.
For custom sleeve patches custom logo orders, minimum order quantity, or MOQ, usually exists because setup work happens before the first finished patch is produced. Digitizing, mold creation, tool preparation, and machine setup all carry fixed costs. With a very small order, those costs are spread over fewer units, so the unit price rises.
As a budgeting reference, simple woven or embroidered patches at scale may fall around the lower end of the market, while specialty PVC, leather, or highly customized shapes cost more. In practice, many buyers see simple pieces priced in the roughly $0.80 to $2.50 range at higher quantities, while more complex builds move beyond that depending on size and finishing. Those figures are only a starting point. A serious quote should be tied to actual artwork, dimensions, and use case.
Here is a cleaner way to compare offers:
- Confirm whether setup or digitizing is included.
- Ask whether sample costs are separate.
- Check if shipping is built in or added later.
- Confirm whether the supplier is applying the patches or only supplying them.
- Ask how inspection and packing are handled.
Some buyers compare patches alongside broader branding and packaging decisions, especially for retail programs or uniform kits. That makes sense. A sleeve patch is part of the visual system, just like labels, hang tags, or Custom Packaging Products that reinforce the same brand message. A mismatched patch can make even a well-made garment feel inconsistent.
If the decision is between a premium feel and a tighter budget, work backward from the finished use. What does the garment need to communicate on the shelf, in the field, or at an event? Once that is clear, the right material and backing tend to become easier to choose.
Timeline, proofing, and turnaround
A standard patch order usually moves through artwork review, proofing, approval, production, finishing, quality checks, and shipping. If the artwork is clean and the patch style is straightforward, that process can move quickly. If revisions are needed or the patch has special construction, the timeline stretches.
For many sleeve patch projects, a realistic production window lands around 12 to 15 business days after proof approval. That can shift with quantity, material, and current production load. Rush service may be available, but it works best when the artwork is final and the patch style is simple. If the design still needs adjustment, rush scheduling becomes riskier.
Several things commonly slow production:
- Artwork revisions after the first proof
- Color matching to brand standards
- Special backing or attachment requests
- Custom shapes or complex borders
- Delays in sample approval
That is why it helps to confirm all details in writing before production starts. If a patch needs to arrive before garment decoration, retail packing, or a launch date, build in a cushion. Uniform orders and seasonal merchandise tend to expose every delay in the chain.
For buyers managing other branded materials at the same time, the patch schedule should be coordinated with the rest of the rollout. Garments may be ready before labels, or packaging may be ready before patches. That mismatch can slow fulfillment even when every individual component is moving normally.
One practical rule holds up well: order earlier than you think you need to. Patch production is manageable, but it still depends on approvals. Delayed approval is one of the most common reasons a job misses its target window.
How to order the right patch for the right garment
Start with the use case. A patch for retail fashion is not the same as a patch for employee uniforms, and neither is identical to a patch for team gear or promotional apparel. The job tells you how much durability, texture, and structure the patch needs.
Then prepare the cleanest artwork file you have. Vector formats such as AI, EPS, or PDF are ideal because they keep edges sharp and scale without quality loss. If you only have a raster image, a high-resolution version may still work, but it may need cleanup if the text is small or the lines are rough.
Next, set the patch size based on actual garment placement. Sleeve patches should fit the sleeve width and the full size range, not just the sample size. A patch that looks balanced on one garment can look oversized or undersized once it is applied across small and extra-large garments.
Choose the construction that fits both the design and the brand position:
- Pick embroidered for texture and strong, readable branding.
- Pick woven for fine detail and sharper small text.
- Pick PVC for water resistance and a modern finish.
- Pick leather for a restrained, premium look.
Request a proof or sample and inspect it closely. Look at edge quality, backing strength, color accuracy, and how the patch will sit on the garment. If the supplier can show placement on the actual sleeve area, that is even better because it catches proportion issues before production.
Finally, approve the order only after confirming quantity, delivery date, packaging needs, and application instructions. If the patches will be sewn on, heat pressed, or staged for later attachment, the production team needs that information early. A missing instruction can create avoidable rework.
For buyers coordinating sleeve patches with broader brand materials, it helps to align the patch shape and color behavior with the rest of the product system. A sleeve patch that echoes the logo treatment used on labels or custom printed boxes tends to make the whole line feel more coherent.
Mistakes that cause problems in fit, finish, and consistency
The most common mistake is asking too much detail from the patch method. Fine text, thin outlines, and tiny icons can look crisp on screen and messy once stitched, woven, or molded. When that happens, the patch loses readability and the garment looks less polished than intended.
Another frequent issue is choosing the wrong backing for the fabric. Heat-applied options can work well on many garments, but they are not right for every material. Delicate fabrics, high-stretch sleeves, and surfaces sensitive to heat usually need more caution. Sew-on takes longer, but it remains the most reliable option in many categories.
Washing requirements are often underestimated. Workwear and uniforms may be exposed to frequent laundering, tumble drying, and abrasion. If the patch is not built for that use, the adhesive can weaken, the edges can lift, or the surface can begin to distort. A patch that fails after a few washes is not a branding asset anymore; it is a maintenance problem.
Placement errors are equally common. A sleeve patch can look too high, too low, or too large if the actual garment size range was never checked. Mockups are useful, but they are not enough. Testing on the real garment is the safer move, especially when the item will be produced in multiple sizes.
Color inconsistency also deserves attention. The patch color should coordinate with the rest of the product line, especially if the brand uses a defined palette across apparel, labels, and packaging. Small differences may not show in a digital render, but they become obvious when the pieces are placed side by side.
Practical buyer tips for a better result
Ask for a recommendation based on wear and wash, not only appearance. That question usually separates a decorative choice from a production-ready one. A good supplier should be able to explain why one construction will hold up better than another on your specific garment.
Keep the logo version used for the patch as simple as possible while preserving recognition. Sleeve patches rarely reward overcomplication. A simplified mark often performs better than an artwork-heavy version because the patch has a limited surface area and a narrow visual distance.
If the design is new, test it in small quantities first. That matters especially for retail launches and uniform refreshes, because the patch may look different once it is attached to fabric rather than shown in isolation. A small test batch is usually cheaper than fixing a large run.
It can also be smart to compare two construction methods side by side. Woven and embroidered patches may both fit the brief, but one may hold details better while the other adds more texture. Physical samples remove guesswork faster than digital approvals do.
For buyers who manage broader product packaging or package branding across apparel and accessories, keep the sleeve patch in the same visual language as the rest of the line. The point is not to make every element identical. The point is to make them look like they belong to the same brand system.
Before the order is placed, confirm the artwork, size, backing, quantity, timeline, and approval method. That list is basic, but it prevents most production problems. Good patch orders are specific orders.
For a retail release, a uniform program, or a branded merchandise drop, the details behind custom sleeve patches custom logo projects need to be settled early. Get the placement right, choose the correct build, and let the patch support the garment instead of fighting it.
That is usually the line between a piece that looks decorated and one that looks designed.
Are custom sleeve patches custom logo better sewn on or heat applied?
Sew-on is usually the safest choice for long-term durability and repeated washing. Heat-applied or iron-on styles can work well when you need faster application, but they depend on fabric compatibility, heat tolerance, and correct press settings. The best choice depends on the garment material, wash frequency, and whether you want a permanent or semi-permanent finish.
What size should a sleeve patch be for apparel branding?
Most sleeve patches are sized to stay visible without wrapping awkwardly around the arm. The right size depends on sleeve width, garment type, and whether the patch will sit on the cuff, upper sleeve, or lower sleeve. A placement mockup on the actual garment size range is the safest way to confirm proportions.
How much do custom sleeve patches custom logo usually cost?
Cost depends on size, quantity, material, detail level, backing, and finishing method. Lower quantities usually carry a higher unit price because setup costs are spread across fewer pieces. The most accurate quote comes from sharing artwork, dimensions, quantity, and application method upfront.
What file do I need to order a custom sleeve patch?
A vector file such as AI, EPS, or PDF is ideal because it preserves clean lines and scalable artwork. If you only have a raster file, a high-resolution version can sometimes be converted, but it may need cleanup. Clear art speeds up proofing and helps the production team match shapes, text, and colors more accurately.
How long does production take for sleeve patches?
Lead time depends on artwork readiness, patch construction, quantity, and whether sampling is required. Simple orders with approved artwork usually move faster than detailed patches with special backings or custom shapes. It is smart to confirm the timeline before approval so the patches arrive before garment decorating or launch dates.