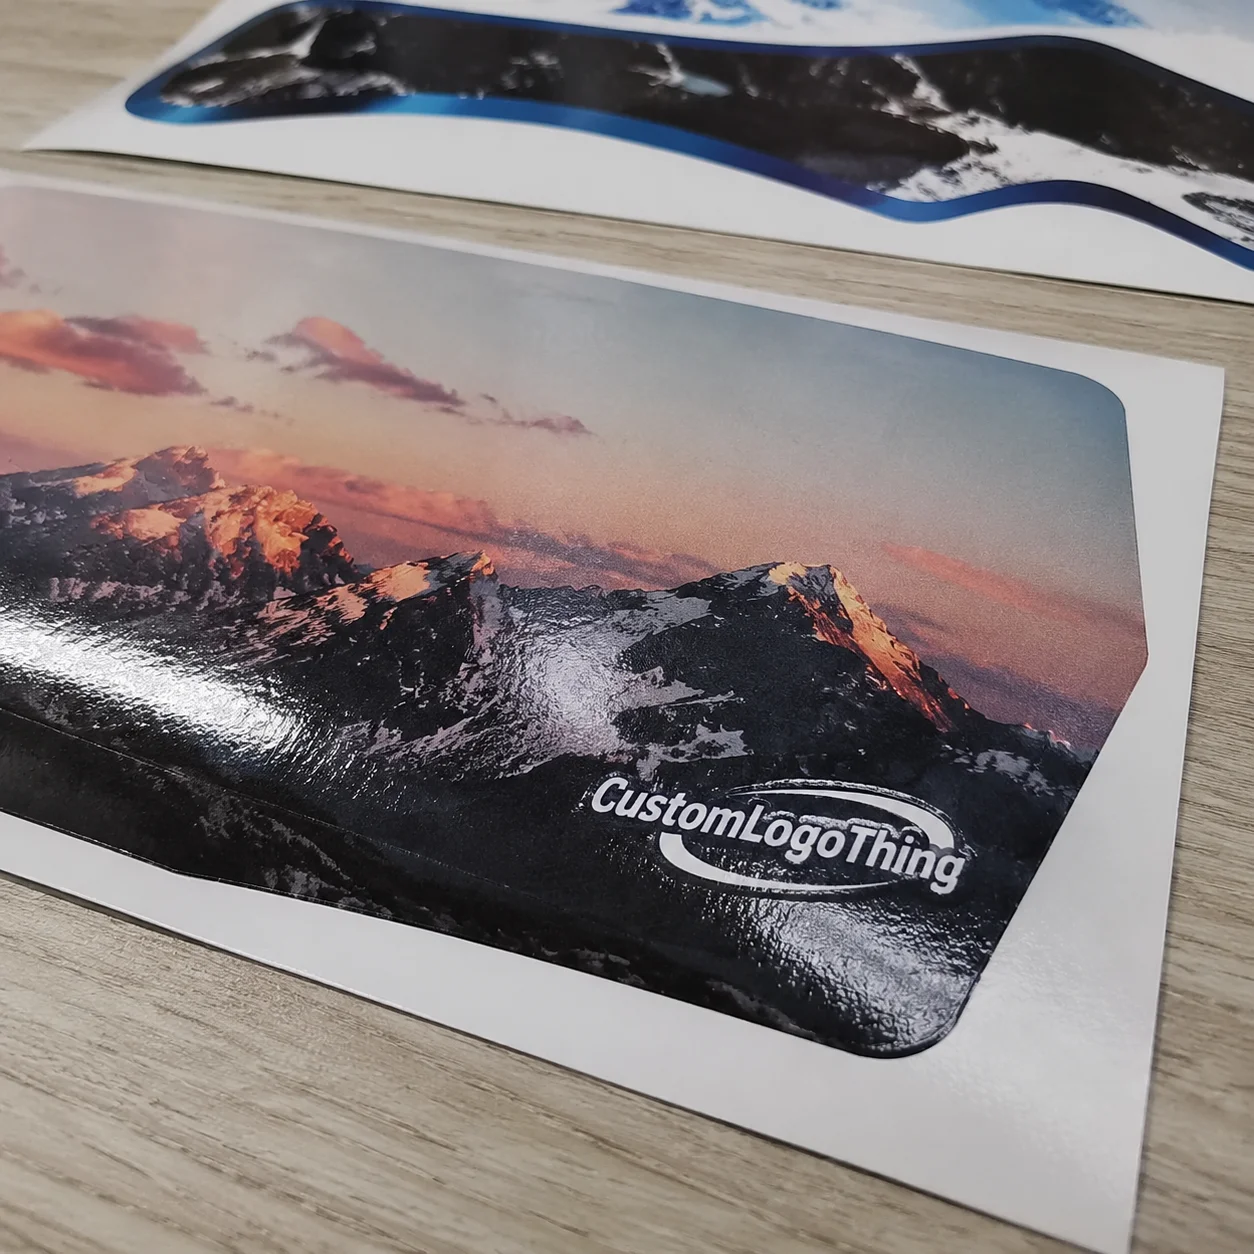
Custom Snowboard Stickers: Specs, Cost, and Ordering
Custom Snowboard Stickers have a harder job than most buyers expect. A laptop decal gets to live indoors, avoid weather, and pretend coffee spills are drama. A snowboard sticker deals with flex, freezing lifts, roof racks, board bags, wax benches, gloves, scrapers, UV, slush, and edge contact.
That difference matters. Use the wrong material and the corners peel. Skip protection and the ink scuffs. Choose weak adhesive and the sticker slides into sad little trash status after one weekend. Great. Exactly the brand impression everyone was hoping for.
For snowboard brands, resorts, shops, clubs, artists, rental fleets, instructors, and riders, stickers are not just decoration. They work as merch, event swag, sponsor visibility, retail add-ons, team identifiers, packaging inserts, and cheap-but-visible brand placement. Cheap in cost, not in spec. There is a difference.
The goal is simple: order decals built for mountain use, not random sticky printed things that look fine in a proof and fail on real gear.
Custom Snowboard Stickers Are Not Just Regular Decals
Custom snowboard stickers are durable printed decals made for boards, helmets, bindings, shop counters, event packs, retail sticker bundles, team kits, and brand merch tied to snowboard culture. Most are printed on vinyl or specialty film, then cut into a logo shape, sheet format, or retail-ready pack.
They do not improve riding. Obviously. They will not fix heel drag, bad wax, or your friend’s heroic decision to hit a rail with zero speed. But poor sticker construction can create real problems: lifted corners catch on gloves, weak adhesive fails in cold weather, and unlaminated ink can rub off after a few days of handling.
Common formats include die-cut logo stickers, kiss-cut sticker sheets, clear decals, laminated vinyl decals, holographic brand marks, sponsor packs, and mixed retail sticker bundles. A board company might use a 4-inch die-cut logo as a giveaway. A resort program may need numbered decals with stronger adhesive for fleet tracking. An artist drop may sell better as a holographic sticker sheet than a plain white vinyl logo.
Buyers tend to call all of these “stickers.” Printers do not. A 2-inch helmet decal, a 9-inch board graphic, and a multi-design kiss-cut sheet have different material waste, cut time, packaging needs, and failure points.
Practical rule: if the sticker will touch snow gear, ask about vinyl, adhesive, laminate, and outdoor durability before asking only for the lowest price. Cheap Stickers That Peel in a week are just tiny pieces of landfill wearing your logo.
Good ordering comes down to specs: material, print method, finish, cut style, cost, timeline, and artwork quality. None of this is exotic. Skipping the basics is how brands end up with muddy colors, unreadable type, or decals that die before the first weekend is over.
How Durable Snowboard Decals Are Made
A durable snowboard decal has several layers working together. The usual build is printed artwork on vinyl or specialty film, pressure-sensitive adhesive on the back, a release liner, an optional protective laminate on the face, and a cut line that defines the final shape. Packaging may be loose bulk, stacked by design, shrink-wrapped bundles, or individual retail bags.
Vinyl is the default for a reason. It handles moisture, mild abrasion, curved surfaces, temperature swings, and normal gear abuse better than paper label stock. Paper is cheaper. It is also a terrible idea for snowboards. Shocking, I know.
Adhesive choice matters as much as the face material. Permanent adhesive is the safest default for long-term board, helmet, and gear use. Removable adhesive makes sense for temporary event signage, short-term sponsor marks, or shop displays where residue matters more than long wear. Specialty adhesives may be needed for cold application, textured plastics, rental gear, or low-energy surfaces that are annoyingly difficult to bond to.
Print method depends on quantity and artwork. Digital printing is common for short runs, full-color logos, gradients, photographic art, and multiple designs in one order. Screen printing can be cost-effective for larger runs with simple spot colors, especially when the same design repeats across thousands of pieces. Specialty finishes such as holographic, reflective, metallic, or textured films cost more, but they can make retail merch feel more intentional.
Lamination is the boring layer that saves the job. Gloss laminate boosts shine and makes colors look punchy. Matte laminate reduces glare and gives the surface a cleaner feel. Protective laminate helps resist scratches from gloves, racks, scrapers, cleaning, and board-on-board contact. If stickers are meant for helmets, boards, roof racks, rental fleets, or wax benches, skipping laminate is usually false economy.
Cutting affects both appearance and survival. A die-cut sticker follows the outer shape of a logo. A kiss-cut sticker cuts through the sticker layer but leaves the backing liner intact, making it easier to peel. Sticker sheets let brands include multiple icons, badges, and small graphics on one backing sheet, which works well for merch packs and event handouts.
Surface prep still matters. Even a premium vinyl sticker can fail if it is slapped onto a wet, waxy, dusty, or freezing-cold board. Clean the surface, remove wax residue, dry it fully, and apply at a reasonable temperature. Adhesive needs contact. It is not magic tape with a lift ticket.
Key Specs That Matter on Boards, Helmets, and Gear
Start with size. Helmet logo stickers usually work well around 2 to 3 inches wide. Board-top decals often land between 3 and 5 inches for readable branding without taking over the graphic. Larger statement stickers for bases, top sheets, shop displays, or sponsor placement may run 6 to 10 inches or more. Sticker sheets are commonly sized around 4 by 6 inches, 5 by 7 inches, or similar retail-friendly formats.
Shape matters more than most artwork files admit. Thin spikes, tiny separated letters, fragile outlines, and overly detailed cut paths can tear during peeling or lift once applied. Bold shapes age better. Physics remains undefeated.
Material choice should match the use case:
- White vinyl: strong color, clean contrast, reliable default for brand logos.
- Clear vinyl: subtle look on helmets, windows, and board graphics, but often needs white ink behind key areas.
- Holographic film: premium merch feel and strong shelf appeal, though fine text can get harder to read.
- Reflective film: useful for visibility on helmets, gear cases, resort equipment, and night-event swag.
- Metallic or textured film: good for limited drops, retail packaging, and premium brand packs.
Finish changes the design fast. Gloss looks bright, wet, and energetic. Matte feels cleaner and reduces glare in photos. Holographic gets attention, but it can fight with small typography and thin linework. If the design has tiny copy under roughly 6-point size, assume it will become decorative dust at normal viewing distance.
Ask the supplier about water resistance, UV resistance, cold performance, abrasion protection, and laminate. For outdoor gear, those are baseline requirements, not fancy extras. Some material data is tested under standards from groups such as ASTM International, while shipping and packed-product handling may reference protocols from ISTA. A sticker order does not need a lab thesis, but suppliers should know what their materials are rated for.
Artwork should be clean before it reaches production. Vector files such as AI, EPS, or production-ready PDF are best for logos and cut paths. High-resolution raster art can work at 300 DPI at final size. Low-resolution screenshots are where print quality goes to die. If the logo came from a social media profile image, stop. Find the real file.
Color contrast also needs attention. Snow is bright. Black gear is common. Board graphics are busy. A white outline, black keyline, or white ink layer behind a clear decal can make the difference between a readable logo and a vague blob that looked “sick” only on a glowing monitor.
Placement affects wear. Stickers near board edges, binding zones, stomp pads, scraper paths, and areas that rub inside bags will take more abuse. That does not mean they cannot go there. It means the spec has to match the location, and buyers should not act shocked when a sticker under a binding strap gets beaten up faster than one on a helmet shell.
Cost, Pricing, and MOQ for Snowboard Sticker Orders
Pricing for custom snowboard stickers depends on size, quantity, material, finish, cut complexity, lamination, number of designs, packaging, proofing time, and delivery deadline. Any quote that ignores half of those details is not a quote. It is a guess wearing a nice shirt.
Small custom runs cost more per piece because setup, artwork review, proofing, printing, and cutting are spread across fewer stickers. Bulk orders drop sharply once those fixed steps are divided across more units. That does not mean every supplier prices the same, and it definitely does not mean the cheapest line item is the best buy.
| Order Type | Typical Quantity | Common Use | Typical Cost Behavior |
|---|---|---|---|
| Personal or test run | 50-100 pieces | Rider designs, artist samples, small club packs | Higher unit cost because proofing and setup are spread thin |
| Shop or event batch | 250-500 pieces | Giveaways, local contests, shop counters, team swag | Better unit cost with room to test finish and size |
| Brand merch order | 1,000+ pieces | Retail packs, resort programs, sponsor kits, product packaging inserts | Lower unit cost, but packaging and multiple SKUs can add back cost |
| Premium specialty run | 250-2,500 pieces | Holographic drops, reflective safety marks, limited merch bundles | Higher material cost and more proofing attention needed |
For rough planning, basic small vinyl decals may sit in the low-to-mid cents range in larger quantities, while short-run specialty stickers can cost several times more per piece. Oversized 8 to 10 inch decals, holographic or reflective films, individual bagging, barcode labels, multiple designs, rush production, and retail carding all push pricing upward.
MOQ is practical, not philosophical. Some suppliers accept very low minimums, especially for digital print. Others set minimum order quantities around 100, 250, or 500 pieces because cutting, setup, and material handling need to make sense. The lowest advertised minimum may skip lamination, use weaker adhesive, or print dull color. Bargain stickers that fail on gear are not a bargain.
For a clean quote, provide the exact size, quantity, material preference, finish, adhesive type if known, laminate requirement, cut style, number of designs, packed format, delivery ZIP or country, and deadline. If the order connects to branded packaging, custom printed boxes, or retail packaging, say that too. The sticker may need to match product packaging colors or fit into a merch kit without curling, scratching, or looking like an afterthought.
Custom Logo Things buyers already sourcing Custom Labels & Tags or broader Custom Packaging Products should treat snowboard decals as part of the same brand system. A sticker tossed into a box can carry the same visual language as hang tags, header cards, inserts, or package branding. Small thing. Big visibility.
If the finish, surface, or application is new, order a pilot run before committing to 5,000 retail pieces. Testing 100 stickers on actual boards, helmets, shop counters, and wax benches is cheaper than discovering a problem after the full shipment lands.
Process and Timeline From Artwork to Delivery
The normal order flow is simple: choose sticker type, submit artwork, confirm specs, receive proof, approve proof, enter production, quality check, pack, and ship. The work sounds easy because the list is short. The mistakes happen because buyers rush the middle.
During artwork review, the printer checks resolution, cut paths, bleed, color setup, tiny details, and whether the shape is practical for cutting and peeling. A 1.5-inch logo with eight separate floating pieces may look clever on screen. In production, it can become a weeding and application headache.
Proofing is the final checkpoint before money turns into physical inventory. Review spelling, logo placement, cut line, dimensions, material, finish, quantity, and backing format. If a resort name is misspelled or a 4-inch sticker was approved at 2.5 inches, that problem belongs to the proof stage, not the delivery stage.
Quality control should include more than counting stacks. A reasonable check looks at print clarity, color consistency, laminate coverage, cut alignment, weeding quality, backing condition, and whether the finished pieces match the approved size. For sticker sheets, check that each kiss-cut shape peels cleanly without tearing the surrounding liner. For die-cuts, check thin corners and sharp points because those are the first places defects show up.
Simple digitally printed laminated vinyl stickers can often move quickly after proof approval, especially if the material is standard and the cut is simple. Specialty films, large quantities, multiple designs, Custom Retail Bags, barcode labels, split shipments, or peak seasonal demand can add several business days or more. Exact timing depends on supplier capacity, approval speed, and shipping method.
What slows orders down? Missing vector files. Unclear sizes. Late approvals. Artwork changes after proofing. Custom packaging requests submitted after pricing. Event deadlines that pretend shipping weather does not exist. Winter launches and resort events need buffer time for production, transit, receiving, sorting, and packing into kits.
Plan backward from the in-hand date, not the event date. If stickers need to be inserted into merch bags, paired with retail hang tags, sent to instructors, or distributed across multiple shop locations, receiving them the morning of the event is not planning. It is gambling with cardboard boxes.
Common Mistakes That Make Snowboard Stickers Fail
The biggest mistake is using paper labels or indoor sticker stock on gear that will face snow, water, cold, UV, flex, and abrasion. Paper has its place in product packaging, shipping labels, and dry indoor uses. Snowboard decks are not that place.
Skipping laminate is another classic. If the sticker goes on boards, helmets, rental gear, roof racks, wax benches, or anything handled repeatedly, laminate protects the print. Without it, the ink takes the abuse directly.
- Tiny text: small copy may vanish on busy board graphics or holographic backgrounds.
- Fragile cut shapes: thin tails, sharp spikes, and separated letters lift faster than bold shapes.
- Bad application: cold, wet, waxy, dusty, or freshly handled surfaces weaken the bond.
- Wrong finish: clear stickers without white ink can disappear on dark boards.
- Poor placement: edges, stomp areas, binding zones, and scraper paths wear faster.
Proof approval deserves more respect than it gets. A proof is not decoration. It is the final production checkpoint for size, spelling, cut line, color, material, and finish. If three people need to approve the logo, have them approve it before the printer starts cutting.
Another mistake is buying custom snowboard stickers purely on unit price. Ask what vinyl is used, whether the adhesive suits outdoor gear, whether laminate is included, how the sticker is cut, and whether samples are available. A sticker that costs a few cents less but fails in the first week costs more in reputation than it saves on the invoice.
Storage can also cause avoidable problems. Keep finished stickers flat, dry, and away from heat before use. Do not leave boxes in a damp back room, crushed under gear, or sitting in a freezing vehicle for days before application. Pressure-sensitive adhesives perform best when the product has been stored properly and applied to a clean surface.
What to Confirm Before Ordering
Build a simple spec list before contacting suppliers. Include sticker size, quantity, material preference, finish, use location, target surface, number of designs, deadline, and packed format. That one-page spec saves emails, proof revisions, and the deeply irritating phrase “I thought it would be bigger.”
Decide the real use case. Personal stickers can be flexible. Event giveaways need speed and decent durability. Retail stickers need presentation, finish consistency, and clean backing. Resort operations or rental fleets may need stronger adhesive, numbering, easy scanning, or specific placement. Brand merch should match the rest of the packaging design, especially if stickers are packed with apparel, bindings, or custom printed boxes.
Prepare artwork properly. Send vector logo files if available. If not, send high-resolution raster art at final size. Include brand colors, cut line notes, transparent areas, and whether white ink is needed behind clear or specialty films. For multiple designs, label the files clearly and state quantities per design.
Ask for recommendations instead of guessing. A good printer can tell you whether matte laminate, gloss laminate, clear vinyl, white vinyl, holographic film, or reflective material makes sense for the design. They can also flag details that may cut badly, print poorly, or disappear against dark gear.
If the stickers will be sold, included with expensive gear, shipped in retail packaging, or applied to rental fleets, request samples or run a small test batch. Apply them to the actual surfaces. Leave them cold overnight. Handle them. Put them near a wax bench. The board shop environment is not gentle, and pretending otherwise is how bad specs survive until launch day.
A strong quote checklist should include material, adhesive, laminate, cut style, proofing process, production time, shipping method, packed format, and any package branding requirements. Start with the riding environment, then choose the material, finish, and cut style that can actually survive it.
FAQ
What material is best for custom snowboard stickers?
Outdoor-rated vinyl is the safest default because it handles moisture, cold, flex, and frequent handling better than paper or basic indoor label stock. Add a protective laminate for stickers used on boards, helmets, roof racks, rental gear, or anything that gets scraped, rubbed, or cleaned often. Clear, holographic, reflective, and metallic films can look great, but confirm contrast and durability before ordering in bulk.
How much do snowboard logo stickers usually cost?
Cost depends on size, quantity, material, finish, laminate, cut complexity, number of designs, and packaging. Small runs have a higher unit cost because setup and proofing are spread across fewer pieces. Bulk orders usually lower unit cost, but specialty films, rush timelines, oversized cuts, and individual bagging can push pricing back up.
Will custom snowboarding decals stay on in cold weather?
They can, if the sticker uses the right vinyl, adhesive, and laminate for outdoor gear. Application matters too: clean the surface, remove wax or dust, apply at a reasonable temperature, and press firmly across the full sticker. Avoid frozen, wet, oily, or freshly waxed surfaces because adhesive needs clean contact to bond.
What size should custom board stickers be?
Helmet and small gear stickers often work well around 2 to 3 inches. Board-top logos commonly land around 3 to 5 inches, while larger statement decals can run 6 to 10 inches or more. Choose the size based on viewing distance, board graphics, cut shape, and whether the sticker needs to be readable in photos.
How long does it take to produce custom snowboard decals?
Simple digitally printed decals can move quickly after proof approval, especially with standard vinyl and standard cuts. Specialty materials, large quantities, multiple designs, custom packaging, and peak seasonal demand can add production time. Plan from the in-hand date, not the event date, so there is time for shipping, sorting, and packing into merch kits or shop displays.


