Custom Stickers Design Starts Before the Artwork
Most sticker problems are not caused by bad graphics. They come from bad assumptions about where the sticker will live, what it will touch, and how people will handle it. Custom stickers design works best when the brief starts with the product, surface, exposure, and application method before anyone opens Illustrator. Otherwise you end up polishing a file that was doomed on contact.
A matte paper sticker can look expensive on a dry carton, then curl like a sad receipt the moment it meets condensation on a chilled bottle. Very glamorous. Very avoidable. Good sticker planning connects packaging design, face stock, adhesive, finish, and application conditions so the label survives the real environment, not the mood board.
Stickers are not just decoration. Buyers use them for branded packaging, packaging seals, QR campaigns, ingredient notes, batch updates, seasonal promos, event handouts, and low-risk label tests before moving into Custom Labels & Tags or full Custom Packaging Products. That flexibility is why they show up everywhere from ecommerce mailers to retail shelves.
The practical definition is simple: custom stickers design covers size, shape, material, adhesive, finish, print method, artwork setup, and application requirements. Not just dropping a logo into a circle and calling it strategy. The brands that get better results treat stickers like part of the product system, not spare decor slapped on at the end.
Start with a few plain questions. Is the sticker decorative, informational, tamper-evident, promotional, or required for compliance? Will it be applied by hand or machine? Does it need to wrap around a curve, sit over a box seam, or stay readable after shipping abrasion? The answers narrow the spec fast.
That matters because a sticker can fail in small, annoying ways. Edges lift. Ink scuffs. QR codes print too small. Clear film shows trapped bubbles. A seal tears the carton surface when removed. None of that sounds dramatic until it hits 3,000 units already packed for a launch.
This guide covers how sticker printing works, which specs affect quality, how pricing is built, what timelines usually look like, and where rookie mistakes turn into expensive reprints. If you already know the sticker has to survive moisture, friction, refrigeration, or shipping, you are ahead of most people who order first and think later.
How Sticker Printing Works From File to Finished Roll
Sticker production usually follows a predictable path: artwork check, proof, material confirmation, printing, cutting, finishing, quality control, packing, and shipping. The steps are ordinary. The failure points are not. A file can look clean on screen and still fail once bleed, cut paths, color shifts, or material texture enter production.
Digital printing is the flexible option for short runs, multiple versions, seasonal designs, and product tests. It keeps setup lighter and lets buyers order smaller batches without committing to a long print run. The tradeoff is that very large repeat orders may not be the cheapest fit.
Flexographic printing makes more sense for higher-volume repeat orders where setup costs can be spread across thousands of units. It can be efficient, consistent, and fast once the job is dialed in. Screen printing is less common for standard branding stickers, but it can work for bold spot colors, opaque whites, or specialty effects. No magic. Different tools for different volumes.
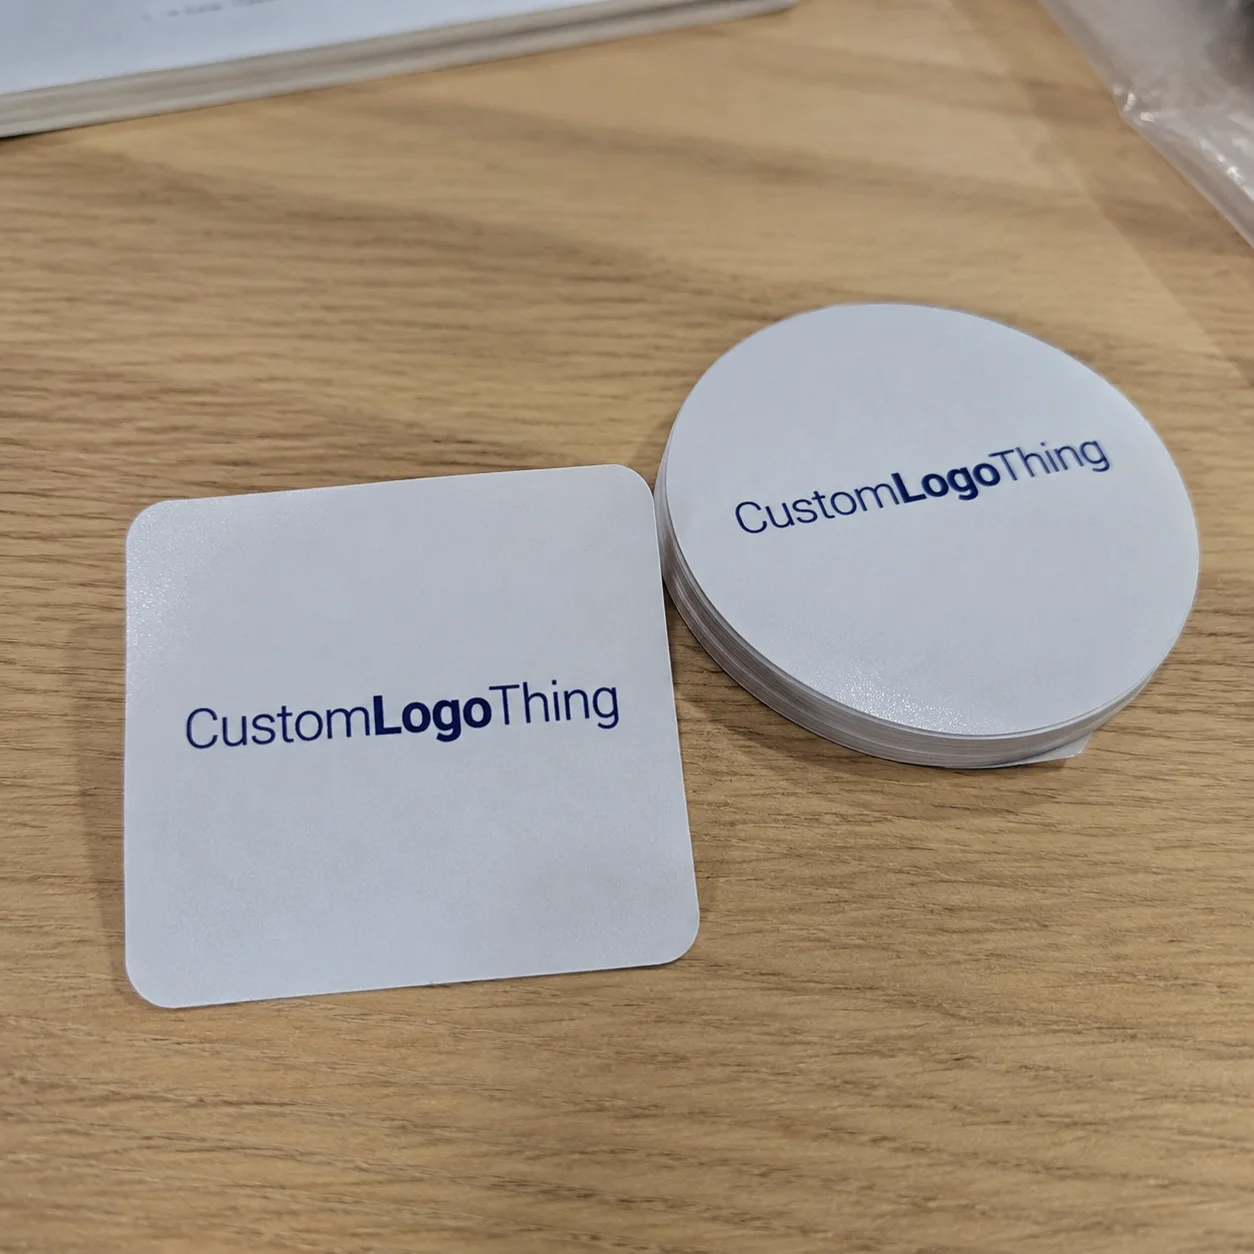
Format matters too. Roll stickers are usually best for packaging teams, fulfillment lines, and applicators that need speed. Sheet stickers work well for office use, events, sample kits, or smaller hand-applied jobs. Individually cut stickers fit giveaways, merch, inserts, and retail handouts where the sticker itself is the product.
Die cutting and kiss cutting are not the same thing, though people mix them up constantly. Die cutting cuts through the sticker and liner to create separate pieces. Kiss cutting cuts only the sticker layer and leaves the backing intact, which makes peeling easier and keeps sets organized. That difference affects application speed, presentation, packing, and waste.
Proofing catches boring mistakes before they become expensive ones. A digital proof checks layout, spelling, dimensions, bleed, safe area, cut line, and basic color intent. It does not perfectly predict every material texture, adhesive behavior, metallic effect, or laminate finish. If a supplier treats proof approval like a substitute for material testing, that supplier is selling optimism.
Production slows down when files are sloppy. Missing bleed, low-resolution artwork, unclear dielines, RGB files in a CMYK workflow, and ignored cut paths all force someone to clean up the mess before anything can print. That costs time and often money. The printer is not a detective. Clean files move faster.
Quality control should include more than counting boxes. Useful checks include print registration, color consistency, edge quality, liner release, adhesive transfer, roll direction, label spacing, and whether the finished size matches the approved proof. For roll labels, unwind direction matters if the stickers feed into an applicator. Get that wrong and congratulations, the machine hates you now.
Materials, Adhesives, and Finishes That Change Performance
Material choice decides whether a sticker feels right and survives long enough to matter. Paper is usually fine for indoor, short-term use on dry packaging. It can look warm, natural, and premium, especially on cartons, pouches, stationery, and bakery-style packaging. It is not the hero for wet, oily, or refrigerated surfaces.
Polypropylene, often called BOPP, handles moisture better and is common for food, beverage, cosmetics, supplements, and personal care applications. White BOPP gives a clean label base. Clear BOPP creates a no-label look on glass or smooth plastic. Metallic BOPP adds shine without using separate foil, though it still needs careful design so the effect does not overwhelm the artwork.
Vinyl adds durability for harder wear, outdoor exposure, tool labels, equipment stickers, and promotional decals. It tends to cost more than basic paper or standard BOPP, but it earns the price when the sticker faces abrasion, sunlight, or rough handling. Textured stocks can elevate premium packaging when the brand wants a tactile finish, but they need testing for fine type, barcodes, and adhesive hold.
Adhesive is just as important as face stock. Permanent adhesive fits most retail packaging and product labels. Removable adhesive works for temporary promotions or surfaces where the sticker should come off cleanly. Freezer-grade adhesive is built for cold storage. High-tack adhesive helps on difficult surfaces, although it will not fix a dusty, oily, or badly textured substrate. Adhesive is not witchcraft.
Surface compatibility is where many sticker jobs get into trouble. Glass, plastic, cardboard, kraft paper, metal, coated cartons, uncoated cartons, and curved containers all behave differently. Condensation, oils, dust, texture, flexing, and low surface energy plastics can all weaken the bond. A smooth glass jar is one thing. A recycled kraft box with paper fibers, seam pressure, and warehouse dust is another story entirely.
Finishes change both appearance and durability. Gloss adds shine and makes colors pop. Matte softens the look and often feels more premium in the hand. Soft-touch gives a velvety surface, but it can show fingerprints depending on the coating and color. Foil creates shelf impact. Spot UV adds contrast without coating the whole sticker. For product packaging and retail packaging, finish should support the brand instead of fighting it for attention.
Lamination and varnish add scuff resistance and moisture protection, especially for ecommerce packaging that gets handled, stacked, and shipped before anyone opens it. A laminate is usually the stronger protective layer. Varnish can be a lighter, more economical option. If the sticker will be touched repeatedly, exposed to condensation, or rubbed during transit, protection usually pays for itself. If it is a one-day event handout, maybe not.
One sensible move: request samples or run a small pilot if the sticker will be refrigerated, oily, textured, outdoors, or applied to curved containers. Test on the actual surface, not a desk, not a random sample board, and definitely not wishful thinking. Check edge lift after 24 hours, after temperature changes, and after light rubbing. Guessing is cheaper right up until the first reprint. Then it gets expensive and a little embarrassing.
For brands trying to keep paper sourcing responsible, review FSC-certified options through FSC. If the application or shipping process needs validation, check methods and guidance from ISTA. Packaging standards exist for a reason. Ignoring them is a hobby, not a strategy.
Sticker Cost, Pricing, MOQ, and Unit Cost Drivers
Sticker pricing is driven by material, size, shape, quantity, number of designs, finish, adhesive type, format, proofing needs, tooling, packing method, and shipping. That is the real formula. Not “premium quality.” Not “best value.” Those phrases are marketing fog. The quote changes because the production job changes.
Small custom batches usually have higher unit costs because setup, proofing, file handling, and machine time get spread across fewer pieces. Larger quantities lower the per-unit cost, but only if you can actually use the stock without waste. Buyers often order the absolute minimum to save money, then reorder two weeks later at a worse price. Efficient? Not really.
Minimum order quantities vary by supplier and production method. Digital sticker orders may start around a few hundred pieces for simple shapes. Specialty materials, foil, custom dies, and flexographic production can push minimums higher because setup is heavier. If a quote seems oddly cheap, check whether the material, adhesive, finish, and size actually match your request.
| Option | Typical Use | Relative Unit Cost | Best For |
|---|---|---|---|
| 500 pieces | Testing, launches, small batches | Highest | New products, sample programs, limited promos |
| 1,000 pieces | Small production run | Medium | Growing brands, seasonal packaging, event campaigns |
| 2,500 pieces | Established repeat use | Lower | Retail packaging, ecommerce inserts, replenishment orders |
Shape affects price. A plain rectangle, square, oval, or circle is efficient. Intricate die-cut edges take more tooling, more waste management, tighter registration, and more handling. That is not a hidden fee. It is physics and labor. The prettier the outline, the more likely it costs extra.
Finish premiums are real too. Foil, embossing, spot UV, soft-touch laminate, waterproof films, opaque white ink on clear stock, and specialty adhesives all increase cost. They can be worth it when the sticker carries the brand experience or replaces printed packaging on a plain carton. If it is a disposable seal on a shipping mailer, spend carefully.
Price ranges are wide because sticker specs vary so much, but the pattern is consistent. Simple paper stickers in standard shapes cost far less than laminated film stickers with custom cuts and special adhesives. A small run may feel expensive per piece even when the total order is modest. A larger repeat order may cut the unit price sharply, but it ties up cash and storage space. Boring tradeoffs. Still real.
Ask for pricing at two or three quantities, such as 500, 1,000, and 2,500 pieces. The break between tiers often tells you more than the first quote does. Sometimes the middle run is the smartest buy. Sometimes the larger run wins by a mile. You do not know until you see the numbers.
Compare quotes by total delivered cost, not just unit price. Shipping, proofing, tooling, rush fees, taxes, split shipments, and packing requirements can change the final number. Also check whether each quote includes the same material thickness, adhesive, finish, cut style, and roll or sheet format. Otherwise you are comparing stickers that only look similar in a spreadsheet.
Do not chase the lowest quote without checking the details. Weak adhesive, fuzzy print, curling edges, poor release from the liner, or color drift can make the final piece look cheap even if the invoice looked beautiful. Unless “budget disaster” is the brand strategy, pass.
Process, Timeline, and Turnaround for Custom Sticker Orders
A clean order process keeps everyone sane. Define the use case, choose size and material, prepare artwork, Request a Quote, review the proof, approve production, inspect finished stickers, and apply them to packaging. The sequence sounds basic because it is basic. The trouble starts when teams skip steps and then act shocked by the result.
Timeline depends on artwork readiness, proof revisions, material availability, order quantity, finishing complexity, die-cut tooling, shipping distance, and seasonal production volume. A simple digital run with ready files can move quickly, often within several business days after proof approval depending on capacity. A complex order with foil, specialty film, custom dies, or testing can take longer. Machines do not care about your launch date. Annoying, but true.
For planning, separate design time from production time. Artwork cleanup, internal approvals, legal copy review, barcode checks, and sample testing are not part of the printer’s actual press schedule, but they still eat calendar days. Many delays happen before the job reaches production. Conveniently, that is also the part buyers can control.
What slows orders down the most? Unclear dimensions, missing bleed, RGB files when CMYK is needed, low-resolution images, no cut line, late copy changes, missing roll direction, and people debating material after the quote is already approved. That creates rework. Rework creates delays. Delays create that special brand flavor known as panic.
Rush orders can work for simple digital sticker jobs, but they do not always compress well for specialty materials or complex finishes. A rush is not a time machine. If the design needs foil, custom tooling, freezer testing, or material sampling, build in more time.
For first orders, buffer time matters even more. Sampling, proofing, internal approvals, and real-world application testing almost always take longer than teams expect. If you are building a new packaging program, start sticker sourcing before final photography or retail launch dates are locked. Do not wait until the week everyone “remembers” labels exist.
Inspection should happen before stickers hit production inventory. Check a few pieces from different parts of the roll or stack. Confirm size, color, finish, cut accuracy, spelling, barcode scan, liner release, and adhesive hold on the actual package. If stickers are roll-fed, confirm core size, roll outside diameter, label spacing, and unwind direction before they reach the application line.
Step-by-Step Guide to Preparing Print-Ready Sticker Artwork
Start with the use case. Where does the sticker go? How long must it last? Will it face moisture, shipping, refrigeration, sunlight, oils, or repeated handling? Those answers shape every other choice. A sticker for a cold bottle is not the same job as a sticker for a kraft mailer, even if the logo is identical.
Next, choose dimensions based on the package panel, container curve, barcode space, legal copy, and visual hierarchy. Do not copy a competitor’s size just because it looks fine on Instagram. Measure the actual surface and build the design around that. If the sticker wraps around a curve, test the shape with a paper mockup before committing.
Set up the artwork at the correct scale with bleed, safe margins, and a clearly marked cut line. Common bleed is often around 1/8 inch, though supplier specs can vary. Important text, logos, barcodes, and QR codes should stay inside the safe area so trimming does not clip them. If the shape is custom, the cut line should be obvious, not hidden like a bad joke.
Use vector artwork for logos, icons, borders, and line work whenever possible. Keep raster images high enough resolution for the final print size. A typical target is 300 dpi at actual size for photo-based artwork, but the printer’s spec wins. Blurry art does not become sharp because someone exported it with confidence.
Color needs a plan. Use CMYK for standard print workflows, or specify Pantone references if color matching is critical. Bright RGB colors on screen may dull in print. Metallic stocks, kraft paper, clear film, and matte laminates can shift the look further. Brand color drift is one of those small errors that looks huge once the label sits on shelf next to a full product line.
Typography, barcode readability, QR code size, contrast, spelling, ingredient copy, and compliance text all deserve a final pass. Small labels are unforgiving. If a consumer has to squint to find the product name, the design is doing too much for the wrong part of the job.
QR codes need quiet space and enough contrast. Avoid placing them too close to a curved edge, foil area, heavy texture, or glossy reflection zone. Test scans from a printed sample, not just from a monitor. The phone does not care how nice the layout looked in the design file.
Use this checklist before sending files:
- Confirm final size, shape, and application surface.
- Include bleed and safe margins in the layout.
- Keep logos, icons, and text vector-based when possible.
- Check colors against the printer’s workflow and material.
- Verify barcode and QR code readability at print size.
- Mark cut lines, fold lines, and non-printing guides clearly.
- Name files by product, version, size, and date.
Send editable source files plus a flattened PDF proof when requested. Include linked images and fonts if the supplier needs native files, or outline fonts if that is their preferred workflow. A clear file name helps too. “Final_final_v7_ok2.pdf” is not a system. It is a cry for help.
Next Steps Before You Request a Sticker Quote
Before requesting pricing, write down the essentials: sticker size, quantity, application surface, indoor or outdoor use, moisture exposure, finish preference, adhesive needs, format, number of designs, and delivery deadline. That one sheet saves a lot of back-and-forth. It also makes quotes easier to compare.
Collect package photos or dielines if you have them. A printer can understand placement, curves, seams, closures, and trouble spots much faster when they can see the real surface. That matters for branded packaging, especially if the sticker has to sit near folds, edges, closures, or seams on Custom Printed Boxes.
Ask for material recommendations instead of forcing a stock choice too early. Clear film, waterproof film, freezer-safe adhesive, paper stock, textured material, removable adhesive, and high-tack options solve different problems. A good supplier will suggest what fits the job instead of just selling whatever happens to be on the shelf.
Prepare one final artwork version before requesting a production proof. Late changes add time and sometimes new setup costs. A quote is not a sandbox for endless revisions. It is a price for a specific job.
Compare quotes on total delivered cost, material quality, proofing support, lead time, finish accuracy, packing method, and communication. The cheapest line item is rarely the best buy once reprint risk, waste, and team time enter the math. Practical buyers know this. Everyone else learns it the expensive way.
For teams building a repeat label program, custom stickers are one of the easiest ways to test package branding without committing to a full packaging redesign. Careful custom stickers design pays off because clean specs, honest use-case details, and print-ready files make the order faster, cheaper, and less annoying for everyone involved.
The final check is simple: match the sticker to the job it has to do. Not the prettiest spec. Not the cheapest spec. The right one. That is how a small printed piece avoids becoming the weak link in the package.
FAQ
What is the best file format for custom sticker design?
Vector files such as AI, EPS, or PDF are best for logos, text, cut lines, and sharp edges. High-resolution PNG or TIFF files can work for photo-based designs, but they need to be sized correctly for print. Include bleed, safe margins, and a separate cut line if the sticker has a custom shape.
How much does custom sticker printing usually cost?
Cost depends on quantity, size, material, finish, adhesive, shape, format, tooling, and whether the order needs special setup. Higher quantities usually lower unit cost because setup and production time are spread across more stickers. Ask for pricing at multiple quantities so you can see where the best break happens.
How long does the custom stickers design and printing process take?
Simple sticker orders with print-ready artwork usually move faster than orders that need file repair, samples, specialty materials, or foil finishes. Proof approval is often the biggest controllable timeline factor, so review size, spelling, color, and cut lines quickly. New packaging projects should include extra time for testing and internal approvals.
What material should I choose for waterproof custom stickers?
BOPP, polypropylene, vinyl, or other film-based materials are usually better than paper for moisture exposure. A protective laminate or varnish can improve scuff resistance and help preserve the print. If the sticker goes on refrigerated, frozen, wet, or oily containers, test the adhesive on the actual surface first.
Can custom sticker designs use foil, clear backgrounds, or special shapes?
Yes. Custom stickers can include foil, spot UV, clear film, matte finishes, soft-touch coatings, textured stocks, and die-cut shapes. Special effects usually increase cost and may require higher minimum quantities or longer lead times. Use premium effects strategically on logos, seals, product names, or limited-edition packaging instead of decorating everything just because the option exists.