Custom Stickers for Products do a lot of quiet work. They turn plain packaging into something finished, carry the details a buyer needs, and keep a brand from looking improvised. The best versions are not flashy for their own sake; they are sized well, printed cleanly, and matched to the surface they are going on.
That makes them useful across a wide range of packaging types, from folding cartons and jars to mailers, bottles, and retail pouches. For small brands, stickers are often the most practical way to improve product packaging without changing the structure of the box, bottle, or bag. For larger runs, they can keep a whole packaging system flexible when formulas, flavors, or SKUs change often.
They also sit at the intersection of branding and function. A label may need to identify a product, a seal may need to show tamper evidence, and a branding sticker may simply need to make the package look intentional. Those jobs overlap, but they are not identical, and the difference matters when you are choosing stock, adhesive, and finish.
What Custom Stickers for Products Actually Do
At the practical level, custom stickers for products solve a simple problem: there is packaging to finish, information to place, and usually not much time to do it. A sticker can carry a logo, ingredients, a barcode, a QR code, warnings, flavor names, batch details, or a seasonal message. It can also create a visual anchor on packaging that would otherwise feel blank.
Product labels, seals, and branding stickers overlap enough that people use the terms loosely, but they serve different purposes. A product label usually stays with the item and carries the core information. A seal is more about closure and first-open protection. A promotional sticker may be temporary, but it still has to adhere cleanly and look intentional. Picking the wrong format usually creates either compliance issues or a packaging layout that feels crowded.
These stickers show up on rigid boxes, poly mailers, kraft bags, glass jars, plastic bottles, and promo inserts. They also pair well with Custom Labels & Tags when a brand wants the same visual system across several package types. In practice, that is where stickers shine: they let one design language travel across packaging without forcing every SKU into the same structure.
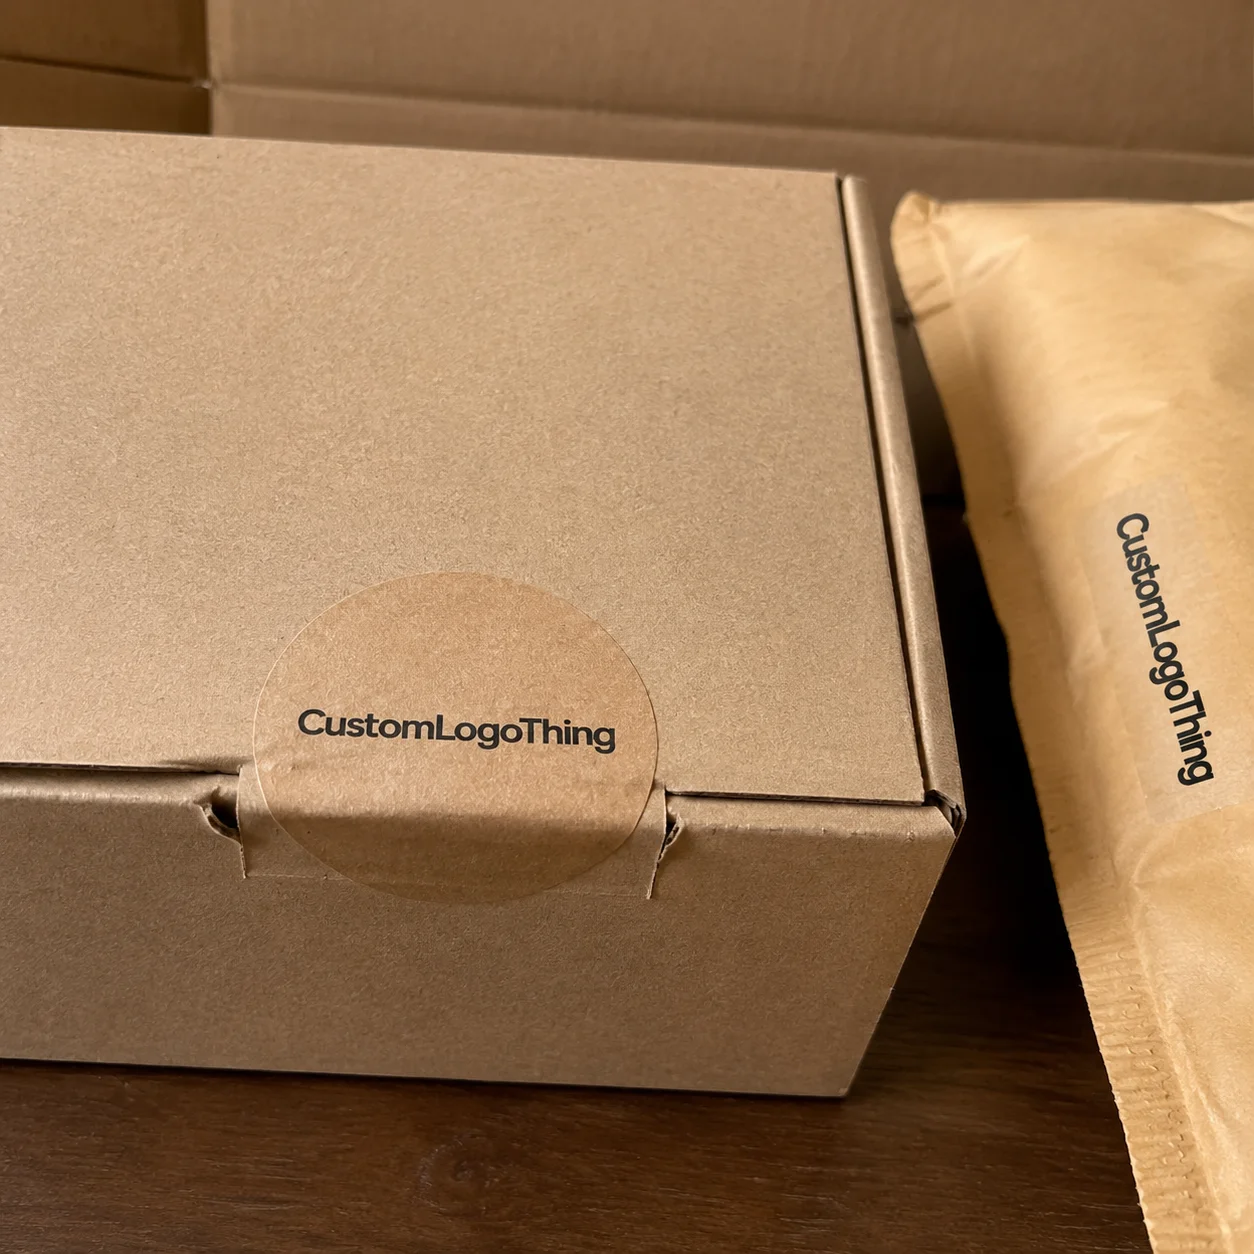
A plain package with a well-placed sticker often looks more credible than an expensive box with weak artwork placement. Printing quality matters, but proportion and alignment matter too.
That is why stickers are used everywhere from DTC shipping to boutique shelf display. They support packaging design without requiring high minimums for fully custom printed cartons. When a product line changes frequently, that flexibility is valuable because the packaging can stay current without burning through inventory.
How the Sticker Production Process Works
Most sticker orders follow the same basic path, and most delays happen in the same few places. The first step is artwork setup. The file has to be sized correctly, with bleed, safe zone, and a cut line that reflects the actual shape. If that part is guessed instead of measured, production gets slower and the final piece usually looks less polished.
Next comes material selection. Paper, BOPP, vinyl, and clear film all behave differently in print and in use. After that comes the print process, which is often digital for shorter runs and more specialized for larger quantities or repeat production. The final steps are cutting, finishing, and packaging the stickers on rolls or sheets depending on how they will be applied.
Proofing is where good orders stay smooth. A proof checks color placement, typography, barcodes, die lines, and any small type that could become unreadable at size. That review is not just about aesthetics. On a compact label, a slight shift in cut position or text placement can create a real usability problem, especially if regulatory copy or a barcode is involved.
Roll format is usually better for faster application and higher-volume packing lines. Sheet format is easier for hand application, small studio runs, and storage in a drawer instead of a warehouse shelf. Neither is universally better. The right choice depends on labor flow, not just on the sticker itself.
The most common file issues are also predictable: missing fonts, low-resolution images, no bleed, and artwork that was built without a true die line. Measured dimensions matter more than guesswork. A sticker that fits the package surface cleanly will always outperform one that forces the design to bend around the package.
Cost, Pricing, and MOQ Factors
Sticker pricing is driven by a handful of variables: size, quantity, material, finish, and shape. Print coverage matters too. A small one-color logo on paper stock costs very differently from a full-color waterproof film label with a Custom Die Cut and a specialty coating.
Unit price usually drops as quantity rises, but not in a perfectly straight line. Setup costs get spread across more pieces, so 500 labels can look expensive while 5,000 may bring the per-unit cost down sharply. Specialty materials, unique shapes, and premium finishes can hold the price up even at volume because the production process is more involved.
For rough planning, paper stickers often fall somewhere around $0.08 to $0.20 per unit at higher quantities. Waterproof BOPP or vinyl can run around $0.12 to $0.35 per unit, depending on size, print coverage, and finish. Premium jobs with foil, soft-touch lamination, or complex die cuts can go beyond that. If a quote comes back without asking about the surface, the environment, or the artwork, it is probably incomplete.
Minimum order quantities also vary. Digital runs support lower quantities more easily, while custom dies, special finishes, and larger-format production tend to push the minimum upward. That is usually less about the sticker itself and more about how much setup is required before the press can run cleanly.
| Option | Typical Use | Price Range | Tradeoff |
|---|---|---|---|
| Paper sticker | Dry goods, boxes, inserts | $0.08-$0.20 | Lowest cost, limited moisture resistance |
| BOPP film | Bottles, jars, handling-heavy packs | $0.12-$0.35 | Better durability, slightly higher cost |
| Vinyl / specialty film | Cold, curved, or rugged surfaces | $0.18-$0.45+ | Strong performance, higher material and setup cost |
The most useful rule is simple: match the sticker to the product value and the real use case. A lower-cost dry goods package does not need an expensive specialty finish. A premium candle set, a refrigerated jar, or a handling-heavy retail item usually needs more durable stock, and that extra protection often pays off in fewer damaged labels and better shelf presentation.
Choosing Materials, Adhesives, and Finishes
Paper remains the economical choice for indoor, dry applications. It prints cleanly, keeps costs down, and works well for cartons, inserts, and products that will not face much moisture or abrasion. BOPP and vinyl are more appropriate when the package may be exposed to oils, condensation, handling, or transit wear. That matters a lot in food, bath, beverage, and personal care packaging.
Clear film has its place when the package itself should stay visible. It can look especially sharp on glass and smooth plastic, but it also reveals mistakes faster than opaque stock. If placement is inconsistent, clear material will show it. That can be useful for a premium look, but only if the application process is controlled.
Adhesive choice deserves more attention than it usually gets. Standard permanent adhesive works for many retail packages. Removable adhesive makes more sense for short-term promotions, reusable containers, or situations where the label should come off cleanly. Refrigerated items, curved containers, and textured surfaces often need a stronger adhesive and a more flexible face stock so the edges do not lift when the temperature changes or the package gets handled.
Finish affects both appearance and behavior. Gloss makes color look brighter and catches more light. Matte cuts glare and often feels calmer and more premium on shelf. Soft-touch can be a nice fit for gift packaging or higher-end custom packaging products, but it adds cost and is not always the right answer when the package will be touched a lot. Specialty varnishes, foil accents, and textured coatings can improve perceived value, though they also increase budget and may extend lead time.
The best spec is the one that fits the actual conditions. If a sticker will face shipping abrasion, condensation, oily hands, or repeated handling, ask for tests that check edge lift, smear resistance, and scuffing. Standards and references from organizations such as ISTA can be useful when packaging needs to survive transit rather than just look good in a photo.
For sourcing and sustainability claims, look for clear documentation, not vague marketing language. Programs like FSC help verify paper sourcing. It is also worth separating face stock, adhesive, and coating claims, because a label can be paper-based and still use non-paper components elsewhere in the build.
Process, Timeline, and Turnaround Expectations
A standard order usually moves through quote approval, proofing, production, and shipping. For clean artwork and familiar materials, proofing may take 1 to 3 business days, and production often runs about 5 to 10 business days after proof approval. More complex jobs take longer, especially if they involve unusual finishes, custom shapes, or detailed color matching.
Rush production is possible when the artwork is final and the spec is simple. A straightforward size, a common material, and standard adhesive are easier to move quickly than a label with special varnish, dense copy, or multiple revisions. The more decisions that are still open, the slower the job tends to become.
Delays usually come from the same places: incomplete artwork, low-resolution files, post-proof changes, or uncertainty about the final dimensions. Custom Die Cuts also need extra review because the cut path has to be verified before the order can run. Fine type, barcodes, and legal copy leave little room for error, so those details need to be settled early rather than corrected after production starts.
In practical terms, a simple run can often finish in about a week and a half after approval. More customized orders often sit in the 10 to 15 business day range, sometimes longer if the finish or cut shape requires extra setup. Clear timelines are a good sign; vague promises are usually a warning that the schedule has not been fully thought through.
Step-by-Step: Ordering the Right Sticker for Your Product
Start with the environment. Dry shelf product, refrigerated item, shipped unit, or hand-applied short run? Those details matter more than the visual reference image. A label for a freezer-safe container should not be spec’d like a sticker for a folded mailer.
Then measure the surface. Flat, curved, textured, and coated materials all behave differently, and the sticker has to fit the shape rather than fight it. A piece that is too wide wraps poorly, while one that is too small loses presence on shelf. Buyers often underestimate how much breathing room the design needs once ingredients, branding, and barcodes are all on the same panel.
- Measure the application area and note whether the surface is flat, curved, textured, or coated.
- Choose the format: sheet for hand use, roll for higher throughput, or die-cut for a custom shape.
- Match material and adhesive to moisture, temperature, handling, and shipping conditions.
- Prepare artwork with bleed, safe zone, and a final cut line that matches the real dimensions.
- Review and approve the proof before quantity, format, and delivery date are locked in.
Application speed matters more than many buyers expect. A sticker that takes just a few extra seconds to place can create real labor cost over hundreds or thousands of units. Crooked placement, bubbles, and lifting edges are often application issues rather than print defects, so the format should support the packing process instead of slowing it down.
It also helps to think about the sticker as part of a larger packaging system. Many brands pair stickers with Custom Packaging Products so the box, insert, and label all feel like one visual family. That coordination usually produces a cleaner shelf presentation than trying to make every item stand alone.
Common Mistakes That Waste Budget
The first mistake is choosing a finish because it looks appealing in a mockup, then discovering it does not fit the actual surface. Matte can be a good choice, but not every adhesive and coating combination performs equally well on oily or heavily handled packaging. Gloss can look strong under store lighting and still struggle if the package sees condensation. Finish should solve a problem, not add one.
The second mistake is guessing the size. That leads to cramped text, awkward margins, and branding that disappears once the product is in hand. If the label has to fit around ingredients, legal copy, or a barcode, the layout needs enough space to breathe. Crowding the panel almost always makes the product look cheaper, even if the print quality is good.
The third mistake is ignoring how the sticker will be applied. If a label is hard to place consistently, the labor cost grows faster than the print cost. A design that creates bubbles, edge lift, or crooked placement is often a design and format problem, not just a production problem. Small operational details become expensive when they repeat across every unit.
The fourth mistake is skipping proof review. That is how cut lines drift, tiny type becomes unreadable, or colors land differently than expected. Proofing exists to catch those issues before the order runs. It is much cheaper to fix a file than to rework finished stock.
The fifth mistake is over-specifying the sticker. Not every package needs foil, soft-touch, or a specialty film. Some buyers spend budget trying to make a low-value item feel premium, when the real problem is that the basic label is too hard to read or too small to matter. Clean execution usually beats expensive decoration.
Best Practices and Next Steps
Keep one sticker system across similar products whenever the packaging can support it. Shared sizes, shared materials, and shared finishes reduce setup complexity and make reorders easier. If every SKU has a different spec for no clear reason, production becomes harder to manage and the brand system loses consistency.
Ask for samples or proofs before committing to a large order, especially when you are trying a new film, adhesive, or finish. A PDF cannot show glare, texture, edge tack, or how the ink will look under lighting. A small test run is often the cheapest way to avoid a larger packaging mistake later.
Build artwork with the real production limits in mind. Bleed, safe zone, and legibility are not optional details. Tiny type placed too close to the edge may look sharp on screen and fail on the finished piece. In packaging, clarity usually matters more than cleverness.
For most buyers, the right question is not which sticker looks best in isolation. It is which sticker fits the package surface, the budget, and the labor flow already in place. That answer changes by product category, shelf life, shipping method, and how the item is packed. A good spec works in the real world, not just in a design file.
Before Ordering Custom Stickers for products, check the surface, estimate the run size, and confirm the conditions the sticker has to survive. Then request a quote that matches the actual use case rather than the idealized one. That approach keeps the purchase useful, predictable, and easier to repeat when the next order comes around.
FAQ
What are custom stickers for products used for?
They brand packaging, seal containers, and add product information without requiring a full packaging redesign. They also work well for limited editions, promotions, and SKU differentiation.
Which material is best for custom product stickers?
Paper works well for low-cost, dry indoor use. BOPP or vinyl is a better fit for moisture, handling, and durability. The adhesive should match the surface and environment, not just the budget.
How much do custom stickers for products usually cost?
Pricing depends on quantity, size, material, finish, and shape. Unit cost usually drops as quantity rises, but specialty finishes and complex die cuts raise the price.
How long does production usually take?
Standard orders often move through proofing and production in a few business days to around two weeks, depending on complexity. Rush timelines are possible when artwork is final and the specification is straightforward.
Do custom stickers work on curved or refrigerated packaging?
Yes, but the adhesive and material need to fit the surface and temperature conditions. Curved or cold surfaces usually perform better with a flexible film and a stronger adhesive designed for that environment.

