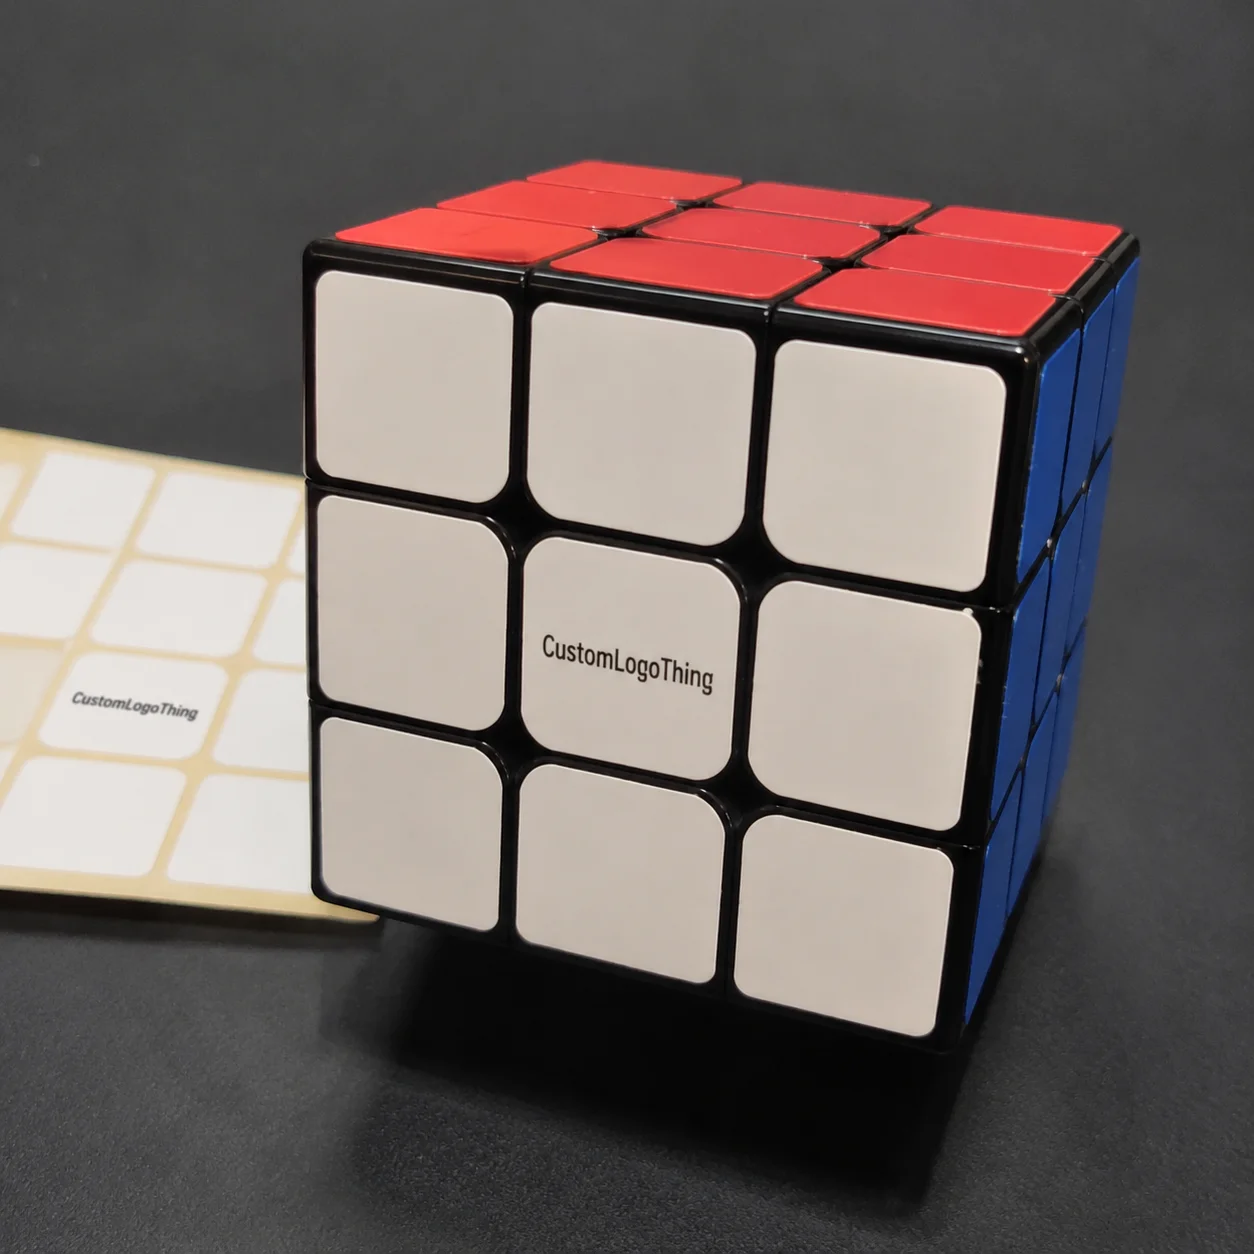
Cheap Custom Die Cut Stickers That Still Look Retail-Ready

A sticker is often the lowest-cost branded item in a shipment. Funny how often it becomes the thing a customer photographs, saves, or sticks on a laptop, bottle, toolbox, mailer, or product package. Cheap Custom Die Cut stickers can absolutely look polished. The catch is that the material, adhesive, cut path, and finish have to match the way the sticker will be used.
Low price and poor construction are not the same thing. Low price usually comes from efficient sheet layout, sensible finished sizing, standard white vinyl or indoor paper stocks, clean artwork, and a production plan that avoids unnecessary handling. Poor construction comes from weak adhesive, dull cutting, thin ink coverage, rushed proofing, or a shape that looks clever on screen but tears after one peel. Very inspiring. Also useless.
Die cut stickers are useful because they create a custom shape without the cost of new packaging tooling. A startup can use them as fulfillment inserts. A subscription brand can seal tissue or brighten a plain mailer. Food producers, breweries, cosmetic lines, event teams, trade show kits, and local retailers can add branding without committing to printed cartons, custom bags, or large-volume packaging runs.
The target is simple: a sharp brand shape, a clean edge, readable artwork, a finish that survives handling, and a reorder path that does not require detective work every time inventory runs low.
For many jobs, a 2-inch to 4-inch sticker is enough for inserts, handouts, product labels, retail bundles, and package decoration. Larger decals work for windows, coolers, equipment, merch packs, and point-of-sale displays, but the extra material has to earn its place. Oversized stickers get expensive fast, and they are not automatically more impressive.
Good budget sticker buying is not about chasing the lowest number. It is about choosing the least expensive construction that still fits the surface, handling, shelf life, and brand presentation.
Custom Logo Things keeps the buying conversation practical: size, material, quantity, finish, delivery needs, and artwork condition. Buyers do not need a pep talk. They need clear options, honest limits, and a quote that reflects how the sticker will actually be printed, cut, packed, shipped, and used.
Materials, Adhesives, and Finishes That Decide Quality
Material choice sets the baseline for how the sticker feels, prints, bends, and survives handling. White vinyl is the everyday workhorse for durable branding because it gives bright color, good opacity, and better moisture resistance than paper. It is commonly used for branded packaging, retail giveaways, bottle decals, laptop stickers, merch inserts, and general promotional use.
Clear film gives a printed-on look on glass jars, tins, clear pouches, and smooth plastic containers. It can look excellent, but Buyers Need to Know one detail upfront: white ink may be required under some graphics so colors do not look transparent, dull, or slightly lost against the product behind the label. That extra ink layer can affect pricing and proofing. Not dramatically in every case, but enough that it should not be a surprise after the quote.
Paper stock is usually the lower-cost choice for indoor packaging labels, insert seals, bakery boxes, short-life retail packaging, and dry product applications. It is not the hero for cold bottles, outdoor decals, wet hands, or high-friction surfaces. Paper is fine when the environment is honest about being indoors and dry.
Adhesive matters just as much as the face stock. Standard permanent adhesive works for most smooth packaging, promo, and indoor label uses. Removable adhesive may make sense for temporary campaigns, event badges, retail displays, or surfaces where residue is a concern. Stronger adhesive options can help on textured, cold, oily, or heavily handled surfaces, but stronger is not automatically better. Too aggressive an adhesive can create removal problems, make application less forgiving, or distort thin film during placement.
Finish changes both appearance and durability. Gloss laminate makes color look brighter and adds scuff resistance, which helps when stickers are shipped loose, placed in merch packs, or handled at events. Matte laminate gives a softer retail feel and works well for cosmetics, coffee, wellness products, boutique packaging, and minimal brand systems. Unlaminated paper keeps cost lower for indoor labels where long-term durability is not required.
- Best budget baseline: white vinyl with one standard laminate for durable everyday use.
- Lowest indoor cost: paper stock without laminate for short-life packaging labels.
- Clean display look: clear film for glass, plastic, or smooth coated surfaces.
- Premium feel: matte laminate when the sticker is part of a retail presentation.
Surface conditions change performance. Glass, plastic mailers, coated boxes, jars, tins, kraft cartons, and corrugated shippers all behave differently because of dust, oil, moisture, temperature, and texture. If the sticker will be applied to cold beverage bottles or handled in damp settings, say that before quoting. If it will be placed on rough kraft paper or corrugated board, mention that too. The adhesive cannot read minds.
Production quality improves when artwork is vector-based, colors are specified clearly, and the sticker shape avoids fragile points. Ink adhesion, laminate bonding, and cut accuracy are easier to control with clean files and realistic geometry. For sustainability-related packaging decisions, buyers can also review guidance from the EPA Sustainable Materials Management program, especially if stickers are part of a broader packaging plan.
Size, Shape, Bleed, and Cut Line Specs to Check
Die cut stickers are trimmed around the custom outer shape of the artwork instead of being limited to a square, circle, oval, or rectangle. That custom shape is the appeal. It also means the cut path has to support both the design and the cutting equipment.
A smooth outline with a few brand-defining curves usually performs better than a shape full of narrow spikes, tiny notches, sharp hooks, or hairline gaps. Intricate silhouettes can look great in a rendering and then become annoying in real life. If the sticker is hard to peel or the edge catches during application, the design is working against the product.
Size drives cost because every extra inch uses more stock, ink, laminate, sheet space, packing volume, and shipping weight. A 2-inch logo sticker may work perfectly as a packaging insert. A 3-inch or 4-inch decal may be better for bottles, merch, laptops, and event handouts. Larger decals make sense for equipment, windows, retail displays, or Custom Packaging Products, but do not size up just because the sticker feels more substantial on a screen.
Artwork quality is where budget stickers either hold up or fall apart. Vector artwork is preferred because edges stay crisp at any size, cut lines can be defined clearly, and small adjustments can be made without rebuilding the file. High-resolution raster files can work if they are clean, sized correctly, and not dragged from screenshots, social media previews, or old web graphics. A 300 dpi file at final print size is a common baseline for raster artwork, though vector is still the safer choice for logos and typography.
Bleed and safe zone are not glamorous. They just prevent ugly results, which is useful. Bleed means the background color or image extends beyond the cut line, often around 0.0625 inch to 0.125 inch depending on the production setup. That extra area prevents tiny cutting shifts from leaving unwanted white edges. The safe zone is the opposite: keep logos, borders, QR codes, fine type, and important artwork inside the trim area so normal cutting tolerance does not remove or crowd them.
Text needs room. If a sticker is only 1.5 inches wide, a tagline that looks acceptable on a monitor may become unreadable after printing, laminating, trimming, and peeling. Thin borders are another common issue because a small cut shift can make one side look heavier than the other. For QR codes, keep the code large enough to scan after lamination and do not place it near the edge.
A useful proof should show printed artwork, the cut line, finished size, material, finish, and any notes about color expectations. Proofing is not ceremonial paperwork. It is the point where the buyer and production team agree on what will be made. Fixing a cut path before printing is cheap. Fixing it after thousands of stickers are finished is not.
Pricing, MOQ, and Unit Cost Drivers
Sticker pricing is normally driven by finished size, quantity, material, finish, number of designs, color coverage, shape complexity, proofing needs, packing style, and delivery speed. Accurate quoting gets much easier when the buyer provides those details upfront instead of asking for “a price on stickers” with no size, use case, or artwork file. That request sounds simple. It is not.
Minimum order quantity, or MOQ, exists because even a small sticker order requires setup, proofing, material handling, printing, cutting, quality checks, counting, packing, and shipping paperwork. The first sticker carries a lot of fixed work. As quantity rises, that setup spreads across more units, which is why 1,000 pieces usually price much better per sticker than 100 pieces.
| Specification Choice | Typical Budget Impact | Practical Buyer Note |
|---|---|---|
| 2-inch white vinyl, standard shape, gloss laminate | Often the most efficient durable option at mid to higher quantities | Good for inserts, giveaways, bottles, and general package branding |
| 3-inch to 4-inch vinyl decal with matte laminate | Higher unit cost due to more material and laminate area | Better for merch packs, laptops, retail displays, and resale bundles |
| Indoor paper sticker without laminate | Lower cost when durability is not required | Suitable for dry indoor labels, box seals, and short-life product packaging |
| Clear film with white ink support | Can add cost because of ink layering and proofing attention | Useful for glass, jars, tins, and a printed-on appearance |
| Multiple designs in one order | May cost more than one design at the same total quantity | Each design can require separate proofing, layout, and handling |
Quantity breaks are one of the easiest ways to make a sane decision. Ask for two or three options, such as 250, 500, and 1,000 pieces, or 1,000, 2,500, and 5,000 pieces if the sticker will be used regularly. The lowest total order cost is not always the best value. The better value is often the quantity that drops the unit cost enough without leaving you with obsolete graphics, expired promo language, or a box of old campaign stickers nobody wants to touch.
Multiple designs deserve a closer look. Ten designs at 100 pieces each may not price the same as one design at 1,000 pieces because each design may need proofing, layout, color checking, cutting setup, count control, and packing separation. If designs share the same size, material, finish, and approval timing, there may be efficiencies. Still, do not assume they will behave like one large run.
Finish choices should be judged by use, not just cost. Matte or gloss laminate may add to the price, but it can reduce scuffing and improve perceived quality, especially when stickers are handled, shipped loose, sold as merchandise, or included beside premium Custom Labels & Tags. For very short indoor use, unlaminated paper may be fine. For retail presentation, laminate often earns its keep.
A useful quote request includes finished size, quantity, material preference, indoor or outdoor use, finish, number of designs, artwork file type, target in-hands date, shipping location, and any packaging requirements. With that information, Custom Logo Things can compare cost-saving options without stripping away the features that make the sticker perform.
Proofing, Production Steps, and Turnaround Expectations
The buying process should feel orderly: send artwork and specs, receive a quote, confirm material and finish, review the proof, approve the proof, move into production, complete quality checks, pack the order, and ship. Not dramatic. Just necessary.
During proofing, the production team checks finished size, cut path, bleed, safe zone, obvious resolution issues, and whether small text or thin shapes may cause trouble. If the sticker has a border, a QR code, a clear film effect, or a tight silhouette, this is the time to slow down and confirm the details. A five-minute review can prevent an expensive reprint.
Turnaround usually starts after proof approval, not after the first inquiry. That point causes plenty of confusion. Production cannot reliably begin until size, material, quantity, artwork, payment details, and delivery method are confirmed. If a launch or trade show date is close, the fastest thing a buyer can do is provide clean artwork, answer proof questions quickly, and avoid last-minute design changes.
Timeline variables include order quantity, number of designs, material availability, finish, cut complexity, current production load, proof revision speed, and shipping method. Clean artwork on standard white vinyl with one laminate will usually move more predictably than a complex order involving several materials, many designs, special packing, and unclear files.
Rush production may be possible for cheap custom die cut stickers if the artwork is clean and the specs use standard materials. Honest warning: missing fonts, low-resolution logos, late file changes, unclear cut lines, and intricate shapes can still slow the job. Faster production is not magic. It is a tighter schedule with less room for preventable friction.
Quality control should cover color consistency, print coverage, laminate alignment, cut registration, edge cleanliness, adhesive performance, and count accuracy before cartons leave the floor. For shipments tied to a launch, subscription box ship date, retail drop, or event, build in time for proof review and transit. If the stickers are part of a larger pack-out, coordinate their schedule with boxes, inserts, labels, and fulfillment deadlines.
For packaging distribution tests and shipping performance, organizations such as ISTA publish standards that help teams think about transit conditions. Stickers are not usually tested the same way as a full shipper, but the broader lesson applies: real handling, vibration, temperature, and moisture expose weak material choices.
Common Buying Mistakes That Make Budget Stickers Feel Cheap
The biggest mistake is choosing only by the lowest unit price without checking material, finish, adhesive, cut quality, and the actual use environment. A low-cost paper sticker may be perfect for an indoor bakery box seal. The same sticker may fail quickly on a cold drink bottle, outdoor tool case, oily cosmetic jar, or textured mailer.
Artwork problems are just as common. Low-resolution logos, screenshots, fuzzy edges, missing fonts, tight borders, and designs with no bleed can make even a well-run production order look less professional. The press can only reproduce the file it receives. If the artwork starts soft, the final sticker will not become sharp because someone selected a nicer laminate. Sadly, printers are not wizards.
Oversizing is another budget leak. A sticker that is too large for the mailer, jar, pouch, insert card, or carton costs more, wrinkles more easily, and may feel awkward to apply. Measure the application area before choosing dimensions. A 2.5-inch sticker with a readable logo often does more work than a 5-inch sticker that overwhelms the package.
Adhesive mismatch creates frustration after delivery. Smooth glass, coated paperboard, flexible pouches, plastic mailers, kraft paper, and corrugated board all present different surfaces. Dust, oil, low temperature, condensation, and heavy handling can reduce bond strength. If the application surface is unusual, send a photo or at least describe the material and environment.
Shape complexity can also work against the buyer. Intricate cuts may look impressive in a mockup, but narrow spikes and tiny inside corners can be harder to peel, slower to apply, and more fragile during handling. A sticker should look custom, yes. It should also release cleanly from the liner and apply without the user fighting it.
Color expectations need a practical conversation. Screen colors are backlit; printed ink is not. Clear materials, metallic surfaces, kraft paper, heavy ink coverage, and gloss or matte laminate can all change appearance. Proof notes help, but material choice matters too. If color matching is critical, say so early and provide brand values or reference files instead of relying on a screenshot.
Budget-conscious does not mean careless. A sharp order starts with the real application, clean artwork, a workable size, a practical finish, and enough schedule to review the proof. That is how affordable die cut stickers can still feel crisp, sturdy, and aligned with the rest of the brand presentation.
How to Order Without Wasting Budget
Start by deciding the main use. Packaging inserts, product labels, retail giveaways, event handouts, merch packs, shipping box branding, and resale sticker sheets each have different priorities. A thank-you insert can be lighter and simpler than a sticker sold as merchandise or applied to a bottle that goes into a cooler.
Next, measure the surface. Check the width and height available on the mailer, pouch, jar, carton, insert card, window, tin, or laptop area. Compare that space with logo readability and peelability. If the customer cannot grab the edge or read the mark, the sticker is not doing its job, even if the unit price looks cute on the quote sheet.
Prepare the basic files and order details before requesting pricing. Send a vector logo if available, preferred dimensions, order quantity, number of designs, material preference, finish preference, shipping location, and delivery deadline. If the sticker will be used on bottles, jars, pouches, mailers, cartons, windows, or outdoor surfaces, add a reference photo or short application note.
Ask for quantity breaks. Seeing the cost at 250, 500, and 1,000 pieces, or at larger tiers if you reorder often, makes the decision clearer. Sometimes a modest increase in quantity drops the unit cost enough to justify the larger run. Other times, the design is campaign-specific, and a smaller order protects cash flow.
Order cheap custom die cut stickers with the right specs, an approved proof, and a realistic delivery window instead of chasing the lowest number alone. Send Custom Logo Things the artwork, size, quantity, finish, use case, and in-hands date, and the team can return a practical quote with a production path that fits the budget and protects the final look.
FAQs
How can I order cheap die cut stickers without sacrificing quality?
Choose a standard material such as white vinyl or indoor paper stock based on the use, keep the size efficient, avoid overly complex cut shapes, and provide clean artwork with bleed and a clear cut line. Request quantity breaks so you can compare unit cost at different run sizes before approving the order.
What is the best material for affordable custom shaped stickers?
White vinyl is usually the most versatile choice because it prints cleanly, handles well, and works for many packaging, giveaway, and branding uses. Paper stock can be more economical for indoor packaging labels when water resistance and long-term durability are not required.
Do cheap custom vinyl stickers work outdoors?
They can work outdoors if the correct vinyl, ink system, laminate, and adhesive are selected for the expected exposure. For outdoor use, tell the supplier about sunlight, moisture, temperature changes, surface type, and expected handling before the order is quoted.
What affects the MOQ for custom die cut sticker printing?
MOQ depends on setup time, material handling, proofing, printing, cutting, finishing, packing, and whether the order includes one design or several designs. Larger quantities usually reduce unit cost because setup work is spread across more stickers.
How long does it take to produce low cost custom die cut stickers?
Turnaround depends on artwork readiness, proof approval speed, quantity, material, finish, cut complexity, and shipping method. Production timing is typically calculated after final proof approval, so fast file response helps protect the schedule.