Custom Visor Stickers: Specs, Pricing, and Ordering
A visor has less printable space than a postcard, yet it often sits at eye level in photos, sideline shots, trade show aisles, retail displays, and social clips. That is why Custom Visor Stickers need more technical attention than buyers usually give them.
They look simple. A logo. A cut shape. Maybe a gloss finish.
In production, these small decals are asked to do a fussy job: stick to a curved, handled surface while staying readable at short viewing distance. Some need to Peel Off Cleanly after a tournament. Others need to stay put through sweat, sun, abrasion, and repeated handling. Same general product category. Very different spec.
What Custom Visor Stickers Are and Why Buyers Use Them
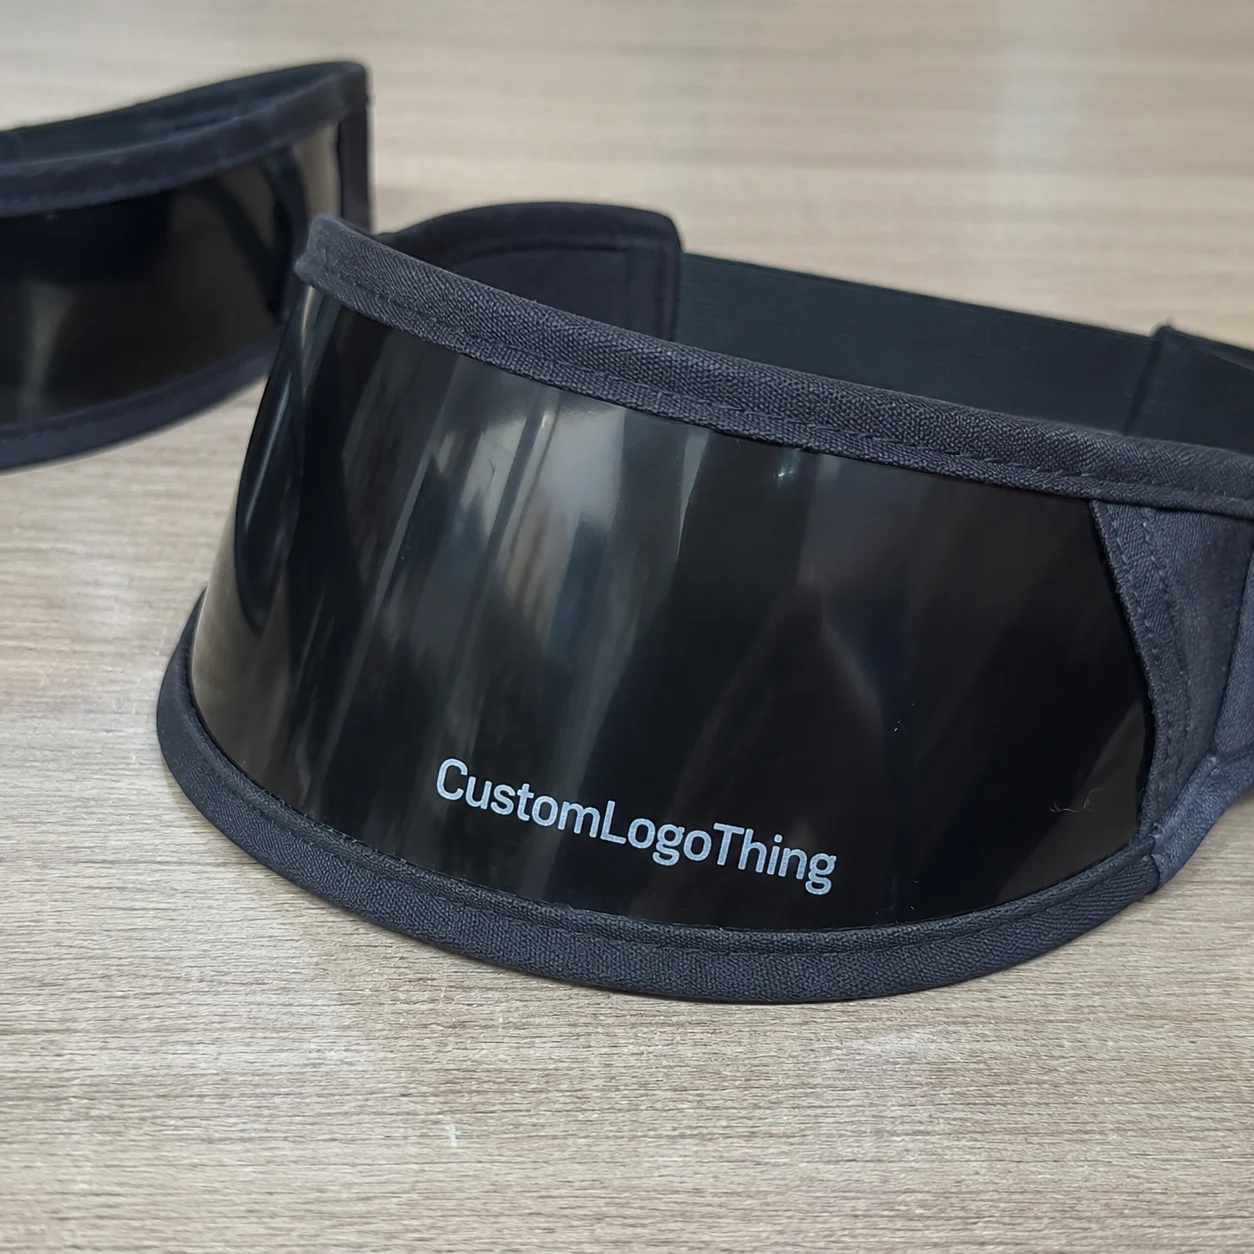
Custom visor stickers are adhesive decals made for placement on hat visors, helmet visors, sun visors, promotional headwear, or visor-shaped packaging inserts. They can be decorative, informational, collectible, tamper-evident, removable, or part of the product identity itself. That last detail matters. A sticker used for retail presentation has different requirements from one applied to a motocross helmet shield.
The main difference between visor decals and ordinary labels is the surface. A flat label on a box usually sits on a clean, stable, low-contact area. A visor sticker may deal with finger oils, fabric texture, sweat, sunscreen, UV exposure, curved placement, and scuffing from bags or shelves. The viewing distance is short too. Fuzzy type and sloppy registration show up fast.
Common buyers include sports teams, golf outings, motorsports programs, school spirit campaigns, outdoor brands, safety helmet programs, branded giveaways, and limited-run merchandise sellers. Apparel teams use stickers because they add visible branding without changing the hat construction. Event buyers like them because a 500-piece run is more flexible than embroidery, molded badges, or custom trim.
Say a small apparel brand orders 500 branded visors for a tournament. The sticker needs to look polished in photos, arrive before the event, and match the brand color closely enough that the cap, decal, and printed flyer feel connected. But should it remove cleanly after purchase? Or stay on as a permanent badge? That decision belongs at the start, not after artwork approval.
Packaging buyer reality check: the first question is not “What looks good?” It is “What job must this sticker do after it leaves the box?”
How Visor Decals Work on Curved, Handled Surfaces
Pressure-sensitive adhesive bonds through contact, pressure, surface energy, and time. Not heat. Not hope. The adhesive needs enough clean surface area to wet out, meaning it slowly flows into microscopic surface texture after application. On a smooth plastic visor, that can happen predictably. On woven cotton or textured performance fabric, the contact area drops fast.
Flat label applications are forgiving. Visor applications are not.
Even a mild curve can create edge lift if the sticker stock is too rigid or the adhesive is poorly matched. A 3-inch rectangle that behaves perfectly on a flat box may curl at the corners on a hat brim. Add handling, sweat, and outdoor use, and the weak points announce themselves. Usually at the worst possible time, because of course they do.
The surface material matters as much as the artwork. Smooth plastic, coated paperboard, synthetic leather, polyester, cotton twill, foam, and helmet shields all behave differently. High-surface-energy plastics usually accept adhesive well. Low-surface-energy plastics, textured fabrics, silicone-treated materials, and water-repellent coatings are harder. If the visor has a DWR coating or a slick performance finish, assume adhesion needs testing.
Flex is the second issue. A thin vinyl or flexible film can follow a slight curve better than a thick paper label. A heavy laminate adds protection but may also increase stiffness. That stiffness can fight the curve and pull the edges up. The trick is not choosing the “strongest” material. It is choosing the material stack that matches the surface, wear level, and removal requirement.
Application pressure is often overlooked. A sticker lightly placed by hand may look fine for a few minutes, then lift later because the adhesive never made full contact. For production runs, especially on fabric or textured visors, a simple roller, firm squeegee, or controlled hand press can improve consistency. Clean hands help too. Finger oils under the adhesive are not part of the design system.
Key Specs to Decide Before You Request Artwork
Artwork is easier to build when the production rules are already clear. If those rules are vague, the designer guesses. Then the printer guesses. Then the buyer gets a proof that looks pretty but may not perform. A familiar little circus.
Start with placement. A front-center visor sticker behaves differently from a side sticker, wraparound decal, or underside label. The more the decal crosses a curve, seam, stitch line, or textured zone, the more carefully the shape needs to be planned. Large blocky shapes are more likely to lift than smaller shapes with rounded corners.
Size comes next. For hat visors, many stickers land between 1.5 and 3.5 inches wide, depending on the brim shape and logo detail. Helmet visor decals can run larger, but they may need contour cuts or segmented layouts to avoid tension. Tiny decals under 1 inch can work, though small type, QR codes, and fine outlines become risky. Small is not automatically cheaper if it increases setup headaches.
Material choice usually falls into a few buckets:
- Paper label stock: low cost, good for short-term packaging or indoor use, weak against moisture and abrasion.
- White vinyl or BOPP film: durable, flexible, and common for branded decals that need cleaner edges and better moisture resistance.
- Clear film: useful when the visor color should show through, but fingerprints, bubbles, and adhesive visibility can be less forgiving.
- Reflective or metallic film: strong visual impact, higher cost, and more limitations on fine detail or color matching.
- Static cling: removable on smooth plastic or glass-like surfaces, not suitable for fabric brims.
Adhesive selection is not glamorous, which is why it gets ignored. Permanent adhesive is best for stickers meant to stay on the visor. Removable adhesive is better for retail labels or event identifiers that should peel away without residue. High-tack adhesive may help with textured or low-energy surfaces, but it can leave residue or damage delicate finishes. Repositionable adhesive sounds convenient until the sticker needs to survive actual use.
Finish changes both appearance and performance. Gloss laminate makes colors pop and improves scuff resistance. Matte looks premium and reduces glare, but it can show oils and rub marks. Soft-touch feels nice in the hand, though it is often overkill for a tiny visor decal. UV coating can add protection, but for outdoor or helmet use, a proper laminate is usually safer than a light coating.
Corner radius deserves its own line because square corners are where many sticker failures begin. Rounded corners reduce the chance of catching, lifting, and peeling. For handled surfaces, a radius of 1/16 inch or larger is often safer than a sharp 90-degree corner. Die-cut shapes can still look custom without turning every edge into a peel tab.
Color matching has limits. Digital printing can get close to brand colors, but exact Pantone matching may require screen printing, spot colors, or a more controlled process. If the sticker sits next to embroidered thread, dyed fabric, or molded plastic, expect slight differences. Different materials reflect light differently. That is physics, not incompetence.
For print files, use vector artwork whenever possible. Convert fonts to outlines. Provide brand color references. Keep thin lines above the printer’s minimum rule, often around 0.25 to 0.5 pt depending on the method. Leave enough bleed, usually 0.0625 to 0.125 inch, and keep critical text inside the safe zone. A visor sticker is small. There is no room for sloppy margins.
Pricing, MOQ, and Unit Cost Factors to Watch
Sticker pricing looks simple until you compare quotes. One vendor quotes pennies. Another quotes three times more. Both might be fair, depending on material, setup, finishing, inspection, and whether the quote includes the parts buyers forget to ask about.
For basic paper or film visor labels, small digital runs may start around $0.15 to $0.60 per piece at a few hundred units. More durable laminated vinyl decals can land around $0.40 to $1.50 each in modest quantities. Specialty materials, reflective films, metallic effects, sequential numbering, aggressive adhesives, or complex contour cuts can push costs higher. Very small orders often carry setup or minimum charges that make the unit price look rude.
Common minimum order quantities range from 100 to 500 pieces for digital production. Screen printing, custom die tooling, specialty adhesives, or exact spot-color work may make more sense at 500, 1,000, or 2,500 pieces and up. If a supplier accepts 50 pieces, great, but the unit price will usually reflect the extra handling.
The biggest cost drivers are predictable:
- Size: larger decals use more material and may reduce how many fit on a press sheet.
- Material: paper is cheaper than vinyl, reflective film, metallic film, or specialty synthetics.
- Adhesive: removable, high-tack, low-temperature, or specialty adhesives may cost more.
- Finish: laminate, UV coating, matte effects, and textured finishes add steps.
- Cut shape: simple circles and rounded rectangles are cheaper than intricate contour cuts.
- Color control: spot colors, proofs, and tight tolerances increase production work.
- Packaging: individually cut decals, sheets, rolls, or retail-ready packs change labor costs.
Ask whether the quote includes art review, proofing, die cutting, setup, overrun policy, shipping, and any tooling. A “cheap” quote that excludes half of those items is not cheap. It is just unfinished math.
Also ask how the stickers will be delivered. Roll labels are efficient for machine or hand application in a production line. Sheets are easier for event teams and small apparel runs. Individual kiss-cut decals feel more retail-ready but require more finishing labor. If volunteers are applying stickers the morning of an event, do not send them a roll that behaves like industrial tape spaghetti.
Process and Timeline: From Proof to Finished Stickers
A smooth order starts with a clear spec. Send the supplier the visor material, intended use, approximate size, quantity, artwork files, color requirements, deadline, and whether the sticker must remove cleanly. If the decal is going on an actual product, send photos or a sample. A flat screenshot tells only part of the story.
Most orders move through five steps: quoting, art review, proofing, production, and shipping. Simple digital sticker orders may finish in 3 to 7 business days after proof approval. More complex jobs can take 10 to 20 business days, especially if they need specialty materials, custom die work, physical samples, or color matching. Rush orders are possible, but they narrow the room for testing. That tradeoff should be visible.
Digital proofs are useful for checking size, layout, spelling, cut line, and general color direction. They do not prove adhesive performance. They also do not show exact texture, laminate feel, or how the sticker bends around a curved visor. For high-visibility orders, ask for a physical sample or pre-production sample. Yes, it adds time. So does reprinting 2,000 decals after the corners lift.
Production tolerances matter. Small shifts in cut alignment, color, or print registration are normal within an agreed tolerance. For tiny logos or thin outlines, a 1 mm shift can look bigger than expected. Build artwork with that in mind. Avoid hairline borders that sit right next to the cut edge unless the supplier confirms the process can hold it cleanly.
Quality control should cover more than counting pieces. Useful checks include:
- Confirming size against the approved proof.
- Checking cut edges for tearing, burrs, or incomplete cuts.
- Reviewing print clarity on small type and logos.
- Testing peel, release liner, and application feel.
- Applying samples to the actual visor surface and watching for edge lift.
- Checking finish consistency under normal light, not just under perfect studio lighting.
If the stickers need to survive outdoor use, ask what durability claim is realistic. A laminated vinyl decal may be rated for months or years outdoors depending on film, ink, laminate, climate, and abrasion. A paper label may look great indoors and fail quickly under sweat or rain. Nobody enjoys discovering that after the shipment arrives.
Common Mistakes That Make Visor Stickers Fail
The first mistake is choosing the sticker before choosing the job. A removable retail decal and a permanent performance decal should not share the same adhesive spec. If the supplier asks how the sticker will be used, answer with more than “on a visor.” That is like telling a mechanic the problem is “car.” Technically true. Not useful.
The second mistake is ignoring the curve. Long rectangles, sharp corners, and stiff materials often fight curved placement. If the brim has a strong arch, consider a smaller decal, a curved layout, segmented graphics, or a more flexible film. The easiest design to print may not be the easiest design to apply.
Another common problem is putting detailed artwork into a space too small to hold it. Thin type, complex crests, tiny social handles, and QR codes can break down fast. QR codes need enough size and contrast to scan after printing and finishing. If the visor sticker is 1.25 inches wide, maybe do not ask it to carry a full mission statement. Radical thought.
Surface preparation gets skipped too often. Dust, lint, oils, sweat, and fabric treatments reduce adhesion. For smooth plastic, a clean dry wipe may be enough. For fabric, cleaning is harder, and some materials simply do not offer reliable adhesion. Test before promising durability.
Temperature also matters. Many pressure-sensitive adhesives apply best at moderate room temperature, often around 60°F to 80°F depending on the product. Cold surfaces can reduce initial tack. High heat can soften adhesive or make application messy. If stickers are applied in a warehouse, outdoor event tent, or unheated storage room, plan accordingly.
Buyers sometimes approve artwork without checking the actual scale. A logo that looks balanced on a monitor may feel huge on a youth visor or tiny on a helmet shield. Print a paper mockup at full size and place it on the product. Not fancy. Extremely useful.
Finally, do not assume “waterproof” means invincible. A film sticker may resist water but still scratch, lift, fade, or fail on a poor surface. A laminate may protect ink but not fix the wrong adhesive. Product claims need context: water exposure, UV exposure, sweat, cleaning chemicals, abrasion, and expected life.
Next Steps: Build a Smarter Visor Sticker Order
A better order starts with a short spec sheet. It does not need to be beautiful. It needs to be specific.
List the visor surface, quantity, size range, intended use, indoor or outdoor exposure, removal requirement, deadline, preferred finish, packaging format, and color expectations. Add photos of the placement area. If the surface is unusual, send a sample or request material testing. The goal is to remove guessing before the proof stage.
For most event, apparel, and promotional orders, a flexible film with rounded corners and either removable or permanent adhesive will cover the majority of needs. For retail presentation, clean removability may matter more than maximum bond. For helmets, outdoor sports, or longer wear, durability and adhesive testing matter more than shaving a few cents off the unit price.
Keep the design simple enough to survive production. Strong logo. Clear shape. Good contrast. Sensible finish. Adequate bleed. Safe margins. If the decal is doing packaging work, make it look intentional. If it is doing performance work, make sure it can take abuse.
The best visor sticker is not always the fanciest one. It is the one that applies cleanly, stays put for the required life, removes if it is supposed to, and still looks like the brand approved it on purpose.
FAQ
What are custom visor stickers used for?
They are used for branding, decoration, retail presentation, event identification, team gear, helmet markings, limited-edition merchandise, and promotional giveaways. The right construction depends on whether the sticker is temporary, removable, permanent, indoor, outdoor, decorative, or functional.
What material works best for visor stickers?
For many orders, flexible vinyl or BOPP film works better than paper because it handles moisture, bending, and scuffing more effectively. Paper can still work for short-term packaging or indoor retail labels. For outdoor wear or helmets, laminated film is usually the safer choice.
Will visor decals stick to fabric?
Sometimes, but fabric is harder than smooth plastic. Woven texture, water-repellent coatings, lint, and fibers reduce adhesive contact. High-tack adhesive may help, but testing is strongly recommended. If the visor is heavily textured or treated, a sticker may not be the best long-term branding method.
Can the sticker be removed without residue?
Yes, if it is made with a removable adhesive and applied to a compatible surface. Removal performance depends on surface material, dwell time, temperature, and adhesive type. A decal that removes cleanly after one day may behave differently after six months in heat and sun.
How much do custom visor stickers cost?
Basic small-run decals often range from about $0.15 to $0.60 each for simple paper or film labels. Laminated vinyl, specialty materials, contour cuts, or tight color requirements can push prices closer to $0.40 to $1.50 each or more. Quantity, size, finish, adhesive, and packaging format all affect the final number.
What is a normal minimum order quantity?
Many digital sticker suppliers start around 100 to 500 pieces. Specialty production, screen printing, custom tooling, or exact spot-color work may require higher quantities. Very small runs are possible, but the setup cost gets spread across fewer pieces.
How long does production take?
Simple digital orders may take 3 to 7 business days after proof approval. More complex visor sticker orders can take 10 to 20 business days, especially if physical samples, specialty materials, custom cutting, or color matching are involved. Shipping time is separate.
Do I need a physical proof?
For low-risk promotional orders, a digital proof may be enough. For outdoor use, helmet use, retail products, or any surface with texture or coating, a physical sample is worth considering. A digital proof checks the design. It does not test adhesion.
What file format should I send?
Vector files such as AI, EPS, or print-ready PDF are best for logos and cut lines. Convert fonts to outlines, include bleed, keep important elements inside the safe area, and provide brand color references. High-resolution PNG or TIFF files may work for simple artwork, but vector is cleaner for small decals.
Are rounded corners necessary?
Not always, but they help. Rounded corners reduce snagging and edge lift, especially on handled or curved surfaces. Sharp corners can work for short-term use, but they are more likely to peel when the sticker is touched, rubbed, or flexed.


