If you make apparel, you already know the problem: too much information, too little space. That is why folded hang tags for apparel manufacturer projects keep showing up in stronger retail programs. They create room for branding, SKU data, care copy, compliance details, and a short brand story without turning the tag into a billboard. The format looks controlled, but more importantly, it solves a real production problem.
Custom Logo Things works with buyers who need tags that look polished and still do the job. You do not need to overspend to look premium. You need the right structure, the right stock, and a proofing process that prevents avoidable mistakes.
Why folded hang tags punch above their weight
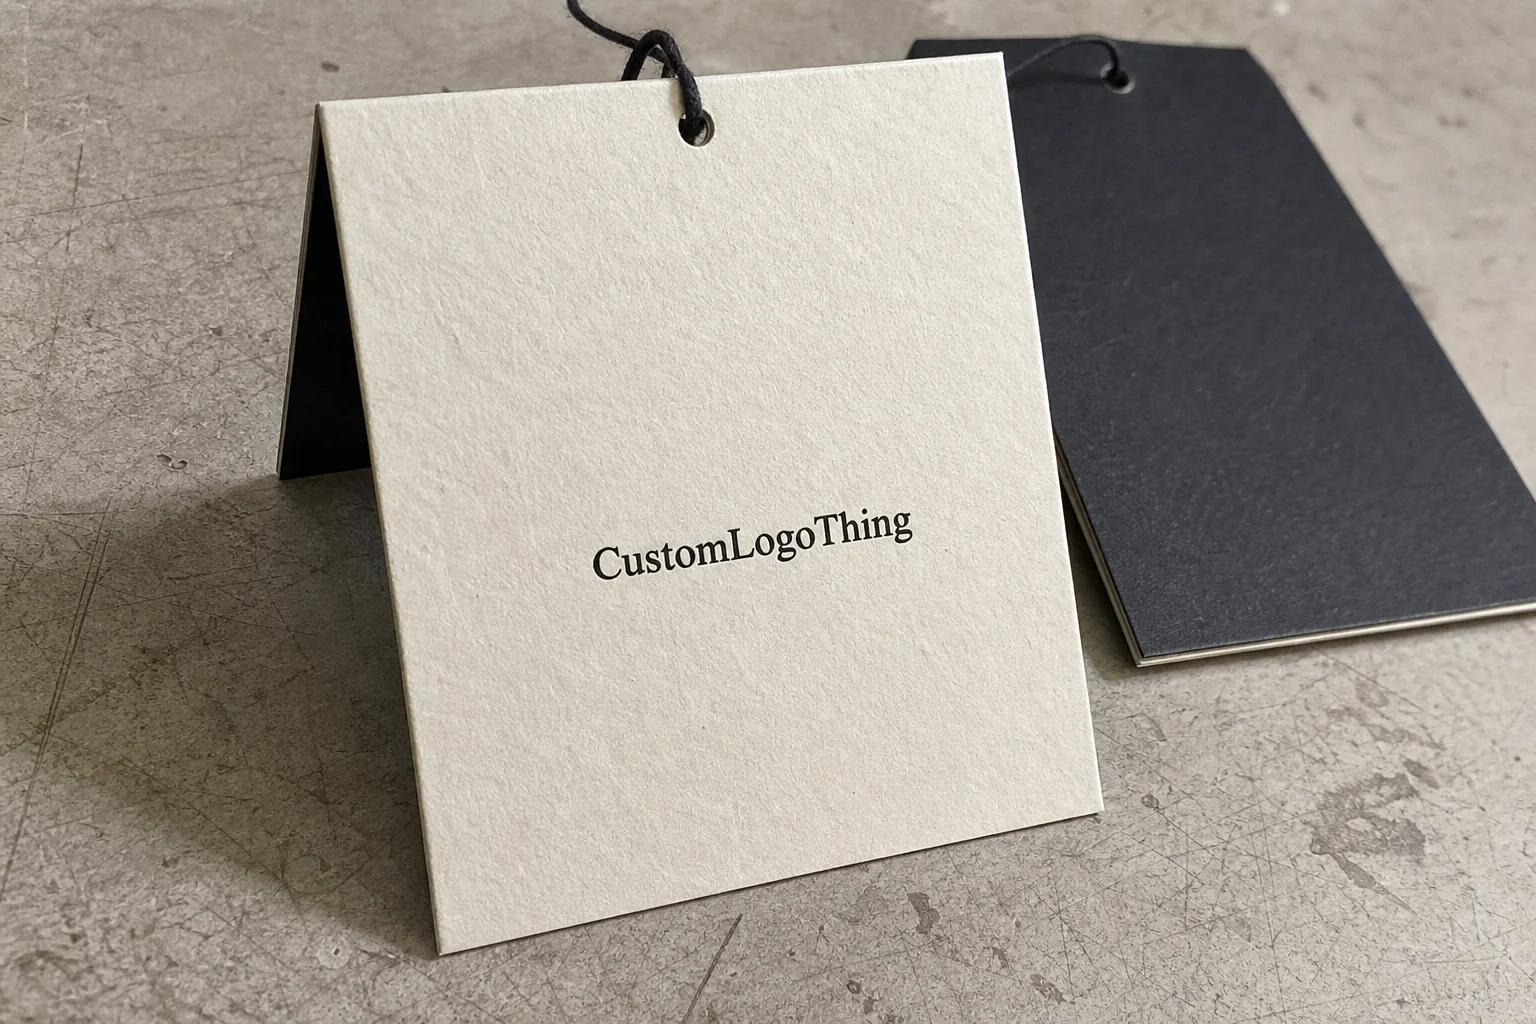
A flat hang tag gives you one usable face, maybe two if the design is sparse. A folded tag gives you multiple panels in the same footprint, which matters when product pages, care instructions, barcode placement, and branding all have to live on one piece. That extra space is not cosmetic; it is operational.
In practical terms, a folded hang tag is a multi-panel paper tag folded from a flat sheet into a booklet-style format. It is usually finished with a string, eyelet, staple, or plastic fastener. It behaves like a miniature brochure attached to the garment, which is why it works so well for premium basics, denim, outerwear, activewear, and Private Label Lines that need more than a logo and a price.
Compared with a standard flat tag, a folded version usually looks more considered and more expensive. The tradeoff is production complexity. More folds. More layout decisions. More opportunities for a barcode to land too close to a crease or for a fold sequence to be reversed in proofing. So it is not the right choice for every garment. It is the right choice when the information load is real and the tag needs to carry it cleanly.
Buyer reality: the best tag is not the fanciest one. It is the one customers can read quickly, retailers can scan reliably, and your factory can produce without unnecessary back-and-forth.
If you are comparing paper tag types, the decision usually comes down to content density and shelf presence. A simple tee may only need a flat tag. A jacket with sizing, compliance, origin, and a brand story is usually better served by a folded format. For other structures that may fit the same program, see Custom Labels & Tags.
| Tag type | Best for | Typical tradeoff |
|---|---|---|
| Flat hang tag | Simple branding, basic SKU and price info | Less room; can feel basic |
| Folded hang tag | More copy, care details, QR codes, retail storytelling | Higher setup and finishing complexity |
| Die-cut tag | Strong visual identity, custom shapes | More tooling and often higher cost |
How folded hang tags work on the production line
Think of folded tags as a small print system, not just a piece of card. The outer panel usually carries the brand, logo, and headline. Inner panels can hold product copy, sizing, fabric details, QR codes, barcodes, compliance text, origin notes, and retailer messaging. That separation keeps the layout readable instead of turning it into a crowded block of type.
The fold style changes how the tag reads. A bi-fold gives you a front and inside spread. A tri-fold creates more panel separation for layered content. Gatefolds open in a more dramatic way and are sometimes used for premium storytelling. Accordion folds work when information needs to be sequenced across several panels or language versions need to stay separate. Each one changes the reading order and the way the tag feels in hand.
Attachment method matters too. String and cotton cord usually suit lifestyle and premium fashion. Loop pins and plastic fasteners are common in high-volume programs where speed and packing efficiency matter. Eyelets reduce tearing around the hole and give a cleaner finish. Staples are straightforward, but they are not ideal for every garment or every brand image. The choice should follow the product, not a mood board.
Production gets more demanding as panels increase. Registration has to line up across folds. The dieline needs careful review. Quality control becomes more involved than with a one-piece tag. Print method also changes the result. Offset printing usually makes sense for larger runs. Digital printing is often better for shorter runs, versioned SKUs, or orders that need fast changes. Finishes such as matte lamination, soft-touch coating, foil, embossing, and spot UV can elevate the look, but they also affect cost and turnaround.
For buyers who care about durability and retail handling, transport and testing standards are useful references even when a tag itself is not formally certified. Packaging teams often look to ISTA for shipping performance and ASTM methods for materials and testing. That mindset matters when a tag is part of a high-value product or a multi-piece assortment that has to stay intact through packing and distribution.
Key specs that affect cost, pricing, and readability
Paper stock is one of the first cost drivers. Coated stock gives sharper print and stronger color contrast. Uncoated stock feels more natural and is easier to write on. Kraft signals a more eco-minded brand position. Textured stock can look premium, but very small type can lose clarity. Recycled stock supports sustainability claims, although brightness and finish options may be more limited. Each choice brings a tradeoff, and the tradeoff should be deliberate.
Size and panel count affect everything downstream. A three-panel folded tag uses more paper than a simple one-fold. Bigger tags need larger dies or more trim area. More panels mean more layout work and more chances for a proof to go wrong. In practical pricing terms, a modest bi-fold on standard card stock at 5,000 pieces might fall somewhere around $0.18-$0.35 per unit, depending on print coverage, attachment, and finish. Add soft-touch coating, foil, or custom die cutting, and the price rises quickly.
Here is the simple version of what usually moves the quote:
- Run length: larger quantities usually lower the unit cost.
- Panel count: more folds mean more setup and more finishing labor.
- Ink coverage: full-bleed designs use more ink and can slow drying or finishing.
- Variable data: unique SKUs, barcodes, or QR codes add proofing complexity.
- Special finishes: foil, embossing, spot UV, and lamination all increase cost.
- Attachment method: cords, eyelets, and fasteners can change the final quote more than people expect.
Readability is where many good concepts fall apart. Do not cram care instructions, legal text, and brand copy into a panel the size of a postage stamp. Keep type sizes practical. Leave enough margin near fold lines so text does not disappear into the crease. Make sure barcodes have clean quiet space and are not sitting on heavy gloss that can interfere with scanning. These are small issues on paper and expensive issues in production.
If your brand makes sustainability claims, make sure the stock and finish actually support them. FSC-certified paper can help support a responsible sourcing story. The FSC system is widely recognized, but only when the material and chain-of-custody claims are real. A green claim printed on a tag is still a claim that needs proof.
| Spec choice | Effect on look | Effect on cost |
|---|---|---|
| Uncoated 400gsm | Natural, writable, understated | Usually moderate |
| Coated 350gsm | Sharper print, richer color | Moderate to slightly higher |
| Soft-touch + foil | Luxury feel, strong shelf impact | Higher |
| Kraft with simple print | Eco-forward, earthy, tactile | Usually moderate |
Folded hang tags for apparel manufacturer orders: process and timeline
The cleanest projects follow the same basic workflow. First define the use case. Then choose dimensions. Then confirm panel content. Then approve the dieline. Then review the proof. Then print, finish, pack, and ship. It sounds simple because it is simple in sequence. The difficulty comes from skipping steps and trying to recover later.
Most delays come from missing artwork, unclear fold structure, late barcode changes, and copy edits after proof approval. Once the proof is signed off, every change has a cost. Sometimes that cost is minor. Sometimes it means a restart. That is not drama from the factory; it is just how production works.
For timing, standard folded tags can often move in roughly 10-15 business days after proof approval if the specs are straightforward and artwork is ready. Custom die cuts, premium finishes, multiple SKU versions, or unusual attachment methods can extend the schedule into the 15-25 business day range. Rush orders are possible in some cases, but custom plus rush usually means a higher price and less room for error.
Proofing matters more than many buyers expect. A digital proof is useful for layout, text, and barcode placement. It is not a perfect color guarantee. For larger runs or launch-critical programs, a production proof or press check can be worth the time. Once a tag is tied to a seasonal launch or retail deadline, nobody wants to discover that the inside panel opens in the wrong order or the barcode sits too close to a fold.
Keeping specs locked early helps avoid the usual “almost ready” stage that burns time without producing progress. It also helps to think about how the tags will arrive. Some orders ship bulk-packed, some are banded by style, and others are sorted by SKU. The best packing method depends on how the factory or warehouse will stage the apparel. If multiple versions are involved, ask for packing that matches the workflow instead of creating hand-sorting at the last minute.
Step-by-step buying guide for better apparel tags
Step 1: Define the job. Is the tag for retail storytelling, compliance, merchandising, or premium branding? The answer changes the size, fold, paper, and finish. If this step is skipped, the design usually becomes everything and nothing at once.
Step 2: Pick the fold structure based on content load. If the tag only needs a logo and barcode, keep it simple. If it needs more space, plan for a bi-fold, tri-fold, or accordion layout. Do not choose a fold first and then force content into it. That is how redesigns happen under pressure.
Step 3: Match the stock to the garment. Heavy luxury card on a basic tee can feel off. A recycled kraft tag on outdoor gear can feel right. A soft-touch finish on premium knitwear may be ideal, while the same finish on workwear could look misplaced. Match the product, not the ego behind the product.
Step 4: Build the layout for fold safety. Set hierarchy clearly. Keep the brand headline prominent. Put functional details where they are easy to find. Leave enough distance from the fold lines. Keep barcodes where scanners can read them without obstruction.
Step 5: Confirm attachment and handling. The tag needs to survive packing, shipping, hanging, and customer handling. Check hole position, eyelet placement, cord length, and whether the tag hangs correctly on the garment. A tag that looks good flat on a screen can behave badly in real life.
Step 6: Review the proof like it matters. Verify copy, SKU logic, barcode size, fold sequence, and color expectations. If you are ordering folded hang tags for apparel manufacturer use across multiple styles, verify each version separately. One bad SKU can create a whole box of unusable inventory.
For brands building a broader packaging system, consistency helps. If paper tags, woven labels, and product stickers all share the same tone and structure, the collection feels more coherent. Many buyers keep the same dimensions or stock families across seasons for that reason. Fewer variables usually means fewer mistakes and faster approvals.
If you want a better sense of how a supplier handles custom work, not just whether they can print a logo, review the company basics too. See About Custom Logo Things.
Common mistakes that waste budget and ruin tags
The first mistake is overloading the panels. If every sentence feels important, none of it stands out. Folded tags are not a substitute for a manual. They are a compact communication tool, so the copy has to be sharp and relevant.
Second, buyers often choose the fold before deciding what needs to fit. That sounds backward because it is backward. Decide the content first, then the structure. Otherwise, you pay for redesigns and extra proofs that could have been avoided.
Third, the garment category gets ignored. Delicate fashion pieces, activewear, outerwear, and workwear do not need the same paper weight or finish. A glossy, heavy tag on lightweight basics can look overbuilt. A thin tag on premium apparel can look cheap. The product should drive the spec.
Fourth, barcode and SKU placement gets left until the end. Then the code lands too near a fold or under a heavy gloss. Scanners do not care about the design concept. They fail. Keep the barcode area clean, flat, and tested before final sign-off.
Fifth, teams submit low-resolution artwork or copy that is still being edited. That creates proof delays and sometimes reprints. Print production is not the place to sort things later. It rarely gets better later. It usually gets more expensive later.
Finally, many teams skip the actual hang test. They approve the mockup, then discover the string is too short, the hole is in the wrong spot, or the tag twists awkwardly on the garment. Test the physical behavior, not just the visual. That small check saves a lot of irritation.
- Too much text on too little space
- Fold choice made before content planning
- Wrong stock for the garment category
- Barcode placed too close to a fold or gloss finish
- Artwork not finalized before proofing
- No actual hanging test on the product
Expert tips for cleaner results and fewer headaches
One practical rule helps a lot: keep one panel for the core brand message and one panel for the functional information. That split makes the layout easier to read, easier to approve, and easier to reuse across styles. Brands that do this well usually move faster because everyone knows where the important content lives.
Use hierarchy aggressively. Big headline first. Medium product details second. Small support copy last. If everything is the same size, the tag reads like a legal notice. A little contrast solves more design problems than people think.
If the order is premium, complex, or tied to a launch, ask for a physical sample. Paper feel, fold sharpness, and finish behavior are hard to judge on screen. A sample can also reveal whether the eyelet sits too close to the edge or the soft-touch coating makes the barcode less reliable. Better to learn that before production.
Standardize wherever possible. Reuse the same tag dimensions, stocks, and attachment types across collections when the brand system allows it. Standardization reduces quoting friction, speeds approvals, and keeps the packaging look consistent. It is not glamorous, but it works.
If you need multiple versions, organize SKUs in a clean spreadsheet before requesting a quote. Include style name, size, barcode, copy changes, language versions, and any finish differences. Nobody wants to untangle a messy file with 18 tabs and half the labels missing.
For sustainability claims, confirm the stock and finishes actually support the message. FSC-certified paper, recycled content, soy-based inks, and water-based coatings can all help, depending on the structure. If the claim is on the tag, it should be true on the spec sheet too.
Next steps: what to prepare before requesting a quote
Before requesting pricing, gather the basics: garment type, target retail channel, exact information needed on the tag, and any compliance or multilingual copy. The more complete the brief, the less guessing the supplier has to do. Guessing is how quotes drift.
Then decide on size preferences, fold style ideas, finish preferences, and attachment requirements. If you already know whether you want a bi-fold, tri-fold, or accordion format, say so. If you need folded hang tags for apparel manufacturer programs across multiple SKUs, list every variant up front. Variant count affects cost more than most buyers expect.
Share your target budget and delivery window. If you want a premium finish on a tight timeline, that changes the recommendation. It is better to set the guardrails early than to fall in love with a spec that does not fit the schedule. Ask for a proof process that includes dieline confirmation and barcode verification, and confirm how the tags will be packed for delivery.
Once the specs are clear, folded hang tags for apparel manufacturer projects become much easier to price, produce, and ship without surprises. The real win is fewer revisions, fewer delays, and tags that make the garment look more valuable instead of just taking up space.
FAQ
What makes folded hang tags better than flat tags for apparel manufacturers?
They provide more panel space for branding, care instructions, SKUs, and storytelling without making the tag physically oversized. They can also look more premium and organized when a product needs more than a simple one-sided tag. They are especially useful when retail information and marketing copy need to live on the same piece.
How much do folded hang tags for apparel manufacturer orders usually cost?
Pricing depends on size, panel count, paper stock, finish, quantity, and attachment method. More folds, specialty finishes, and variable data like barcodes or versioned SKUs raise the unit cost. Larger runs usually bring the per-tag price down, but setup and finishing choices still matter. For a standard bi-fold at moderate quantities, a rough range around $0.18-$0.35 per unit is common, with premium finishes pushing higher.
What is the typical turnaround for folded hang tags?
Turnaround depends on artwork readiness, proof approval speed, and whether the order uses standard or custom finishing. Simple folded tags can move faster than orders with die cuts, foil, embossing, or multiple SKU versions. A straightforward order may ship in 10-15 business days after proof approval, while more complex jobs often need 15-25 business days.
What information should go on folded apparel hang tags?
Use outer panels for branding and the inner panels for product details, care info, barcode, SKU, size, and QR code if needed. Do not cram every sentence into one panel; hierarchy matters more than stuffing in more text. Leave margin near folds and keep scannable codes away from heavy gloss or awkward edges.
How do I avoid mistakes when ordering custom folded hang tags?
Approve the dieline carefully and verify fold order, panel sizes, and hole placement. Check artwork resolution, barcode clarity, and final copy before production starts. If the order is premium or complex, request a sample or proof review before full production.