If you want to get Custom Made Stickers that do more than sit neatly on a mockup, the real work starts with fit: fit for the surface, fit for the environment, and fit for the way the sticker will be handled after it leaves the printer. A sticker can look sharp on screen and still fail on a waxy mailer, a cold bottle, or a rough carton flap. That mismatch is where a lot of avoidable waste begins.
The best sticker orders are usually the least dramatic ones. The artwork is clear, the stock suits the substrate, the adhesive matches the surface, and the finish supports the use case instead of fighting it. Whether the sticker is sealing packaging, labeling a product, or carrying a brand mark on a shipping box, the spec should be chosen with the actual job in mind, especially if the sticker needs to sit alongside broader Custom Packaging Products or Custom Labels & Tags.
Why Custom Stickers Matter More Than They Seem
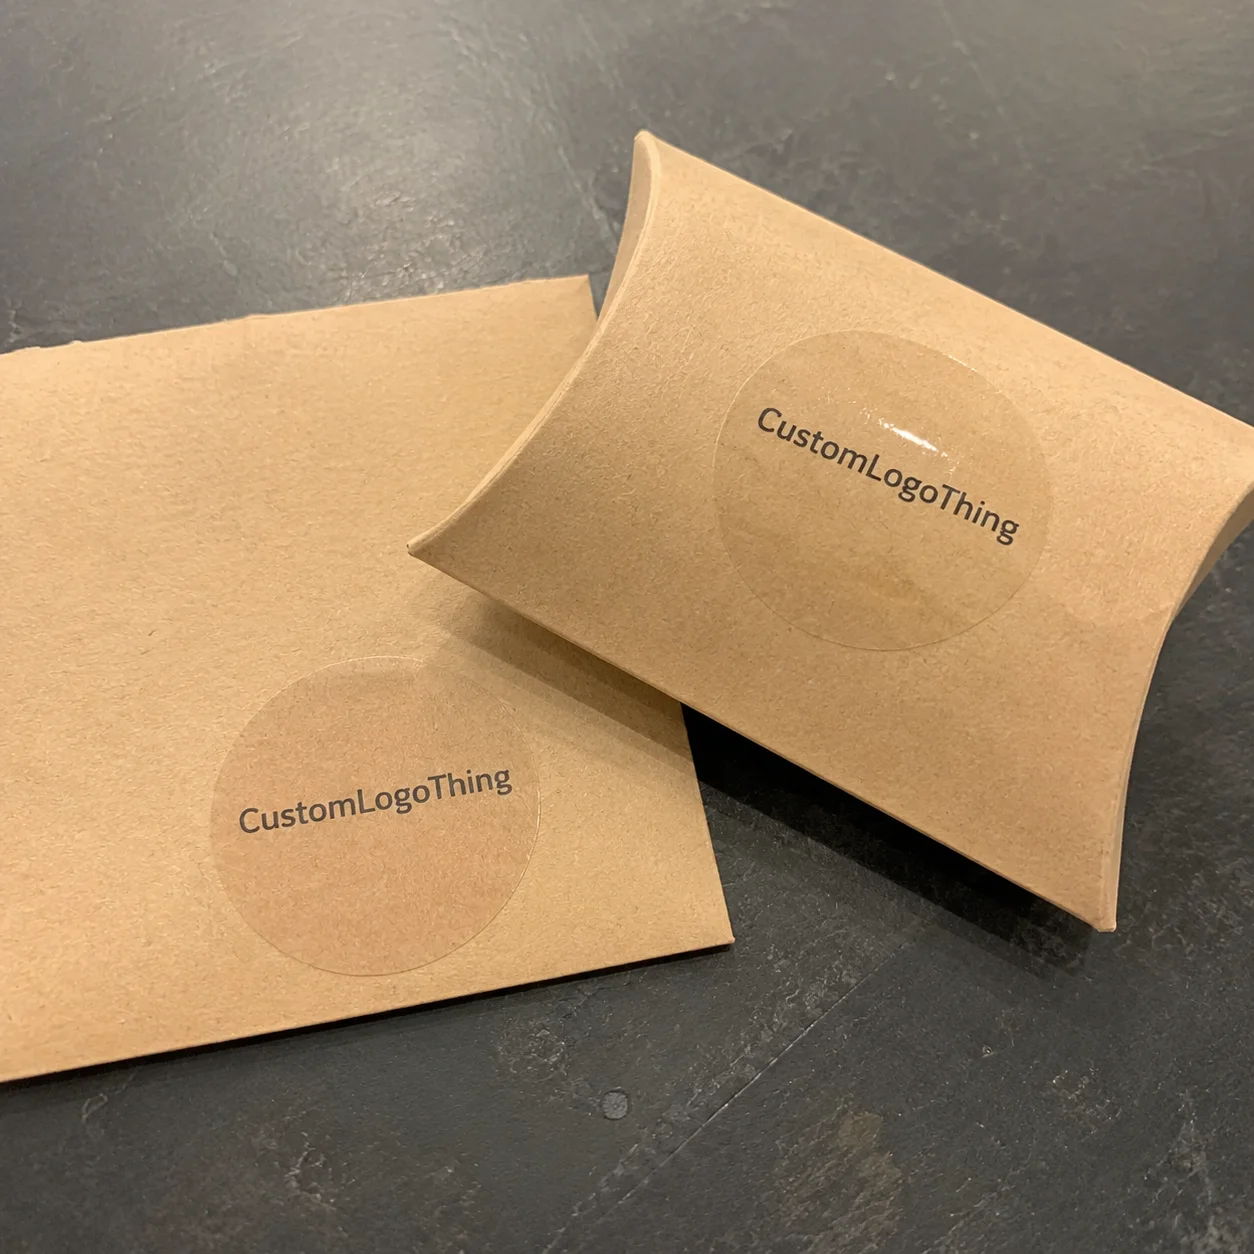
Stickers are small, but they influence how finished, consistent, and credible a product feels. A plain carton with a clean die-cut logo sticker can look intentional instead of improvised. A branded seal can make a mailer feel closed, not just taped shut. A well-made product label can pull a whole package together without competing with the rest of the design.
That is why buyers often get Custom Made Stickers for more than decoration. They use them for branding, tamper evidence, seasonal SKU identification, event handouts, shipping presentation, and quick visual sorting in the warehouse. The function changes the spec. A giveaway sticker can tolerate a wider range of materials than a refrigerated product label, and a short-run promotional piece has different needs than a sticker that will be stored, stacked, and shipped repeatedly.
Appearance matters, but durability and placement matter just as much. A gloss finish may look stronger under store lighting, while matte can suit a quieter, more tactile brand. A permanent adhesive can be right for a seal that should not be removed, yet the same adhesive may be overkill on a temporary promotion. Texture, moisture, refrigeration, handling, and surface chemistry all affect how well a sticker performs after application.
“A sticker only looks inexpensive when it fails early; the real cost shows up in replacement, rework, and lost presentation.”
That is the practical side of sticker buying. Good choices are rarely flashy. They are just well matched.
How Sticker Production Actually Works
Most sticker jobs move through the same sequence: artwork review, proofing, print production, cutting, finishing, and packing. The early stage is where the most expensive mistakes happen. A missing bleed, a misread cut line, or a file that is too low in resolution can slow the order before production even begins. If you Get Custom Made stickers with print-ready artwork, the proof cycle is usually cleaner and the turnaround easier to predict.
Digital printing is common for short and mid-sized runs because it avoids the heavy setup that long-run methods need. It is efficient for varied artwork and smaller quantities, and it handles custom die shapes well. Offset-style production can make sense at higher volumes, but sticker buyers usually see digital first unless the order is very large and standardized. Specialty treatments such as spot gloss, foil, or textured coating add time, cost, and another layer of proof review.
The cut format changes both the look and the application experience. Kiss-cut stickers are cut through the face stock while staying on the liner, which is useful for sheets and easy peel-off handling. Die-cut stickers are trimmed to the exact shape of the artwork, which gives the cleanest branded presentation. Sheets are practical for manual application and lower-volume use, while rolls work better on packing tables and labeling lines where speed matters. Singles fit inserts, handouts, and promotional distribution.
Proofing is more than a formality. Good buyers check size, border thickness, spelling, cut placement, barcode positioning if needed, and whether the sticker still fits the intended panel or product surface. If the artwork is clear and the spec is already locked, the order tends to move faster because fewer decisions are still floating around.
For projects that touch transit performance or responsible sourcing, ISTA and FSC are useful references when packaging and material choices need to align with broader requirements.
Materials, Adhesives, and Finishes
Material choice is where a sticker either earns its keep or starts causing trouble. Paper is usually the economical choice for dry, indoor use, mailers, inserts, and short-run branding. It prints well and feels familiar, but it does not like moisture. Vinyl is more durable and forgiving, especially when the sticker will see abrasion, handling, or exposure to water. BOPP, a polypropylene film, is widely used for product labels and retail packaging because it handles moisture better than paper and keeps a clean appearance on bottles, pouches, and cartons. Specialty films can bring extra texture or resistance, but they are only worth paying for when the application really needs them.
The adhesive matters just as much as the face stock. A sticker that behaves beautifully on a smooth box may lift on kraft, curl on a bottle, or fail to grab on a refrigerated surface. Permanent adhesive is common when the sticker needs to stay put for the life of the package, while removable adhesive can suit temporary promotions, seasonal branding, and short-term campaigns. Cold rooms, condensation, dust, and textured surfaces all make initial tack less predictable, so the substrate should be part of the spec from the start.
Finish changes both appearance and handling. Matte gives a softer, less reflective look and can suit minimalist or artisanal branding. Gloss increases color pop and often reads more vividly under retail lighting. Soft-touch creates a velvety feel that can make premium packaging feel more deliberate, though it is mainly a tactile finish rather than a durability upgrade. Lamination helps protect against scuffs, moisture, and color wear, which is useful for stickers that will be stacked, shipped, or touched often.
There is always a tradeoff. The more premium the finish, the more you want to confirm that the application surface can support it. Rough kraft, curved bottles, cold packaging, and condensation all change the equation. A simpler stock with the right adhesive often outperforms a prettier stock chosen for the wrong surface.
| Material | Best For | Typical Strength | Common Limitation |
|---|---|---|---|
| Paper | Dry indoor labels, mailers, short-run branding | Economical and easy to print | Weak against water and scuffing |
| Vinyl | Durable stickers, high-handling promotions | Good abrasion and water resistance | Higher cost than paper |
| BOPP | Retail packaging, bottles, pouches, cartons | Strong moisture resistance and clean print quality | Less ideal on highly textured surfaces |
| Specialty film | Premium effects and unusual environments | Application-specific performance | Higher cost and longer approval time |
Material and finish choices also affect how the rest of the packaging reads. A sticker that clashes with the box stock or sheen can make an otherwise well-designed package feel patched together. Matching the visual tone matters more than people think, especially when stickers sit on top of custom printed boxes or shipping materials.
Pricing, MOQ, and Unit Cost
Sticker pricing is mostly a function of size, quantity, material, shape, finish, and turnaround. Larger pieces use more stock and ink. Complex outlines need more careful cutting. Heavy coverage and specialty treatments can add press time. Rush orders often cost more because they compress scheduling and reduce production flexibility.
Unit cost usually drops as quantity increases because setup, proofing, and handling get spread across more pieces. That is why a 1,000-piece order can cost noticeably more per sticker than a 5,000-piece run even when the artwork is unchanged. The picture shifts again if the job includes lamination, foil, unusual adhesives, or intricate die lines. Volume helps, but it does not erase spec complexity.
For a rough frame of reference, simple short-run stickers at moderate quantities may fall around $0.12 to $0.30 per unit, while premium materials or unusually shaped pieces can run higher. Treat that as a guide, not a quote. The real comparison only works when the quotes use the same size, stock, adhesive, finish, shipping terms, and proof expectations.
Minimum order quantity matters because setup and waste have to be covered somewhere. Some providers use an MOQ to keep Custom Die Cutting or specialty finishing efficient. That first order may feel expensive, but repeat orders often get easier once the approved spec exists. If you plan to get Custom Made Stickers on a recurring basis, keeping the final spec on file saves time and reduces the chance of accidental changes later.
The low quote is not always the best value. Sometimes the higher price is simply the one that includes the better adhesive, a more suitable stock, or a finishing step that prevents waste downstream. That is a useful distinction, especially for packaging that has to survive handling rather than just pass a quick visual check.
Timeline and Lead Time Expectations
A standard sticker order usually starts with artwork submission and proof review, then moves into print and finishing after approval. For straightforward jobs using common materials and shapes, production often takes about 7 to 12 business days after proof approval. Specialty finishes, custom shapes, higher volumes, or nonstandard adhesive requirements can extend that timeline. Shipping sits outside production, so total delivery time depends on transit distance and the date the job is approved.
Fast turnaround depends on a few simple things: clean files, standard materials, a clear quantity, and quick proof responses. Slowdowns usually come from revisions, unclear artwork, missing bleed, unexpected size changes, and requests that require extra testing. Every added round of decision-making stretches the calendar.
Teams often underestimate how much room they need before a launch or seasonal deadline. If the stickers are tied to packaging, trade show materials, or a product release, it helps to build in space for proof corrections and shipping delays. Sticker lead time is not mysterious, but it does reward early clarity.
For operations teams, the important idea is predictability. Once the stock, adhesive, size, and art are settled, the job becomes far easier to plan. That is true whether the stickers are for retail packaging, warehouse use, or a short campaign that needs to land on a specific date.
Ordering the Right Sticker for the Job
Start with the use case. Is the sticker for branding, sealing, labeling, promotion, or decoration? That answer shapes nearly every other decision. A seal on a shipping mailer needs different performance than a giveaway sticker that only needs to look good for a short time. A product label has to fit the panel, support the information hierarchy, and stay readable after application.
Next, choose the size, shape, and quantity with the surface in mind. A design that looks balanced on a computer screen may be too large for a narrow bottle shoulder or too small to read on textured corrugate. Shape matters too. A simple round or square sticker can be easier to place cleanly, while a custom outline may help the artwork stand out if the design calls for it.
Artwork prep should be practical, not precious. Vector files are best for logos and cut lines because they scale cleanly. Text should stay readable at the final size. Bleed should be included where required, and important details should stay away from the edge. If the sticker needs to match a brand color exactly, say that before proofing so the expectations are clear. For jobs tied to branded packaging, this step keeps the sticker from drifting away from the rest of the system.
Before approval, check the proof like someone who has to run the order, not admire it. Confirm dimensions, spelling, border thickness, barcode placement if used, and whether the cut line interferes with small details. Save the final spec. Reorders go much better when the approved material, adhesive, and finish are documented instead of guessed at later.
- Define the job: label, seal, promo, or branding.
- Choose stock and adhesive for the real surface.
- Set size, shape, and application format.
- Upload print-ready artwork with bleed and notes.
- Review the proof and archive the approved spec.
Common Mistakes That Create Waste
The most common mistake is choosing the wrong adhesive for the surface. That can lead to peeling, curling, weak initial grip, or edges lifting after application. Cold environments, glossy plastics, dusty cartons, and textured kraft all behave differently, so a sticker that sticks fine on a sample sheet may fail in real use.
Material mismatch causes trouble too. A paper sticker can look fine in a mockup and still struggle the moment moisture or abrasion enters the picture. Likewise, an overbuilt premium stock may cost more than the job needs if the sticker will only be used once and never handled again. The point is not to buy the fanciest spec. It is to buy the spec that matches the environment.
Shape and detail can create problems as well. Extremely thin borders, tiny type, and intricate outlines are harder to cut cleanly and harder to read once applied. Designs that depend on delicate micro-detail often lose clarity after trimming. Clear typography, strong contrast, and sensible spacing usually print and cut more reliably.
Proofing mistakes are costly because they are easy to prevent. People approve size without checking the product panel. They miss copy errors. They overlook a cut line that bites into fine artwork. That risk is even higher when stickers have to coordinate with carton graphics, ingredients, handling icons, or barcode placement. A few minutes of attention at the proof stage can save a lot more than a small difference in unit price.
Smart Prep Before You Request a Quote
Before you ask for pricing, gather the basics: size, quantity, surface type, artwork file, preferred finish, and target ship date. That keeps the conversation grounded in an actual use case instead of a rough guess. If you plan to get custom made stickers for a launch or replenishment cycle, note whether the order has to coordinate with cartons, insert cards, or other packaging pieces.
It also helps to decide how the stickers will be applied. Sheets are practical for hand application and smaller batches. Rolls fit faster application, dispensers, or higher-volume labeling. Singles are useful for inserts, events, and packaging where presentation matters more than application speed. The format should follow the workflow, not the other way around.
Comparing two material and finish options can be worthwhile, even if one seems like the obvious budget choice. A matte paper version may be enough for a low-risk mailer, while a BOPP or laminated option is often more reliable on packaging that sees humidity, friction, or repeated handling. A slightly higher spec can prevent rework later.
If the order matters, ask for a sample or proof before the full run. That is especially sensible for retail packaging, refrigerated products, and premium kits where the sticker has to do more than simply exist. The goal is not just to print something that looks right once. It is to deliver a sticker that behaves correctly after it is applied.
That is the real standard for anyone who wants to get custom made stickers with confidence: treat the sticker as part of the packaging system, not as a decorative extra. When the stock, adhesive, finish, and artwork line up with the job, the result looks better, lasts longer, and avoids expensive surprises.
How do I get custom made stickers for packaging with the right adhesive?
Start with the surface. Cardboard, glass, plastic, kraft, and refrigerated packaging all behave differently, so the adhesive should be chosen for the real substrate, not just the artwork. If the application is sensitive, ask for a sample or proof before the full run.
What affects the cost when I get custom made stickers?
Quantity, size, material, finish, shape complexity, and turnaround all affect price. Specialty films, lamination, foil, and Custom Die Cuts usually add cost, so the cleanest comparison is between quotes that use the same spec set.
How long does the sticker production process usually take?
Standard sticker jobs often take about 7 to 12 business days after proof approval, though specialty finishes or complex cutting can take longer. Artwork readiness and fast proof feedback have a big effect on the schedule.
What file should I send when I want custom made stickers?
Vector artwork is best for logos and cut lines, and high-resolution files work for many full-color designs. Include bleed where needed, keep text readable at final size, and mention any color-match expectations before proofing.
Should I order stickers in sheets, rolls, or singles?
Sheets are good for hand application and lower volumes. Rolls suit faster application or dispensers. Singles are useful for giveaways, inserts, and promotional distribution where presentation matters most.


