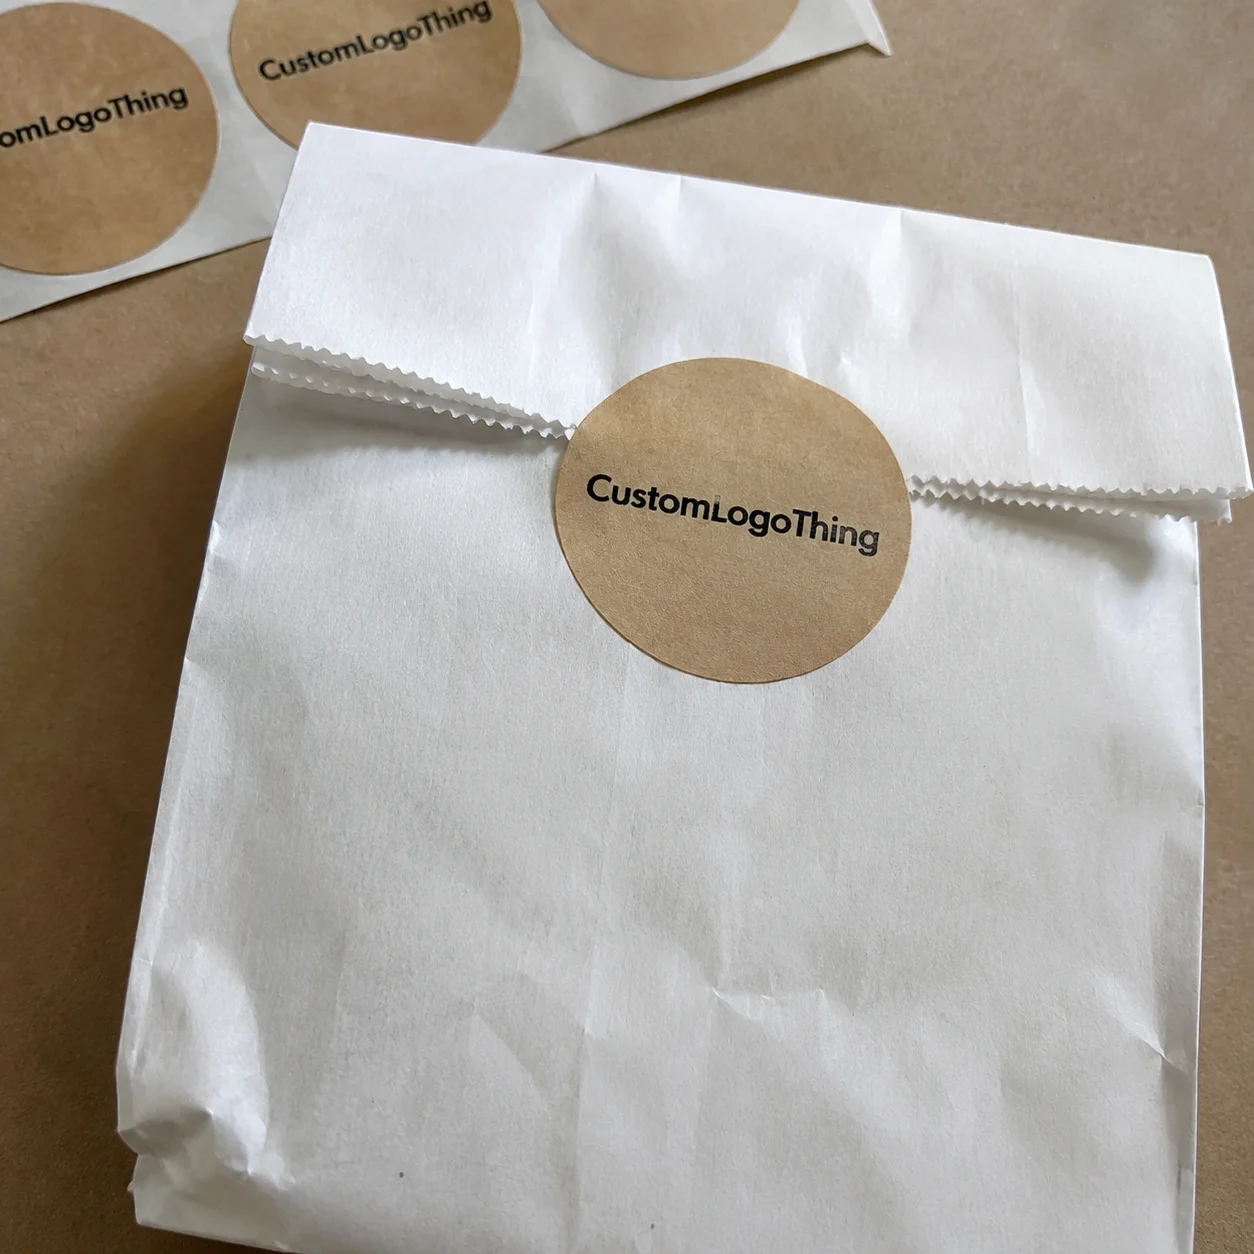
Custom Made Stickers for Cars: Order Smarter Decals
A parked service van can create thousands of street-level impressions in a week. A bad decal makes every one of them work against you. That is the uncomfortable truth behind Custom Made Stickers for cars: the format looks simple, but people judge the material, color, cut, placement, and installation almost instantly.
I treat vehicle stickers less like cheap promo items and more like compact outdoor signage. They sit in sunlight, take rain at highway speed, get scrubbed at washes, and still need to communicate in two to five seconds. The smartest order is not always the lowest quote. It is the one that balances visibility, durability, removability, compliance, and cost without pretending one vinyl fits every job.
What Custom Made Stickers for Cars Really Do

Custom made stickers for cars are adhesive graphics built for vehicle surfaces. They are not paper stickers with a logo dropped on top. A proper vehicle decal usually starts with outdoor-rated vinyl, compatible adhesive, UV-resistant ink, and a finish selected for the way the vehicle will be used.
The category is wider than many buyers expect. A 3-inch oil change reminder on a windshield is not the same product as a 12-inch die-cut logo on a contractor door. A bumper sticker, rear-window decal, fleet unit number, magnetic sign, tailgate graphic, and partial vehicle wrap solve different problems. They also fail in different ways.
Small bumper stickers usually support campaigns, clubs, fundraising, or personal expression. Window decals work well for rear glass, dealership branding, event promotions, and local service businesses, especially when the buyer wants paint-free placement. Die-cut logo stickers create a cleaner branded look because the shape follows the artwork. Fleet labels identify vehicles, branches, service categories, asset numbers, or inspection status.
Magnetic signs deserve their own caution. They can be useful for temporary branding, but they are not a magic answer. They do not work on aluminum panels, and they dislike curved doors, dirty surfaces, trapped moisture, and high-speed edge lift. If the vehicle is washed often or parked outside in bad weather, magnets need more maintenance than most people expect.
The useful idea is controlled visibility. You choose the size, message, material, adhesive strength, finish, and placement instead of accepting one-size-fits-all signage. That control matters for plumbers, delivery teams, food trucks, car clubs, dealerships, schools, nonprofits, and solo operators trying to make a vehicle work harder between jobs.
Practical rule: if the sticker represents your business on public roads, treat it like mobile brand packaging. A weak decal can cheapen the same logo that looks polished on custom printed boxes, retail packaging, or a storefront sign.
Here is the mistake I see constantly: buyers ask for “a sticker price” before defining the vehicle, surface, lifespan, and finish. That is backward. The decal only works if it fits the job it is being asked to do.
Vehicle Decal Materials, Adhesives, and Finishes
Automotive surfaces are hostile compared with laptops, shipping cartons, or indoor signs. A car decal may face UV exposure, rain, road grit, salt spray, heat from dark paint, soap, fuel residue, ice scrapers, and sharp temperature swings. A sticker that survives on a box for three days tells you almost nothing about how it will perform on a van door for three years.
The two common vinyl families are calendared vinyl and cast vinyl. Calendared vinyl is thicker and usually more economical. It is a sensible choice for flat or gently curved surfaces and short- to medium-term use, often in the 6-month to 3-year expectation range depending on grade, ink, lamination, climate, and exposure.
Cast vinyl costs more because it is thinner, more conformable, and better suited to compound curves, rivets, ribbed panels, and longer outdoor use. It is usually the safer option for difficult vehicle shapes. If a supplier quotes cast vinyl for a complex panel, they are not necessarily upselling. Sometimes they are preventing the decal from shrinking, lifting, or looking tired before the campaign is over.
Adhesive choice matters just as much. Permanent adhesive is common for long-term branding on service fleets and commercial doors. Removable adhesive suits promotions, leased vehicles, seasonal messaging, and campaigns where clean removal matters. Low-tack removable vinyl may be easier to remove, but it can also be less forgiving on edges, curves, and high-wash vehicles. There is always a trade-off. Annoying, but real.
Static cling is a glass-only option. It does not behave like vinyl on painted metal, and it should not be treated as a universal substitute. It can work for temporary interior window messages, parking permits, or dealership glass graphics, but it depends on a smooth, clean surface and enough contact area.
Finish changes both appearance and durability. Gloss produces strong color pop and often matches shiny vehicle paint. Matte can look cleaner and more modern, especially on white vans or dark panels. Clear film is useful for glass-friendly graphics, though contrast must be tested against tinted windows. Reflective film improves low-light visibility for service, safety, and roadside use, but it adds cost and may need tighter specification for commercial applications.
Lamination is the quiet durability layer. A clear overlaminate helps protect ink from scratching, fading, mild chemicals, and repeated washing. For many outdoor vehicle stickers, laminated vinyl is the difference between a decal that still looks intentional after two seasons and one that starts looking tired after a few hard months.
Surface shape is the hidden variable. A flat truck door is forgiving. A curved bumper, ribbed van panel, fuel door, wheel arch, or plastic trim piece is not. Standards thinking helps here: automotive decals are not governed by the same logic as corrugated transit testing under ISTA, but the principle is similar. The environment must shape the specification.
A decal that fails early costs more than reprinting. It sits in public while peeling, curling, or fading. That is brand damage with a license plate attached.
Design Specs That Make Car Stickers Look Professional
Readability comes first. A car sticker often has two to five seconds to communicate while someone walks past, waits at a light, or follows in traffic. That is not much time.
A crowded decal with three phone numbers, a slogan, a QR code, five icons, and a paragraph of services may satisfy an internal checklist, but it usually fails on the road. Nobody is reading your tiny service menu from two lanes over. They are driving.
Prioritize one message, one brand mark, and one action. That action might be a phone number, short website, service area, QR code, or social handle. For moving vehicles, bigger type usually beats clever copy. A clean 24-inch door logo and one readable URL will outperform a beautiful miniature brochure stuck to a tailgate.
Size planning should follow the use case. Small rear-window decals might run 4 to 8 inches wide for clubs or personal branding. Medium door logos often sit in the 12 to 24 inch range. Bumper labels may be narrow but need strong contrast. Large tailgate graphics require more attention to cameras, handles, trim, and license plate clearance. Fleet identification stickers need consistent placement across vehicle models, even if the exact panel dimensions change.
Artwork files can make or break production. Vector files such as AI, EPS, SVG, or production-ready PDF are best for logos, text, and die-cut shapes because they scale cleanly. Fonts should be outlined. Brand colors should be embedded or specified. Raster images, when used, should be high resolution at final print size. Screenshots, tiny web logos, and compressed social media graphics often produce fuzzy edges.
For contour-cut decals, the cut path should be clear. A common production setup uses a separate vector line, often named as a cut line or kiss-cut path, with adequate spacing from the printed artwork. Bleed may be needed when color extends to the edge. Even a 0.06-inch registration shift can become visible on a tight border, so design with realistic production tolerance.
Contrast needs field testing. Black lettering on smoked glass may disappear. White graphics on white vans need a border, shadow, or alternate placement. Chrome trim reflects the environment. Gloss lamination can create glare. If you sell premium services, the sticker should not rely on a color combination that only works on a bright design screen.
Die-cut shapes look polished, and they connect nicely with broader package branding or Custom Labels & Tags used across products and collateral. Still, custom shapes expose more edges to weather and washing. A simple rectangle with rounded corners may last better in harsh use than a detailed contour cut with thin points.
Mock up the design on a straight-on photo of the actual vehicle before approval. Not a generic sedan. Not a stock white van. Use the real panel, with handles, curves, sensors, mirrors, defroster lines, and paint color visible. This one step catches placement problems early, which is far cheaper than discovering them after printing.
Pricing, MOQ, and Unit Cost Factors Buyers Should Expect
Pricing for car stickers is shaped by size, vinyl type, adhesive, finish, order quantity, ink coverage, cut complexity, lamination, proofing, packaging, and shipping. Two decals can both be 6 inches wide and still cost very different amounts if one is a one-color rectangle and the other is reflective, laminated, contour-cut, and individually bagged.
Unit cost usually drops as quantity rises because setup, file prep, press calibration, material handling, and cutting time are spread across more pieces. MOQ, or minimum order quantity, is the smallest quantity a producer can run efficiently without pushing too much setup cost onto only a few units. For custom work, the MOQ is not a punishment. It is the math of production.
| Order Type | Typical Specification | Common Cost Range | Best Fit |
|---|---|---|---|
| Simple bumper sticker | Standard outdoor vinyl, rectangle, no specialty laminate | $0.35-$0.90 each at 500 pieces | Campaigns, events, giveaways |
| Die-cut logo decal | Outdoor vinyl, contour cut, gloss or matte finish | $0.80-$2.50 each at 250 pieces | Car clubs, small fleets, brand decals |
| Laminated vehicle door graphic | Calendared or cast vinyl, UV print, overlaminate | $4-$18 each depending on size | Contractors, service vans, delivery vehicles |
| Reflective fleet sticker | Reflective film, lamination, controlled cut shape | $6-$25 each depending on grade and size | Safety, utility, roadside visibility |
These ranges are not universal quotes. They are planning bands. Material grade, freight, artwork condition, order structure, and supplier location can move the number quickly.
Hidden cost drivers show up often. Rush production can add 15% to 40%. Multiple artwork versions increase proofing and setup time. Individual bagging helps field installers but adds labor. Sequential numbering is useful for assets and fleet tracking, yet it changes the print file workflow. Split shipments to different branches may cost more than one consolidated delivery.
Ask for quotes using exact specs. “How much per sticker?” is too vague. A better request says: 6 inches wide, outdoor vinyl, removable adhesive, gloss laminate, contour cut, 500 pieces, packed in bundles of 50, shipped to one address. That level of detail gives suppliers a real target and helps you compare bids fairly.
Cost also belongs next to lifespan. A cheaper decal that looks poor after six months can be more expensive per month than a better decal that performs for several years. The same logic applies to branded packaging: low unit price is attractive until scuffed ink, weak board, or inconsistent color starts undermining the buyer’s perception.
Process and Timeline From Artwork to Finished Decals
A typical vehicle decal order moves through inquiry, quote, artwork review, digital proof, approval, printing, ink curing if required, lamination, cutting, quality check, packing, and shipping. Printing is only one step. The timeline often depends more on specification clarity and artwork quality than on press speed.
For straightforward custom made stickers for cars, a common production window is 5 to 10 business days after proof approval, with shipping added separately. More complex work can stretch to 12 to 18 business days, especially if it involves specialty reflective film, cast vinyl, multiple sizes, first-article approval, or split shipments. Rush options may exist, but they compress decision time and increase the risk of missed details.
Proofing is the checkpoint. Confirm size, spelling, colors, cut lines, quantity, orientation, and finish before production begins. If the decal says “24/7 Emergency Heating” instead of “24/7 Emergency Plumbing,” the press will not know. It will print exactly what was approved. Machines are obedient like that, which is not always helpful.
Quality control should be more than a quick glance. Useful checks include color consistency, edge cleanliness, correct cut depth, laminate alignment, obvious banding, ink scratches, count accuracy, and packaging condition. For contour-cut decals, the backing should release cleanly without tearing the face film. For laminated pieces, watch for trapped dust, silvering, bubbles, or exposed edges that could invite lifting.
Complex fleet orders need more discipline. If the same logo must fit a compact car, cargo van, pickup, and box truck, one file may not work across all vehicles. Templates, measurements, or sample testing can prevent a 20-inch graphic from landing awkwardly across a door crease or sliding rail.
Production timing also depends on material availability. Specialty films can have longer lead times than white vinyl. Lamination may need cure time depending on ink system and process. Cutter capacity matters during busy periods. Shipping distance matters more than buyers want it to. A finished decal sitting in a carrier hub is still not installed on the vehicle.
Ask the supplier for three dates: proof-ready date, production completion date, and estimated arrival date. A vague “quick turnaround” promise is not enough for fleet rollouts, dealership events, local campaigns, or trade shows. If installers are scheduled for Friday morning, the difference between Thursday delivery and Monday delivery becomes expensive.
Approve slowly enough to catch mistakes, but not so slowly that the job loses its slot. That balance is boring. It also saves money.
Common Ordering and Installation Mistakes to Avoid
The biggest ordering mistake is choosing a sticker only by price without confirming whether the material is rated for outdoor vehicle use. Indoor vinyl, paper stock, and general promo stickers may look fine at delivery. Then sunlight, water, heat, and washing reveal the shortcut.
Low-resolution artwork is another repeat offender. A logo pulled from a website header may be 300 pixels wide. That might look acceptable on a phone. Enlarged to 18 inches on a truck door, it can look soft, jagged, or amateur. The cleaner route is vector art, outlined type, and a supplier who checks cut paths before production.
Skipping vehicle measurements creates preventable trouble. Handles, trim, fuel caps, wipers, cameras, sensors, hinges, and glass defroster lines all steal usable space. A rear-window QR code may be technically printable but useless if it sits behind a wiper sweep or too high for a pedestrian to scan.
Installation is where many good decals get ruined. Surfaces should be clean, dry, and free from wax, silicone, heavy polish, grease, and road grime. Cold panels reduce adhesive flow. Fresh paint may need weeks to cure fully before vinyl is applied; this depends on the paint system, so the installer or body shop should confirm. Textured plastic is risky because adhesive cannot make full contact with the surface.
Placement mistakes are just as costly. Do not block driver visibility, lights, mirrors, license plates, backup cameras, radar sensors, or regulated markings on commercial vehicles. The EPA is not writing your decal spec, of course, but environmental exposure and cleaning chemistry are real performance factors. Use materials that fit the conditions instead of hoping the cheapest film will survive them.
Removing and reapplying a decal sounds simple. It rarely is. Vinyl can stretch, dust can contaminate adhesive, and edges can weaken. A crooked decal pulled back and reset may never bond as cleanly as a fresh piece.
- Order one or two extras for small jobs, and more for multi-vehicle installs.
- Keep installation temperature within the vinyl supplier’s recommended range, often around 50°F to 90°F.
- Wait before washing after installation, commonly 24 to 72 hours depending on adhesive and conditions.
- Use rounded corners when possible to reduce edge lifting.
- Avoid placing thin details where brushes, wipers, or fuel spills will hit them repeatedly.
Preventable mistakes turn into measurable waste. One bad install can erase the savings from choosing a cheaper supplier, especially if the vehicle has to be pulled out of service for repair or replacement graphics.
Before You Request a Car Sticker Quote
Before asking for a quote, gather the facts that affect production. You do not need to become a print engineer. You do need enough detail to prevent guesswork.
- Vehicle type: sedan, pickup, van, box truck, trailer, or mixed fleet.
- Surface location: painted door, rear glass, bumper, tailgate, panel, or window.
- Sticker size: width and height in inches, plus any placement limits.
- Quantity: include extras for installation damage and future replacements.
- Artwork: vector logo, production PDF, or high-resolution image.
- Finish: gloss, matte, clear, reflective, laminated, or unlaminated.
- Expected lifespan: short promotion, seasonal use, or multi-year branding.
- Deadline: arrival date, not just the date you hope production starts.
Take straight-on photos of the vehicle area where the decal will sit. Add measurements in inches. If the panel is curved, ribbed, or interrupted by trim, show that clearly. Those photos can save several rounds of email and reduce the chance of a decal that technically matches the requested size but does not fit the vehicle well.
Decide whether the sticker needs to be removable, weather-resistant, reflective, laminated, individually packaged, or matched across multiple vehicles. If you are already ordering Custom Packaging Products, product packaging inserts, or retail packaging, keep the visual system consistent. Vehicle decals, labels, and packaging design should not look like three unrelated brands.
If you are unsure about design density, prepare two versions. One bold version for distance. One more detailed version for parked or close-up viewing. In practice, the bold version wins more often than internal teams expect.
For larger fleet jobs, ask for a digital proof and consider a sample or first-article approval before the full order is produced. A sample costs time, but it can prevent 200 decals from being printed with a color, size, or cut issue that everyone notices too late.
Compare quotes by specification, not just total price. One supplier may include lamination, outdoor vinyl, and organized packing. Another may quote unlaminated film and leave shipping vague. Those are not equal offers.
Gather specs first, and custom made stickers for cars become easier to quote, easier to install, and more likely to look professional on the road. The decal may be small, but it carries the brand every mile.
FAQ
How long do custom car decals usually last outdoors?
Most quality outdoor vinyl decals last several years, but lifespan depends on material grade, ink system, lamination, sun exposure, washing habits, road salt, and whether the decal is installed on a flat or curved surface. Ask for the expected outdoor rating of the exact material rather than assuming every vinyl sticker has the same durability.
Are custom made auto stickers safe for vehicle paint?
Vehicle-rated vinyl is generally safe for sound, fully cured paint when installed and removed correctly. Risk increases on old paint, repainted panels, peeling clear coat, rust, textured plastic, or surfaces cleaned with wax or silicone before application.
What artwork file is best for personalized car stickers?
Vector files such as AI, EPS, SVG, or production-ready PDF are best for logos, text, and die-cut shapes because they scale cleanly. High-resolution PNG or TIFF files may work for image-based designs, but screenshots and low-resolution social images often print poorly.
Can custom vehicle stickers go through a car wash?
Many laminated outdoor vinyl decals can handle gentle washing after the adhesive has fully bonded, often after a short waiting period. High-pressure spray aimed at decal edges, harsh brushes, strong chemicals, and frequent automatic washes can shorten sticker life.
What affects the price of custom car sticker printing most?
The biggest price drivers are sticker size, order quantity, vinyl type, lamination, cut shape, color coverage, proofing needs, rush timing, and shipping. A precise quote should list specs clearly so you can compare unit cost, durability, and finish across suppliers.