Buyer Fit Snapshot
| Best fit | Package Products for Shipping The Right Way projects where brand print, material claims, artwork control, MOQ, and repeat-order consistency need to be specified before quoting. |
|---|---|
| Quote inputs | Share finished size, material target, print colors, finish, packing count, annual reorder estimate, ship-to region, and any compliance wording. |
| Proofing check | Approve dieline scale, logo placement, barcode or warning zones, color tolerance, closure strength, and carton packing before bulk production. |
| Main risk | Vague material claims, crowded artwork, missing packing details, or unclear freight terms can make a low unit price expensive after revisions. |
Fast answer: Package Products for Shipping The Right Way: Material, Print, Proofing, and Reorder Risk should be specified like a repeatable production item. The safest quote records material, print method, finish, artwork proof, packing count, and reorder notes in one written spec.
Production checks before approval
Compare the actual filled-product size with the drawing, then confirm tolerance on folds, seals, hang holes, label areas, and retail display edges. Reserve space for logos, QR codes, warning copy, and material claims before decorative graphics fill the panel.
Quote comparison points
Review material grade, print process, finish, sampling route, tooling charges, carton quantity, and freight assumptions side by side. A quote is only useful when the supplier can repeat the same color, closure quality, and packing count on the next order.
How to Package Products for Shipping the Right Way starts with a lesson I learned on a dock outside Indianapolis, Indiana: a box can look square, stack neatly, and still fail if the product can drift even a quarter inch inside it. I watched a pallet of glass bottles leave a warehouse with clean printed cartons, 48 mm tape lines, and labels applied straight, then arrive with chipped shoulders because vibration settled the void fill and the bottles kept knocking into each other over a 220-mile parcel linehaul. That is why how to package products for shipping is never just a box decision; it is a full system of package protection, shipping materials, closure method, and handling assumptions that have to hold together from dock to doorstep. The best packouts usually look less glamorous than the mockups and a lot more durable in the real world.
If you run order fulfillment, manage ecommerce shipping, or supervise a factory pack line, the goal is not to overbuild every order. The goal is to match the transit packaging to the product, the carrier path, and the cost of failure. A $0.22 insert can prevent a $38 return, a reshipment, and the review that says the item "showed up loose in the box." That math is ugly, but it is real, and it is why how to package products for shipping deserves a process instead of a guess. In one Midwest fulfillment center, I saw damage claims drop from 4.8% to 1.9% after a $0.17 corrugated pad was added to a mug kit; the change paid for itself in 11 days. A cleaner packout can matter more than a prettier outer sleeve, and the numbers usually prove it.
"Most shipping damage I have investigated did not come from the box bursting open. It came from the product shifting, settling, or punching through one weak spot after another on a route that lasted three days and 14 handoffs."
I write that as someone who has stood beside corrugate lines in Dongguan, watched samples get dropped from pallet height in Chicago, and sat through supplier meetings where a carton spec changed by 0.5 mm because the first build passed in the lab but failed after a full truck ride from Memphis to Atlanta. How to package products for shipping is practical work. The details matter more than the slogan printed on the outside of the carton, especially when the carton is made from 350gsm C1S artboard on the shelf-facing side and corrugated board on the shipping side. And, honestly, slogans do not help when a customer opens a smashed candle and sends the photo to support at 11:47 p.m., complete with a damaged wick and a broken glass rim. Good packaging is not decorative theater; it is a controlled response to motion, pressure, and time.
How to Package Products for Shipping: What It Really Means
At its simplest, shipping packaging is the outer shipper, the inner protection, the closure, the label, and the way those pieces work together to survive sorting, stacking, vibration, compression, and drops. If one piece is wrong, the whole packout can fail. I have watched a carton made from strong 44 ECT board still collapse because the insert was undersized by just enough that the product could lean against the sidewall during a rough parcel route that included two conveyor transfers and one 36-inch drop. When people ask how to package products for shipping, this is the part they often skip: the package is a system, not a single material choice.
Display packaging and shipping packaging are not the same thing, even when they share a few layers and the same logo. A retail-ready carton may look sharp on a shelf in Austin or Toronto, but how to package products for shipping is about function first and appearance second. A custom printed sleeve can support a brand story, yet if the inner tray cannot keep a ceramic mug upright through a 42-inch drop sequence, the sleeve will not save the order. That mismatch is more common than most teams want to admit, especially when the sample looked perfect under studio lighting and failed in a freight trailer at 7 degrees Celsius. The outside can sell the product; the inside has to survive the route.
The best shipping decisions start with the product's failure mode. Does it scratch? Does it crush? Does it tip? Does it burst at the seam? A smartphone accessory, a candle jar, and a stainless tumbler all need different transit packaging even if they move through the same ecommerce shipping channel from Shenzhen, Guangzhou, or Monterrey. One-size-fits-all thinking creates avoidable returns, and it usually shows up as a pattern rather than a one-off mistake. I have never once seen a "temporary" shipping shortcut stay temporary after the first 300 orders. If the product behaves differently, the packout should too.
Here is the piece many teams miss: how to package products for shipping is not only about surviving one impact event. It is about surviving the whole path from warehouse pick to final doorstep. The box might be lifted by a picker, compressed under another carton, bounced across a sorter, and then dropped into a porch pile by a carrier with a 2 p.m. stop in Queens and a 6 p.m. stop in Newark. The right package protection keeps the item steady through every stage, even the annoying ones nobody puts in the sales deck. It also keeps the customer from becoming the final tester in a chain of avoidable mistakes.
One of my clearest memories comes from a client meeting with a home fragrance brand in Philadelphia. They had elegant printed cartons and a polished retail presentation, but their wick trimmers were arriving bent because the inserts left a 3 to 4 mm lateral gap. We fixed it by switching to a snug molded pulp tray with two retention points and a paper overwrap, and the damage rate dropped from 7.2% to 0.8% in the next 30 days. That is a textbook example of how to package products for shipping correctly: fit the product, lock it in place, and let the carton do its job. The shipping box is not there to look clever. It is there to survive a 1,200-mile trip.
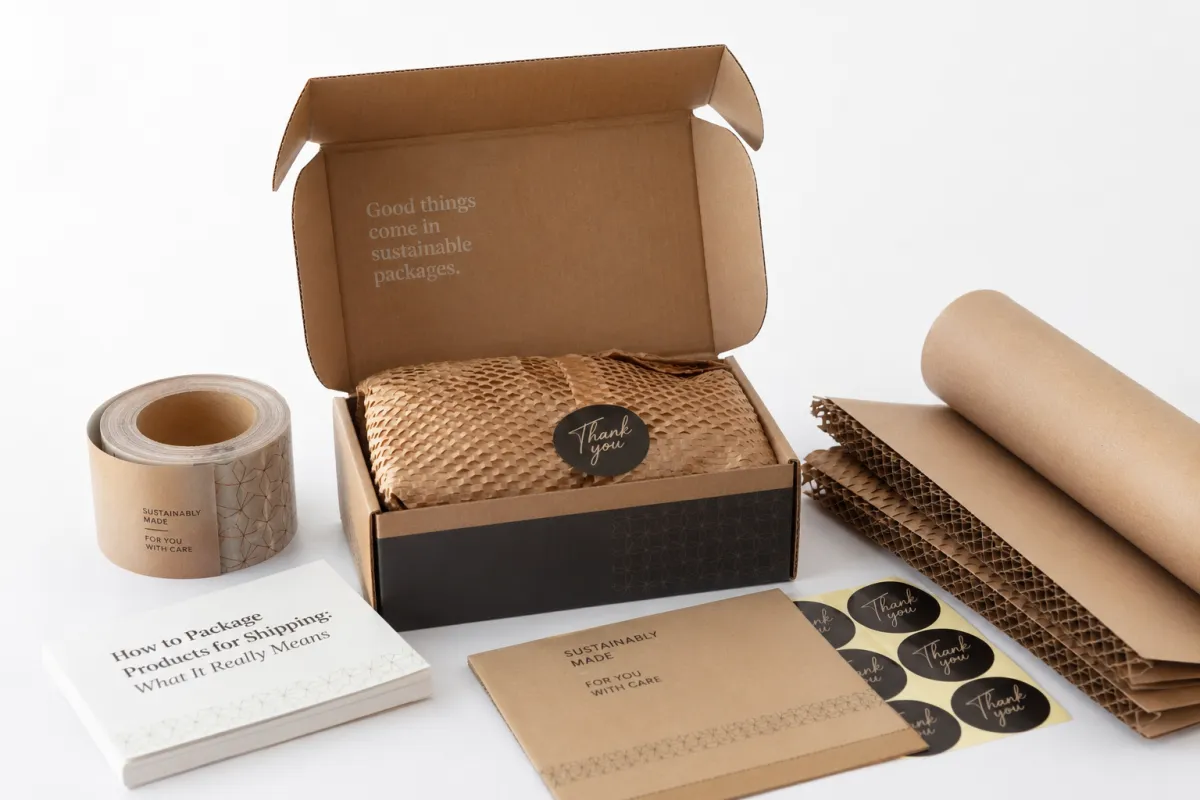
For teams validating a packout, I lean on recognized test methods rather than opinions. The ISTA testing methods are a solid reference point, especially for parcel and distribution testing, and fiber-based packaging choices often need to align with sourcing goals from the FSC system if sustainability claims matter to the brand. A supplier in Foshan can quote a molded pulp tray at 12 to 15 business days from proof approval, but the test method still decides whether it works. Those standards do not replace common sense, but they keep the packout honest and save you from the classic "it looked fine on the sample table" trap. They also give teams a common language for package protection instead of a round of opinions that nobody can measure.
How the Shipping Packout Process Works
The shipping packout process starts with product evaluation. I measure the item, note the weak spots, and decide whether it needs surface protection, crush resistance, immobilization, or all three. A glass jar with a metal lid is not just "fragile"; the lid can loosen, the shoulder can chip, and the label can scuff, so the packout has to address each failure point directly. A lot of packaging failures happen because people describe the object by category instead of by behavior, which is how a 14-ounce candle ends up in the same shipper as a steel accessory and gets crushed on day one. If you want to understand how to package products for shipping, start by understanding how the product fails.
From there, the team chooses the outer shipper and then builds protection in layers. The first layer is usually product wrap or surface protection, the second is the cushioning or insert system, the third is the carton itself, and the fourth is palletizing if the product moves in bulk. That layered thinking is one reason how to package products for shipping is better treated like an engineering task than a guess from the warehouse bench. I know that sounds slightly dramatic, but I have never watched a broken shipment and thought, "That definitely needed less rigor and a smaller spec sheet." Layered protection is boring in the best possible way.
On a corrugate line I visited in Shenzhen, a supplier once tried to save cost by moving a client from a custom die-cut insert to loose kraft paper. The sample looked acceptable until we ran a vibration test and the product sank to the bottom corner of the shipper after about 18 minutes of simulated handling at 1.5 Gs. We put the insert back, changed the flute profile, and kept the freight footprint the same. The lesson was simple: how to package products for shipping correctly often costs less than repeated damage. Saving a penny on the insert and losing ten dollars on the claim is not financial discipline; it is self-sabotage with a spreadsheet. That is usually the moment the procurement team starts caring about movement inside the box.
Timeline matters too. A typical shipping packaging project might start with a one-week spec review, followed by material selection, a sample build, transit testing, revision rounds, and then production release. If the product is high-value or brittle, I usually expect at least two rounds of samples before anyone signs off, and a custom insert from a plant in Suzhou or Vietnam may take 12 to 15 business days from proof approval. That is not delay for delay's sake; it is how you avoid finding a weakness after 800 units are already on the floor. I have seen teams skip that step because they were "behind schedule," which usually means they were about to create a much larger schedule problem later. The calendar always looks friendlier before the first claim report lands.
Different parts of the supply chain own different pieces of the work. Packaging engineers define the test target, corrugate converters make the box, foam or pulp vendors make the inserts, and fulfillment teams prove whether the design can actually be assembled at line speed. A solution that takes 90 seconds per unit might be fine for a boutique run, but it can cripple order fulfillment if you are pushing 1,200 orders a day out of a warehouse in Phoenix or Dallas. The box has to work in theory and in a real shift, which is where elegant ideas sometimes collapse like a bad folding chair. That is where how to package products for shipping turns into a labor problem, not just a materials problem.
Shipping success also depends on the journey, not just the drop. A packout that survives a single 30-inch drop may still fail under 60 pounds of stack load or a 2-hour ride through a parcel sort center in Louisville. That is why how to package products for shipping should be judged against vibration, compression, and handling variation, not one dramatic test. The world loves a dramatic drop test video, but the boring stack load is often the more honest villain, especially when the bottom carton sits under 11 more cases on a pallet. The weak spot is often not the crash; it is the slow squeeze that comes after.
What Drives Cost and Pricing in Shipping Packaging
Packaging cost is driven by board grade, carton style, insert complexity, cushioning type, print coverage, volume, and labor. If you are ordering 5,000 pieces, a simple custom mailer might land around $0.18 to $0.28 per unit, while a printed shipping box with a custom insert set can easily move into the $0.70 to $1.40 range depending on size and material. For a 350gsm C1S artboard sleeve with a 32 ECT mailer underneath, I have seen pricing sit near $0.24 per unit at 5,000 units in coastal China, while a double-wall shipper from Illinois can be closer to $1.12. That spread is exactly why how to package products for shipping has to be costed as a system, not as one material line. Material, labor, and freight all sit in the same equation whether the budget likes it or not.
The cheapest material is not always the cheapest outcome. I once reviewed a beverage accessory packout where the team saved $0.09 per unit by dropping from a formed insert to loose fill. The damage rate rose enough that returns, replacement freight, and customer service time erased the savings in less than one quarter. Honest math like that is the backbone of good shipping packaging. It also has a way of making everyone suddenly very interested in failure rates, especially when the claims report lands with a 6% spike in one zip code cluster. If you are serious about how to package products for shipping, then total cost matters more than the sticker price on the insert.
| Packaging Option | Typical Use | Sample Unit Cost at 5,000 | Strength / Risk Notes |
|---|---|---|---|
| Custom corrugated shipping box | General ecommerce shipping, medium-weight products | $0.22-$0.68 | Good balance of cost and package protection; board grade matters a lot, especially 32 ECT vs 44 ECT |
| Double-wall corrugated shipper | Heavy, stack-sensitive, or fragile items | $0.78-$1.35 | Higher compression strength; can reduce crush damage and repacks on 40-pound pallets |
| Molded pulp insert set | Glass, ceramics, and brand-led retail packs | $0.34-$0.62 | Excellent retention and sustainable appeal; tooling can add 10 to 18 days of lead time |
| EPE foam insert set | Electronics, delicate finishes, tight immobilization | $0.29-$0.58 | Strong shock control; less fiber-friendly than paper-based options and often heavier in freight quotes |
| Custom poly mailer | Apparel, soft goods, low-fragility items | $0.12-$0.26 | Lightweight and freight-friendly; poor choice for rigid or fragile items with hard corners |
| Kraft paper dunnage | Void fill and light cushioning | $0.03-$0.09 per packout | Works well for basic immobilization; not enough for fragile corners alone or heavy glass |
Dimensional weight is another quiet cost driver. A box that measures 16 x 12 x 10 inches may price higher than a tighter 14 x 10 x 8 inch carton even if both hold the same product, because carriers charge based on occupied space as much as actual weight. Oversized packaging often costs more than a better-fitted shipper with cleaner internal structure. I have seen teams focus on board cost and then get blindsided by freight, especially on routes from Los Angeles to New York where a single inch can change the billable weight. If you are working through how to package products for shipping at scale, dimensional weight belongs on the first page of the analysis, not the last.
Material choice matters, but so does labor. A packout that needs four folds, two tape passes, a wrap step, and a custom insert can be more expensive in assembly than a slightly pricier box that drops together in one motion. On a busy line, I care about assembly seconds almost as much as I care about board costs, because wasted motion becomes real money by the end of the shift. A 7-second difference across 10,000 orders is not trivia; it is a scheduling issue wearing a cardboard disguise, and at $18 per labor hour that difference can be more than $350 in one production run. That is why how to package products for shipping should always be reviewed with the warehouse team in the room, not just procurement.
There is also a freight side to the equation. If a stronger carton trims damage claims by 2 percent and reduces dimensional weight by even 0.4 pounds per shipment, the total savings can beat the lower-cost option by a wide margin. That is the business case behind smart how to package products for shipping decisions. Tiny numbers add up. They always do, which is rude but true, especially when 15,000 orders move through a Midwest fulfillment center in one quarter. The right box can save money in places the original quote never mentioned.
How do you package products for shipping, step by step?
The best way to think about how to package products for shipping is to move through the packout in a fixed order. That keeps the process consistent whether a seasoned operator or a new hire is handling the order. I have seen too many mistakes happen because people chose materials first and product risk second. Material shopping is not a strategy. It is a detour that usually ends with a rushed rework and a second freight bill. A repeatable sequence usually beats a clever improvisation.
-
Profile the product. Measure length, width, height, and weight, then mark the weak points: corners, lids, screens, glass, threads, seams, and finishes. A 2.4-pound ceramic diffuser needs a different plan than a 2.4-pound book because the failure mode is completely different. Weight alone can be misleading; brittle objects like to teach that lesson the hard way, especially when the ceramic body is only 4 mm thick at the rim. If you want to know how to package products for shipping well, this is the first filter that matters.
-
Choose the outer shipper. Pick a box or mailer that fits the route and the risk. For many consumer goods, leaving 1 to 2 inches of room on each side for protection is enough; for fragile items, I often want a tighter custom fit so the product cannot migrate. A 44 ECT shipper with a 1.75-inch buffer can be perfect for one SKU, while a 32 ECT mailer is better for soft goods. The goal is not to create empty space and then fill it with hope. The right outer carton is one of the simplest answers to how to package products for shipping without overspending.
-
Select the protective system. Decide between inserts, partitions, molded pulp, foam corners, corrugated pads, air pillows, or paper fill. The key question is not "What is cheapest?" but "What keeps this item from moving, rubbing, crushing, or puncturing?" If the answer is "not much," then the system is not ready. In one packaging trial, a $0.31 molded pulp cradle beat a $0.27 loose-fill build because the product stayed centered within 2 mm instead of drifting 9 mm. That tiny movement difference is exactly where how to package products for shipping becomes measurable.
-
Build the packout. Center the product, lock it into the insert, remove movement, and close the carton with a consistent tape pattern. If the box has a heavy bottom panel or a carry orientation, label that clearly so the warehouse and carrier know what side matters most. I still get mildly irritated when a package is marked "this side up" and then stacked sideways like a prank during a 6 a.m. line load. A packout only works if the assembly matches the spec every time.
-
Test before release. Run drop, vibration, and compression checks that reflect the real route. I prefer to test with actual product, actual filler, actual labels, and the same closure method the production team will use, because fake samples hide real problems. A pretty sample without real stress is just packaging theater, and a theater prop is not a shipping spec. If the goal is to master how to package products for shipping, then testing is not optional; it is the proof.
One client meeting still sticks with me. A kitchenware brand wanted the outside carton to stay minimal, almost like a premium gift box, but their stainless steel tools kept snapping loose inside during transit. We changed the packout to a two-piece corrugated cradle with a paper band, and the operator time increased by only 6 seconds per unit while claims fell from 5.1% to 1.0% in eight weeks. That is the kind of tradeoff I like: a small assembly cost for a real drop in damage. You can almost hear the finance team exhale in the conference room. It is a reminder that how to package products for shipping is often a compromise between speed, protection, and cost, not a perfect formula.
Another practical point: tape matters more than most teams think. In humid warehouses in Houston, dusty cut rooms in Ontario, and cold dock areas in Minneapolis, the wrong adhesive can peel off the seams before the carton even reaches the carrier. I have had a B-flute shipper look perfect on Friday and fail Monday morning because the tape never fully bonded to the recycled liner after a 14-hour cold soak at 38 degrees Fahrenheit. Details like that are why how to package products for shipping deserves real attention. The tape is not glamorous, but it is the part that gets blamed when everything else has a bad day. A better closure pattern can rescue a strong box that would otherwise fail at the seam.
If you need a starting point for materials, browse the Custom Packaging Products page for box and insert categories, then compare whether Custom Shipping Boxes or Custom Poly Mailers fit the product family better. Matching the shipper to the item is half the battle in ecommerce shipping. The other half is resisting the temptation to call the lightest option "good enough" before it has earned that label through an actual 48-hour transit test. That kind of discipline is what makes how to package products for shipping repeatable instead of lucky.
Common Mistakes When You Package Products for Shipping
The most common mistake I see is oversizing the carton. Big empty spaces create movement, raise dimensional weight, and invite damage because the item can pick up speed before it hits a wall. A box that is 20 percent too large often causes more trouble than a slightly tighter carton with proper inserts, especially in parcel shipping on routes that pass through three sort centers and two truck transfers. A little extra room sounds harmless until the product starts acting like a bowling ball in a shoebox. If you are reviewing how to package products for shipping, the first fix is often less space, not more filler.
Another mistake is mixing protection methods without a plan. Loose fill around a product that needs structure can settle during transit and leave the item sitting crooked in the corner by the time it reaches the customer. If the product needs support, give it support; if it needs cushioning, give it cushioning, but do not assume any filler automatically counts as package protection. The word "filler" is not a magic spell, and a 0.5-ounce bag of kraft paper does not replace a retention system. The packout has to match the failure mode, or the damage just waits for the next truck.
Weak closures are a classic failure point too. A single strip of low-grade tape may work in a clean room, but not in a dusty warehouse or a cold trailer. I once negotiated with a tape supplier after a run of cartons opened at the side seam because the adhesive performance dropped below spec in lower temperatures; we moved to a better tape grade and added a two-strip H pattern, which solved the problem without changing the box. That kind of fix is boring, and boring is often what success looks like in shipping. Sometimes how to package products for shipping is really about eliminating the one weak detail that keeps repeating.
Pretty outer packaging does not guarantee safe transit packaging. I have seen gorgeous printed cartons with underbuilt inserts fail within the first mile because the inside was designed more like a display package than a shipping system. That disconnect is common in brands that prioritize unboxing visuals before they understand how to package products for shipping properly, especially when the sleeve uses 350gsm C1S artboard and the inner support is just two flimsy paper tabs. The product does not care how photogenic the carton is if it arrives broken. The customer also does not care if the box looked nice in the studio.
Skipping real testing is the mistake that costs the most later. A packout that looks good on the bench can still fail after carrier vibration, temperature swings, and stack compression. If the product is expensive, brittle, or hard to replace, test more than once and test with the exact shipping materials you plan to buy in production. One "successful" lab sample does not mean much if the unit dies on a route that is harsher than the test path, like a July shipment through Texas heat and a January one through Wisconsin cold. That is why practical how to package products for shipping work relies on real transit conditions, not wishful thinking.
Teams also forget to account for the operator. A design that only works if one highly experienced person assembles it carefully is not a stable solution. On a busy fulfillment floor, the best packout is the one that survives a Tuesday morning rush, a temp worker, and a 300-order backlog without drifting out of spec. Real life is noisy. Packaging has to be, if not forgiving, at least not fragile in the wrong places, especially at 9:15 a.m. when the first pallet is already late. Good how to package products for shipping decisions make room for human variation, not just ideal conditions.
Expert Tips for Better Protection and Lower Cost
Design around the product's actual failure mode, not tradition. If the item scratches easily, focus on surface isolation and soft contact points. If it crushes under load, concentrate on board grade and stack strength. If it rattles, fix retention first, because movement is usually the root cause behind bad how to package products for shipping outcomes. I have seen more success from fixing movement than from chasing fancy materials, and a $0.05 corrugated spacer has saved more claims than a $1.20 printed sleeve ever did. The smartest packouts are usually the ones that solve one stubborn problem very well.
Standardize a few proven box sizes and insert families. That makes purchasing easier, reduces setup time, and keeps your warehouse from managing 19 nearly identical shippers that each save two pennies but cost hours in confusion. I have watched a plant save more money by reducing SKU sprawl than by chasing cheaper cardboard. Fewer options, fewer mistakes, fewer 3 p.m. mysteries on the dock in Columbus, Ohio. If you want cleaner how to package products for shipping execution, simplify the menu.
Test more than one material combination. A paper-based insert may work just as well as foam if the fit is tight and the product is not especially shock-sensitive. A slightly different flute, panel depth, or corner support can shave freight cost and improve package protection at the same time. Small adjustments matter more than most people expect. Packaging is full of situations where a 6 percent change creates a 60 percent difference in outcome, especially when the item weighs under 3 pounds but breaks at the edge. That is why how to package products for shipping often rewards experimentation over habit.
Keep the design line-friendly. That is a factory-floor rule I learned after standing beside operators who had to assemble complicated kits under a stopwatch. If the packout needs five extra hand motions, the process may fail during a peak order week even if the lab sample passes. Good how to package products for shipping work respects the people building the box as much as the product inside it. If the assembly step makes people sigh, that is data, and data beats optimism every time. A design that is slightly less elegant but much faster often wins on the floor.
Document the spec in plain language. I like one page with material descriptions, tape pattern, photo references, void fill amount, and a note on which side faces up. When volume grows, that simple sheet is worth more than a long email thread because it prevents the little changes that quietly wreck consistency. A photo and a sentence can prevent a thousand units of chaos, especially when the supplier in Mexico City or Ningbo is working from a translated PDF and a tight timeline. Clear specs turn how to package products for shipping into a repeatable process instead of tribal knowledge.
One more tip from a supplier negotiation that saved a client money: ask whether a custom insert can be nested or shipped flat before assembly. In one case, we cut inbound freight by 14 percent simply by changing how pulp trays were packed at the vendor in Yiwu. That kind of detail often gets overlooked in discussions about how to package products for shipping, but it can make the whole program cheaper. Sometimes the savings are hiding in the box before the box even reaches you, and sometimes they are hiding in the pallet pattern. Transportation efficiency can matter almost as much as unit cost.
For brands that care about materials sourcing, keep an eye on fiber content and certification. FSC-aligned board can support a sustainability story, and paper-based transit packaging can reduce plastic use without sacrificing structure if the fit is correct. I am careful here, though: sustainability claims should be matched to the actual material chain, not just the marketing copy. Customers are sharper than brands give them credit for, and they notice when the story and the shipment do not line up, especially if the carton arrives in a 100% plastic mailer after a paper-only promise. Good how to package products for shipping strategy can support both protection and sourcing goals, but only if the material decisions are honest.
Actionable Next Steps to Improve Your Shipping Process
Start with your top-selling three products and write one-page packout standards for each. Include dimensions, board grade, insert type, tape pattern, label placement, and photos of the finished shipper. That gives every picker, decorator, and fulfillment partner the same instructions for how to package products for shipping consistently. It also cuts down on those maddening "I thought you meant the other box" moments that can waste 20 minutes and one customer order. Standardization is not flashy, but it is usually where the first savings show up.
Then audit your last 20 damage claims. Sort them by failure type: crush, shift, puncture, abrasion, moisture, or closure failure. Once you know the pattern, you can connect each issue to a packaging change instead of guessing. A crack at the corner usually needs a different fix than a loose lid or a scuffed finish. The patterns are usually there; they are just buried under a pile of complaints and bad assumptions from the last 60 days. That audit often tells you more about how to package products for shipping than a week of debating materials.
Build a small pilot run with real materials. Do not test with substitute product, loose samples, or generic filler if the finished order will use custom cartons and specific shipping materials. A 10-unit test with real product and actual labels will show you more about how to package products for shipping than a polished presentation sample ever will. Presentation samples are excellent at one thing: lying politely while the actual product gets bounced across a 500-mile route. A real pilot is the quickest way to learn where the design bends or breaks.
Track three numbers every month: damage rate, packaging cost per order, and freight cost per shipment. If damage drops but freight spikes, you may have overbuilt the carton. If freight drops but damage rises, the design is too light. Those three numbers tell the truth faster than any opinion in the room. The room will still argue, of course, but at least you will have evidence, a month-end report, and a starting point for the next round of improvements. That is the practical side of how to package products for shipping: monitor, compare, adjust.
Finally, update your vendor requirements and train the team. A great packout fails if the warehouse keeps using the wrong insert or folds the closure differently after a shift change. I have seen a carefully engineered program fall apart because one supervisor told people to "just use extra fill," which sounds harmless until returns start landing in waves. Extra fill is not a repair plan. It is usually a sign that the real problem has not been solved yet, and it can add $0.11 per order without improving protection. Training is part of the packout because how to package products for shipping only works when the floor can reproduce it.
If you need a practical next move, choose one product, one box, and one test route, then document the results. That is the fastest path to better how to package products for shipping decisions, and it usually reveals a few easy wins within the first week. You do not need a giant overhaul to get better. You need a clear starting point and the willingness to stop guessing, especially when a $0.19 material change can save a $42 replacement. Small changes can have outsized effects when the route is rough and the margins are tight.
Once that first product is dialed in, expand the same method to the next SKU family. The real goal is not a perfect one-off packout; it is a repeatable system that holds up across order fulfillment, seasonal spikes, and carrier variation. I think that is the part people underestimate most: the boring consistency required to keep damage low when volume is climbing and everyone is tired, like the week before Black Friday when the outbound dock in Nashville is moving 2,400 cartons a day. Strong how to package products for shipping habits compound faster than almost any single material upgrade, and the payoff shows up in fewer claims, fewer reworks, and fewer late-night support tickets.
How do I choose the right box when I package products for shipping?
Measure the product first, then size the carton so you only leave the room needed for package protection, usually about 1 to 2 inches per side for many consumer goods. If the item is fragile, heavy, or oddly shaped, you may need a stronger board grade, a custom insert, or a different shipper style altogether. I also check dimensional weight before approving the carton, because a larger box can cost more to ship even if it uses less material. That hidden cost catches teams off guard all the time, especially when a 15 x 12 x 10 carton bills higher than a tighter 13 x 10 x 8 design. The right box is the one that fits the product and the freight budget.
What materials work best for fragile products?
Use protection that holds the item in place, such as molded pulp, corrugated inserts, foam corners, or tightly fitted paper cushioning. Loose fill alone rarely solves a fragile-item problem because it can shift and settle during transit. For glass, ceramics, and electronics, I always recommend testing the full packout with a real drop sequence before you ship at scale. If it shatters in the test, at least the test is doing its job instead of pretending, and a 42-inch drop on the corner will tell you more than three meetings ever will. Fragile goods usually need immobilization before they need more padding.
How can I lower shipping packaging costs without increasing damage?
Reduce wasted space so you are not paying for oversized cartons, extra void fill, or higher Dimensional Weight Charges. Standardize on a small set of box sizes and insert styles so purchasing and assembly stay simple on the production floor. Then choose the least expensive shipping materials that still pass drop and compression tests for the product. I would rather see a slightly better box than a cheap box that creates a return spike two weeks later, especially if the savings are only $0.06 per unit. Good how to package products for shipping decisions cut waste without cutting protection.
How long does it take to develop a new shipping packout?
A simple packout can move quickly, but a custom solution usually needs spec review, sample builds, transit testing, and revisions before it is ready. The timeline depends on product complexity, tooling needs, and whether you are using stock components or custom-made transit packaging. For fragile or high-value items, plan enough time to test more than one option so you do not lock in a design that fails later. The calendar never seems urgent until the first damaged pallet arrives, and then 12 to 15 business days suddenly feels very short. A careful timeline is usually cheaper than a rushed correction.
Do I need custom packaging for shipping every product?
Not always. Stable, low-risk items may ship well in standard cartons with the right filler or inserts, and a custom solution would just add cost. Custom packaging becomes more valuable when the product is fragile, high-value, oddly shaped, or expensive to replace after damage, which is why how to package products for shipping should always be matched to the real risk, not the habit. Habit is convenient. It is not always smart, and it can cost $0.30 per order before anyone notices. The right answer is the one that fits the damage profile, not the one that has always been used.


