Buyer Fit Snapshot
| Best fit | Mailing Bags Comparison projects where brand print, material claims, artwork control, MOQ, and repeat-order consistency need to be specified before quoting. |
|---|---|
| Quote inputs | Share finished size, material target, print colors, finish, packing count, annual reorder estimate, ship-to region, and any compliance wording. |
| Proofing check | Approve dieline scale, logo placement, barcode or warning zones, color tolerance, closure strength, and carton packing before bulk production. |
| Main risk | Vague material claims, crowded artwork, missing packing details, or unclear freight terms can make a low unit price expensive after revisions. |
Fast answer: Mailing Bags Comparison: Material, Print, Proofing, and Reorder Risk should be specified like a repeatable production item. The safest quote records material, print method, finish, artwork proof, packing count, and reorder notes in one written spec.
Production checks before approval
Compare the actual filled-product size with the drawing, then confirm tolerance on folds, seals, hang holes, label areas, and retail display edges. Reserve space for logos, QR codes, warning copy, and material claims before decorative graphics fill the panel.
Quote comparison points
Review material grade, print process, finish, sampling route, tooling charges, carton quantity, and freight assumptions side by side. A quote is only useful when the supplier can repeat the same color, closure quality, and packing count on the next order.
Mailing bags comparison can feel straightforward on a spreadsheet, and then reality hits in the conveyor lane. A single weak seam, a thinner gauge, or a finicky mouth seal can turn a “good” freight choice into a return loop and a support thread of complaints that won't stop humming in your dashboard. I've watched teams chase a lower SKU-cost and then spend more time than expected rethinking the process after damaged parcels started bouncing back from sort centers. The practical comparison starts before labels are printed: film behavior, closure chemistry, print durability, and what the bag does after it moves from the desk to handling fixtures and door-to-door transport. That is the real test of a mailing bags comparison.
Mailing Bags Comparison: Why One Ounce of Film Can Double Fulfillment Damage
One extra ounce of polyethylene, or one underbuilt gauge, can swing shipping economics in ways that don't show up in procurement memos. A mailer that looks cheap on a quote can still return with crushed corners, split seams, and split reputations if your carriers run hard cycles through cages, hoppers, and dense loading patterns. In my experience, the first real decision point is whether the bag can hold up through handling friction from your specific line setup, not whether it looks premium on the sample shelf.
From a fulfillment perspective, the question is practical and stubbornly specific: does the bag match your product, your packing rhythm, and your transportation lane together? Standard machine-grade mailers usually make sense for dry, dimensionally stable SKUs, especially when packing speed and repeatability dominate. Reinforced or coated structures usually win when content moisture, long-distance transit, or high-value brand exposure raises failure consequences. That is why a mailing bags comparison needs a clear product profile before supplier conversations start.
Buying teams often start with the cheapest line item and then discover that the savings were temporary. A two-cent reduction can disappear when replacement shipping, repack labor, complaint handling, and carrier claim investigations stack up across weeks of live operation. I've seen one retailer choose a lower-bid run for its apparel accessory line; by week three, complaint categories were up enough to trigger expedited replenishment and manual QC on every outgoing tote. A stronger mailing bags comparison keeps protection, sealing consistency, and abuse tolerance in the same cost equation as base price.
A cheap mailer is expensive the moment it splits on the belt.
The most useful comparisons usually evaluate at least three families in parallel: standard LDPE, recycled-content variants, and a reinforced or hybrid build with stronger mouth architecture. Then test them across routes, not just one lane: humid coastal routes, short-haul urban rerouting, and long-haul line-haul environments all stress the same bag in different ways. In humid zones, edge-softening and label adhesion move up the list; in short-haul high-turnover networks, split frequency often tracks packing speed and bag fit more than raw barrier specs.
It sounds obvious, but this distinction is where teams earn predictability. A bag that performs in a pilot and fails after day 12 of a volume shift is not a product issue; it is usually a process-selection mismatch. That mismatch is exactly what a reliable mailing bags comparison is designed to expose early.
How It Works: Evaluating Material, Film, and Handling Performance
Material selection is where the comparison becomes technical for a reason. Most mailers rely on LDPE or LDPE blends, and some include recycled content or co-extruded skins to balance stiffness and flexibility in selected zones. LDPE stays popular because it seals reliably, runs fast, and behaves predictably in many fulfillment systems, but two LDPE films can still feel different on the line depending on additive package, orientation, and extrusion profile.
Gauge and strength are often confused because they are numerically adjacent but operationally very different. Gauge is a static thickness value; strength is what remains after the package has been pinched, twisted, and dropped under real load. A 2.5 mil structure can still lose against a stronger 2.25 mil option if seal layers are weak, if orientation is off, or if edge control is poor. In a practical mailing bags comparison, I track burst resistance, puncture response, seal peel behavior, and tear propagation, then connect that to fit and throughput rather than treating each test as an isolated metric.
Closure engineering shapes not only packing speed but failure probability. Adhesive strips are fast when operators are trained and the liner is removed consistently, because seal pressure consistency tends to be easier to hit. Reseal strips and zipper systems can support returns-heavy programs, but they add tooling complexity and can slow throughput under stress. Anti-tamper features reduce unauthorized opening risk and can support post-delivery trust, but they often introduce higher opening force and different friction profiles at the customer touchpoint.
Small details are the place where teams lose control of decisions that looked simple on Monday and painful by Friday. Corner reinforcement often determines split patterns on rigid inserts after a brief compression event. Tear notches improve user opening ergonomics, yet if placed too close to the stress line from inserts or staples, they can turn a short shock into a full split. Gusset depth changes fill efficiency and label placement, and print area quality must survive fold lines, compression, and scanning intensity from conveyor-mounted readers. In a serious mailing bags comparison, these nuances tend to determine whether the bag works in the wild or just in photos.
Standards and reference frameworks reduce guesswork if used correctly. Packaging guidance from packaging.org and test method references from ISTA are useful to normalize vocabulary and expectations before trials. They do not choose suppliers. They do help your team separate performance claims from repeatable evidence and reduce the chance of debating adjectives instead of data.
Key Factors in Mailing Bag Selection: Protection, Weight, and Brand Perception
Strong mailer selection starts with matching product behavior to expected handling stress. Delicate items need puncture resistance and corner protection. Items with odor sensitivity or humidity risk need tighter mouth control, because even a small leak can damage the brand narrative fast. Heavy goods need structure and closure stability under compression, not just a bigger bag width. Temperature-sensitive contents can still fail for many reasons upstream and downstream, but weak sealing and inconsistent closure are rarely the only culprit.
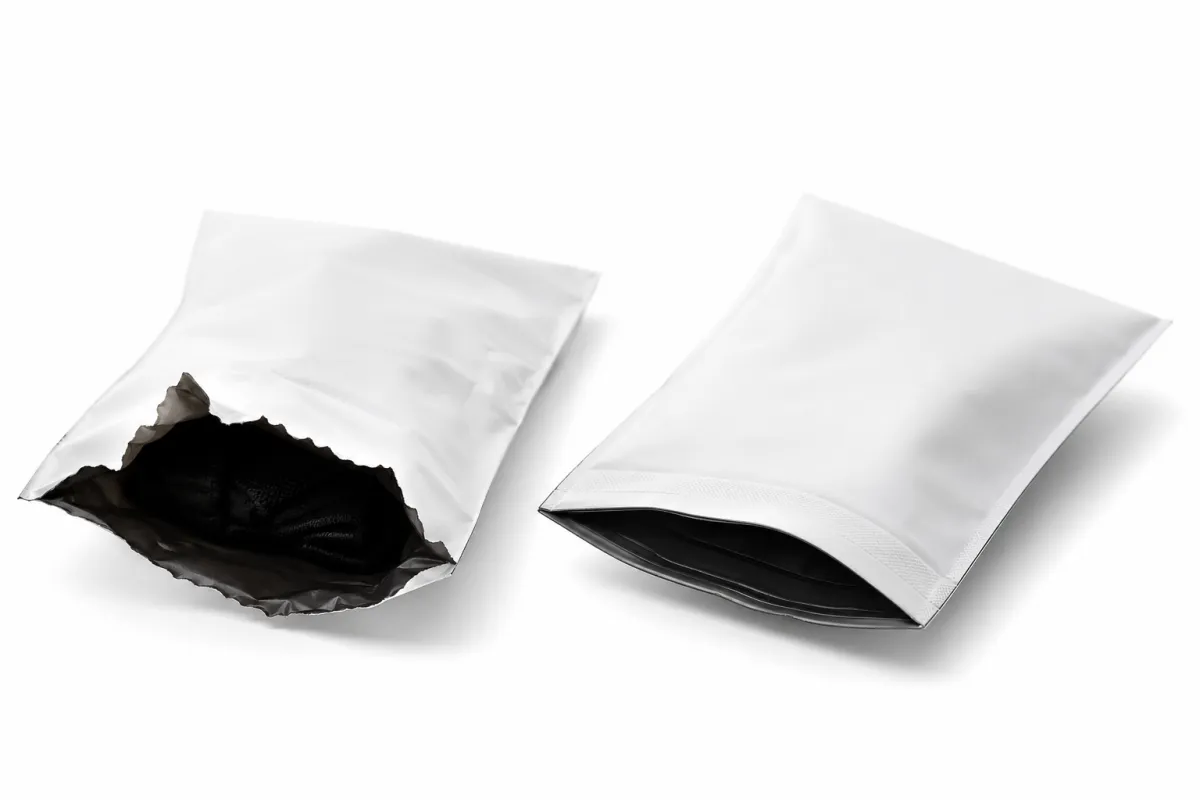
Brand cues are set before opening and usually judged in the first few seconds of arrival. Matte faces can signal premium restraint, while gloss can keep brand colors cleaner under bright scan conditions. Matte-black interiors can look intentional in photos, but they can alter print contrast and increase color-match challenges if your artwork team is not aligned. Clear windows help internal operators and customers confirm contents quickly, but they can also make barcode placement and visual design harder to control in one-shot branding systems. A mailing bags comparison that ignores this front-end perception misses part of the fulfillment experience your customer actually consumes.
Dimensional decisions are where people routinely overpay for convenience. A bag with 10 percent less air volume often improves movement control and helps reduce impact transfer, but if operators must force-fill every order, line labor and cycle stability drop. Larger internal volume improves speed in some lines but can increase dimensional weight and produce hanging or snagging in sort systems. The right setup treats fit, labor, and carrier pricing as a single model, then refuses to let any one metric dominate the decision.
Label reliability quietly decides outcomes on the back end. Surface texture, coating, and label stock all change scan performance and peel resistance after humidity shifts. In tight logistics networks with fast scan windows, slip-sheet labels or external secondary barcodes can outperform direct print despite extra material cost. A cleaner front face can be strategically worth more than a tiny visual effect, if your team keeps scanning and handoff speed stable. The Custom Poly Mailers option in your portfolio tends to work best when print, closure strategy, and size are decided in one synchronized pass instead of after-the-fact revisions.
The central rule across fulfillment models is simple and hard to obey: treat protection, labor efficiency, and brand impact as one connected system. If one component slips, the shipment still leaves your dock, but the delivery experience you designed is already weakened. That's not theoretical; it is what support teams see as soft cost by the second Monday of a launch.
How Do You Run a Mailing Bags Comparison on the Packing Line?
The cleanest mailing bags comparison begins with a use-case matrix, not supplier logos. Start with stable product classes, average order mix, operator comfort, route profile, and current line bottlenecks. A 6-ounce soft sample can tolerate very different bag behavior than a 3-pound mixed order that gets folded and handled three times before pickup.
After the matrix, create a weighted scorecard before any quote lands in your inbox. One practical model is:
- Burst and puncture resistance - 30 percent
- Closure reliability - 25 percent
- Print requirements and brand finish - 15 percent
- Lead time and supply stability - 15 percent
- Unit economics - 15 percent
Some teams ask whether this looks rigid; it is, on purpose. The framework prevents late-stage debate from hijacking decision logic when pricing gets emotional. If all options must meet identical conditions, the first-lowest quote loses a lot of its negotiating power.
Next, lock quote consistency before numbers are reviewed. Demand identical print count, color count, artwork version, dimensions, delivery terms, and handling assumptions from every supplier. If one bidder uses a two-color workflow and another assumes four-color, you are no longer comparing apples and apples; you are comparing two cost models hiding behind formatting differences. Setup charges, artwork corrections, plate fees, freight basis, and sample revision rules should be visible in day one.
Then run line trials, because there is no substitute. Use 20 to 50 pieces per option at minimum with actual operators, live SKUs, and real label flow. Track fill seconds, seal failures, jam events, label retention, and operator workload signals, not just final defect counts. A one-week pilot catches rhythm and repeatability trends, while a 7 to 14 day window filters out one-off shift effects. A mailing bags comparison based only on sample photos is a best-case hypothesis, not an operational forecast.
Before volume ramp, record acceptance thresholds in writing and share with operations. Define exact tolerances for seal failure, packing speed variance, and complaint sensitivity; attach owner, escalation path, and revision trigger for each threshold. If the numbers break, you then know whether to renegotiate specs, adjust training, or reject and move on. That simple step avoids argument after shipment when everyone is already under pressure.
In one warehouse I worked with, teams ran the same pilot criteria across three carriers' handling realities and discovered one option was fine in one lane but failed in another because conveyor acceleration was higher than expected. No amount of marketing copy would have revealed that.
Common Mistakes in a Mailing Bags Comparison and How to Avoid Them
Comparing only unit price is still the noisiest mistake in a mailing bags comparison, and it keeps repeating because it is easy. Hidden costs include minimum order increments, tooling and plate charges, inbound freight volatility, rejected lots, artwork cleanup, and labor penalties from slower closures. A bag that looks like a $0.14 win can become $0.19 in reality if support cost is treated as “someone else's problem.”
Environmental and regulatory checkpoints often get pushed to the end, where they become expensive delays. If you claim recycled, compostable, or specific recovery standards, make sure the construction, supplier documentation, and chain-of-custody support that claim before the PO is approved. Lanes with high inspection pressure can scrutinize labeling, inks, and closures more aggressively than expected, and reusable or unusual adhesives can trigger questions later in your network. A disciplined mailing bags comparison brings compliance and material proof into the primary criteria table, not an appendix.
Insufficient testing is the next familiar failure. A sample carton can pass visual checks and still fail under compression stacking, vibration, or repeated belt transfers. Seal separation usually surfaces first. Edge puncture tends to follow, and label peel can spike with humidity swings after day two or three of real usage. A reliable mailing bags comparison introduces simple transit-abuse simulation before scale, even if that means extending a pilot by a few days.
Data must dominate opinion. A bag that speeds pack-out but raises complaints by even a small percentage usually shifts cost into support and returns, where the margin erosion hides. If operator notes show “works once, then slips,” capture that in your scorecard immediately instead of treating it as noise. The same complaint can look minor in isolation and become expensive once volume compounds.
For teams wanting a more formal methodology, ISTA and packaging.org references remain useful, especially for structuring stress test language before trials. These frameworks do not replace live-line evidence, but they do force consistency and reduce the temptation to award bids on presentation alone.
If you are deciding for highly fragile content, I recommend one extra discipline: define a failure taxonomy in advance. Label each defect as “seal,” “material,” “fit,” or “process” so teams can diagnose the issue path instead of guessing from hindsight.
Cost and Pricing in a Mailing Bags Comparison: Where the Real Expense Hides
Pricing only starts making sense when decomposed into layers. In a practical mailing bags comparison, that means base film, print setup, color count, artwork edits, tooling or plate charges, freight, labor impact, and expected losses from defects. Custom dimensions and short lead times can add cost in ways that are easy to ignore on a first quote. The sticker price is almost always only part of the story.
Use this framework while reading vendor numbers. A low setup fee can improve short-run sampling, especially during promo spikes or product launch cycles. Unit price often becomes truly relevant only at scale when fixed setup and prepress expenses are diluted across the full run. That is why mailing bags comparison models should use realistic demand curves, not placeholder growth assumptions.
| Mailer option | Typical construction | Typical quoted unit cost at 5,000 pcs | Strength and handling notes | Best fit |
|---|---|---|---|---|
| Standard LDPE poly mailer | 1.75-2.25 mil film, adhesive strip | $0.12-$0.18 | Lightweight, fast to pack, good for dry goods with low puncture risk | Stable, dry, high-volume shipments |
| Recycled-content poly mailer | 2.0-2.5 mil film with PCR blend | $0.14-$0.22 | Similar handling, can vary more by resin blend and print finish | Brands balancing sustainability messaging and cost |
| Co-extruded reinforced mailer | Two-layer or blended film, stronger seal zone | $0.18-$0.30 | Better tear behavior and seal confidence, often worth it for heavier packs | Longer lanes, heavier items, customer-facing parcels |
| Kraft-faced poly hybrid | Paper outer layer with poly support | $0.22-$0.36 | Premium feel, better scuff masking, usually slower and more expensive to produce | Brand-heavy programs and retail-style presentation |
That table is a starter map, not a universal benchmark. Film thickness, print coverage, dimensions, and order volume all change pricing in ways that can be material across a single quarter. A 10 x 13 shift to 14 x 17 can alter material yield and carton efficiency, and that then changes carrier profile fit and lane utilization. In a mailing bags comparison, dimensional efficiency can beat a marginal graphic discount without warning.
Carrier-facing cost becomes visible once parcels enter actual billing and dimensional algorithms. A loose bag can create inefficient void space and force higher pricing tiers. A heavier or oversized profile can trigger surcharge behavior in specific lanes or routing zones. The metric that matters is landed cost per successful delivery, not nominal invoice cost per piece.
A practical internal model can stay simple and still be effective:
- Unit price - quoted bag cost
- Setup cost - artwork, plate, or tooling fees
- Freight per unit - inbound shipping and warehouse handling
- Labor impact - seconds added or removed per pack
- Defect allowance - scrap, rework, or replacements
- Return adjustment - expected damage or claim cost
When those variables are tracked, premium-priced options can absolutely be cheaper over time. A tougher bag may increase acquisition cost by a few cents, but if it reduces failure events and complaints, it can improve margin through less interruption. My rule of thumb after many comparisons: if a change removes 20 seconds from rework per 100 packages, it usually pays for itself faster than people expect.
Trust caveat: resin pricing and freight escalators shift quickly by region and quarter, so keep updating these ranges with three live quotes before final sign-off.
Process and Timeline: From Sample Approval to Production and Fulfillment
Timeline ambiguity is one of the most common causes of launch misses in a mailing bags comparison. The path is usually: artwork review, sample approval, production scheduling, in-process checks, then fulfillment staging. For many standard custom programs, 2 to 6 weeks is common, but only if files are clean and material is available.
A practical template many teams use:
- Artwork and proof review - 1 to 3 business days with clean files
- Sample production and prototype confirmation - 3 to 7 business days
- Bulk production - 7 to 15 business days for standard runs
- QA and packing prep - 1 to 3 business days
- Freight and receiving - depends on lane, destination, and carrier capacity
The timeline improves when compliance and design verification run in parallel, not as sequential bottlenecks. A bag that performs slightly better but misses a retail peak window can erode margin and customer confidence faster than one that is modest but dependable. Delivery readiness is a performance parameter, not just a logistics issue.
Delay triggers repeat across programs: wrong dieline file formats, missing closure specs, unstable film supply, and aggressive graphics requiring repeat proof cycles. Any one of these can stall schedules and amplify labor stress in fulfillment. A mailing bags comparison that models these risks with dates and owners is more realistic than one that ignores variability until someone yells at 5 p.m.
For teams that prefer practical checkpoints:
- Small test run - validate behavior under line conditions before committing to mass quantities
- Seasonal run - place orders early and leave buffer for correction cycles during demand spikes
- High-volume replenishment - track stock days and reorder buffer with actual dispatch pace, not intuition
If you are running a branded series, a second technical review of custom printed poly mailer options is usually the right moment to lock print specs, dimensions, and timelines before full placement. That second pass often prevents emergency changes later and keeps the mailing bags comparison tied to operational reality rather than a glossy PDF.
A tiny practical lesson from one high-mix fulfillment center: they lost three days waiting on revised adhesive specifications, while the operators were already building toward seasonality. A single alignment checkpoint avoided that pain after they moved packaging QA before the production slot lock.
Expert Tips for Your Mailing Bags Comparison Conclusion and Immediate Next Steps
The strongest mailing bags comparison is the one your team can repeat each quarter without rebuilding the scoring system from scratch. A compact scorecard plus a controlled pilot generally beats a polished sales sample every time. I would rather defend three criteria across three vendors than chase a marginal price edge and then rework operations for months.
Set weights once and leave them fixed unless strategy changes and is documented. Compare at least three suppliers against the same weights, and do not rewrite criteria after seeing bids unless you are doing a deliberate redesign. If closure durability is a must, assign sufficient weight up front. If brand finish is a strategic pillar, score it directly and consistently.
After onboarding, run a 14-day optimization cycle and compare pilot claims against live fulfillment behavior. Capture seal consistency, complaint volume, operator friction, and variance between pilot and full lot performance. Most “material defects” I see are actually packaging-system problems: label position, overstuffing, or operator work habits that changed once volume ramped. A robust mailing bags comparison treats the mailer as one element in a chain, not the only hero.
Reorder planning should follow supplier performance and stock coverage together. A slower supplier with reliable consistency can still be better if lead times are predictable and replenishment starts early. A faster supplier with high variation often shifts cost into safety inventory, extra inspections, and support overhead. A mailing bags comparison is valuable only when it exposes that tradeoff before the next purchasing cycle locks in.
Before scaling, document three controls: acceptance thresholds, reorder trigger levels, and a post-launch review date, then archive that package with the purchase record. Keep it available for the next season. The simplest path is usually to shortlist two finalists, run both through line pilots, and compare results against your current baseline with the same metrics. That's how a mailing bags comparison becomes a practical shipping improvement rather than another procurement event.
My final rule is simple: if one option improves performance but adds confusion for operators, don't call it a win yet. If one option costs a little more but lowers returns, lowers support touches, and stabilizes your delivery rhythm, that tradeoff is usually worth the premium.
What should I include first in a mailing bags comparison so I pick the right poly mailer quickly?
Lock down three constraints before reviewing vendor proposals: product weight and fragility, lane type, and required brand presentation. Once these are fixed, many options fail early for objective reasons, and you can spend less time comparing style and more time comparing outcomes. That makes the mailing bags comparison faster and less noisy.
How do I estimate the real cost difference in a mailing bags comparison beyond unit price?
Start with quoted unit cost, then add setup and artwork charges, minimum order effects, freight, likely defect rates, labor impact, and return handling. A reliable mailing bags comparison is based on all-in landed cost per successful order, not only invoice cost per piece.
How long is the process and timeline for switching to a new poly mailer in a shipping program?
Fast-track programs commonly complete in 2 to 6 weeks when approvals, pilots, and line testing stay disciplined. Complex print requirements, unusual dimensions, or supply constraints can stretch that to 6 to 8 weeks. A clear mailing bags comparison maps this timeline before the commitment is final.
Which option is usually better in a mailing bags comparison: clear poly or kraft poly mailers?
Clear mailers support inspection and label visibility, and are often practical for complex picking environments. Kraft hybrids read stronger on brand tone and can hide transport scuffs better in motion. The right choice in a mailing bags comparison depends on product risk, lane stress, and the delivery impression you need to protect.
What mistakes cause the most issues after a mailing bags comparison and rollout?
Teams most often fail from inconsistent supplier specifications, skipping line testing, and assuming sample quality will hold at volume. A strong mailing bags comparison sets objective criteria first, verifies on live operations, and makes complaint data—not supplier promises—the final check.
How should I decide whether to upgrade film thickness or change the closure design first?
Start with the most common observed failure mode. Frequent corner puncture or seam splits usually call for stronger film structure or better edge control. Frequent customer complaints about open-mouth delivery usually point to closure redesign. A disciplined mailing bags comparison fixes the first failure source before broadening material changes.
What if one supplier's quote is lower but the pilot score is inconsistent?
Use your threshold rule, not your comfort with a lower number. If repeatability is weak, the mailer can still be a bad fit for scale no matter how good it looked in a static test. In a mailing bags comparison, the lower quote is only one data point, not a decision.
Can I run this process with an internal team only, no third-party consultant?
Yes, if you have clear criteria, controlled pilot volume, and someone accountable for final acceptance gates. The process is less about outside expertise and more about execution consistency. If this is your first cycle, keep the matrix simple and revisit weights after one round.

