Buyer Fit Snapshot
| Best fit | packaging cost and design planning for packaging buyers who need material clarity, print proof, packing fit, cost control, and repeat-order reliability where brand print, material, artwork control, and repeat-order consistency matter. |
|---|---|
| Quote inputs | Share finished size, material target, print colors, finish, packing count, annual reorder estimate, and delivery region. |
| Proofing check | Approve dieline scale, logo placement, barcode or warning zones, color tolerance, and any recyclable or compostable wording before bulk production. |
| Main risk | Vague material claims, crowded artwork, or missing packing details can create delays even when the unit price looks attractive. |
Fast answer: Packaging Cost and Design Planning: Material, Finish, MOQ, and Proof should be specified like a repeatable production item. The safest quote includes material, print method, finish, artwork proof, carton packing, and reorder notes in one written spec.
What to confirm before approving the packaging proof
Check the product dimensions against the actual filled item, not only the sales mockup. Ask for tolerance on folds, seals, hang holes, label areas, and retail display edges. If the package carries a logo, QR code, warning copy, or legal claim, reserve that space before decorative graphics fill the panel.
How to compare quotes without losing quality
Compare board or film grade, print process, finish, sampling route, tooling charges, carton quantity, and freight assumptions side by side. A lower quote is only useful if the supplier can repeat the same color, closure quality, and packing count on the next order.
Packaging cost design tips shape far more than most brands realize, because the real bill is rarely just the quoted unit price; it is the combined effect of board usage, print setup, inserts, freight, storage, and the labor required to turn a flat sheet into a finished carton. I’ve watched a carton change by just 4 mm in width at a converter in Dongguan and seen the whole job move from a clean 1-up fit on the sheet to a waste-heavy layout that added material, slowed packing, and changed the freight class. That is why packaging cost design tips are not a “nice to have” for a purchasing team—they decide whether a margin stays tidy or leaks on every reorder.
Custom Logo Things sees this every time a buyer starts with a style preference instead of a specification sheet. A pretty custom printed box can look great on a screen mockup, but if the carton is 8 mm too tall, the void fill grows, pallet density drops, and your landed cost climbs. I’ve seen beverage brands lose three rows per pallet because they chose a slightly oversized mailer box for a bottle set; the freight bill was higher than the printing upgrade they had worried about all along. Good packaging design is not about spending less everywhere. It is about spending in the right places, on purpose, with the product and distribution path in mind.
For reference on material standards and packaging performance, I often point buyers toward the technical resources at the Packaging Machinery Manufacturers Institute and the testing guidance from ISTA. Those standards matter because a box that looks economical on paper can fail in transit if the structure was guessed instead of engineered. A lot of brands overpay for “nice-looking” packaging because nobody challenged the first spec before quoting, and that is a costly little habit.
Why Packaging Cost Design Tips Matter More Than Most Brands Realize
The strongest packaging cost design tips begin with one simple truth: packaging is a system, not a single number. Unit cost is only one part. In a factory, I’ve seen a 350gsm SBS carton with a soft-touch lamination come in cheaper per unit than a heavier rigid box, yet the rigid box proved to be the better decision for a premium gift set because it protected the product better and reduced returns. That is the kind of tradeoff experienced buyers understand: sometimes the right structure lowers the total cost of ownership even if the sticker price is higher.
On the factory floor, early design decisions affect die-line efficiency, sheet utilization, and corrugator yield almost immediately. If your artwork bleeds too far, if the flap proportions are awkward, or if the insert design creates an extra converting step, the line slows down. I remember a folding carton job for a skincare client where the artwork team kept stretching the logo across the side panel. The layout looked beautiful, yes, but the press required a larger sheet and the die cutter had to adjust for tighter registration tolerance. The fix was simple: move the logo 12 mm inward, keep the brand impact, and save enough board to improve the unit cost across the run.
Packaging cost design tips belong in purchasing, operations, and brand discussions at the same table. Lower landed cost, fewer production delays, better margins, and more room for premium branding where it matters all come from the same discipline. If you are building retail packaging or shipping Packaging for Subscription boxes, the box size and board grade can change pallet count, damage rate, and storage fees in one move. Brands that treat branded packaging as an engineered item, not decoration, usually end up with the better long-term result.
One client meeting still sticks with me. A cosmetics company wanted metallic foil on every visible panel of a sleeve and insert set. We broke the quote into three versions: full foil, front-panel foil, and no foil with a premium matte coat. The front-panel option cut setup time, reduced scrap, and still gave the unboxing moment they wanted. That is a practical example of packaging cost design tips in action—showing how to protect the brand while trimming unnecessary expense.
There is also a trust issue here that gets overlooked. A quote can look low because it leaves out a test run, a die charge, or the extra packing labor that shows up later. I prefer to call those items out before a buyer commits, even if it makes the first number look less exciting. It is a lot easier to adjust the spec than to explain a surprise invoice after the freight is already booked.
Product Details That Drive Packaging Cost
Better packaging cost design tips start with the elements that move price most: box style, size, material thickness, print method, coatings, inserts, and special finishes. A mailer box in E-flute corrugated board is usually a very different cost profile from a rigid setup box wrapped in printed art paper over greyboard. The mailer is efficient for shipping and warehouse use; the rigid box feels stronger in presentation and heavier in the hand. Neither is “better” in a vacuum. The right choice depends on how the product ships, where it sits on the shelf, and what the buyer expects from the package branding.
Here’s the practical breakdown I use with buyers:
- Mailer boxes: often cost-efficient for e-commerce, especially in E-flute or B-flute corrugated board.
- Folding cartons: strong for retail packaging, especially with SBS paperboard or CCNB for lighter products.
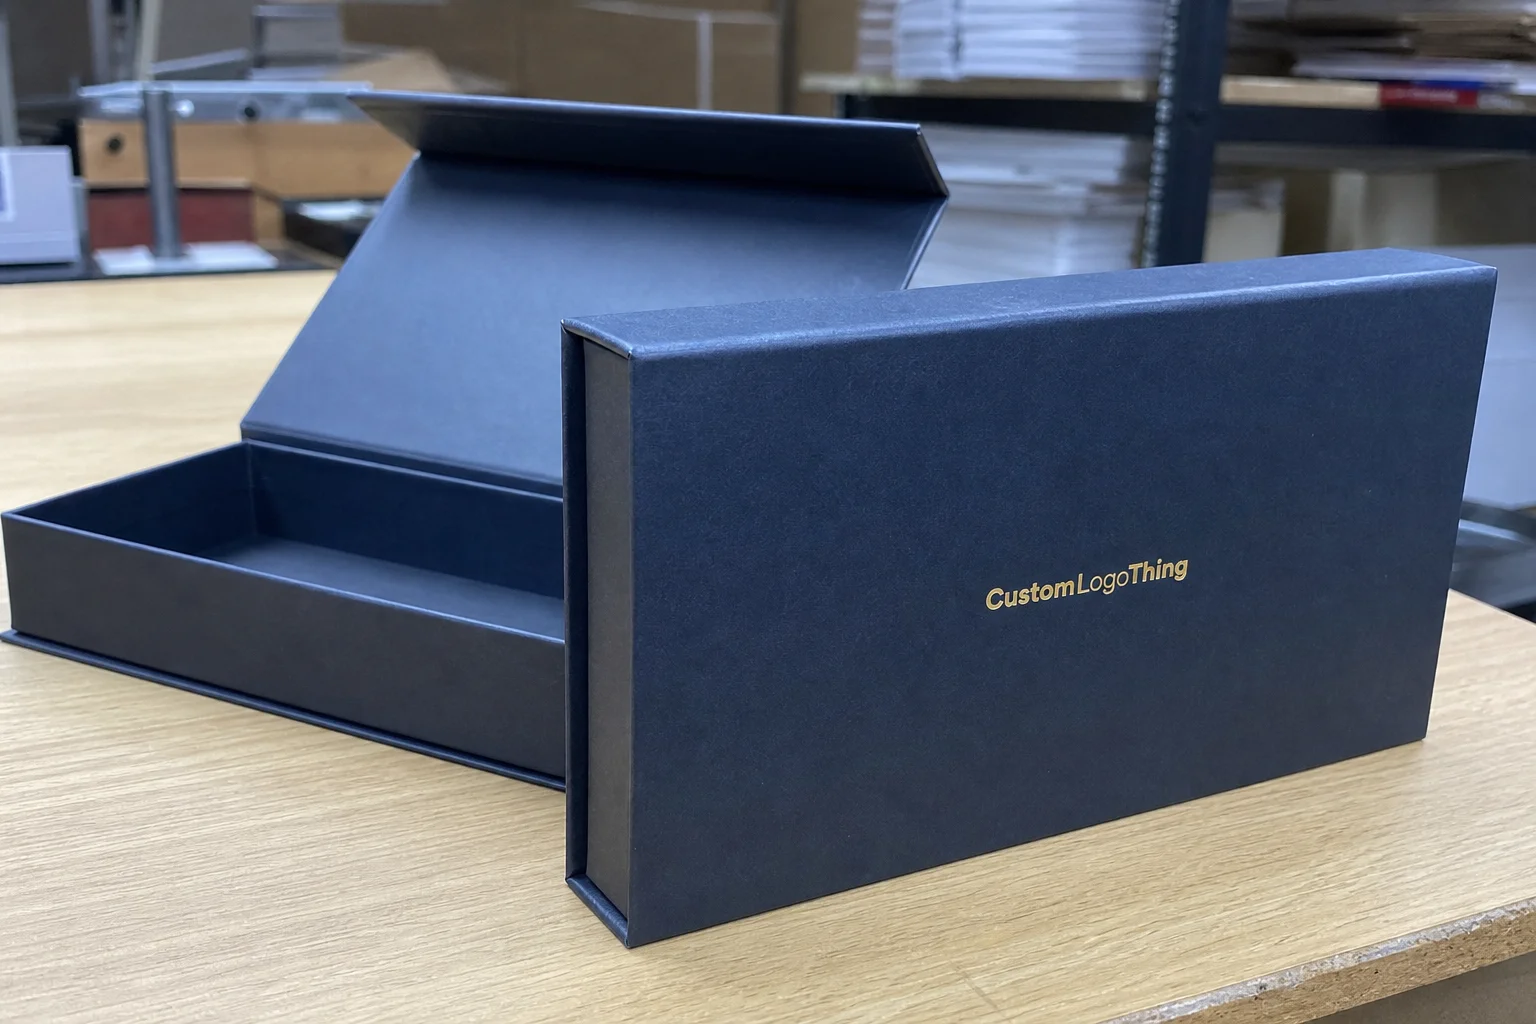
- Rigid boxes: premium presentation, usually higher material and labor cost because of wrapping and assembly.
- Paper tubes: useful for cosmetics, tea, apparel accessories, and promotions where shape helps shelf appeal.
- Sleeves: a budget-conscious way to add branding to a stock tray or simple inner pack.
Custom dimensions rank among the most overlooked packaging cost design tips. A well-fitted box can reduce void fill, lower dimensional weight, and improve pallet density. I worked on a corrugated shipper program for a small home goods line where the original box had 18 mm of empty headspace. By reducing that clearance and shifting from a bulky insert to a simpler folded paperboard cradle, the client saved on filler, cut shipping complaints, and fit 14% more units per pallet. That kind of improvement does not always show up in the first quote, but it shows up in the freight bill every month.
Artwork complexity drives cost too. On offset, flexo, and digital presses, more ink colors usually mean more setup and press attention. Heavy coverage on both sides can add drying time, especially if you are using coatings or specialty inks. A simple one-color print on kraft corrugated can look sharp if the typography is clean and the structure is designed well. A lot of brands spend money trying to impress with six colors and spot effects when one strong brand color, handled properly, would do the job at a lower total cost. That is one of the most reliable packaging cost design tips I can offer.
Finishing choices matter too. Gloss UV, soft-touch lamination, hot foil stamping, embossing, and window patching all add time and handling. I’ve seen a rigid box line in Shenzhen slow down by nearly 20% because a client wanted foil on the lid, the side walls, and the insert. The product looked luxurious, no question, but the finishing stack pushed the job into a more expensive production lane. If you need premium presentation, put it where the customer sees and touches most. That approach is one of the smarter packaging cost design tips for branded Packaging That Still needs to hit a budget.
And if you are dealing with a product that needs strong shelf presence, don’t assume “more decoration” equals “more value.” Sometimes the sharper move is better structure, a cleaner print layout, and a better opening experience. That combination can feel more expensive to the customer while actually being kinder to your manufacturing budget. Kinda nice when the math works out that way.
Specifications to Lock In Before Requesting a Quote
Good packaging cost design tips start with a proper spec sheet. Before requesting a quote, prepare the inside dimensions, product weight, board grade, print sides, finish type, insert style, and packing format. If you send a vague request like “need a nice box for a candle set,” you will usually get a conservative estimate that assumes extra board, more labor, and more safety margin than you may actually need. That is how overbuilt packaging happens.
Here is the checklist I want from a buyer before pricing:
- Inside length, width, and height in millimeters.
- Product weight per unit and total packed weight.
- Packaging style: mailer, rigid, folding carton, tube, or sleeve.
- Board grade preference: E-flute, B-flute, SBS paperboard, CCNB, or rigid greyboard.
- Print sides: outside only, inside only, or both.
- Finish preference: matte, gloss, soft-touch, foil, embossing, or none.
- Insert type: paperboard, molded pulp, foam, corrugated, or no insert.
- Target quantity and any repeat order plans.
Those details make a real difference because materials are not interchangeable. E-flute is thin and print-friendly, often chosen for retail mailers and lighter product packaging. B-flute has more wall depth and better cushioning, which makes sense for heavier shipping boxes. SBS paperboard is a strong choice for sharp retail graphics and lighter goods. CCNB can be cost-effective when you need a printable liner and do not need luxury presentation. Rigid greyboard is used for premium packaging, gift sets, and high-end custom printed boxes that need structure and visual weight.
The most common mistake I see is buyers asking for the cheapest quote before confirming fit. I visited a beauty brand that had ordered 10,000 units of a folding carton that looked fine in the render but crushed slightly in transit because the wall score was too tight for the product shape. The replacement run cost more than the original savings. That is why I recommend a prototype or sample run. A physical sample verifies fit, compression strength, print alignment, and how the closure behaves after repeated handling. If you want the best packaging cost design tips, test the structure before mass production, not after a warehouse complaint.
For sustainability-minded projects, it also helps to review fiber sourcing and recyclability guidance from FSC and materials guidance from the EPA recycling resources. Not every recyclable claim fits every market, and local collection rules vary, so the claim has to match the material and the geography. I’ve had buyers assume “paper-based” automatically meant curbside recyclable everywhere, and that is simply not true in every city or country.
Pricing, MOQ, and How to Lower Total Packaging Cost
MOQ is where many buyers get surprised, and it is one of the biggest reasons packaging cost design tips matter during procurement. Lower quantities usually cost more per unit because tooling, plates, die cutting, press setup, and packing labor are spread across fewer pieces. Higher quantities reduce the per-unit price, but only if you can store the inventory and use it before the design changes. I’ve seen a $0.42 unit price on a 1,000-piece run fall to $0.18 at 5,000 pieces simply because setup costs were absorbed more efficiently and the paper was purchased in more favorable sheet volumes.
Pricing usually includes tooling, dielines, print plates where applicable, coating setups, material sourcing, finishing, and shipping method. If a buyer wants a rigid box with foil and a custom insert, the tooling and assembly costs can be just as important as the board itself. That is why I often recommend asking for tiered quotes at 1,000, 3,000, and 5,000 units. The comparison reveals where the real breakpoints are and helps you decide whether the storage savings outweigh the unit cost savings.
There are several design choices that reduce total cost without making the package feel stripped down:
- Use one strong ink color instead of four-color coverage when the brand system allows it.
- Choose standard board sizes where possible to improve sheet utilization.
- Simplify inserts by using folded paperboard instead of molded components if protection allows.
- Limit specialty finishes to the lid or front panel.
- Keep the structure aligned with existing converting equipment to reduce setup time.
Those are practical packaging cost design tips, not theory. I once negotiated with a supplier on a luxury candle program where the client wanted a full-wrap foil sleeve, a flocked insert, and a two-piece rigid carton. We stripped the insert down to a one-piece paperboard cradle, kept the matte lamination, and left the foil only on the lid. The box still looked premium on shelf, but the production line ran cleaner and the quote dropped by a meaningful amount. That kind of tradeoff is what smart product packaging decisions look like in real life.
Do not ignore shipping method either. Air freight can erase every saving you worked to achieve in the structure. If the project allows, build around ocean freight timelines and schedule production early. If you need a domestic replenishment program, ask your supplier how the cartons pack, how many per case, and whether the outer shipper can be optimized for pallet height. These details are not glamorous, but they are often where the best packaging cost design tips pay off.
One more thing: a quote that looks low because the supplier “forgot” to include freight or final packing can become the most expensive option very quickly. I’d rather see a buyer compare complete landed cost than chase the cheapest factory line item. That’s the cleaner way to keep the budget honest.
How do packaging cost design tips shape your quote?
In practical terms, packaging cost design tips shape your quote by changing how much material is used, how much labor is required, and how efficiently the package moves through the factory. A small adjustment in size can affect sheet layout, die-cut yield, packing density, and freight class all at once. That is why two cartons that look similar on paper can produce very different pricing from the same supplier.
For example, a carton that nests cleanly on a printing sheet may run quickly with minimal scrap, while a slightly taller version may force a less efficient sheet arrangement and increase waste. The same applies to inserts, finishes, and board grades. The more your design aligns with standard converting steps, the lower the quote usually becomes. If the design adds custom wrap labor, special coatings, or unusual cavity shapes, the estimate rises because the factory must devote more time and material to the job.
That is also why packaging buyers should ask suppliers for options, not just a single number. A front-panel foil treatment, a standard insert, or a standard board grade may give you nearly the same brand impression at a much better price. In other words, packaging cost design tips are not only about cutting expense; they are about making the quote respond to smart design choices rather than guesswork.
If the supplier can show how each change affects board usage, press time, and final assembly, you are in much better shape. That sort of transparency is a sign you’re talking to someone who actually understands the factory math, not someone simply relaying a price from a spreadsheet.
Process and Timeline From Dieline to Delivery
The standard workflow is straightforward, yet delays usually happen where buyers assume things are already settled. A clean process starts with discovery, then specification review, dieline creation, artwork prep, proofing, sampling, production, inspection, and shipping. If the artwork is press-ready and the structure is finalized, the job moves faster. If the buyer is still changing dimensions after the proof stage, the schedule gets longer and the cost often climbs.
In most custom packaging programs, dieline creation can take a few business days, proofing another few days, and sampling a little longer if special finishes are involved. Production timelines vary by format, but I usually tell clients to expect more time for rigid boxes and complex finishing than for simple corrugated mailers or folding cartons. A clean run for a straightforward mailer can be much faster than a wrapped rigid box with foil and insert assembly. The point is not to promise the shortest lead time; it is to protect the schedule with realistic expectations.
One of my most useful packaging cost design tips is to lock specs early. I’ve watched a project lose a full week because the client kept adjusting the insert cavity after artwork approval. Press-ready files matter too. If you send linked images, missing fonts, or low-resolution art, someone has to stop the line or rework the file package. That delay costs more than the file fix itself. A disciplined handoff saves money and keeps the program on track.
Quality control should not be an afterthought. On the factory floor, we check dimensions, glue strength, print registration, cut accuracy, and case packing before release. For shipping cartons, drop-testing or transit simulation may be appropriate, especially if the product is fragile. That is where standards like ISTA help guide the test plan. If the product is high value or breakable, a sample that survives the bench test is worth far more than a pretty render. Packaging that fails in transit is not economical, no matter how good the quote looked.
I’ve had projects where the sample passed visually but failed after the third handling cycle because the tuck flap lost tension. That kind of issue is easy to miss if nobody physically opens and closes the box a few times. Small details, big consequences.
Why Choose a Factory-Direct Packaging Partner
Factory-direct manufacturing reduces middleman markup and usually shortens the distance between your question and a real technical answer. That matters when you are making decisions about corrugated converting, rigid box wrapping, folding carton gluing, and post-press finishing. A team that knows the line can tell you whether your chosen laminate will crack on the score, whether the insert tolerance is realistic, or whether the board choice will hold up through warehouse stacking. That kind of guidance is one of the strongest packaging cost design tips a buyer can get.
I’ve been on the floor when a sales rep promised a finish that the machine could technically do, but only at a painfully slow speed. The production manager was right there, and he said, “We can make it, but not at that price.” That honest moment saved the client from a bad expectation. I trust factory-direct teams who speak plainly about tradeoffs, because they usually care more about repeat business than flashy promises.
If you are comparing suppliers, look for practical problem-solving, not just a polished presentation deck. A good partner will help you balance branded packaging with budget, recommend material swaps that keep the look intact, and tell you when a simpler build would protect your margin better. You can also review product options through Custom Packaging Products if you want to compare formats before requesting a quote. The right supplier relationship is about fit, speed, consistency, and the ability to adjust when the product or market changes.
There’s also a credibility difference you can feel pretty quickly. A factory-direct partner usually knows the real reason a design is expensive: maybe the wrap paper choice slows hand assembly, maybe the insert needs an extra glue point, maybe the lamination is fighting the board grain. That kind of answer is much more useful than a vague “this is premium,” which doesn’t help anyone make a budget decision.
Next Steps to Apply Packaging Cost Design Tips Right Away
If you want to put packaging cost design tips to work immediately, start with the basics: confirm product dimensions, choose the packaging style, decide the print coverage, set a target MOQ, and gather your artwork files. Then ask for two or three spec options so you can see how small changes affect total price and lead time. That comparison is where the smartest savings usually appear.
Request a sample or prototype before approving full production, especially if the product is fragile, heavy, or sold in a premium retail setting. I’ve seen a $0.06 material change save more than $4,000 on a large order because it improved pallet density and reduced rework. That is why the best packaging cost design tips are not just about lower quote numbers; they are about total cost, delivery reliability, and presentation quality that matches the brand.
Start by trimming the variables you can control: size, structure, finish, and insert complexity. Keep one eye on the customer experience and the other on what the factory has to do to produce it. If both line up, the budget usually behaves itself.
If you are ready to build a quote around sensible design choices, send the product details, target quantity, finish preferences, and shipping needs. A clean brief lets us recommend the structure that fits your budget instead of forcing you into a one-size-fits-all answer. That is the real value of thoughtful packaging cost design tips: less waste, better specs, and packaging that earns its place in the budget.
Frequently Asked Questions
What are the best packaging cost design tips for reducing unit price?
Use standard sizes and materials whenever possible. Reduce print complexity, specialty finishes, and oversized structures. Increase order quantity if storage and cash flow allow, since setup costs spread across more units.
How does MOQ affect packaging pricing?
Lower quantities usually cost more per unit because setup, tooling, and press preparation are divided across fewer pieces. Higher MOQs improve material buying power and production efficiency. Ask for tiered quotes to compare unit price at different volume levels.
Which packaging materials are usually the most cost-effective?
Corrugated mailers and folding cartons are often the most economical for shipping and retail use. E-flute and B-flute corrugated board can balance protection and cost well. Rigid boxes usually cost more, but can be worthwhile for premium presentation.
How can I lower packaging cost without making the box look cheap?
Focus budget on the visible customer-facing surfaces and simplify hidden structural elements. Use one strong brand color, clean typography, and smart material selection. Choose one quality finish instead of stacking multiple expensive effects.
What information should I send to get an accurate packaging quote?
Share product dimensions, product weight, packaging style, artwork files, finish preferences, and target quantity. Include any shipping or storage constraints, since those affect design choices. If possible, provide a sample of the product so fit and protection can be evaluated properly.