Why personalized return labels matter for clothing brands
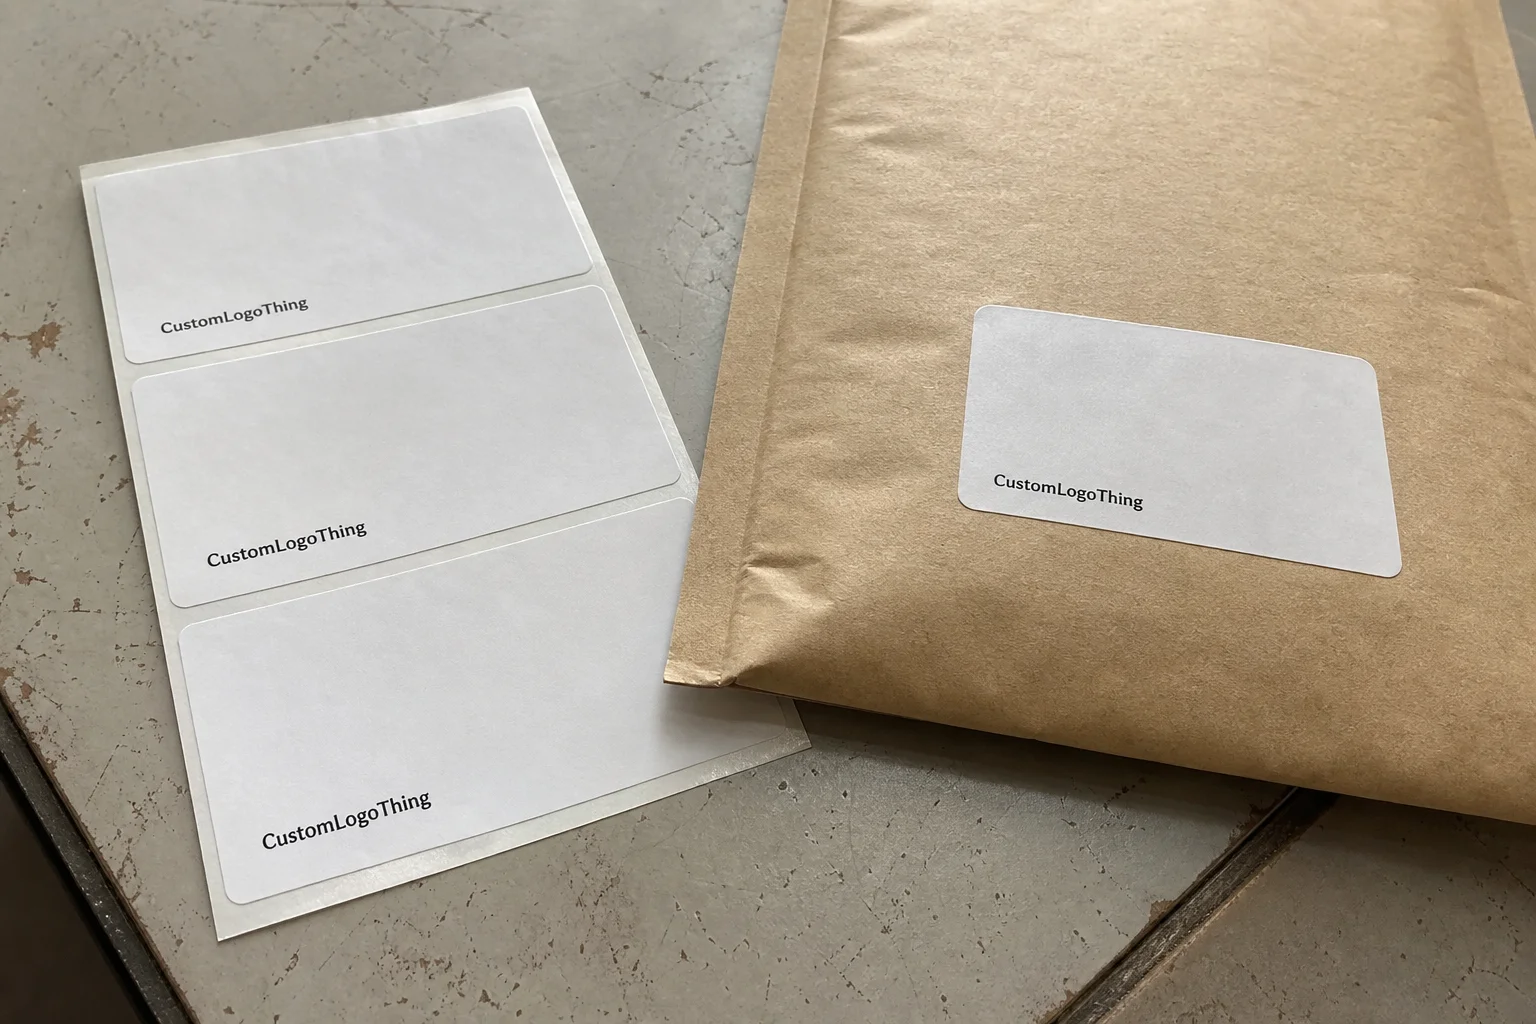
Personalized return mailing labels are one of those packaging components that seem minor until they start causing friction. Then they become very noticeable. In apparel fulfillment, a label gets handled by packing teams, carriers, receiving staff, and customers who may need to send something back after trying on a garment at home. If the address block is easy to read and the adhesive behaves properly, the entire return path becomes less messy.
Generic address stickers can do the job, but branded return labels usually do it with fewer mistakes and less manual cleanup. They help staff identify the right parcel faster, reduce handwritten corrections, and give the package a more organized look when it moves through multiple hands. For a clothing brand, that polish matters because returns are still part of the customer experience, even if nobody is excited to receive one.
The labor savings are easy to underestimate. A return label that costs only pennies may save a few seconds at packing, a few more at sorting, and a few more when the parcel is received or re-routed. That does not sound dramatic on a single order, but across a week of shipping volume, those seconds add up into real operational time.
These labels are used far beyond return envelopes. They appear on mailers, poly bags, rigid boxes, internal routing slips, packing inserts, and return kits. If your packaging system already includes Custom Labels & Tags, return labels are often the easiest place to tighten consistency without changing the entire packaging program.
For clothing brands, the practical value is straightforward: fewer undeliverable returns, less handwriting, and a cleaner presentation. The label does not need to be flashy. It just needs to read clearly, hold to the intended surface, and survive normal handling without peeling at the corners.
How personalized return mailing labels work in real orders
Most orders begin with the same basic structure: business name, return address, and sometimes a logo. Some brands add a barcode, QR code, or routing number to help with internal sorting. Others keep the design minimal because a return label has one main job, which is to be read quickly without hesitation. That restraint is usually the smarter choice.
Customization options typically include size, shape, material, finish, adhesive type, and whether labels are supplied on sheets or rolls. Standard formats such as 2" x 4", 3" x 2", and 4" x 6" are common because they fit common shipping and packing workflows. Custom die-cut shapes are possible, but they usually raise setup cost and can extend lead time.
Material selection changes how the label performs. Paper stock is fine for indoor use, dry storage, and low-abuse handling. Synthetic stocks such as polypropylene or polyester hold up better on shipping cartons and in environments where moisture or rubbing may be an issue. If the label is going on a glossy poly mailer, the adhesive must be specified for that surface; a general-purpose adhesive may stick at first and still fail later.
Application method matters just as much. Manual packing lines usually work best with sheets or individual labels, while higher-volume operations tend to prefer rolls because they feed faster and create less handling waste. If a brand uses thermal printers, the stock must be compatible with the printer type. Digital printing allows more color and design detail, but it changes the economics, especially on short runs.
In real production, personalized return mailing labels tend to serve four common workflows:
- E-commerce returns for customer-facing parcels
- Wholesale shipping for carton identification and routing
- Warehouse processing for internal sort-and-send steps
- Customer service inserts inside boxes or return kits
Brands that already use Custom Poly Mailers should test labels on the actual mailer surface before placing a larger order. A label that bonds well to kraft board may lift from a slick film surface if the adhesive is not matched correctly. That kind of mismatch is common enough that it should be expected, not treated as a surprise.
Cost, pricing, and MOQ factors you should compare
Pricing for personalized return mailing labels is usually shaped by five variables: size, color count, material, coating, and quantity. Once you add a custom die-cut shape or a special adhesive requirement, the quote starts to reflect the extra setup. A simple one-color paper label costs far less than a synthetic label with full-color artwork and a matte laminate.
Small runs carry a higher unit cost because the fixed production setup is spread across fewer pieces. As quantity rises, the unit price usually drops in a way that is easy to see on the quote sheet. A 500-piece order can feel expensive per label, while 5,000 or 10,000 pieces often move into a much more efficient range.
For standard sizes and normal print coverage, a digitally printed return label often lands around $0.12-$0.35 per piece in moderate quantities. Smaller orders can run higher, especially if the job requires a special finish, unusual size, or extra setup. Specialty material, heavy ink coverage, and custom shapes can all push the price into a different bracket. The math is simple, even if the quote does not always look simple at first glance.
MOQ matters because it changes the buying strategy. Lower minimums are useful when testing a new format or verifying whether a label works on a specific surface, but they usually come with a higher unit cost. Higher minimums make more sense when the return address is stable and the packaging volume is predictable. If reorders are frequent, standardizing the size early usually beats chasing a one-off shape that sounds distinctive but creates more cost and delay.
For most buyers, the cleanest comparison looks like this:
- Sheet labels: best for low-volume, hand-applied work
- Roll labels: best for faster fulfillment and higher application speed
- Premium stock: best for better durability and a more finished presentation
- Standard size: best for cost control and simpler reordering
If sustainability is part of the brief, ask about stock options and waste reduction before approving the final spec. FSC-certified paper can be a useful sourcing benchmark, and the EPA’s waste reduction resources provide a broader framework for thinking about material use, even though they are not label-specific. In practice, the most sustainable option is often the one that avoids over-specifying a label that does not need to be premium in the first place.
| Order type | Typical use | Relative cost per label | Best fit |
|---|---|---|---|
| Sheet labels, low quantity | Manual packing, small brands | Higher | Testing, small batch operations |
| Roll labels, mid to high quantity | Faster application, fulfillment lines | Lower | Growing e-commerce brands |
| Premium stock with coating | Retail presentation, durable use | Mid to high | Branded packaging programs |
| Custom shape or specialty material | Unique branding or tough handling | Highest | Special projects, display packaging |
Process and timeline: from artwork to delivery
The production flow is usually straightforward. You send the logo, return address, size preference, and any barcode or QR code data. The supplier prepares a digital proof. You review and approve it. After that, printing, finishing, packing, and shipping happen in sequence. The process is simple on paper, though accuracy at the beginning saves far more time than last-minute corrections at the end.
Turnaround depends on the material, quantity, and proof approval speed. Standard custom label jobs often take about 12-15 business days from approval to shipment. Simpler orders may move faster, while rush jobs can be possible if stock, finish, and press scheduling allow it. Faster service usually comes with a higher price or fewer options, which is the normal tradeoff rather than an exception.
Most delays are not caused by printing itself. Missing artwork, incomplete address information, late color changes, and slow proof approvals are the usual culprits. A return label may look like a small purchase, but it still goes through the same approval steps as any other printed packaging item. When a buyer treats it like a last-minute admin task, the schedule tends to slip.
Seasonal apparel launches make timing more sensitive. During peak periods, packaging inventory moves faster, review cycles are longer, and replenishment windows get tighter. A label order that seemed comfortably early during planning can suddenly become urgent. For that reason, it is better to place return label orders before the pressure builds rather than waiting until the bin is nearly empty.
“The labels weren’t the expensive part. The expensive part was fixing the mess every time we had to handwrite return information.”
If the labels will support parcel handling or shipping compliance, ask for durability expectations early and confirm the intended test conditions. ISTA, the International Safe Transit Association, is a useful reference because it focuses on shipping and transit performance rather than visual appeal. That distinction matters: a label that looks good in a mockup may still fail if the adhesive, coating, or substrate is not matched to the actual packing environment.
Step-by-step: how to order labels that actually fit your workflow
Step 1: define the use case. Decide whether the label is for returns only, outbound shipping, or both. That answer affects the layout, the amount of information on the label, and the required durability. A return-only label can stay minimal; a dual-purpose label usually needs tighter structure.
Step 2: choose the format. Sheets are practical for low-volume teams and manual application. Rolls are usually better when staff need to apply labels quickly during packing. Individual labels can work well for kits or inserts, but they are not always the most efficient option if the order volume grows.
Step 3: lock in size, adhesive, and finish. Match the label to the actual surface. Glossy poly mailers, kraft boxes, coated cartons, and insert cards do not behave the same way. Matte finishes often improve readability, while gloss can create glare that makes text harder to scan.
Step 4: prepare the artwork carefully. Give the supplier the exact return address format, not a rough version. If the label includes a logo, a clean vector file is usually the safest choice. If you need a barcode, QR code, or routing code, specify the placement early so the proof does not turn into a round of revisions.
Step 5: review, approve, and test. Before committing to the full run, apply a sample to your actual packaging. Fold it, rub it, and leave it in the conditions it will actually face. If the label needs to survive humidity, cool storage, or repetitive handling, test under those conditions rather than assuming the proof tells the whole story.
A practical reorder checklist keeps the process moving later:
- Approved artwork file
- Exact return address format
- Preferred size and shape
- Material and adhesive spec
- Application method: sheet, roll, or individual
- Any special routing or barcode requirements
That checklist also makes it easier to coordinate the label with the rest of the packaging system. If mailers, inserts, and outer boxes are being ordered together, the return label should fit the same visual and operational logic. The goal is not to make every component identical; it is to make them work together without extra sorting or rework.
Common mistakes that make return labels look cheap or fail
The first mistake is oversized design ambition. A return label is not a miniature brand campaign. If the type is decorative or too small, the address becomes harder to read and the label loses the one function it absolutely cannot miss. Readability has to come first.
The second mistake is choosing the wrong adhesive. A label that performs well on paper cartons may peel from glossy mailers, fabric pouches, or cold-stored packages. If the packaging surface changes, the adhesive spec should change too. That is one of the most common causes of premature lifting.
The third mistake is crowding the layout. A label needs room for the address block, routing information, and any machine-readable code. White space is not wasted space; it gives the content room to work. When everything is packed too tightly, scanning becomes harder and the label looks more like a draft than a finished component.
The fourth mistake is ignoring printer compatibility. A layout built for digital printing may not suit thermal use. A roll designed for automatic application can be awkward for hand packing. The format should match the workflow, not the preference someone had while approving the proof.
The fifth mistake is skipping an actual surface test. Many label problems only appear after the label is applied to the real packaging and handled a few times. That is where buyers discover curling corners, poor adhesion, smudging, or a finish that looked fine on screen but behaves badly in the warehouse. A short test run is cheaper than a warehouse cleanup.
For brands that care about shipping durability, the right mental model is performance first, decoration second. That means checking the stock, adhesive, coating, and application method with the same seriousness you would use for any other packaging component that passes through a rough handling chain.
Expert tips for better results and next steps
Keep the layout simple. A strong return label usually needs a brand mark, sender details, and any required barcode or routing information. That is enough. If the brand needs more visual presence, the mailer, insert, or outer box is usually the better place for it. Overloading the label only makes it harder to use.
Choose one standard size across multiple packaging formats if you can. That makes inventory easier to manage and reduces the chance that a team orders two or three similar labels that are not actually interchangeable. Standardization also shortens reorder discussions, which is a practical benefit that gets overlooked until someone has to clean up the mismatch.
Order a small test batch before changing material, adhesive, or printer method. That kind of trial is cheap insurance. A label that looks correct in proof may behave differently on a slick surface, in humid storage, or during a busy packing shift. The test does not have to be elaborate; it just has to be real.
Save a reorder file with the essentials clearly labeled:
- Final artwork
- Approved address block
- Label dimensions
- Material and finish
- Printer or application method
- Any special routing or barcode requirements
That way the next order is a reorder, not a search mission. If the spec is already documented, production can move with fewer questions and fewer delays.
For brands that are still comparing formats, samples usually settle the question faster than a quote sheet alone. Measure the actual packaging surface, check the fit, compare the feel of the stock, and confirm the label remains legible under normal handling. Then request pricing against the exact specification rather than an approximate idea.
Used well, personalized return mailing labels are one of the quiet improvements that makes apparel packaging easier to manage. They reduce address errors, simplify returns, and make the shipping process feel more organized without asking for much attention. That combination is exactly why they stay valuable: not because they are dramatic, but because they keep solving small problems before those problems become expensive.
What are personalized return mailing labels used for in clothing packaging?
They identify the sender on returns, exchanges, and outbound parcels. They also help brands keep packaging consistent and reduce address errors. They work well for mailers, boxes, insert cards, and return envelopes.
How much do personalized return mailing labels usually cost?
Cost depends on size, material, finish, quantity, and print complexity. Smaller runs usually have higher unit cost. Standard sizes and larger quantities generally offer the best price break, while specialty materials and custom shapes raise the total.
What is the best format: sheets or rolls?
Sheets are practical for low-volume or manual application. Rolls are better for faster packing lines and higher-volume fulfillment. Choose based on how your team actually applies labels rather than what sounds efficient on paper.
How long does production usually take for custom return labels?
Typical timelines depend on proof approval, material selection, and order size. Standard jobs often take about 12-15 business days after approval, while rush production may be possible if the spec allows it. Delays usually come from artwork or approval issues rather than printing itself.
What details should be included on personalized return mailing labels?
Include the return name or business name, address, and any routing information needed. Add a barcode, QR code, or tracking element only if your workflow uses it. Keep the label readable first; design comes second.