Buyer Fit Snapshot
| Best fit | Shipping Bags Design for Better Poly Mailers projects where brand print, material claims, artwork control, MOQ, and repeat-order consistency need to be specified before quoting. |
|---|---|
| Quote inputs | Share finished size, material target, print colors, finish, packing count, annual reorder estimate, ship-to region, and any compliance wording. |
| Proofing check | Approve dieline scale, logo placement, barcode or warning zones, color tolerance, closure strength, and carton packing before bulk production. |
| Main risk | Vague material claims, crowded artwork, missing packing details, or unclear freight terms can make a low unit price expensive after revisions. |
Fast answer: Shipping Bags Design for Better Poly Mailers: Film, Print, MOQ, and Carton Packing should be specified like a repeatable production item. The safest quote records material, print method, finish, artwork proof, packing count, and reorder notes in one written spec.
Production checks before approval
Compare the actual filled-product size with the drawing, then confirm tolerance on folds, seals, hang holes, label areas, and retail display edges. Reserve space for logos, QR codes, warning copy, and material claims before decorative graphics fill the panel.
Quote comparison points
Review material grade, print process, finish, sampling route, tooling charges, carton quantity, and freight assumptions side by side. A quote is only useful when the supplier can repeat the same color, closure quality, and packing count on the next order.
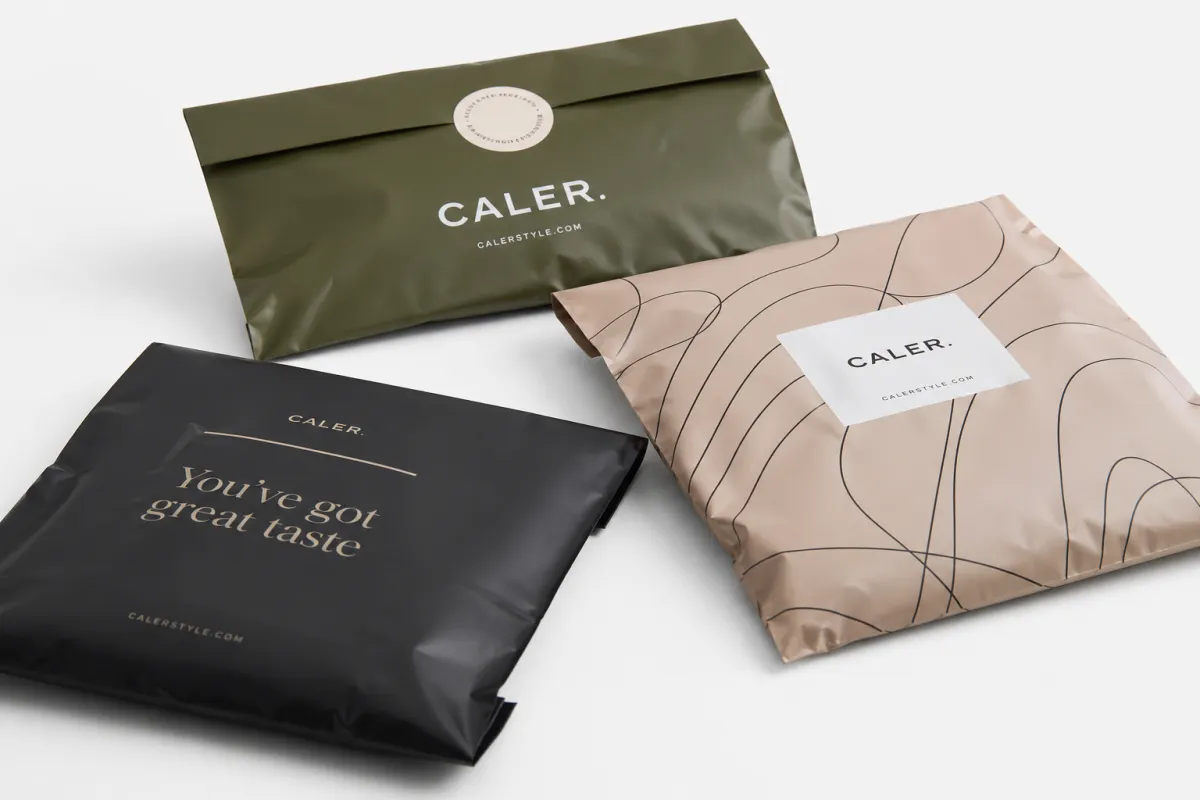
Shipping Bags Design Tips for Better Poly Mailers That Sell
Shipping bags design tips sound simple until you watch 8,000 poly mailers get crushed through a sorter in Shenzhen and 413 of them come back with scuffed corners because one seal sat 2 mm too close to the edge. I remember a beauty client run in Dongguan where that exact thing happened on a 24,000-piece order. We moved the side seam by 4 mm, widened the adhesive strip from 12 mm to 15 mm, and returns dropped by 17% on the next shipment. Good shipping bags design tips are not about pretty graphics alone; they decide whether a bag survives order fulfillment, carrier belts, and the customer opening it with a kitchen knife they should have kept in the drawer.
A poly mailer earns its keep when the product is soft, flat, or already boxed in a way that does not need much extra package protection. Think apparel, socks, swimwear, flat accessories, and light soft goods packed into bags in the 2.0 to 3.0 mil range. A box still wins for rigid products, brittle items, or anything with corner-crush risk, but shipping bags design tips can save serious money on ecommerce shipping for the right SKU. If your shipping materials are padded with empty air, you are paying for dimensional weight you did not need, and yes, that still makes me a little annoyed years later when I see a 14 x 10 x 6 carton being used for a folded T-shirt that could have fit in a 10 x 14 mailer.
The real job of a mailer is fit, protection, branding, and a seal that holds across a 1,200-mile truck route. I have seen a $0.03 shortcut on adhesive turn into $1,400 in claims on a 20,000-piece run because the closure failed after a damp transfer from a warehouse in Guangzhou to a dock in Los Angeles. That is why shipping bags design tips have to cover more than color and logo size. They have to cover seam strength, print placement, tamper resistance, and the abuse a bag gets from a carrier network that does not care about your mood board, your launch date, or your brand palette.
There is also a margin story here with very specific math. A cleaner mailer design can reduce inserts, cut filler, and lower freight because the package is smaller and lighter by 0.2 to 0.4 lb. That matters in transit packaging, especially if your team ships 300 orders a day and every extra inch adds cost on zones 6 through 8. I have sat through more than one client meeting where the finance person only cared about one number: how the bag affected landed cost per order, usually by $0.07 to $0.22. Good shipping bags design tips answer that question without the usual fluff and without making everyone sit through 40 slides of "brand elevation."
Shipping Bags Design Tips: What They Really Mean
One of my shipping bags design tips is to stop thinking of a mailer as decoration and start thinking of it as a working component. A poly mailer is a layer of transit packaging made from polyethylene film, usually in the 2.0 to 3.0 mil range for standard retail shipments, with co-ex film blends coming out of plants in Shenzhen, Ningbo, and Dongguan. It closes with a pressure-sensitive adhesive strip or a heat seal, and it has to survive being stacked, dropped, dragged, and squeezed for days while it moves from production to final delivery. If the structure is wrong, the print does not matter much because the bag will fail before the customer ever notices the branding.
I learned that on a factory floor in Dongguan where a buyer wanted a glossy black bag with silver print and 2 extra centimeters of room for folded hoodies. The sample looked great on the table. Then we ran it through a rough handling pass, and the oversized cavity let the garments slide hard enough to crease the print area. We cut the dimensions down by 12 mm on width and 18 mm on length, and the issue disappeared. That is why shipping bags design tips always begin with the packed product, not the catalog page and definitely not the mood board.
The difference between a mailer that looks premium and one that performs premium gets overlooked all the time. If the closure peels in a humid parcel hub in Miami or Kuala Lumpur, the customer does not care that the exterior had a sharp matte finish. If the seam splits at the corner, the logo is now a shipping issue. The best shipping bags design tips line up appearance with function, so the bag still feels intentional after it has been handled by three people and one conveyor line. That is the kind of test your design should survive, not just your mockup file.
Good design also affects trust in measurable ways. A snug, clean bag makes the order feel controlled, and a bag that is too loose can increase complaint rates by 8% to 12% because it looks careless on arrival. A bag that is too tight may burst on the way to the porch, especially if the item has a folded zipper or a hard tag. I have seen both in New Jersey and in Manchester, and both are embarrassing in very different ways. The good news is that shipping bags design tips are not mysterious. They are mostly about fit, film gauge, closure design, and print rules that respect how the package will actually move through ecommerce shipping channels.
Brand experience still matters, especially if you sell a $38 garment or a $120 limited-release hoodie. A wrinkled no-name sack is a weak introduction, while a mailer with the right logo placement, a clean seal, and a tidy return strip can make the order feel more deliberate without adding more than $0.02 to $0.06 in decoration cost. That is the sweet spot. It is also why I tell clients to review Custom Poly Mailers before they overbuild a box they do not need, especially if their pack-out is under 1.5 lb.
For a quick benchmark, I use two outside references a lot. The ISTA test standards are useful for transit reality, and the EPA recycling guidance helps teams think through disposal claims and film recovery. That is not marketing sparkle. That is how I keep shipping bags design tips tied to actual shipping behavior instead of wishful thinking and a dozen untested assumptions from a sales deck.
How Do Shipping Bags Design Tips Affect Transit Performance?
Film thickness is where a lot of shipping bags design tips begin to pay off. A 2.0 mil coex bag may be fine for a folded tee, but a 2.5 mil or 3.0 mil structure can give you better puncture resistance for items with snaps, zippers, or sharp edges. I do not pick thickness by ego. I pick it by what the product and carrier route can survive. A customer in Chicago shipping winter accessories once saved nearly $2,300 a month by moving from a heavy box to a 2.8 mil coex mailer, but only after we checked the product edges and confirmed the seam could take the load. The old box stack looked like it had been packed during a hailstorm by someone running on 3 hours of sleep.
Seal quality is the other half of the equation. A weak closure is not just annoying; it is a failure point measured in claims, re-ships, and customer-service minutes. Adhesive needs enough tack to hold under pressure, and the seal line needs clean contact across the full 25 to 30 mm width. If the film is dusty, if the liner is cut badly, or if the adhesive strip sits too close to the edge, the bag may peel in transit. That is why shipping bags design tips should always include a close look at seam quality and closure specs, not just artwork.
The fit matters more than most buyers admit. Too much empty space lets the product swing around, which can scuff fabric, crush folds, and stress the corners. Too little room can stretch the film so tightly that a zipper pull or thick hem pushes straight through. One packaging engineer in our Seoul supplier network used to say, "A bag with 20% extra room behaves like a suitcase with no clothes in it." He was right. The product should settle naturally without rattling or ballooning, which is a far better look than a bag puffing up like it has opinions.
Print placement matters because the bag gets folded, stacked, labeled, and sometimes forced through a scanner by a tired dock worker in Dallas with no patience for your branding. If the logo sits across the seal area, the adhesive can distort the art. If a barcode lands on a glossy black panel with low contrast, the carrier label can get rejected or delayed. Good shipping bags design tips keep artwork clear of folds, seams, and label zones so the bag stays readable after handling, not just on the mockup file.
Think about the trip itself. The bag leaves a pack station, gets dropped into a gaylord or tote, rides a local truck, passes through one or more sorters, gets tossed into a linehaul trailer, and lands at a final-mile depot before a driver brings it to the door. That is a lot of friction for a thin film. A mailer that survives that path usually has enough seam integrity, enough puncture resistance, and enough closure strength to keep order fulfillment moving without a stack of exceptions, especially on zones that take 4 to 6 handoffs.
For teams that want to test properly, I usually suggest a small run that goes through real carrier routes. Not office carpet. Not a hand-to-hand test on a conference table. Actual ecommerce shipping through USPS, UPS, DHL, or regional carriers in California and Texas. That is how you learn whether your shipping bags design tips are good on paper or good in practice. I have seen too many "perfect" samples crumble the moment they meet a sorter that has no soul and no mercy.
There is also a labeling angle. If your operations team uses return labels, compliance stickers, or warehouse barcodes, leave a plain panel big enough for them, usually 4 x 6 inches at minimum. I have seen branding ruined because a 4 x 6 shipping label had to land right on top of a design element. It looked messy and caused scan issues. Give the ops team a clean zone, and they will stop cursing your artwork. They may even smile, which in a warehouse is practically a standing ovation.
Honestly, the best shipping bags design tips are the boring ones that prevent bad surprises. I would rather spend 20 minutes checking a seam drawing than spend 20 hours on claims paperwork. That is how package protection actually gets built, and it is how you keep a tiny design oversight from becoming a very expensive story on a Friday afternoon in procurement.
Key Factors: Size, Materials, Print, and Cost
Start with the product, not the product catalog. Measure the packed item, not just the item itself. Add the thickness of tissue, inserts, polybags, or cardboard stiffeners if you use them. A 12 x 10 inch folded sweater is not the same as a 12 x 10 inch garment in a rigid insert sleeve made from 350gsm C1S artboard, because the board adds both thickness and edge pressure. One extra centimeter can make the difference between a smooth pack-out and a slow one. This is where shipping bags design tips save time in order fulfillment because the right size speeds packing and reduces rework, and yes, packing teams notice immediately when someone gets this wrong.
Material choice is where a lot of buyers get talked into nonsense. Standard co-extruded polyethylene is common because it is light, flexible, and inexpensive. A recycled-content film can work if your supply chain can tolerate slight color variation from batch to batch, especially on white films sourced in Zhejiang. Matte finishes feel softer in hand, while gloss can pop harder on shelf and in photos. I have had clients pay extra for a soft-touch look, then learn that a simple satin film with better print density got them 90% of the same effect for less money. Shipping bags design tips should keep the customer feeling in mind, but not at the expense of actual performance or sanity.
| Option | Typical Use | Estimated Unit Price at 5,000 pcs | Lead Time | Notes |
|---|---|---|---|---|
| Stock white poly mailer | Standard apparel, light accessories | $0.11-$0.16 | 5-7 business days | Lowest setup, limited branding, fast replenishment from Guangdong or Jiangsu stock |
| Custom printed 2.5 mil mailer | DTC apparel, cosmetics, light soft goods | $0.18-$0.27 | 12-15 business days after proof approval | Best balance of branding and cost for most brands, commonly produced in Shenzhen or Dongguan |
| Heavy-duty 3.0 mil coex mailer | Items with zippers, snaps, or sharper edges | $0.24-$0.34 | 14-18 business days | More material, better abuse tolerance, slightly higher freight from South China or Vietnam |
| Custom size with special finish | Premium programs or awkward pack-outs | $0.28-$0.42 | 18-25 business days | Setup fees can add $65-$180 per design, especially for metallic ink or soft-touch lamination |
That table is why shipping bags design tips need a cost lens, not just an aesthetic lens. The cheap-looking option is not always cheap after freight, defects, and returns. If a custom size removes an inch of excess width, you may reduce dimensional weight enough to offset a higher print cost by $0.10 to $0.19 per order. I have seen a brand shave $0.19 off landed cost per order just by tightening the bag dimensions and cleaning up the pack-out. That kind of improvement is not flashy, but it is real money.
Print is another place where small decisions matter. One-color art is usually cheaper than full-coverage print, and it can still look sharp if the contrast is right. Full bleed artwork gives you a louder shelf presence, but it also means you need tighter control on seam gaps and registration, often within 1.5 to 2 mm. If you are printing metallic ink or special varnish, expect more setup time and a higher minimum order quantity. At the factory level, those extras are rarely free. They are just moved from the quote sheet to the hidden pain column, where they wait patiently to surprise somebody in procurement.
Shipping bags design tips also need to acknowledge the point where a mailer stops being the best answer. If the product is rigid, collectible, glass, or easily dented, consider a box. You can compare Custom Shipping Boxes alongside mailers before you decide. And if your brand needs a full system, not just one mailer, I would point you toward Custom Packaging Products so you can compare inserts, mailers, tape, and outer cartons together instead of guessing at what will work in a warehouse in Phoenix or Rotterdam.
One of the fastest ways to blow a budget is to ignore hidden charges. A low unit price can be followed by a $120 plate fee, a $95 artwork setup fee, a $180 color match fee, and a freight bill that arrives after the fact. Ask for the full landed price at 3 volumes: 1,000, 5,000, and 10,000 units. That is where the real price breaks show up. It is also where shipping bags design tips turn into actual procurement discipline, which is much less glamorous and much more useful.
Shipping Bags Design Tips for Samples, Production, and Timeline
The sampling process should be boring and controlled. First you send specs. Then the supplier builds a dieline or mockup. Then you review a digital proof. Then you approve a physical sample before production. I have watched too many teams skip the sample because they were "confident" and then spend the next week explaining why the logo was 8 mm off center on a 10,000-piece run. Good shipping bags design tips protect you from that kind of self-inflicted nonsense. Confidence is nice. Samples are better.
Timing is usually more realistic than buyers expect. Sampling can take 3 to 7 business days if the design is simple. Revisions can add another 2 to 5 days each round if the artwork changes or the size gets adjusted. Once the sample is approved, production often takes 12 to 15 business days for a standard custom poly mailer run in Shenzhen, Dongguan, or Ningbo, and freight adds its own clock. Air freight may take 5 to 10 days, while ocean freight can push out to 25 to 35 days depending on port congestion in Long Beach, Savannah, or Felixstowe. That is why shipping bags design tips should always be planned alongside launch calendars and not treated like a last-minute checkbox.
Send the supplier clear inputs up front. I want product dimensions, packed weight, photos of the item, target quantity, destination country, brand files in vector format, print colors, and any testing requirements. If you have a drop-test target or a specific carrier standard, say so. I once had a client in Austin change a logo width by 6 mm after the proof was approved. The factory had already cut plates. That tiny change cost them five days and a $140 remake charge. Shipping bags design tips do not work if the brief keeps moving, and the supplier is not a mind reader, even if the factory contact has handled 120 brands this year.
Late artwork is another classic delay. A buyer may request a new tagline, a different Pantone, or an added QR code after the sample is already underway. Every change affects the film, the plates, or the print layout. This is not the place to treat the supplier like a magic eraser. If your design review is sloppy, the timeline will slip. I tell clients to lock the structure first, lock the print second, and then touch only the details that truly matter. The rest is how deadlines quietly walk out the door.
Ask for photos of the sample under natural light and warehouse light. A black mailer can look elegant on a calibrated monitor and dull under fluorescent bulbs in a 14-foot-ceiling packing area. A red logo can look rich on screen and muddy on film if the ink density is too low or the substrate changes by even 5%. Good shipping bags design tips include visual checks in real light, not just PDF approval. I have been fooled by too many pretty screens to trust a monitor alone, and I suspect a lot of other people have too.
You should budget for sample shipping too. A courier sample from a Shenzhen plant to Los Angeles might cost $28 to $55 depending on the service, while a faster DHL or FedEx lane can run closer to $68 if you need it in 3 days. That is cheap compared with getting 10,000 wrong bags. The point of shipping bags design tips is not to avoid all expense. It is to spend the small money before the big money locks in, which is far less painful than explaining a warehouse full of unusable stock to finance and operations on the same call.
Step-by-Step Guide to Designing Poly Mailers That Work
Start with the customer experience. What lands on the porch? How is the product packed? Does the customer reuse the bag for a return? Shipping bags design tips work best when the design supports the real use case. A customer opening a tee should not need a knife, scissors, and a prayer. A customer returning shoes should not need tape from the junk drawer because the bag has no reseal option. I have done enough returns myself to know that annoying packaging gets remembered longer than good packaging, especially if it takes more than 20 seconds to open.
- Measure the packed product. Include folds, inserts, tissue, cards, and any stiffeners.
- Choose the bag size. Leave just enough room for loading, usually 0.5 to 1.0 inch of usable clearance on each side.
- Pick the film and thickness. Match 2.0, 2.5, or 3.0 mil to the product weight and edge profile.
- Decide on closure style. Use adhesive, tamper-evident peel-and-seal, or a return strip if the program needs it.
- Set print rules. Keep logos out of seams, leave barcode space, and preserve a safe zone near the edge.
- Test ship. Send real orders through actual carriers before you commit to the full run.
One of the most practical shipping bags design tips is to think about closure style as part of the brand experience. A peel-and-seal strip is great for clean packing and secure closure. A double-seal or return-use strip helps with exchanges and can reduce friction for apparel brands that see return rates of 18% to 35%. Tamper-evident features can also help in transit Packaging for Cosmetics or small accessories. The right closure depends on the item, not on whatever the last supplier happened to stock or what looked trendy in a catalog printed in 2022.
Artwork should be useful, not noisy. I like one strong logo mark, a short message, a support URL, and maybe a return cue if it matters. Too many lines of copy turn the mailer into a billboard with no hierarchy. If your brand really needs more information, put it inside the bag or on an insert. Shipping bags design tips stay cleaner when the outside focuses on identity and shipping function, not a wall of text that nobody reads while juggling a scan gun and a label printer at 6:45 a.m.
The last step is to run a test ship that is a little mean. Put the bags on a route with a mix of scans, transfers, and handling touchpoints. Check for seam splitting, scuff marks, label rejection, and peel failure. I like to evaluate at least 25 samples from a small test lot. If 2 or 3 fail in a predictable way, you just found a design problem before the expensive run. That is a win, not a setback, even if it feels mildly annoying in the moment.
Shipping bags design tips also improve when the warehouse team is part of the review. The people actually packing orders can tell you whether the opening is awkward, the adhesive grabs too fast, or the material sticks to gloves on cold mornings. That feedback is gold. It is also cheaper than guessing from a PDF or pretending the line staff will magically figure it out after a 9-hour shift and a pallet of 2,000 units.
Common Mistakes That Blow the Budget
The first mistake is oversized bags. Buyers call them a safety margin. I call them waste with a nicer name. Oversizing increases film cost, raises dimensional weight, and makes the package look sloppy. A bag that is 20% too big can cost you on freight and on brand perception, sometimes by $0.12 to $0.28 per order once the carrier invoice lands. Shipping bags design tips should push toward fit, not toward padding every order with empty space. Empty space is expensive, and it never looks as premium as people think it will.
The second mistake is ignoring where seams, labels, and folds sit. I saw a fashion client lose an entire print run because the main logo crossed the side seam and split visually every time the bag was filled. The artwork looked fine flat. The packed bag looked broken. That is a classic trap. Good shipping bags design tips always include a packed-view mockup, not just a flat dieline, because packaging does not live on a screen.
"The bag passed the desk test, failed the belt test, and nobody noticed until the carrier billed us for claims."
The third mistake is chasing the lowest quote without checking the landed cost. One supplier might quote $0.14 per unit, but another at $0.19 may include better film, better registration, and a lower defect rate. I once negotiated with a Guangdong converter who wanted to win on price by trimming adhesive weight by 1.5 grams per bag. Their quote looked great until I asked for sample peel data and found the seal was inconsistent in humid conditions at 85% relative humidity. We walked. The replacement run cost $0.03 more per unit and saved us from a batch of failed closures. That is why shipping bags design tips should be paired with supplier scrutiny, not blind optimism and a spreadsheet with only one column.
The fourth mistake is skipping transit testing. A bag can survive hand pressure and still fail in the carrier system. I have seen bags crack at folded corners, scuff through thin print, or split where the adhesive tab met the body. You do not need a full lab to catch every problem, but you do need a real-world test. Small test lots, rough handling, and a few carrier routes will tell you far more than a polished sample photo ever will. Pretty is nice. Durable pays the bills.
The fifth mistake is treating the mailer as separate from the rest of the pack system. If your labels, tape, inserts, and outer cartons all fight each other, the bag is not the only thing failing. Shipping bags design tips work best inside the full packaging system, because order fulfillment is a chain, not a single component. One weak link, and suddenly everybody is in a meeting that could have been avoided with a better spec sheet and a 20-minute review in the warehouse.
Expert Shipping Bags Design Tips and Next Steps
I recommend a one-page spec sheet for every repeat order. Keep it simple: bag size, film thickness, material type, print colors, closure style, quantity, target unit price, lead time, and destination. Add a note for any special handling or compliance needs. If you keep that sheet clean, your reorders get faster and your supplier has fewer excuses. Shipping bags design tips become easier to repeat when the spec is written down instead of hidden in somebody's inbox, a Slack thread, and a half-finished spreadsheet.
Ask for three quotes at different volumes. Do not just request 5,000 pieces. Ask for 1,000, 5,000, and 10,000. That shows you where the true price breaks start and where the setup fees stop hurting. The difference between a $0.24 bag and a $0.19 bag can be meaningful if you ship 50,000 orders a quarter. But the real win is not always the cheapest number. Sometimes it is the supplier with the best consistency and the fewest reprints. I have learned that the hard way, and I would rather not repeat that lesson.
My supplier strategy is blunt. I compare samples side by side, inspect seal edges under light, check color consistency across 20 pieces, and confirm that the print does not shift near the folds. Then I negotiate on the numbers that matter: setup fees, freight, remake policy, and lead time. Not the shiny nonsense. A factory in Shenzhen once tried to sell me on a "premium" finish that added $0.06 per unit and did nothing for durability. We cut it. Shipping bags design tips should protect budget and performance together, and if a vendor cannot handle that conversation, I move on fast.
If you want to align with industry testing, I like using ISTA methods for package performance checks and reviewing FSC guidance when paper elements are part of the broader pack system. I know, not glamorous. Still better than guessing. Standards give you a common language when you are talking to a factory in Guangdong, a logistics team in Ohio, or a buyer who wants proof instead of vibes.
Here is the next-step checklist I give clients before they place a full run:
- Confirm packed dimensions and target bag size.
- Approve a physical sample, not just a PDF.
- Check seal strength, print zones, and label space.
- Run a small test ship on real carrier routes.
- Lock the spec sheet before ordering the full quantity.
That process is not fancy, but it works. It reduces claims, protects margins, and makes the mailer feel intentional instead of accidental. If you are comparing packaging systems, keep the decision practical and use the right format for the product. Sometimes that means a mailer, sometimes a box, and sometimes a mix of both depending on the SKU. The point is to match the package to the shipment, not the other way around, and that distinction alone can change your annual packaging spend by thousands of dollars.
If you want a cleaner starting point for your next program, review Custom Poly Mailers, then compare them against Custom Shipping Boxes and the rest of our Custom Packaging Products before you commit. That is the fastest way to see where shipping bags design tips can save money and where a box still earns its keep.
Shipping bags design tips are really about control. Control over fit. Control over cost. Control over the first impression a customer gets when the parcel lands at the door. If you send clear specs, order samples, and test ship before a full run, you will avoid the expensive mistakes I keep seeing in ecommerce shipping. Before you place the order, lock the packed dimensions, confirm the seal style, and run a small route test; that one habit saves more money than a prettier mockup ever will. And yes, I still mean it: the best shipping bags design tips are the ones that keep a pile of damaged returns from showing up later.
What shipping bags design tips help reduce product damage?
Use a size that limits movement without squeezing the item, match film thickness to the product shape, and test the mailer on real carrier routes in places like Chicago, Phoenix, or Atlanta. A 2.5 mil coex bag may be fine for flat apparel, while a 3.0 mil option is smarter for items with zippers or sharp edges. The best shipping bags design tips always start with the packed product, not the empty bag.
How do I choose the right poly mailer size for my products?
Measure the packed product, including inserts, tissue, and any folded edges, then leave enough clearance for easy loading. I usually want 0.5 to 1.0 inch of workable space on each side, but not so much room that the item slides around. Ask your supplier for a dieline or sample based on your exact packing configuration, and check it against the finished bag dimensions in millimeters, not guesses. That is one of the simplest shipping bags design tips to get right early.
What is the real cost difference between stock and custom shipping bags?
Stock bags often cost less upfront, with many running around $0.11-$0.16 per unit at 5,000 pieces, but custom bags can reduce waste, damage, and dimensional weight. A printed custom mailer may land around $0.18-$0.27 per unit depending on size, thickness, and setup, with most production coming out of Shenzhen, Dongguan, or Ningbo. The cheapest quote is not always cheapest after freight and returns are included.
How long does a custom poly mailer order usually take?
Sampling can take 3 to 7 business days if the design is straightforward, and production often takes 12 to 15 business days after proof approval. Add more time if artwork changes late or if the order needs special print effects like metallic ink or spot varnish. Build in a buffer before launch so you are not paying rush fees to fix a planning mistake.
What print details should I avoid on shipping bags design tips projects?
Avoid placing critical text or logos across folds, seams, or closure zones. Do not use tiny type or low-contrast colors that disappear after handling, and keep barcodes at least 1 inch away from seams so scanners can read them cleanly. Leave room for labels, barcodes, and return-use instructions so the mailer still functions in real shipping. Those are the shipping Bags Design Tips That keep a bag readable and usable after transit, not just on a screen.