Tiny Stickers Custom: Order Small Labels That Sell
What Tiny Stickers Custom Orders Actually Mean
Tiny Stickers Custom orders look cheap and simple until the artwork is too detailed, the adhesive is wrong, or the sticker disappears on the package. Small-format printing is less forgiving than big labels. Cute, yes. Magical? No.
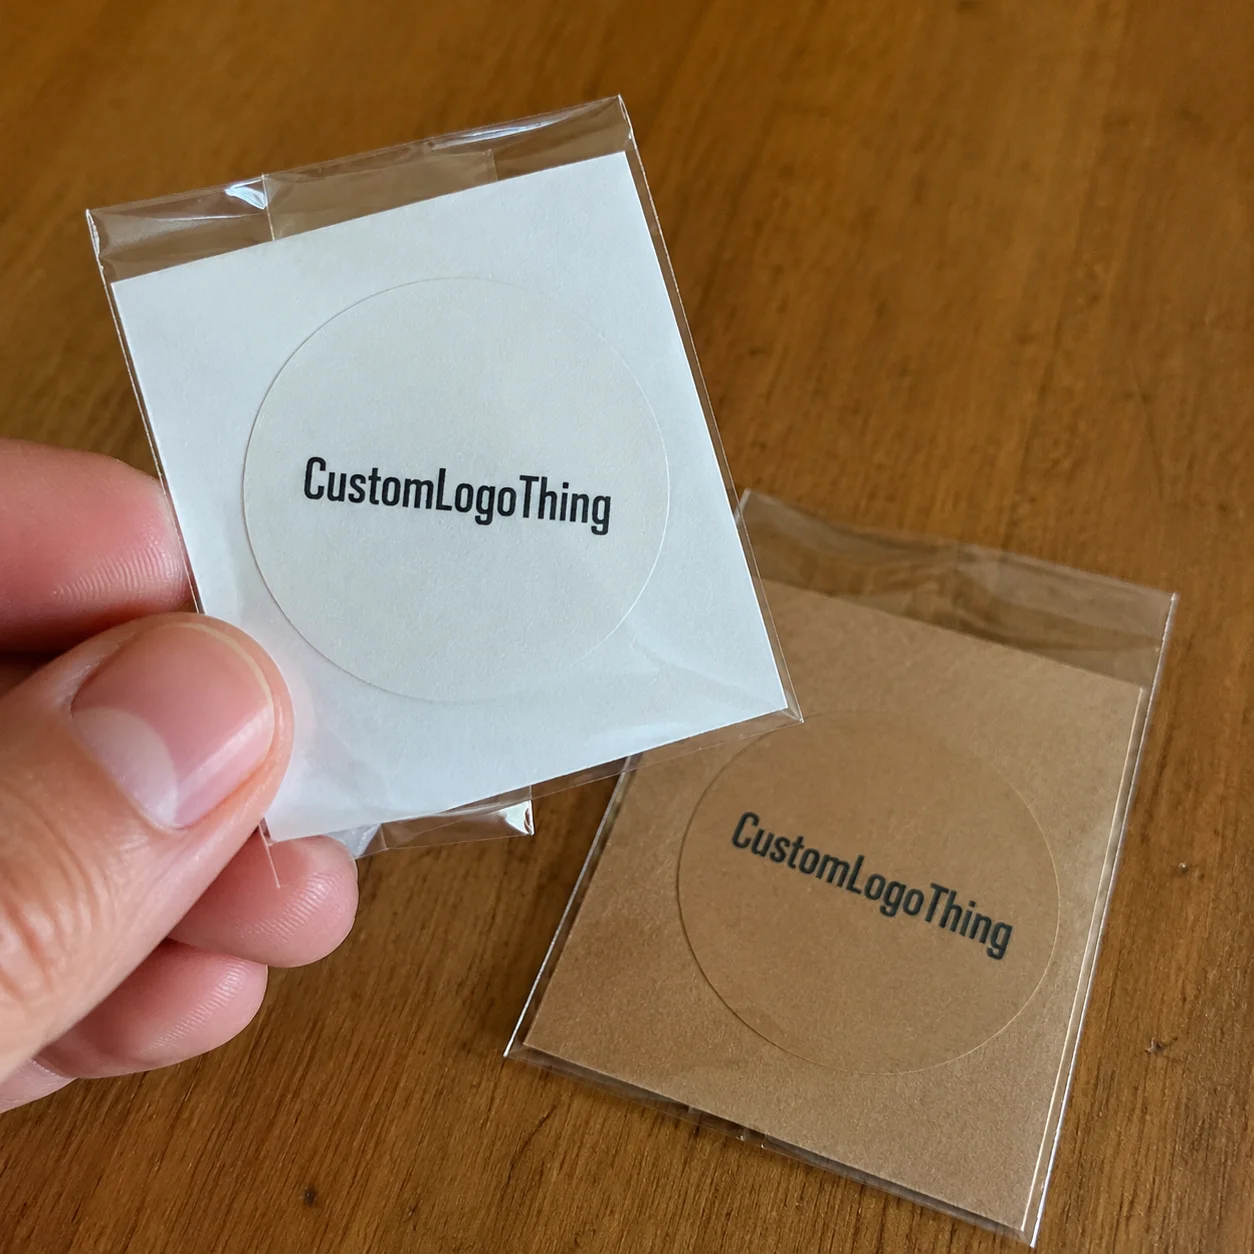
A tiny custom sticker is a small adhesive label, usually around 0.25 to 2 inches wide, made for a specific brand, product, campaign, or packaging job. They show up as product seals, mini logo labels, QR code tags, flavor markers, batch labels, closure stickers, event giveaways, and small package branding accents that make plain packaging look intentional.
Brands use them because they add polish without forcing a full redesign of boxes, bags, jars, pouches, mailers, or insert cards. If a startup is still testing scents, flavors, seasonal drops, or retail packaging layouts, a small sticker run is usually safer than jumping straight into Custom Packaging Products with printed artwork locked into every unit.
The names get messy. Tiny stickers are the broad category. Mini labels usually carry product or brand information. Seal stickers close tissue paper, boxes, jars, or mailers. Dot stickers mark colors, sizes, flavors, prices, or batches. Small die-cut stickers follow a custom shape instead of a circle, square, oval, or rectangle. Same family. Different jobs.
The smaller the sticker, the more every detail matters. Line thickness, font size, contrast, cut tolerance, adhesive choice, and finish decide whether the finished piece looks premium or like a postage-stamp crime scene. That sounds dramatic. It is also accurate.
This guide covers size, materials, pricing, production timeline, ordering steps, common mistakes, and the buying checks worth doing before spending real money on tiny Stickers for Packaging.
How Small Custom Sticker Printing Works
Small custom sticker printing usually follows a predictable production flow: file review, proof setup, material selection, printing, lamination or finishing, die cutting, quality check, packing, and shipping. The order may look simple from the buyer side, but every step affects the final peel, color, edge, and shelf impression.
For shorter runs, digital printing is common because it handles lower quantities, multiple designs, and variable artwork without expensive plates. For larger repeat orders, flexographic printing can make more sense, especially on roll labels used in production lines. Specialty effects such as foil stamping, spot UV, embossing, metallic ink, or raised varnish may need extra setup, extra drying time, or different equipment. Fancy costs money. Shocking, I know.
Proofing matters more at small sizes. A logo that looks crisp on a laptop screen can turn into a blur at 0.5 inch wide. Screens lie because they glow, enlarge, and hide production limits. A proof helps catch size, cut line, bleed, safe zone, color mode, text readability, and file resolution before the job moves to print.
Common cut types include circles, squares, rectangles, ovals, kiss-cut sheets, roll labels, and custom die-cut shapes. Simple shapes usually cost less and run faster because the cut path is cleaner and easier to control. A tiny shape with thin points, narrow gaps, or sharp internal corners can slow production and increase waste.
Sheets are handy for hand application, samples, event giveaways, low-volume packing, and office use. Rolls are better for faster peeling, label dispensers, and production workflows. If you are applying 200 stickers by hand once a month, sheets are fine. If your team is applying 5,000 labels a week, rolls save labor and sanity.
Color setup also matters. Most sticker printing uses CMYK, while Pantone matching may be used for tighter brand color control. Clear materials often need white ink behind the artwork, or the design can look weak against the package. Bleed and safe zones are not decorative printer jargon. They keep art from getting clipped when cutting moves by a fraction of a millimeter.
Practical example: a 0.75-inch logo seal for a candle box needs stronger contrast and fewer details than a 2-inch jar label. If your full logo has fine script, a thin icon, and a tagline, use the icon or wordmark only. Tiny Stickers Custom Printed for real packaging need artwork built for the size, not just shrunk until it technically fits.
Key Specs That Make Tiny Stickers Look Sharp
Start with size. Use 0.25 to 0.5 inch stickers for color dots, tiny icons, batch marks, or quick visual sorting. Use 0.75 to 1 inch for logo seals, envelope closures, small retail tags, or lid stickers. Use 1 to 2 inches when the sticker needs readable branding, a QR code, a short product name, or two to four words of supporting text.
Artwork should get simpler as size gets smaller. Use bold logos, thick lines, clean shapes, and high contrast. Tiny stickers are not the place for five taglines, a watercolor background, tiny legal copy, and a social handle in 4-point type. That is not design. That is a dare.
Font size depends on typeface, print method, surface, and finish, but a rough rule helps. Keep essential text around 5 to 6 points minimum for very short copy, and go larger if the material is textured, matte, kraft, metallic, or clear. Script fonts, ultra-light fonts, and condensed fonts often fail first. They may look elegant on screen and muddy on a sticker smaller than a coin.
Material choice should match the environment. White paper works for indoor dry goods, bakery boxes, mailer inserts, tissue seals, and low-moisture retail packaging. BOPP or vinyl is better for moisture resistance, oils, refrigeration, bath products, beverages, candles, and products handled often. Clear film creates a minimal “printed-on” look, but it usually needs white ink if the logo must stay bright. Kraft paper fits natural, handmade, or organic-style branding, while metallic stock adds a premium accent without redesigning the whole package.
Finishes change both appearance and durability. Matte feels soft and modern. Gloss adds color pop and helps small artwork stand out. Soft-touch feels premium, though it can show scuffs depending on handling. Laminate adds protection against moisture, rubbing, and light abrasion. For durability testing guidance on packaged goods, standards groups such as ISTA are useful references, especially if stickers are part of a ship-ready packaging system.
Adhesive deserves more attention than buyers usually give it. Permanent adhesive works for packaging seals and product labels that should stay put. Removable adhesive works for temporary pricing, promo labels, or items where residue is a problem. Freezer-grade adhesive is made for cold environments. Stronger adhesives help on curved jars, tubes, textured boxes, flexible pouches, or low-energy plastics.
Buyer tip: If the sticker crosses a box flap, jar curve, pouch seam, or tube radius, test adhesion before ordering volume. Flat desk tests are cute. Real packaging surfaces are less polite.
Tolerance is the quiet killer on tiny labels. A 1 mm shift on a 4-inch label may barely show. On a 0.5-inch sticker, it can look crooked. Use bleed, keep critical artwork inside the safe zone, and avoid borders that sit too close to the edge unless you enjoy living dangerously.
| Sticker Use | Typical Size | Suggested Material | Best Format |
|---|---|---|---|
| Color coding or batch dots | 0.25 to 0.5 inch | Paper or BOPP | Sheets or rolls |
| Logo seals for boxes or tissue | 0.75 to 1 inch | Paper, kraft, or gloss film | Sheets for hand packing |
| Small product branding | 1 to 2 inches | BOPP, vinyl, or paper | Rolls for volume |
| QR code labels | 1 inch minimum, often larger | White BOPP or white paper | Sheets for testing, rolls for scale |
Cost, Pricing, MOQ, and Unit Cost Tradeoffs
Sticker pricing is driven by size, material, quantity, finish, shape complexity, number of designs, roll versus sheet format, specialty effects, proofing needs, and shipping speed. A tiny circle on white paper is one thing. A clear film die-cut with white ink, foil, five design versions, and rush shipping is another. Same category, very different invoice.
As a rough buying range, tiny paper stickers at higher volumes may land around $0.02 to $0.08 per sticker, depending on size and specs. Short-run custom shapes or small quantities can be closer to $0.10 to $0.35 per sticker. Waterproof film, metallic stock, foil, specialty adhesive, or tiny multi-version runs can push higher. These are planning ranges, not promises, because quotes depend on artwork, supplier setup, and material availability.
Minimum order quantities exist because setup takes time whether the order is 100 stickers or 10,000. File review, proofing, material loading, cutting setup, packing, and admin time do not vanish because the sticker is small. Machines do not run on vibes. A supplier may set an MOQ by sticker count, roll count, sheet count, or dollar minimum.
Unit cost usually drops as quantity increases. That does not mean you should buy 20,000 untested labels because the per-piece price looks delicious. If the sticker is too small, the adhesive lifts, or the color looks wrong on the actual package, the “savings” become very expensive drawer clutter.
A smarter path is simple: order samples or a smaller first run, test the sticker on the real product surface, then scale after the specs are proven. For new packaging design, testing 250 to 1,000 stickers is often safer than committing to a large run. Once the surface, size, and artwork are locked, higher quantities make more sense.
Compare quotes properly. Check material, adhesive, finish, number of colors, proofing, shipping, roll direction, core size, number of designs, setup fees, die fees, and whether revisions are included. If one quote is half the price, find out what disappeared. It might be laminate, white ink, adhesive quality, inspection, or sane delivery timing.
Hidden costs matter too. Hand application can be slow. Poor peelability wastes labor. Failed adhesion causes repacking. Unreadable art causes reprints. Rush shipping can eat the savings from choosing the cheaper vendor. For eco-related packaging claims, use real guidance instead of vague green fluff; the EPA recycling resources are a better starting point than sticker-sheet marketing copy.
If you are ordering custom tiny stickers for a branded packaging launch, price the whole job, not just the sticker. Include labor, waste, testing, delivery date risk, and how painful a reprint would be.
Process, Timeline, and Turnaround for Mini Sticker Orders
A normal mini sticker order starts with a quote request. You confirm size, shape, quantity, material, finish, roll or sheet format, and use case. Then you upload artwork, review the digital proof, approve production, and wait while the stickers are printed, finished, cut, inspected, packed, and shipped.
Simple tiny stickers on standard paper or white BOPP can often move quickly, sometimes in 3 to 7 business days after proof approval for production, depending on the supplier and queue. More complex work may take 8 to 15 business days or longer. Custom shapes, foil, spot UV, multiple versions, exact color matching, unusual adhesives, and specialty stocks all add friction.
Proofing is not a ceremonial step. During proof review, check the exact size, cut line, bleed, safe zone, color setup, artwork resolution, text readability, QR code function, and orientation. If the sticker is on a roll, confirm unwind direction if it will be used with a dispenser or machine. Roll direction sounds boring until someone loads 3,000 labels backward.
Turnaround usually starts after proof approval, not when someone sends a blurry logo screenshot at midnight and hopes for miracles. Send final vector artwork when possible: AI, EPS, SVG, or print-ready PDF. If you only have a PNG, make sure it is high resolution and clean enough for the final sticker size.
Rush orders may be possible, but they limit choices. You may need to accept standard materials, skip specialty finishes, reduce revisions, or choose a simpler shape. Fast, cheap, and perfect rarely sit at the same table. Pick two, and even then read the proof.
Build in buffers for first orders, retail launches, seasonal campaigns, trade shows, influencer kits, and products that need surface testing. Curved jars, cold bottles, oily containers, textured boxes, waxed paper, and flexible pouches can behave differently from a flat sample sheet. Give yourself at least a few extra business days if the packaging has any of those variables.
To speed up production, prepare the basics before asking for a quote: final artwork, exact size, material preference, use case, quantity range, delivery deadline, and application method. If the label will be machine-applied, include roll direction and core requirements. If it will go on food, cosmetics, candles, or anything regulated, confirm the sticker does not need required product information before you reduce it to decorative confetti.
Step-by-Step Guide to Ordering Small Custom Stickers
Ordering small stickers is easier when you treat them like packaging components, not afterthoughts. A mini label can affect product packaging, photography, shelf appeal, sealing, scanning, and customer experience. Small size does not mean small consequences.
- Define the job. Decide whether the sticker is for branding, sealing, pricing, batches, ingredients, QR codes, tamper evidence, decoration, or product differentiation. One sticker can do two jobs. Five jobs is usually asking for clutter.
- Measure the application area. Use the actual box, pouch, jar, bag, tube, envelope, or insert card. Guessing from memory is a great way to order the wrong size. Measure flat width, curved surface behavior, flap overlap, and nearby seams.
- Choose the shape. Circles and rectangles are clean, familiar, and cost-efficient. Custom die cuts add visual impact for logos, mascots, and icons. Roll labels support production workflows. Kiss-cut sheets are friendly for handouts and small packing tables.
- Pick material based on the environment. Paper is fine for dry indoor packaging. Film is better for moisture, oils, refrigeration, bath products, candles, beverages, and frequent handling. Kraft looks natural but can mute colors. Clear film looks minimal but needs careful color planning.
- Simplify artwork. Remove tiny text, thin lines, low-contrast colors, and unnecessary details. Keep the main visual readable at arm’s length. For a 0.75-inch seal, a strong icon often beats a full logo lockup.
- Request the right proof. Ask to see size, cut line, bleed, safe zone, orientation, and roll direction if needed. For critical retail packaging or a large production run, request samples or a press proof when available.
- Test before scaling. Apply stickers to the real surface and check adhesion, peeling, legibility, color, finish, and performance under store lighting or photo lighting. Leave samples on the product for a few days if the surface is curved, cold, oily, or textured.
If your sticker is part of a bigger package branding system, line it up with your boxes, labels, tissue, insert cards, and shipper materials. A small sticker can connect plain stock packaging to a branded look, especially when paired with Custom Labels & Tags or custom printed boxes.
For sustainability-minded brands, ask about FSC-certified paper, liner waste, material compatibility, and whether the sticker affects recyclability of the package. The Forest Stewardship Council is a useful reference for paper sourcing claims. Do not slap an eco claim on a sticker just because the color is brown. Kraft color is not a certification. Brown paper has fooled more than a few marketing teams.
Common Mistakes and Next Steps Before You Buy
The most common mistake is shrinking full-size artwork onto a tiny sticker. Small stickers need redesigned artwork, not a miniature billboard packed with microscopic nonsense. If a customer needs to squint, rotate the package, and guess what the icon says, the design is failing.
Another mistake is choosing material by price alone. Cheap paper stickers can work beautifully on dry boxes, tissue, bakery bags, and indoor mailer inserts. Put that same sticker on oily jars, bath products, refrigerated items, or curved tubes, and it may lift, wrinkle, stain, or absorb moisture. The cheap option becomes expensive when you repack orders or lose shelf appeal.
Application method gets ignored too often. A sticker that peels easily from a sheet may not be ideal for a label dispenser. A roll label that faces the wrong direction can slow a packing line. Machine-applied labels may require specific roll direction, gap spacing, core size, outside diameter, and liner strength. Ask before printing, not after the rolls arrive.
Over-ordering is another classic. Higher quantity lowers unit cost, but only after the specs are proven. Test first, then scale. Boring advice. Expensive to ignore.
Under-checking proofs can hurt just as much. Confirm size, color, spelling, QR code function, cut line, bleed, safe zone, and material callout before approval. For QR codes, print a sample at actual size and scan it with multiple phones. Tiny QR codes can fail fast if contrast is weak or quiet space is too tight.
Before requesting a quote, collect the details that matter:
- Actual package surface and measured application area
- Two possible sticker sizes, such as 0.75 inch and 1 inch
- Preferred material, such as paper, BOPP, vinyl, kraft, clear, or metallic
- Finish preference, such as matte, gloss, soft-touch, laminate, foil, or no finish
- Quantity range, number of designs, and sheet or roll format
- Deadline, delivery location, and hand or machine application method
The cleanest buying decision starts with the package, not the dropdown menu. Measure the surface, simplify the artwork, pick the right adhesive, and test before scaling. If the goal is tiny Stickers Custom Made for real packaging, the best order starts with the product surface, not a random size pulled from a menu.
FAQs
What size should tiny custom stickers be for packaging?
Use 0.5 to 1 inch for small logo seals, 1 to 2 inches for readable branding, and larger sizes if the sticker needs text, QR codes, ingredients, or instructions. Measure the actual package surface before ordering because curved jars, box corners, pouch seams, and closures can make a sticker look smaller than expected.
Are tiny stickers custom orders cheaper on sheets or rolls?
Sheets are often practical for low-volume hand application, samples, and event use. Rolls are usually better for larger orders, faster peeling, dispensers, and production lines, but pricing depends on material, quantity, adhesive, and finish.
What material is best for small waterproof stickers?
BOPP, vinyl, or another film material is usually better than paper for moisture, oils, refrigeration, bath products, drink packaging, and frequent handling. Add a laminate or protective finish if the sticker needs extra scuff resistance or longer durability.
Can tiny custom stickers include QR codes?
Yes, but the code must be large enough to scan reliably and should have strong contrast with enough quiet space around it. Test the printed proof or sample with multiple phones before approving a full run, because tiny QR codes can fail fast.
How do I get an accurate quote for mini logo stickers?
Provide size, shape, quantity, material, finish, roll or sheet format, number of designs, use case, delivery location, and deadline. Share the artwork file if available so the supplier can flag tiny text, weak contrast, cut issues, or specialty production needs before pricing.

