Buyer Fit Snapshot
| Best fit | Labeling Shipping Boxes Correctly projects where brand print, material claims, artwork control, MOQ, and repeat-order consistency need to be specified before quoting. |
|---|---|
| Quote inputs | Share finished size, material target, print colors, finish, packing count, annual reorder estimate, ship-to region, and any compliance wording. |
| Proofing check | Approve dieline scale, logo placement, barcode or warning zones, color tolerance, closure strength, and carton packing before bulk production. |
| Main risk | Vague material claims, crowded artwork, missing packing details, or unclear freight terms can make a low unit price expensive after revisions. |
Fast answer: Labeling Shipping Boxes Correctly: Material, Adhesive, Artwork, and MOQ should be specified like a repeatable production item. The safest quote records material, print method, finish, artwork proof, packing count, and reorder notes in one written spec.
Production checks before approval
Compare the actual filled-product size with the drawing, then confirm tolerance on folds, seals, hang holes, label areas, and retail display edges. Reserve space for logos, QR codes, warning copy, and material claims before decorative graphics fill the panel.
Quote comparison points
Review material grade, print process, finish, sampling route, tooling charges, carton quantity, and freight assumptions side by side. A quote is only useful when the supplier can repeat the same color, closure quality, and packing count on the next order.
One crooked shipping label can cause more chaos than a torn carton flap. I’ve seen Tips for Labeling shipping boxes correctly save a warehouse from a week of rework, and I’ve also watched a label placed 6 mm over a seam turn a clean parcel into a manual-sort exception that cost $18 in extra handling. That’s not theory. That’s a Tuesday morning in order fulfillment at a plant outside Chicago, Illinois. And yes, somebody always says, “It’s probably fine.” It is never fine.
For Custom Logo Things, this topic matters because packaging is never just packaging. It’s transit packaging, customer experience, and cost control all living in the same box. If your Tips for Labeling Shipping Boxes Correctly process is weak, the fallout shows up as misroutes, missed scans, reships, and support tickets. If it’s tight, the parcel moves faster, the barcode reads cleanly, and your brand looks organized before the customer even opens the carton. Honestly, I think that first impression matters more than most teams want to admit, especially when a $0.03 label prevents a $12 resend.
When I visited a Midwest 3PL near Indianapolis a few months ago, the shipping manager showed me a stack of 42 cartons waiting for relabeling because the original prints were too faint to scan after the boxes rubbed against each other on a conveyor. That one issue added 27 minutes of labor per 100 orders. Small label. Big bill. I still remember the look on his face when he said, “We fixed it with one printer setting.” One setting. After two weeks of chaos. Love that for everyone involved.
Tips for Labeling Shipping Boxes Correctly: Why Small Labels Cause Big Problems
The best tips for labeling shipping boxes correctly start with a blunt reality: logistics systems are unforgiving. A shipping label that is slightly smudged, placed over a seam, or hidden under clear tape can trigger delays, a misroute, or a manual scan. Even a few millimeters can matter because carriers rely on fast, clean reads at sorting speed, not careful human inspection. No one at a conveyor in Memphis is pausing to admire your typography.
Proper labeling means more than printing an address. It means the recipient name is legible, the barcode has enough contrast to scan, the label sits on a flat visible surface, and any handling marks are clear enough for warehouse staff to act on. If a box needs “This Side Up,” a fragile symbol, or a service-level mark, those details should not fight with the main shipping data. They should support it. A label that looks cute but scans badly is basically a very expensive sticker, even if it came off a nice 4x6 thermal roll.
I’ve sat in client meetings where the finance team treated label quality like an admin issue. Then we traced the chargebacks. A single bad label on a $7 parcel had triggered a $12 re-delivery, a $4 service ticket, and nearly $9 in labor. That is why tips for labeling shipping boxes correctly belong in cost analysis, not just in the packing manual. If you’ve ever had to explain that math to leadership in a conference room in Dallas, you already know the room goes quiet real fast.
People underestimate how much customer trust depends on scan accuracy. A buyer does not care that the carton looked neat if the delivery missed the apartment number and ended up two streets away in Brooklyn. In ecommerce shipping, the label is the front line of package protection for the order itself. The customer sees the box, sure, but they feel the label problem, especially when support quotes a 3-5 business day delay for a carrier correction.
Good labels are designed for speed and machine reading. They are not decorative. They are not there to look tidy under fluorescent lights. They are built so a sorter, a driver, or a warehouse scanner can confirm the parcel in under a second. That’s the whole job. Fancy is optional. Readable is not. If the barcode needs a flashlight and a prayer, you already lost the shipment.
“The label is the parcel’s passport. If the passport is smudged, nobody wants to argue with the border agent.”
That quote came from a carrier rep during a supplier negotiation in Shenzhen, and it still fits. In the shipping box world, a label is a data carrier first and a sticker second. The more you treat it that way, the fewer exceptions you’ll create. And the fewer exceptions you create, the fewer people you have standing around a dock in Los Angeles muttering about “mystery delays” like it’s a supernatural event.
How Tips for Labeling Shipping Boxes Correctly Work in the Shipping Process
Good tips for labeling shipping boxes correctly need to map the full workflow, because label quality is not created at the printer alone. It starts when order data is captured, continues through template selection, and ends only after the parcel clears the carrier handoff. One mismatch anywhere in that chain can break the whole process. That is why I keep saying the label is a system, not a sticker.
The sequence is simple, but each step depends on the one before it. First, the order management system pulls the shipping address and service level. Next, the label file is generated with the right barcode format, tracking number, and carrier code. Then the label is printed, checked, and applied. Finally, the package is scanned at the packing station and again at dispatch. If one step gets lazy, the rest starts wobbling. I’ve seen this exact chain fail in a warehouse in Atlanta because one ZIP code field was clipped by 2 mm.
Warehouse staff and automation both need consistency. If one pack line uses 4x6 labels and another uses 4x2.5, you create drift. If one operator places labels 20 mm from the left edge and another places them 5 mm from the corner, scanners start encountering the label in unpredictable positions. Consistency is one of the most practical tips for labeling shipping boxes correctly because it cuts out guessing. Guessing is what gets you a pile of reprints and a headache before lunch.
Here’s the placement rule I use when reviewing carton setups: put the primary shipping label on the largest visible flat panel, keep it away from seams and taped edges, and do not wrap it around a corner unless the label stock is specifically designed for that geometry. A label crossing a fold is one of the fastest ways to create an unreadable barcode. I remember one supplier in Ningbo trying to defend a corner wrap by saying, “It still sticks.” Sure. So does chewing gum. Doesn’t mean it belongs on the box.
Barcode scanners are literal. They want contrast, a clear quiet zone around the code, and enough print density to separate bars or pixels cleanly. If the print head is worn, if the toner is faint, or if the ink feathered on a corrugated surface, the read rate drops. One box may scan. The next may not. That unpredictability is what creates manual handling, and manual handling is where speed goes to die. A fresh 203 dpi thermal printer in a packed warehouse can handle basic carton labels, but faint output is asking for trouble.
International shipments raise the stakes. Customs paperwork, harmonized codes, carrier-specific declarations, and destination formatting rules can all influence how labels are applied. On a multi-carrier lane, one carrier may require the label on the long side while another prefers the top panel. The practical tips for labeling shipping boxes correctly are the same, but the rulebook changes by network. That’s shipping for you: one global standard, five local exceptions, and three people arguing about them in Singapore over a shipment that should have left two hours earlier.
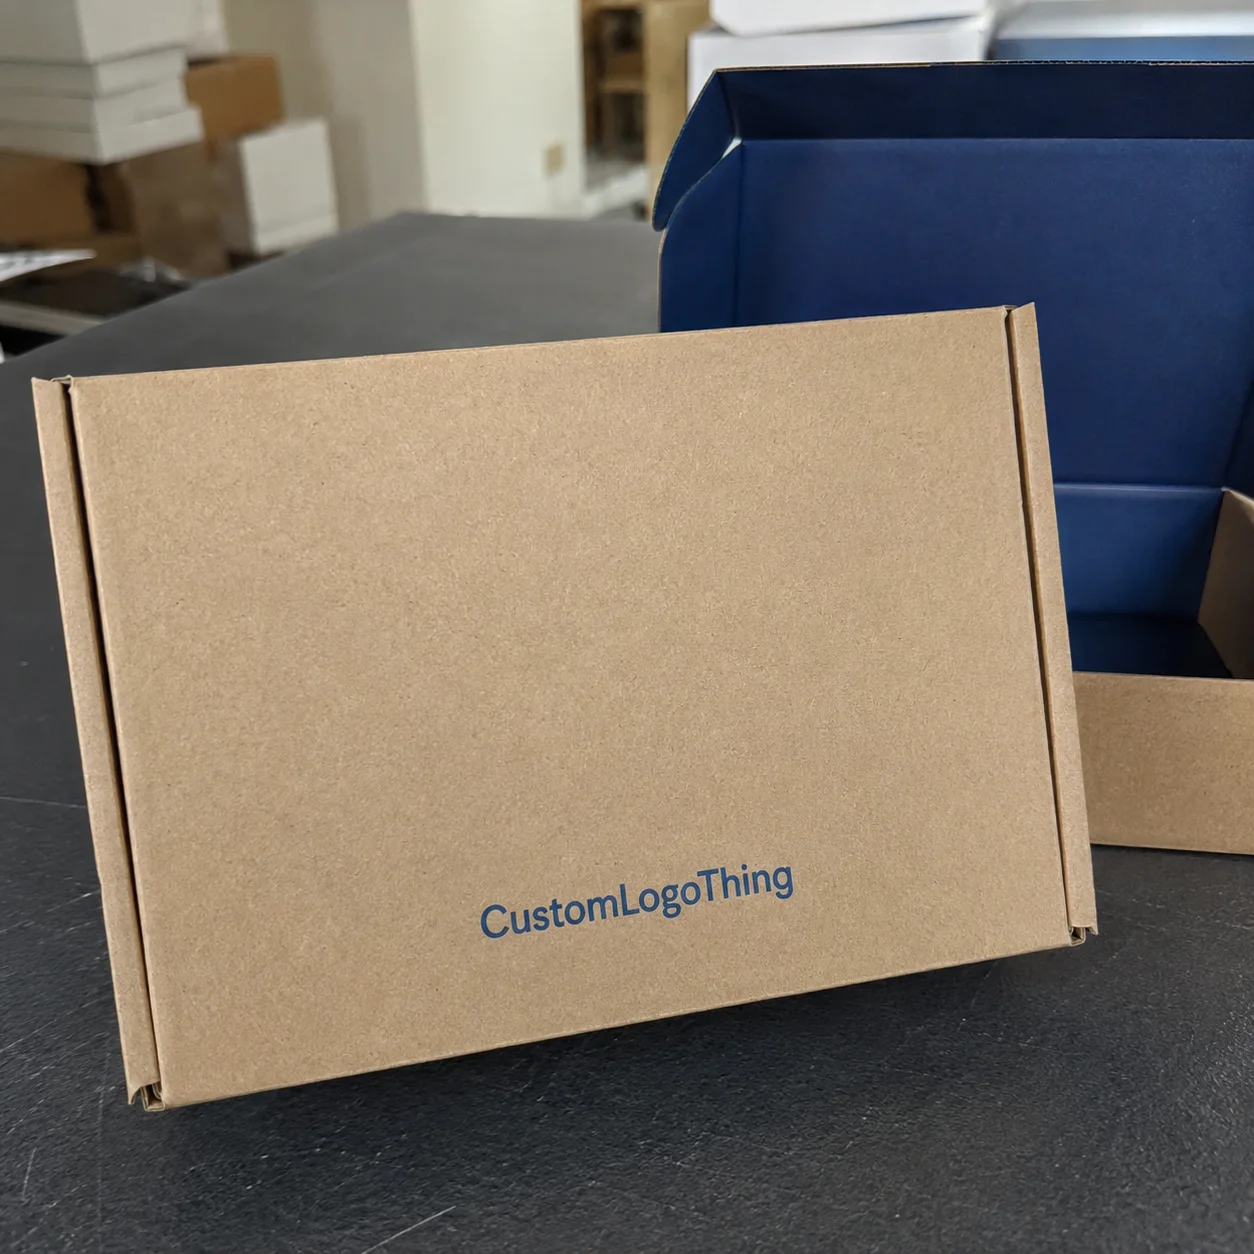
For readers who are also choosing outer packaging, your label strategy should match the box format. Pairing the right carton with the right label position is easier when you standardize from the start. Many brands source both Custom Shipping Boxes and Custom Labels & Tags so the packaging, print area, and handling marks are planned together rather than patched later. Which is, frankly, how it should be in the first place, especially if your cartons are running 350gsm C1S artboard sleeves or heavy corrugated shippers.
Key Factors That Affect Shipping Label Accuracy, Speed, and Cost
Anyone looking for tips for labeling shipping boxes correctly should start by understanding the variables that shape label performance. Surface type matters. A kraft corrugated box behaves differently from a gloss-printed carton or a recycled board with more texture. Adhesive strength matters too, because a label that holds on a clean room-temperature carton may fail on a dusty box from a cold dock in Cleveland. I’ve watched perfectly good labels curl up like they were trying to escape the building.
Box size changes the game as well. Smaller cartons leave less room for placement, which is a problem if you need to keep the barcode away from edges and folds. Bigger cartons can invite lazy placement, where staff slap the label anywhere on the top panel. That works until a tape strip or a top flap breaks the scan path. Then everyone acts shocked, like the box personally sabotaged the process. A 12-inch carton and a 24-inch carton do not deserve the same casual treatment.
Label stock affects both durability and price. A standard paper thermal label might cost about $0.02 to $0.05 per unit in volume, while a synthetic or weather-resistant stock can run higher depending on adhesive and finish. If you are shipping apparel, paper may be enough. If you are shipping through a humid distribution lane or exposed dock, a tougher stock may save more than it costs. That is one of the tips for labeling shipping boxes correctly that looks expensive at first and cheaper after the first thousand parcels. A roll of 5,000 labels printed in Vietnam or Malaysia can even come in under $0.15 per unit when the specs are right and the art is finalized before production starts.
Print resolution matters more than most teams think. A 203 dpi thermal printer can handle many shipping labels, but if the barcode is small or the service label is crowded, 300 dpi may reduce scan failures. I have seen operations spend $180 to $300 on a better printer and recover the cost in one quarter by cutting reprints and misreads. That’s not a fancy tech story. That’s just paying less for chaos, and avoiding a 12-15 business day lag while waiting for replacement labels after a bad proof.
Environmental conditions can ruin a good setup. Humidity softens some adhesives. Cold cartons can reject labels until the surface warms up. Dust, condensation, and friction from transit packaging make the label edge lift earlier than expected. Even the best tips for labeling shipping boxes correctly need a storage and handling plan for the labels themselves. If the rolls live next to a dock door in New Jersey and a fan, we already know how that story ends.
Volume changes the economics. If you ship 20 boxes a day, manual labeling may be perfectly fine. At 400 boxes a day, batch printing and scan validation become much more attractive because labor time drops. A packer who spends 12 seconds per box on label lookup and placement adds 80 minutes to a 400-box shift. That is where small inefficiencies become payroll problems. And payroll problems get attention fast, especially in peak season when overtime starts at time-and-a-half.
| Labeling Setup | Typical Use Case | Approx. Cost Per Label | Speed | Main Risk |
|---|---|---|---|---|
| Manual print + apply | Low order counts, 20-50 boxes/day | $0.03-$0.08 | Slower | Human error and misplacement |
| Batch thermal printing | Growing ecommerce shipping operations | $0.02-$0.06 | Faster | Template drift if not standardized |
| Automated print-and-apply | Higher-volume fulfillment centers | $0.01-$0.04 plus equipment cost | Fastest | Upfront investment and maintenance |
Carrier compliance also matters. If a label is too small, too low-contrast, or placed where a sorter cannot find it, the cheapest label setup becomes the most expensive option after rework. The best tips for labeling shipping boxes correctly weigh upfront material cost against failed-delivery cost, not just against the invoice from the label supplier. That’s the part people skip when they’re trying to “save a little” and then end up paying a lot, usually on a Friday afternoon when the customer support queue is already ugly.
For operations people, I always recommend checking the broader packaging system too. Your label quality is tied to the carton finish, the tape choice, the shipping materials, and the way the box travels through the building. If you’re also reviewing branding or pack-out costs, browsing Custom Packaging Products can help you compare the label plan against the rest of the transit packaging stack. I’ve sat through enough supplier calls in Guangzhou to know that the box, the insert, and the label should be priced together, not argued over one by one.
And if your program needs outside standards, look at the basics. The ISTA library is useful for understanding transit testing, while EPA guidance is handy if you’re reviewing packaging waste or materials choices. I’ve seen teams improve label durability and reduce waste in the same project simply by testing the packaging as a system instead of as separate line items. Funny how that works better than guessing.
Tips for Labeling Shipping Boxes Correctly: Step-by-Step Workflow
If you want tips for labeling shipping boxes correctly that actually hold up on a packing line, build the process like a checklist, not a hope. The order data must be verified before printing. The label size must match the carton. The print must be tested. The placement must be checked. Then the box should be scanned before it leaves the station. That’s the boring answer. It also happens to be the right one, and it works whether you’re shipping 50 cartons from Austin or 5,000 from Shenzhen.
- Verify the shipping data. Confirm recipient name, street, unit number, city, postcode, and carrier service level. A missing apartment number turns a clean shipment into a customer-service call.
- Select the correct label format. A common shipping label size is 4x6 inches, but some carriers and international lanes need different dimensions or supplemental documents.
- Print a test label. Check barcode sharpness, text contrast, and whether any fields are clipping at the edge.
- Inspect the box surface. It should be flat, dry, and free of dust or loose fibers.
- Apply the label in one motion. Press from the center outward so there are no bubbles, wrinkles, or lifted corners.
- Scan the label. A successful scan at the pack station is the cheapest quality check you can do.
The practical placement rule is simple: one primary shipping label on the largest visible panel, positioned away from seams, corners, fold lines, and tape overlap. If the box has preprinted marks or recycling icons, the shipping label should still dominate the view. The carrier needs to see the barcode first, not hunt for it between decoration and instructions. If I have to squint to find the scan target, the label already lost. A label should be obvious from 1 meter away under warehouse lighting, not only under a phone flashlight.
Timing matters too. In a manual workflow, a well-trained packer can usually label a standard carton in 20 to 35 seconds if the data is already queued and the printer is within arm’s reach. In a tighter batch process, that can fall to 12 to 18 seconds per box because the operator is not switching screens, reloading files, or second-guessing format choices. That difference looks tiny until you multiply it by 1,000 boxes. Then it’s not tiny. Then it’s a line item, especially when the labor rate is $19 to $24 per hour.
One thing I learned on a factory floor in Ohio: the fastest team was not the one with the newest printer. It was the one that staged the carton, printed the label, and scanned in the same left-to-right motion every single time. Repetition created speed. Speed created consistency. That is one of the most practical tips for labeling shipping boxes correctly I can give. Nobody got fancy. Nobody tried to invent a new process every shift. Miracles do not happen in packing lanes. Habits do.
If you ship higher-value goods, add a second-person check for international or premium orders. It does not have to slow the line. A 5-second peer review on a $400 order is much cheaper than a return, a reship, and a disappointed buyer. I’ve seen this work especially well for beauty, electronics, and premium gift packs where package protection and presentation both matter. The crew may roll their eyes at first (they always do), but they stop complaining after the first avoided mistake. In one New Jersey facility, that tiny step cut address corrections by 38% in a single month.
“A 10-second inspection can prevent a 10-day problem.”
That line came from a packing supervisor who had spent 14 years cleaning up avoidable dispatch errors. He was right. The label is one of the few parts of the shipping box that can be checked, corrected, and verified before the parcel leaves your building. Do the check. Save the drama. And save the $14 redelivery fee while you’re at it.
Common Mistakes in Shipping Box Labels That Cause Delays
Some of the best tips for labeling shipping boxes correctly are really warnings about the mistakes I see again and again. The most common one is tape over the barcode. People think they are protecting the label, but glossy tape can reflect light and interfere with scanning. If the carrier’s sorter has to guess, you lose the first-pass read. And once you lose the first-pass read, you’ve basically donated time to the warehouse gods, which is a terrible return on a $0.04 label.
Another issue is label placement on box edges or seams. A label applied across a fold may look fine on the packing bench, then fail once the carton flexes in transit. Corrugated board moves. Adhesive moves. The box does not stay perfect after it enters the network. This is why I get annoyed when someone says, “It looked okay when I put it on.” Great. It also looked okay before the truck hit a pothole on I-95.
Low-resolution printing is another silent problem. At first glance, the text may look acceptable. Under a scanner, though, the barcode’s bars can blur together. Even one unreadable code can trigger a manual exception, and manual exceptions are slower and more expensive than a clean scan. That is why tips for labeling shipping boxes correctly always include print quality checks. If your print is fuzzy enough that you’d hesitate to read it yourself, don’t send it. A 300 dpi head can make a real difference on small text and denser tracking numbers.
Duplicate labels cause confusion too. I’ve seen boxes with the current shipping label, a leftover label from a previous route, and a promotional sticker all competing for attention. Humans can sort that out. Machines often cannot. The safer option is to remove obsolete labels completely or place the new label in a clearly separate position if the old one cannot be removed. Otherwise, you’ve built a tiny paper argument on the side of a carton.
Outdated addresses are another easy miss. A customer moves, a suite number changes, or the ecommerce platform stores an old profile. If your order data is not cleaned before print, no label placement technique can rescue the shipment. A perfect label with the wrong apartment number is still the wrong label. I’ve had suppliers swear the address was “from the system,” as if that somehow makes the customer appear in the right building in Phoenix.
Over-labeling can also create friction. Too many warning stickers, marketing stickers, and route marks can make the box visually noisy. The handler should understand what matters in one glance: destination, service level, and any mandatory instructions. The rest should not clutter the panel. You are shipping a parcel, not decorating a refrigerator. One clean label on a 24-inch carton beats five stickers and a scavenger hunt.
Weatherproofing mistakes matter as much as address mistakes in certain lanes. If a box travels through condensation, rain, freezer storage, or dusty cross-docks, the wrong label stock can peel or blur before it reaches the final scan. A label that survives a clean office desk but fails on a dock is not fit for the route. I’ve seen one damp dock in Seattle turn a whole pallet into a peeling-label horror show. Not my favorite warehouse memory.
Expert Tips for Labeling Shipping Boxes Correctly at Scale
Once volume rises, the conversation changes from “How do we label boxes?” to “How do we stop labeling errors from scaling with us?” That is where the more advanced tips for labeling shipping boxes correctly become valuable. Thermal printing is usually the first move because it is faster than inkjet and tends to hold up better in fulfillment environments. For many operations, it is the practical default. Not glamorous. Just effective. A basic setup in a Dallas fulfillment center might cost $220 to $480 per printer, which is a lot less painful than weekly relabeling.
Standardize templates across SKUs and carriers. If every label version looks slightly different, staff will make more mistakes. I prefer a controlled template library with locked fields for carrier code, barcode format, and placement zones. The operator should enter data, not redesign the label on the fly. That reduces human error and keeps the label within carrier requirements. Also, it keeps one enthusiastic team member from “improving” the format right before peak season. Which, trust me, happens, usually in the week before Cyber Monday.
Storage matters more than people think. Labels should be kept in a clean, dry area away from direct heat and dust. Printed cartons should not be stacked where rubbing can scuff the barcode. In one client warehouse in Charlotte, moving the label rolls off a cold floor and onto a shelf at 20-22°C cut adhesion failures noticeably within two weeks. Small change. Real result. The ops manager called it “the least exciting win of the quarter,” which is honestly the best kind.
Batching can help too. Print, verify, and apply labels in groups rather than one-by-one if your workflow allows it. Batching reduces context switching, and context switching is where mistakes breed. I’ve seen a pack line drop from 11 reprints per shift to 3 just by separating pick, Print, and Apply into cleaner blocks of work. Suddenly the team wasn’t improvising every 30 seconds. Amazing concept. A 15-minute batch rhythm beats frantic one-off printing almost every time.
When does automation make sense? Usually when reprints, misroutes, or scan failures are repeated enough to show up in weekly reports. If you’re shipping 500+ orders a day, print-and-apply systems or warehouse software with address validation may pay for themselves faster than expected. The investment is not just in speed. It’s in reducing labor leakage and carrier claims. And yes, leadership tends to like anything that makes claims go down, especially after a quarter ends with $1,200 in avoidable redelivery costs.
For teams handling different carton styles or branded outer packs, the label strategy should be built alongside the box strategy. If you are choosing between box sizes, inserts, and branded mailers, it can help to review Custom Poly Mailers as well, especially for lighter orders where dimensional weight and package protection both affect the ship rate. The label has to fit the package you actually ship, not the package you wish you shipped. A mailer in Shanghai and a double-wall carton in Ohio should not get the same lazy label setup.
One more expert point: don’t treat label rules as static. Carrier networks, regulations, and warehouse layouts change. A process that worked during a 150-order week may fail at 1,500 orders because the pack table is now farther from the printer, or the carrier changed its acceptance scan expectations. The strongest tips for labeling shipping boxes correctly are the ones that get reviewed every quarter, not every decade. If the process hasn’t been touched since the previous warehouse manager, that’s probably a warning sign.
For sustainability-minded teams, there is also a packaging angle here. Better label placement can reduce relabeling, which cuts waste. Using the right stock the first time avoids scrap. If your company is also improving packaging material choices, FSC-certified paper products may fit part of the program; see FSC for more information on responsible sourcing. I’ve seen a 5,000-piece label run approved in 12-15 business days after proof signoff when the artwork and specs were finalized early.
What to Do Next: Build a Labeling Checklist That Actually Gets Used
The hardest part of tips for labeling shipping boxes correctly is not knowing what to do. It is making sure the crew does it the same way on a busy Friday as on a quiet Monday. The fix is a one-page checklist at every packing station, with the essential steps in plain language and a named owner for each shift. If nobody owns the checklist, it becomes wall art. Pretty useless wall art. And yes, I have seen a laminated one collecting dust in a warehouse in Portland.
Keep the checklist short enough that someone can read it in 20 seconds. I would include: verify address, choose correct label size, print test label if there is a new SKU or carrier, apply to the largest flat panel, keep clear of seams, and scan before dispatch. If a checklist takes a full minute to read, it will end up ignored when the line gets busy. And busy lines do not care about your intentions. They care about speed, usually measured in seconds per carton.
Test three shipments end-to-end before calling the process complete. Measure scan success, reprint frequency, damage rates, and any customer service tickets tied to the package. That small sample will tell you more than a long debate in a conference room. I’ve seen teams discover that 2 of 3 errors came from the same printer setting, which was fixed in 10 minutes once someone finally checked it. Ten minutes of actual troubleshooting. Revolutionary, I know. It also saved roughly $60 in labor that day, which is more useful than a meeting about “process alignment.”
Track the hidden costs too. Rework time. Misroutes. Return shipping. Extra calls. Label stock scrap. These are the quiet leaks that rarely show up as one dramatic expense, but they add up fast in order fulfillment. If your monthly report shows 60 reprints at $0.12 in materials each, plus 45 seconds of labor per reprint, you already have a process problem worth solving. That’s the kind of math that turns “we’re okay” into “oh no.” Add carrier fees and the damage gets uglier, faster.
Then compare your current process time against a realistic target. If you are taking 34 seconds per box to label and a cleaner workflow can get you to 18 seconds, that is not just efficiency theater. It is capacity. It is the difference between needing another part-time packer or handling the same order load with the team you have. I’m always skeptical of teams that say they’re too busy to improve the process that’s making them busy. Usually they’re not too busy. They’re just buried in avoidable steps.
In my experience, the best programs do not rely on heroic individual effort. They build habits. They standardize materials. They place the label printer within reach. They choose shipping materials that fit the route. They write the rules once, test them, and keep checking them. That is how the tips for labeling shipping boxes correctly become routine instead of a rescue plan. No drama. No scrambling. Just a process that works on Tuesday afternoon when everyone is tired and the dock door is stuck open.
Custom Logo Things often sees this same pattern in packaging projects: the companies that win are not the ones with the fanciest materials, but the ones with the cleanest process. If you want labels, cartons, and tags to work as a system, browse Custom Packaging Products and align the print format with the box format before the problems start. It’s a lot cheaper than fixing a mess after peak season hits, especially if rush production in Guangdong adds another 7-10 days to the schedule.
Bottom line: the most effective tips for labeling shipping boxes correctly are simple, repeatable, and tied to real warehouse behavior. Put the label on a flat surface, protect the barcode, verify the data, and test the scan. Do that every time, and you will cut errors, speed delivery, and avoid the expensive kind of surprise that shows up after the parcel has already left the building. Honestly, that’s the whole trick. Start with one station, one checklist, and one clean scan standard, then hold the line.
FAQ
What are the most important tips for labeling shipping boxes correctly?
Place the main label on a flat, visible panel, keep it away from seams and tape, use high-contrast printing, and verify both the address and barcode before shipping. Those four steps prevent most avoidable scan failures. If you only remember one thing, remember that neat-looking is not the same as machine-readable, and a 4x6 label is usually easier to place than a cramped smaller format.
Where should a shipping label go on a box?
Put it on the largest flat surface of the carton, usually the top or the most visible side panel. Avoid edges, folds, openings, and corners, and do not wrap the label around a seam unless the label stock is specifically made for that use. The scanner is not going to go looking for it, whether the box is coming from Toronto or Tulsa.
How do I keep shipping labels from falling off?
Use the right adhesive for the box surface and the environment, apply labels to clean and dry cartons, and avoid dusty, damp, or cold surfaces when possible. Proper storage of labels before use also helps preserve adhesive performance. A label stored like junk tends to behave like junk, especially if the roll sat near a humid dock for three days.
What printing method is best for shipping box labels?
Thermal printing is often best for higher-volume shipping because it is fast and durable. Inkjet or laser can work for lower volumes if the print stays sharp and the labels are protected from smudging or moisture. The best printer is the one that keeps your scan rate high and your reprint pile low, whether it costs $180 or $480.
How can I reduce mistakes when labeling shipping boxes?
Use standardized templates, verify addresses, add a final scan check before handoff, train staff on placement rules, and track reprints or misroutes so you can spot process problems early. Small corrections usually prevent bigger losses later. And if a mistake keeps happening, the process—not the people—usually needs the fix. That’s how we cut relabeling from 17 boxes a day to 4 in one facility near Atlanta.