Beanies with Branded Logo Patches: Order Them Right
What Beanies with Branded Logo Patches Actually Are
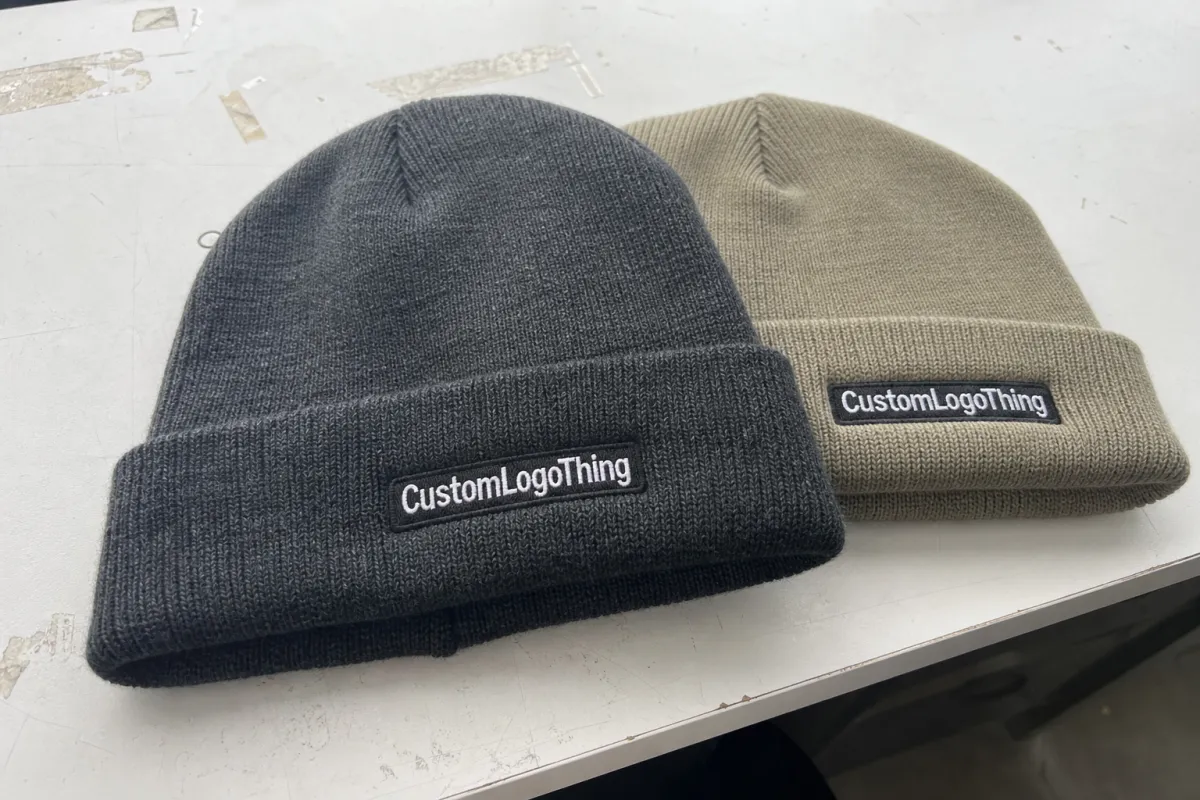
Beanies with branded logo patches usually look cleaner than direct embroidery on knit because the patch gives the eye a controlled surface. That matters on ribbed fabric. Knit has stretch, texture, and tiny shifts in tension, so even a well-digitized embroidered logo can sink into the yarn or lose edge definition. A patch creates a small billboard where the brand mark can stay readable, especially on cuffed hats where the front area is only about 2.0-3.0 inches tall.
At the simplest level, the product is a knit beanie with an applied front mark, usually on the cuff or front panel. The patch may be woven, embroidered, leather, faux leather, PVC, or TPU. Each one changes the character of the hat. Woven reads crisp and detailed. Leather feels quieter and more premium. PVC and TPU are more graphic and modern. Embroidered patches sit in the middle and bring texture without the full softness of knit embroidery.
Buyers tend to choose this decoration method for retail lines, employee uniforms, winter promotions, and outdoor programs because it is easier to control than stitching a small logo directly into yarn. The result often photographs better too. A patch gives shape and contrast, which helps a beanie stand out on a shelf, in a product photo, or in a stack of folded inventory.
The final result depends on a few variables that are easy to underestimate: the patch material, the beanie blank, the size of the mark, the placement, and the attachment method. A good logo on the wrong patch can feel heavy, stiff, or oddly oversized. A modest design on the right blank usually looks more expensive than the artwork alone would suggest.
Material choice also needs to match the market. A 100 percent acrylic beanie can take a wide range of patch types and remains the most common cost-controlled option. Acrylic-wool blends feel warmer and more substantial, but they can be less forgiving if the patch is too stiff. Recycled polyester and performance blends are increasingly common for brands that want a lower-impact story, and those programs are often paired with GRS-certified yarn or trims. If the line uses organic cotton or organic cotton blends, ask for GOTS documentation. For finished goods, OEKO-TEX Standard 100 is the most relevant check for dyes and skin-contact safety. WRAP and BSCI are useful when you want social compliance evidence for the sewing or finishing facility.
Patch Styles, Materials, and Build Choices
The patch material sets the tone for the whole beanie. Woven patches work well for small type, thin rules, and detailed icons because the thread structure can hold fine information better than many embroidered setups. Embroidered patches add thread depth and a more traditional feel, which works well for heritage brands or marks that do not depend on micro-detail. Leather or faux leather gives the hat a warmer, more premium finish. PVC and TPU create a molded look with sharp edges and a stronger visual pop, especially on darker knit. For lines that need a softer hand, felt or twill patches are also common because they sit flatter than molded options.
Beyond the base material, the build details matter. Edge finishing changes the silhouette. Merrowed borders feel classic and tactile; laser-cut or die-cut edges read cleaner and more technical. Thickness affects how the patch sits on the cuff. A thin woven patch may lie flatter, while a raised leather or molded patch can feel more substantial but also more rigid. A patch that is too thick may look strong on a table and clumsy on the head. Most beanie patches land in the 1.5-2.5 mm thickness range; once you move above that, the hat can feel top-heavy.
There is also a practical tradeoff between detail and durability. A woven patch can hold line work that would blur in embroidery, but if the logo depends on a very small negative space, it still has limits. A debossed faux leather patch can look sharp from a distance yet lose information if the artwork is crowded. Raised or printed elements help brands add depth, but they increase the risk of scuffing in transit if the packaging is not right. For PVC or TPU, a factory will usually create a mold or tooling plate first, then run the patch through injection or heat-forming equipment before trimming and backing it.
The beanie knit itself should be part of the decision. A dense rib knit usually supports a flatter patch better than a loose gauge. A heavyweight cuffed beanie can take a slightly larger patch without feeling top-heavy. A slouchy fit often needs smaller branding because the crown drapes more and the eye is already moving. The right patch on the wrong knit can still look off, even if each component is good on its own. In production terms, a 7-gauge or 9-gauge rib knit usually gives a firmer front panel than a looser fashion knit, and that makes placement more predictable.
For projects where the logo includes small letters or a narrow icon, woven patches are often the safest starting point. For brands that want a higher perceived value, a leather or faux leather patch tends to look more deliberate. For performance or utility programs, PVC and TPU are easier to wipe clean and usually keep their shape better after repeated wear. If the line needs a washable, low-fuss surface, avoid overly thick foam backing and ask for a low-profile sew-on or heat-applied backing.
Here is a practical way to compare the common options:
| Patch style | Visual feel | Typical add-on cost | Best fit |
|---|---|---|---|
| Woven | Crisp, detailed, flatter surface | $0.45-$1.05 per unit at 500 MOQ | Small text, clean logos, sharper retail presentation |
| Embroidered | Textured, traditional, visible thread depth | $0.40-$0.90 per unit | Simple marks, heritage brands, softer visual identity |
| Leather or faux leather | Premium, warm, slightly rugged | $0.55-$1.30 per unit | Lifestyle lines, outdoor brands, elevated promo kits |
| PVC or TPU | Bold, modern, highly defined | $0.75-$1.60 per unit | Performance branding, heavy-use programs, strong contrast logos |
Those numbers are directional. The real price moves with patch size, mold or tooling cost, number of colors, backing type, and how much handwork the attachment requires. A two-color woven patch on a standard cuffed beanie is one thing; a multi-layer molded patch with a complex outline is another. The useful question is not which patch is cheapest, but which patch gives the logo the clearest read without making the hat feel overbuilt. If the artwork uses more than 5 colors, expect the patch cost to climb faster because registration and setup become more labor-intensive.
Process and Timeline: From Artwork to Finished Hats
Clean orders tend to follow the same sequence: artwork review, patch proofing, blank selection, sample approval, attachment confirmation, and bulk production. That order matters because it keeps the project from bouncing between open decisions. If color, size, and material are all changing at once, delays multiply quickly. A realistic factory timeline for a standard patch beanie is 18-22 business days after proof approval and deposit, while a fully custom build can stretch to 25-35 business days.
The artwork stage is where many problems start. Vector files are ideal because the patch maker can check line weight, spacing, and negative space. A low-resolution image may look acceptable on a screen and still fail once it is translated to a small physical patch. Thin letters, gradients, and tiny outlines are the first things to simplify or redraw. The patch has to survive size reduction, stitch limitations, and the stretch of the knit underneath it. For woven patches, line weights below about 0.3 mm are usually risky; for embroidery, very small counters and open areas can close up during stitching.
Sample approval is usually the most informative step. A mockup can show placement, but it cannot show stiffness, edge height, or how the patch behaves on the curve of a beanie. That is especially true for cuffed styles, where the front surface looks flat in a flat lay and different once worn. A sample also exposes whether the patch is too wide for the cuff, whether the threads crowd at the corners, or whether the backing pulls the knit. The most useful sample flow is usually: digital mockup, patch prototype, stitched beanie sample, then pre-production sample with final colors and labels.
A practical sampling timeline is 24-48 hours for artwork revisions, 3-5 business days for a patch prototype, and 5-10 business days for a sewn sample if the blank yarn is already available. Most suppliers charge a sample fee of $35-$120, and some will credit it back against a bulk order. If a PVC or TPU mold is needed, tooling can add $60-$200 depending on size and complexity. Ask whether the sample uses the same sewing method as bulk production, because hand-applied samples can hide fit issues that a machine-applied run will expose.
There is also a difference between production time and transit time. Air freight can save a deadline, but it changes the landed cost. Sea freight lowers unit shipping cost on larger orders, but it adds planning risk. If the hats need to ship into distribution or a retail warehouse, carton dimensions and drop-test expectations should be settled before the run starts. For packed goods, basic transit testing standards such as those published by ISTA.org are a useful reference point. For finished carton QC, ask for carton count verification, outer carton label checks, inner polybag count, and a final packing list match before dispatch.
A patch can look perfect in a flat mockup and still fail on a finished beanie if the cuff stretches, the logo sits too high, or the backing is too stiff for the knit. The safest way to prevent that is to approve a sewn sample, not just a digital proof, and to check it under real wear conditions.
Cost, Pricing, MOQ, and Quote Factors
Factory pricing depends on the blank, the patch type, the attachment method, and the order size. A common quote for a cuffed acrylic beanie with a woven patch lands around $2.50-$4.00 per unit at 500 MOQ. At 1,000 units, the same style may drop into the $2.10-$3.20 range if the artwork is simple and the patch is a standard size. Finer materials, custom packaging, and special labeling will push it up again.
MOQ usually splits into two parts: the beanie blank and the patch. Stock blanks can often be ordered at 100-300 pieces per color, while custom knit colors or custom yarn blends may need 300-1,000 pieces. Woven and embroidered patches can sometimes start at 100-200 pieces per design, but molded PVC, TPU, and leather-look setups often work best at 300-500 pieces because tooling and setup have to be spread across the run. If you want multiple colorways, ask whether the MOQ applies per color or per total order.
The patch attachment method also changes price. Sew-on is the most common and usually the least risky for cold-weather hats. Heat transfer and adhesive backing can be faster, but they are more sensitive to wash cycles and surface texture. A sewn patch may add a little labor time, while a heat-applied patch may need extra testing to make sure it holds after repeated wear and laundering. For a premium retail line, hidden stitching around the perimeter can make the front cleaner but usually adds labor cost.
Quote factors worth checking up front include yarn composition, gauge, cuff height, patch dimensions, backing style, number of colors, packaging, label placement, and whether the order needs individual polybags or hang tags. If the supplier is quoting recycled polyester, ask for GRS certification for the yarn or trim chain. If the beanie is marketed as skin-safe, ask for OEKO-TEX Standard 100 on the finished goods or at least on the yarn and trim inputs. If the supplier claims social compliance, request WRAP or BSCI documentation rather than a verbal assurance.
One useful pricing rule: once the patch becomes more than 3.0 inches wide or introduces multiple raised layers, expect the cost to move faster than the blank itself. In many orders, the patch and labor can account for 35-55 percent of the unit price, especially at lower MOQs. That is why a simple, legible mark often beats a complex one when the budget is fixed.
Placement, Size, and Fit Decisions That Matter
Placement decisions look small on a spec sheet and large on the finished hat. On a cuffed beanie, a patch usually reads best when it sits centered and about 0.25-0.5 inches above the cuff fold line. Too low and the logo disappears into the fold. Too high and it starts drifting into the crown, where the knit curves away from the viewer. On slouchy hats, the best placement is often smaller and slightly lower than on a cuffed style because the drape shifts the visual weight downward.
Size needs to be tied to the blank, not the art alone. A common patch width is 2.0-3.0 inches for adult beanies, with height around 0.75-1.25 inches for horizontal marks and up to 2.0 inches for compact logos. Youth beanies usually need to stay smaller. If the patch is too large for the cuff, the hat starts to look top-heavy. If it is too small, the logo loses legibility from more than a few feet away.
The fit of the hat affects perceived quality as much as the artwork does. A heavyweight rib knit with a tidy fold supports a clean patch, while a loose or highly elastic knit can distort the border when worn. If the beanie will be sold flat and folded, check the patch under both conditions. It should look centered in a stack and still read well on a head. That is why the sample should be tried on, not just measured on a table.
Attachment also changes feel. A patch with a thick backing can create a visible ridge under the cuff. A thin sew-on patch tends to disappear into the fabric more naturally. If the design needs a crisp edge, ask for an edge stitch that sits 1-2 mm in from the perimeter rather than a wide, heavy border. That keeps the patch from looking bulky while still locking it down securely.
Step-by-Step Ordering Checklist for a Clean Run
1. Lock the logo file in vector format and check line weight, spacing, and minimum text size before sending it to the factory.
2. Choose the beanie base first: acrylic for cost control, acrylic-wool for a warmer hand, recycled polyester for a sustainability story, or organic cotton if the line needs GOTS-backed fiber sourcing.
3. Pick the patch style that matches the artwork. Woven is safest for fine detail, embroidered is best for texture, faux leather is best for a premium look, and PVC or TPU is best for a bold utility feel.
4. Confirm the patch size, placement, backing, and edge finish. Ask the supplier to show the dimensions on a mockup with measurements in inches or millimeters.
5. Request a sample sequence: digital proof, patch prototype, sewn beanie sample, then pre-production sample. Do not skip the sewn sample if the order is large enough to matter.
6. Check the sample against a short inspection list: center position, patch flatness, edge quality, stitch tension, color match, cuff stretch, and label placement.
7. Approve the bulk run only after the pre-production sample matches the intended packaging, hang tag, size label, and carton count.
8. During bulk production, ask for in-line photo updates at the first 20-30 pieces, then a mid-run check, then final carton photos before shipment.
9. Use an AQL plan for final inspection. A common target is AQL 2.5 for major defects and 4.0 for minor defects, with special attention to patch alignment, loose threads, stains, and wrong labels.
10. Verify the shipping documents before release: PO quantity, color breakdown, carton count, gross and net weight, and the packing list against the physical cartons.
Common Mistakes That Make the Final Hat Look Off
One of the biggest mistakes is making the patch too large for the cuff. A logo that looks balanced on screen can overwhelm the beanie once it is sewn on. The second mistake is choosing a patch that is too thick for a soft knit. A heavy PVC or layered faux leather patch can flatten the cuff and make the hat look stiff in the wrong way.
Another common issue is ignoring contrast. A dark patch on a dark beanie can disappear in low light, while a high-gloss patch on a glossy knit can create glare that makes the artwork hard to read. If the brand mark relies on legibility, the patch should create contrast in either color, texture, or both.
Factories also see avoidable problems with tiny text, overloaded icons, and too many colors. Small letters can close up in woven construction, and fine embroidered details can blur if the stitch density is too high. If the patch is trying to do too much, it often ends up looking less premium instead of more branded.
Placement mistakes are equally common. A patch sewn off-center by even 3-5 mm can look wrong on a cuffed hat because the eye reads symmetry immediately. Loose stitching, thread tails, and uneven backing edges are also easy to spot, so they should be checked before packing. A clean final product almost always comes from a factory that checks centering, stitch tension, and packing order instead of relying only on the final carton count.
Next Steps for a Better Bulk Order
If you are comparing suppliers, ask for the same quote structure from each one: blank material, patch type, patch size, MOQ, sample fee, decoration method, production lead time, and freight assumptions. That makes it easier to compare apples to apples. A low unit price can hide a high mold fee or a strict MOQ, so the full landed cost matters more than the headline number.
For a clean first order, start with one blank color, one patch style, and one packaging format. That keeps the run simple and makes quality control easier. Once the base style is proven, you can test a second colorway or a different patch material in the next order. This is usually the fastest way to build a range without creating avoidable delays.
If sustainability claims matter, ask for documentation at the component level rather than treating the beanie as one vague product. GOTS applies to certified organic fiber inputs, GRS applies to recycled content, and OEKO-TEX Standard 100 applies to harmful-substance testing on the finished textile or its components. WRAP and BSCI help with factory compliance checks, but they are not a substitute for material certification. The best suppliers can explain exactly which part of the item each certificate covers.
FAQ
What patch style is best for small logos?
Woven patches are usually the safest choice for fine text and narrow icons because they hold detail better than embroidery on a small format. If the logo is very simple, embroidered or faux leather can still work well.
What is a realistic MOQ for branded logo patch beanies?
For stock blanks, 100-300 pieces is common. For a fully custom style with a patch, 300-500 pieces is a practical starting point, and 1,000+ pieces usually brings better unit pricing.
How should I inspect the first sample?
Check center position, patch size, edge finish, stitch tension, color match, cuff stretch, and label placement. If possible, check it both flat and on-head so you can see whether the patch still reads correctly when worn.
Which certifications matter most?
OEKO-TEX Standard 100 is useful for finished-goods safety, GRS is relevant for recycled yarns or trims, GOTS is relevant for organic fiber programs, and WRAP or BSCI can support social compliance verification.


