Buyer Fit Snapshot
| Best fit | Branded Boxes With Window projects where brand print, material claims, artwork control, MOQ, and repeat-order consistency need to be specified before quoting. |
|---|---|
| Quote inputs | Share finished size, material target, print colors, finish, packing count, annual reorder estimate, ship-to region, and any compliance wording. |
| Proofing check | Approve dieline scale, logo placement, barcode or warning zones, color tolerance, closure strength, and carton packing before bulk production. |
| Main risk | Vague material claims, crowded artwork, missing packing details, or unclear freight terms can make a low unit price expensive after revisions. |
Fast answer: Branded Boxes With Window: Design, Cost, and Process should be specified like a repeatable production item. The safest quote records material, print method, finish, artwork proof, packing count, and reorder notes in one written spec.
Production checks before approval
Compare the actual filled-product size with the drawing, then confirm tolerance on folds, seals, hang holes, label areas, and retail display edges. Reserve space for logos, QR codes, warning copy, and material claims before decorative graphics fill the panel.
Quote comparison points
Review material grade, print process, finish, sampling route, tooling charges, carton quantity, and freight assumptions side by side. A quote is only useful when the supplier can repeat the same color, closure quality, and packing count on the next order.
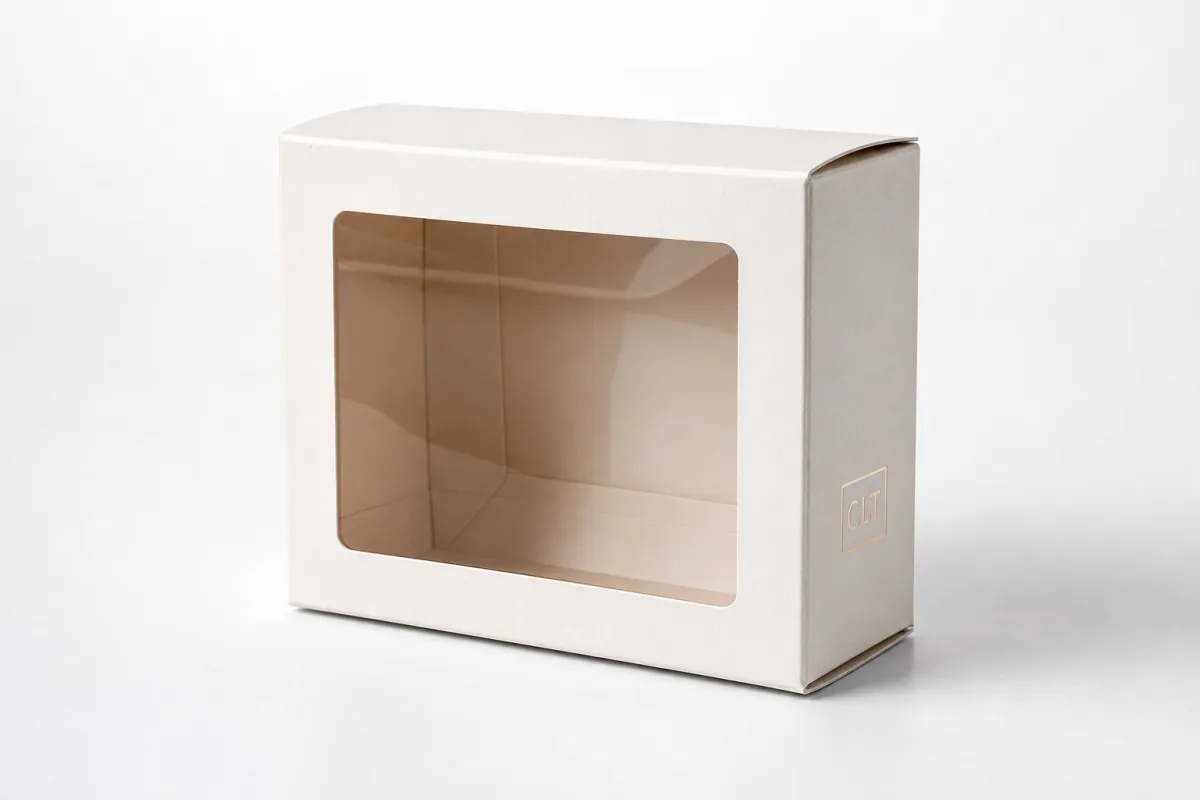
Branded boxes with window can change a buyer's first reaction in a matter of seconds, because the product is visible before the carton is opened and the value feels easier to judge. That small opening does more than decorate a package; it lets the shopper confirm color, shape, texture, and quantity right away, which often lowers hesitation and makes the item feel more credible on shelf.
For custom packaging buyers, the real question is not whether branded boxes with window look good in a mockup, but whether they are built with the right board, the right cutout, and the right production method so the package still protects the product, prints cleanly, and stays inside budget. A window carton only earns its place when the structure, finish, and display value all work together in the hand and in transit.
I have seen plenty of window packs that looked sharp on screen and then fell apart the moment the product was inserted. The reverse happens too: a plain-looking carton with a well-sized window, good board, and clean insert can feel surprisingly premium once it is assembled. That is the part people miss if they only judge the front panel.
Why branded boxes with window change shelf appeal fast
Picture a buyer standing in front of two nearly identical products. One sits in a closed carton with only a photo to trust. The other uses branded boxes with window, so the buyer can see the actual item without breaking the seal or opening the pack. That simple difference shortens the decision path, because the product starts selling itself before anyone lifts the box off the shelf.
Branded boxes with window show up often in categories where presentation and trust need to work side by side. Cosmetics buyers want to see shade, finish, and pack format. Gift shoppers want a preview of what is inside the box. Food brands use window cartons to show quantity, texture, or freshness. Specialty retail and premium consumer goods use the same format because the display value is immediate and the product feels less like a guess.
A window also acts like a promise. If the product is visible, the buyer expects the item inside to match the image on the carton, and that expectation can be a powerful trust signal. A well-designed window does not need to reveal everything; it only needs to reveal the right detail. That distinction matters, because branded boxes with window work best when the opening guides the eye toward the part of the product that helps the sale.
If the window does not help the buyer decide faster, it is probably just a hole in a box. The best branded boxes with window make the product easier to inspect while still keeping the pack structured, branded, and easy to stack.
There is also a practical side that buyers appreciate. A visible product reduces returns caused by mismatch, especially in categories where color, texture, or size can vary slightly from one item to another. Branded boxes with window are especially useful for items that need to feel honest and easy to judge, not hidden behind a heavy layer of print or glossy graphics.
From a brand perspective, the window gives the design team a focal point to build around. A strong border, a crisp logo, and a clean die-cut opening can make the carton feel more premium than a fully printed surface alone. The trick is to let branded boxes with window support the brand story rather than overpower the product. The opening should feel intentional, not like leftover space in the layout.
That tension between visibility, protection, and cost is where most packaging decisions land. Branded boxes with window can look simple on shelf, but the best versions usually come from careful structure planning, not from a nice-looking mockup alone. That is kinda the whole tradeoff: a package needs to reveal enough to persuade, while still holding its shape through packing, shipping, and display.
How branded boxes with window work: structure and materials
At the most basic level, branded boxes with window are built from a printed outer carton, a cutout or opening, and then either a clear film patch or an open display area. Depending on the product, there may also be an insert, tray, or separator that holds the item in place so the window shows the right angle and the product does not shift during transit. Once that is broken into parts, the format becomes much easier to plan.
Window styles and display choices
There are two main window approaches. The first uses a clear patch - often PET, acetate, or another transparent film - to seal the opening while still showing the product. The second is an open window, where the board is die-cut and the product is visible through the hole. Branded boxes with window can use either style, but the choice depends on how much protection the product needs.
A sealed film window is usually the stronger option for items that need dust protection, freshness protection, or a smoother premium finish. PET is common because it is clear, durable, and holds up well in conversion. Acetate can also work, although the best material depends on the product, shelf life, and environmental goals. Some brands ask about PLA or other plant-based options, but those should be checked carefully because not every alternative behaves the same way in heat, humidity, or storage.
Open windows are simpler and often cheaper, but they suit products that can safely be exposed. Dry goods, gift items, and some retail accessories are common examples. The risk with an open window is not just dust; it is also handling. If the item can scuff, crush, or dry out, a sealed version of branded boxes with window is usually the wiser move.
In sample reviews, I usually ask one blunt question: what happens to the product after it sits on a truck for two days and then gets handled by five different people? If the answer is anything other than "still looks good," the window style needs another look.
Board choices and print surfaces
Board selection matters just as much as the window itself. For folding cartons, SBS is a familiar choice because it prints cleanly and holds crisp edges. CCNB can be a practical option for cost control on less premium programs. Kraft board gives a more natural look and can support a recycled aesthetic, while corrugated board is better for heavier products or shipping cartons that need more structure. For high-end presentation, rigid chipboard often provides the firmness and perceived value that cheaper boards cannot match.
Board thickness should match the product weight and the distribution method. A lightweight cosmetic item may work well in 16 pt to 24 pt paperboard. A heavier kit, candle set, or gift bundle may need E-flute corrugated or a rigid structure around 1.5 mm to 3 mm thick. Branded boxes with window work best when the board is chosen for function first and appearance second, because a beautiful carton that collapses in transit is not a good package.
Finishing affects the look of the window area too. Matte laminate can soften the graphics and make the visible product stand out more clearly. Gloss can increase contrast and make colors feel sharper. Soft-touch can add a premium hand feel, although it may not be the right choice for every product because it can show handling marks more quickly. Spot UV can direct attention toward the logo or framing elements, but it should be used with restraint so the window remains the focal point.
If recycled sourcing or chain of custody matters to the brand, it is worth asking whether the board can be sourced through FSC. That does not automatically make the box better, but it can help align branded boxes with window to a sustainability policy without changing the display format.
Why the dieline matters so much
The dieline is where a lot of good ideas get saved or lost. Window placement, glue flap position, panel size, and product clearance all depend on accurate structural drawing. If the cutout lands a few millimeters too high, the product may disappear behind a shelf lip. If the opening is too close to a score line, the panel can weaken. If the artwork is placed without thinking through the fold, the logo may end up awkwardly near the edge of the opening.
That is why branded boxes with window should be planned with a real dieline, not just a front-facing artwork file. The package has to be reviewed in flat art, folded form, and shelf view. A designer looking at a PDF on screen may think the layout feels balanced, but once the carton is formed, the opening, the folds, and the internal support can shift the visual weight quite a bit.
One simple rule keeps the process grounded: the window should show the product at the point where it looks most convincing, and the printed graphics should frame that view rather than fight it. That is the difference between a package that feels deliberate and one that feels improvised. Branded boxes with window are not difficult to make, but they reward careful structure work.
Branded boxes with window cost, pricing, and MOQ basics
Cost is where buyers often get surprised, because branded boxes with window can look like a small change and still carry meaningful tooling, labor, and material impact. The biggest drivers are board grade, print coverage, finish type, window size, whether the window is patched or open, and whether the carton needs inserts or special assembly. Larger windows do not always raise the cost in a straight line, because they may also force reinforcement or create more waste on the press sheet.
For planning purposes, a simple run of branded boxes with window can vary quite a bit by construction. A flat folding carton with modest print coverage might stay near the lower end of the range, while a rigid presentation box with a custom insert, film patch, and premium finish can move much higher. The point is not to memorize a single number. The point is to understand which features are actually buying shelf value and which ones are only adding expense.
| Box style | Best fit | Rough unit price at 5,000 pcs | What drives the cost |
|---|---|---|---|
| Open cutout folding carton | Dry goods, light retail items, low-risk display packaging | $0.18-$0.38 | Lowest material use, no patch film, simpler converting |
| PET or acetate patch window | Cosmetics, gifts, specialty food, premium retail | $0.24-$0.55 | Film material, patch labor, extra quality checks |
| Rigid box with insert and window | Gift sets, premium consumer goods, high-value presentation | $1.10-$2.80+ | Thicker board, hand assembly, insert complexity, premium finishing |
Those numbers are planning ranges, not fixed quotes, and branded boxes with window can move outside them if the print coverage is heavy, the die shape is unusual, or the order needs special finishing. Still, a table like this helps a buyer compare structures quickly and decide whether the window itself is worth the premium.
MOQ matters too. Digital short runs can sometimes start in the low hundreds, which is useful for launch tests, seasonal items, or a new product color. Offset production usually becomes more efficient at higher quantities, often around 1,000 to 2,500 pieces and up, depending on the converter. That is why branded boxes with window are often priced in tiers: the unit cost improves as the setup work gets spread over more cartons.
A useful quote should show more than the unit price. Ask for the tooling or die charge, print setup, window patching cost, insert cost, proofing, shipping, and any assembly labor. If you do not see those pieces spelled out, the comparison is incomplete. I also like to ask for two versions of the same design - one with a film window and one with an open cutout - because the cost difference is easier to evaluate when the structure stays otherwise identical.
For brands that want to compare format options or understand what is available beyond a single carton style, our Custom Packaging Products page is a useful place to start. If you want to see how similar packaging choices played out on actual jobs, the Case Studies section can help ground the conversation in real packaging outcomes.
Production process and timeline for branded boxes with window
The process for branded boxes with window is straightforward once the steps are laid out, but each step can add time if the package is highly customized. A small retail carton with a standard window might move quickly. A premium presentation box with custom inserts, multiple finishes, and strict brand color matching will need more back-and-forth before production starts.
- Discovery and specification gathering: product dimensions, weight, fill method, display needs, and shipment method are confirmed so the box can be built around the actual item.
- Dieline creation: the structural layout is drawn and the window position is fixed in relation to folds, flaps, and glue areas.
- Artwork placement: the design team places logos, product claims, and visual framing around the opening so branded boxes with window keep the focal point clean.
- Proofing: digital proofs or hard proofs are reviewed for color, alignment, and fit before anything is committed to the press or die line.
- Sample approval: a physical sample confirms that the product sits correctly, the window shows the right portion, and the assembly sequence works.
- Printing and die cutting: the board is printed, cut, scored, and shaped to the approved dieline.
- Window patching and finishing: the clear film or open window is completed, then coatings, laminations, or special effects are added if needed.
- Final assembly or flat packing: the cartons are either packed flat for easier storage or assembled and kitted depending on the packing plan.
That sequence sounds simple, but branded boxes with window often slow down at the proof and sample stages. The most common reason is not the box itself; it is the product fit. If the item has a label seam, a curved surface, a fragile edge, or a sealed wrapper, the window needs to account for those details or the display looks off-center.
Realistic lead times depend on how many variables are in play. A standard job with clear specifications might be ready within 10-15 business days after proof approval. A more custom build can take 3-6 weeks, especially if there are insert revisions, specialty coatings, or seasonal production queues. If the shipping lane is long, add more time for transit and receiving.
For transport testing, many packaging teams use the ISTA framework as a reference point, especially if branded boxes with window need to survive parcel handling, vibration, or drop exposure. That does not replace product-specific testing, but it does provide a practical benchmark for how the pack should behave in transit.
Ask for a milestone schedule before the order is released. You want to know when the dieline will be ready, when the first proof will arrive, when the sample is expected, and when production and shipment will happen. That kind of visibility saves more headaches than almost any other part of the process, because branded boxes with window tend to involve both the print team and the structural team at the same time.
Key factors that affect fit, strength, and display
Good packaging starts with fit. If the product sits too deep, the window may show only a sliver of the item. If it sits too high, the top edge can get exposed or the closure can look uneven. Branded boxes with window should reveal the best side of the product, not the most convenient side for the designer. I usually want at least a few millimeters of breathing room so normal production tolerances do not clip the visible area.
Product reveal and visual hierarchy
The window needs to support the message, not compete with it. If the product itself is the hero, the graphics around it should frame it cleanly. A strong logo, a simple color palette, and one clear benefit statement often do more than a crowded front panel. Branded boxes with window benefit from restraint because the shopper is already seeing part of the item. Overloading the face panel can make the package feel busy and reduce the impact of the reveal.
Think about shelf height too. A shopper usually sees a carton from a slight downward angle, not perfectly head-on. That means the visible portion of the product should be chosen for that viewing angle. A bar soap, tea tin, cosmetic jar, or small accessory may need the opening shifted slightly to the upper third of the pack so the right surface catches the eye first.
In practice, I like to print a quick mockup, fold it by hand, and set it on a shelf or table from arm's length. That ten-minute check catches more display mistakes than a polished PDF ever will. It's a small step, but it keeps the final carton honest.
Strength, shipping, and environmental conditions
Box strength depends on board thickness, panel size, product weight, and how the carton is used. A retail-only box that sits on a shelf is not the same as a shipper that rides through parcel networks. If the package will be stacked, boxed again, or handled in bulk, the structure has to resist compression around the window area. That is one reason a larger window may need reinforcement, not just more cutout.
Humidity and temperature can also change how branded boxes with window behave. Film can bow slightly if storage conditions are poor, coatings can show scuffing, and some board stocks can lose stiffness in damp environments. For that reason, I like to ask where the product will be stored before launch and whether the package will sit in a warehouse, a back room, or a climate-controlled retail environment. Those conditions matter more than people think.
Fragile items need extra attention. Inserts, trays, and dividers should stop the product from pressing against the film patch or the inside edge of an open window. If the item shifts too much, the display loses its premium feel. If it presses too hard, the window can distort. Branded boxes with window should feel balanced from the first sample, not after the second or third revision.
Compliance and practical details
Compliance depends on the product category. Food packaging may need to think about direct contact, migration risk, moisture control, and freshness. Some dry foods do fine with a windowed carton, while other items need an inner barrier or a sealed liner before the carton can safely show the contents. Cosmetics and personal care products may need to keep labels visible for ingredient or batch information. Gifts and general retail items are usually easier, but they still need tamper awareness and protection from dust.
That is why branded boxes with window should never be approved on appearance alone. I want the buyer to ask a few practical questions: Can the package be opened and resealed easily? Does the window expose the right product face? Can the barcode be scanned without removing the item? Will the carton still look clean after 20 handlers touch it? Those questions sound ordinary, but they save real money later.
For product categories that need more context on format selection, color control, or structural options, the best starting point is often a simple comparison between the product, the shelf, and the shipping route. Branded boxes with window work well when those three pieces match the package design instead of fighting it.
Common mistakes to avoid with window packaging
The most common mistake is making the window too large. A large opening can weaken the panel, reduce the room available for print, and expose seams, glue flaps, or tray edges that should stay hidden. Bigger is not automatically better. With branded boxes with window, the opening should be sized to show enough product to create interest, not so much that the box starts to look fragile or unfinished.
Another problem is choosing a window shape that looks great on a drawing but fails in real shelf conditions. A fancy curve or angled cut may read well on screen, then disappear once the item is packed and placed at the customer's eye level. The package should be judged while standing up, not just while lying flat in a proof file. If the product cannot be recognized quickly, the window is not doing its job.
A clean die-cut is not the same as a useful display. The best branded boxes with window show the product clearly, keep the structure sound, and leave enough print space for the brand message to breathe.
Poor artwork alignment is another easy way to weaken the design. Logos drifting too close to the cutout, copy crowding the reveal, or decorative borders touching the edge of the opening can make the pack feel cramped. I often recommend leaving a clear zone around the window so the product has room to speak for itself. That spacing matters even more on smaller cartons.
Over-specifying finishes is a quieter mistake, but it shows up quickly in cost. A box meant for short retail exposure may not need heavy embellishment, multiple spot treatments, and complex laminations. Those details can add appeal, but only if they support the product. For branded boxes with window, the visible item already carries a lot of weight, so the print system should help, not compete.
Skipping sample review is probably the biggest risk of all. Digital proofing is useful, but the actual carton may look different once the board is printed, cut, folded, and assembled. The film can read clearer or hazier than expected. The product can sit slightly off-center. The cutout can feel larger in hand than it did on the screen. That is why physical samples are worth the time, especially on the first run of branded boxes with window.
One more mistake deserves a mention: forgetting how the pack will be handled after packing. If the box is stacked, shipped, or stored for weeks before use, a fragile window style may not hold up. That is not a design failure; it is a planning failure. A good package respects the real route from line to shelf.
Expert tips and next steps for a cleaner packaging order
If you want branded boxes with window to quote and run smoothly, start with a simple spec sheet. Include the product dimensions, weight, fill method, target quantity, where the pack will be used, and the preferred window size. That one page can save several rounds of clarification later. It also helps the vendor recommend the right board and window style instead of guessing.
I also recommend requesting a dieline early. Even if the final artwork is not ready, the dieline gives the design team a real structure to work against. That makes it much easier to place the window intentionally, protect important copy, and avoid costly changes after the first proof. For branded boxes with window, an early dieline is usually the difference between a tidy launch and a messy revision cycle.
Compare at least two or three structures before locking in the order. Sometimes a slightly different carton style reduces board usage, improves shelf impact, or simplifies assembly enough to save more money than a smaller print change ever would. The cheapest-looking option is not always the cheapest once labor, packing, and shipping are included. Branded boxes with window deserve that side-by-side review.
- Confirm packing method: flat-packed cartons, pre-assembled boxes, and kitted inserts each create different labor needs.
- Check storage conditions: heat, humidity, and warehouse time can affect film, board, and finishing quality.
- Review the shelf view: make sure the product face shows the right detail from a normal customer angle.
- Ask for sample photos: they help catch alignment issues before the job is approved.
- Compare cost tiers: a small structure change can shift branded boxes with window into a better price band.
For brands that want to compare packaging styles without guessing, the cleanest path is usually simple: define the product, choose the display style, request a sample, review Pricing and Lead Time, then approve the final structure only after the fit and finish are proven. That is the practical way to buy branded boxes with window, and it keeps the project grounded in what the customer will actually see on shelf.
Used well, branded boxes with window do three jobs at once: they help the product sell, they keep the item protected, and they make the package feel more honest to the buyer. Used poorly, they become an expensive cutout with weak structure and awkward graphics. The difference is usually found in the details, and the details are exactly where good packaging decisions pay off. If you are moving into a first run, start with the product dimensions, the viewing angle, and the storage route, then build the window around those realities instead of the other way around.
Are branded boxes with window strong enough for shipping?
Yes, if the board grade, window size, and internal support are designed for the product weight and transit method. For shipping, ask for reinforcement, inserts, or corrugated construction when the item can shift or press against the panel. Branded boxes with window can travel well, but the structure has to match the route.
What material is best for branded boxes with window?
The best material depends on the product and use case: paperboard works well for retail, corrugated for heavier items, and rigid board for premium presentation. If the window needs to be sealed, confirm whether the film should be PET, acetate, or another approved clear material. The right answer for branded boxes with window usually comes from the product, not a generic material list.
How do I lower the cost of branded boxes with window?
Keep the structure simple, reduce unnecessary finishing, and size the window only as large as needed to show the product clearly. Ask for quotes at multiple quantities so you can see where unit cost improves and whether MOQ affects your budget. Branded boxes with window get cheaper fastest when labor and waste are trimmed, not when the design is stripped of all character.
Do branded boxes with window need a plastic film?
Not always; some designs use an open cutout, while others need a clear patch to protect freshness, keep dust out, or meet shelf and shipping requirements. A film window is usually the better choice when the product needs a sealed display surface or a smoother premium finish. The right option for branded boxes with window depends on exposure risk and presentation goals.
What is the typical lead time for branded boxes with window?
Lead time depends on artwork approval, sample revisions, tooling, finishing, and order size, so a simple project moves faster than a highly customized one. Ask for a milestone schedule so you know when to expect the proof, sample, production run, and delivery date. Branded boxes with window usually go more smoothly when the calendar is mapped before production starts.


